
This Hi-Tech stage was created exclusively for LearnMMD.com's readers by dA's Trackdancer ... Enjoy!
 |
| Instructions
for the LearnMMD Stage This Hi-Tech stage was created exclusively for LearnMMD.com's readers by dA's Trackdancer ... Enjoy! |
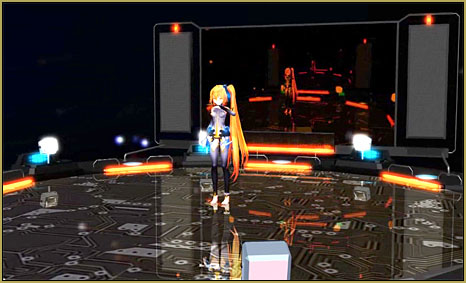 |
The LearnMMD Stage ...
|
||
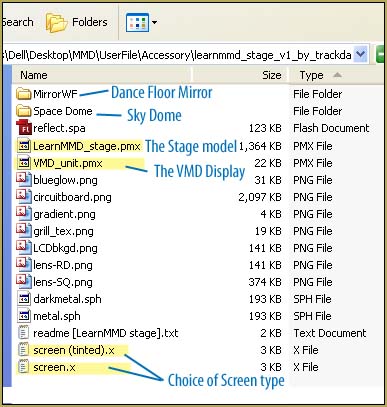 |
There are plenty of pieces
included in your LearnMMD Stage set! The Space Dome and the Floor Mirror load like Accessories ... as does the Screen, that large rear projection screen. You have a choice of screens:
... as does the VMD unit. |
||
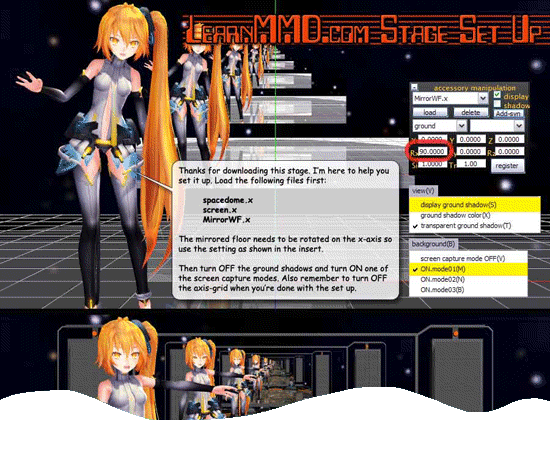 |
Trackdancer,
the creator of the LearnMMD Stage, provided this
brilliant graphic as a way to show you how to set-up your new
stage ... study that image to see what's involved ... and then take a
look, below, as I help you to see the individual steps of the process. Keep with it! ... you will LOVE your new LearnMMD Stage! |
||
So ... Let's get started! 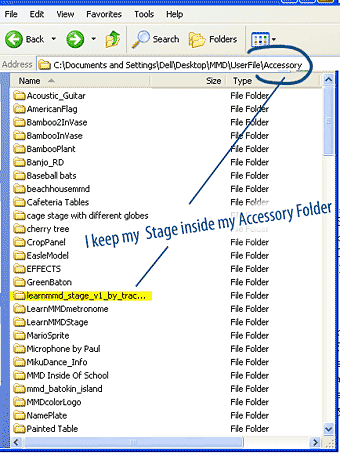 |
I Downloaded the LearnMMD Stage Zip Folder and dragged it to my Desktop. ... and double-clicked it to open it ... I chose the EXTRACT ALL command and OK'd the defaults to put the finished Folder on my desktop. Then I opened my MMD folder and navigated my way to the Accessory Folder inside the Users folder ... and I dragged the LearnMMD Stage folder into the Accessory folder. ... TRUE: the actual Stage model is a PMX model,
but I like to keep all of the pieces together in the same folder ...
and, being a stage, I keep the entire folder inside my Accessory folder. |
||
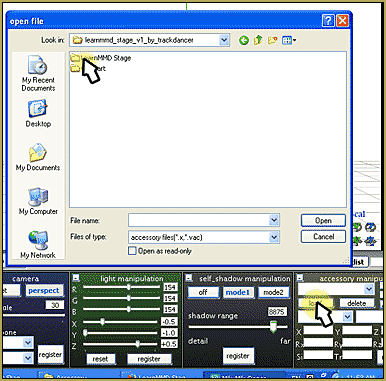 |
First ... we will LOAD the SPACE DOME and the MIRROR ... BOTH load as .x file Accessories and so you use the LOAD button in the Accessory Manipulation Panel (the AMP). Just LOAD and navigate your way into the Stage Folder to select, first, the Space Dome ... and then follow the same process to LOAD the MirrorWF.x Now LOAD a Screen.x ... either Tinted or not. Remember to REGISTER each one. |
||
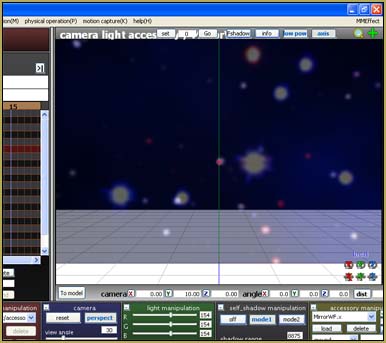 | This is what we have, so far ... | ||
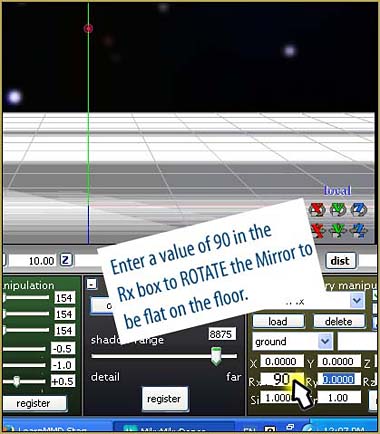 | We need to ROTATE the MIRROR so that it sits flat on the floor ... do it by entering a value of 90 into the Rx box in the AMP. Remember to REGISTER that setting. | ||
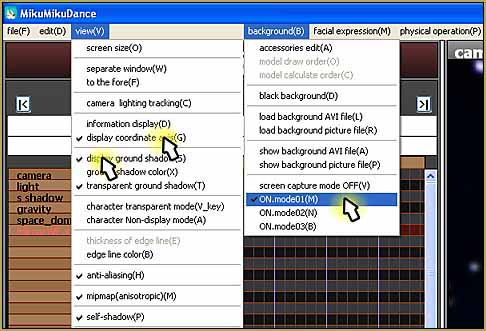 | Now ... in the VIEW menu, Turn Off the "Display Coordinate Axis" Turn Off the "Display ground Shadows" ... and over in the Backgrounds menu, Turn ON one of the Screen Capture Modes. I am using ON.mode01(M) ... but you can experiment! | ||
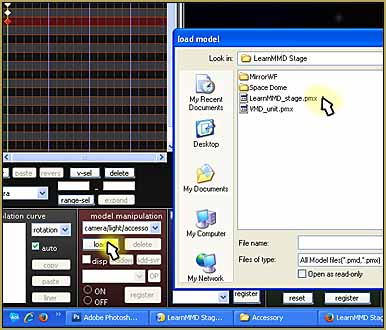 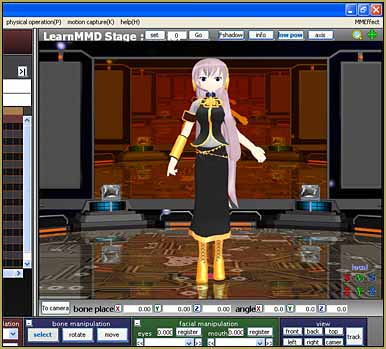 |
Now Load the Stage ... LOAD it as you would any other model ... except you have to navigate your way into your Accessories Folder to find it!  Load the stage and see what you have. I also loaded Luka ... just to see her! |
||
Let's Turn the Lights on! 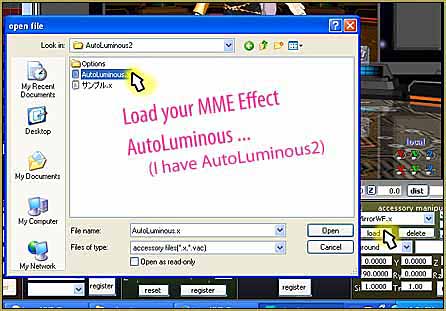 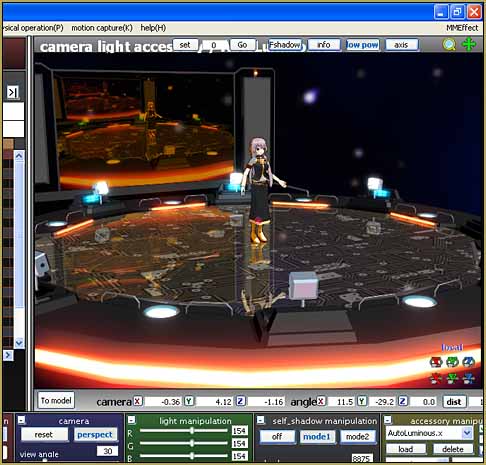 | To Turn On The Lights, you have to be running MME ... MikuMikuEffects ... and you must have a version of the AutoLuminous Effect. See the pages of LearnMMD.com for instructions for Downloading and Installing MME ... and also see the tutorial for Downloading and Installing the AutoLuminous Effect. Use the "Skydrive" link there ... it takes you to the proper page. .  The Lights are ON! ... And YOU are ready to Dance! | ||
Want to SEE your music?? Watch it dance? 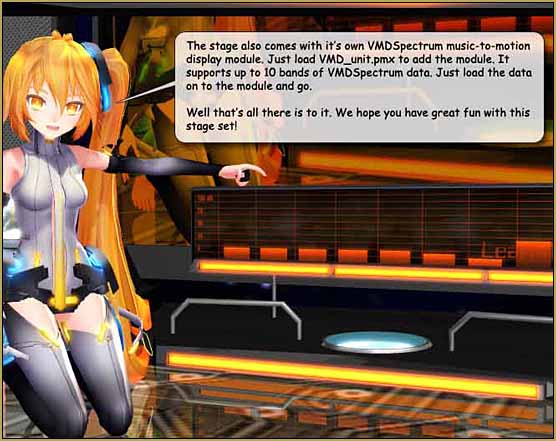 | To use the VMD Unit ... You will need to convert your existing music into a VMD file that will drive the "spectrum bars" of the VMD Spectrum unit. Wait until you have your final soundtrack WAV file created ... and then use VMD Spectrum Analyzer to create the VMD motion file. LearnMMD.com shows you where to download the VMDSpectrum Analyzer software and how to use it ... See the article on LearnMMD.com | ||