

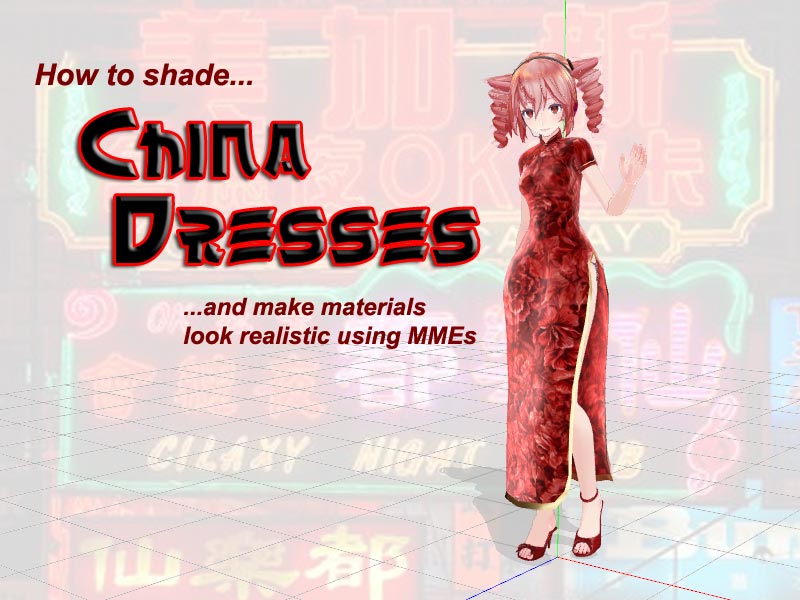
Shading China Dresses
Using Advanced Shader Techniques
There is a whole series of Tda style models decked out in China Dresses or Cheong-sams (literally: long dress) which are highly popular. The models are beautifully detailed and featured regularly in videos on YouTube and in fact, one well known MMD video maker (RongSamaYou) specializes in using this type of model. These videos and others like them are all made to a very high standard and what this article will be about is how to use advanced shader techniques to shade this type of model in order to get the best results out of them.
Word of warning though, most of those almost photo-real videos need fairly high spec PCs to make, but to actually shade the models correctly doesn’t need those kind of specs.
Note that the MME shading schema that we will be introducing here was originally designed for making videos and, although it can be used for picture making as we will be doing here, still imagery renders don’t really utilize the full potentials of the schema.
There are different approaches to shading these types of models with MMEs to get almost photo-real results, but here is one method and we will be using the Teto model wearing a cheong-sam simply because this is one of the best in the series and actually it was this model that started off the fad. The edit was made by Reyama090 and the dress essentially became the template for most of the models in the series. Customizing the dress itself is actually very easy to do – just change the dress texture map. These texture maps very often just use photographs of real cheong-sam fabrics so this gives the series of models a very authentic look.
That being the case, let’s start off with a closer look at the dress. There are various styles of cheong-sams. Those made for daily wear, which can be very practical, are generally made from some type of light cotton material, with or without an internal lining. If the dress does not have an internal lining, traditionally a shift of similar size is worn underneath. But the type Teto is wearing is evening wear and the design although considered ‘modern’ is based on style made popular by Chinese courtesans in the 1920s, 30s and 40s. This is because of the high split – very high in Teto’s dress – which in “polite” Chinese circles is considered “improper”. But times do change and so do moral values…
The best cheong-sams are tailored made to fit and usually made from some type of silk fabric. Many modern types use printed fabrics (usually polyester or cotton) but the best and most expensive ones are still made from silk or embroidered silk. Satin or velvet materials are sometimes used too, but these types of cheong-sam are less common. Like Japanese kimonos, there are ways to properly wear cheong-sams. In traditional circles, a shift is almost always worn underneath for both practical and moral reasons. Teto on the other hand would definitely be considered a “party” girl.
So how do we go about shading something like a cheong-sam in MMD and Teto for that matter to get the most out of the design? Well, let’s start by looking at one of the real things which Teto will show us below.

Now the first thing that should have caught your attention comparing Teto with the real woman is that the woman’s dress is “ready-to-wear” and Teto’s dress is tailor made. Also, the real dress is embroidered and Teto’s dress most likely made from a printed material. But they have one thing in common: both are shiny and we will need to capture this quality when selecting our shading method. Note, however, that not all cheong-sams are necessarily made from shiny materials. Most daily wear cheong-sams and especially the cheap ones are not shiny.
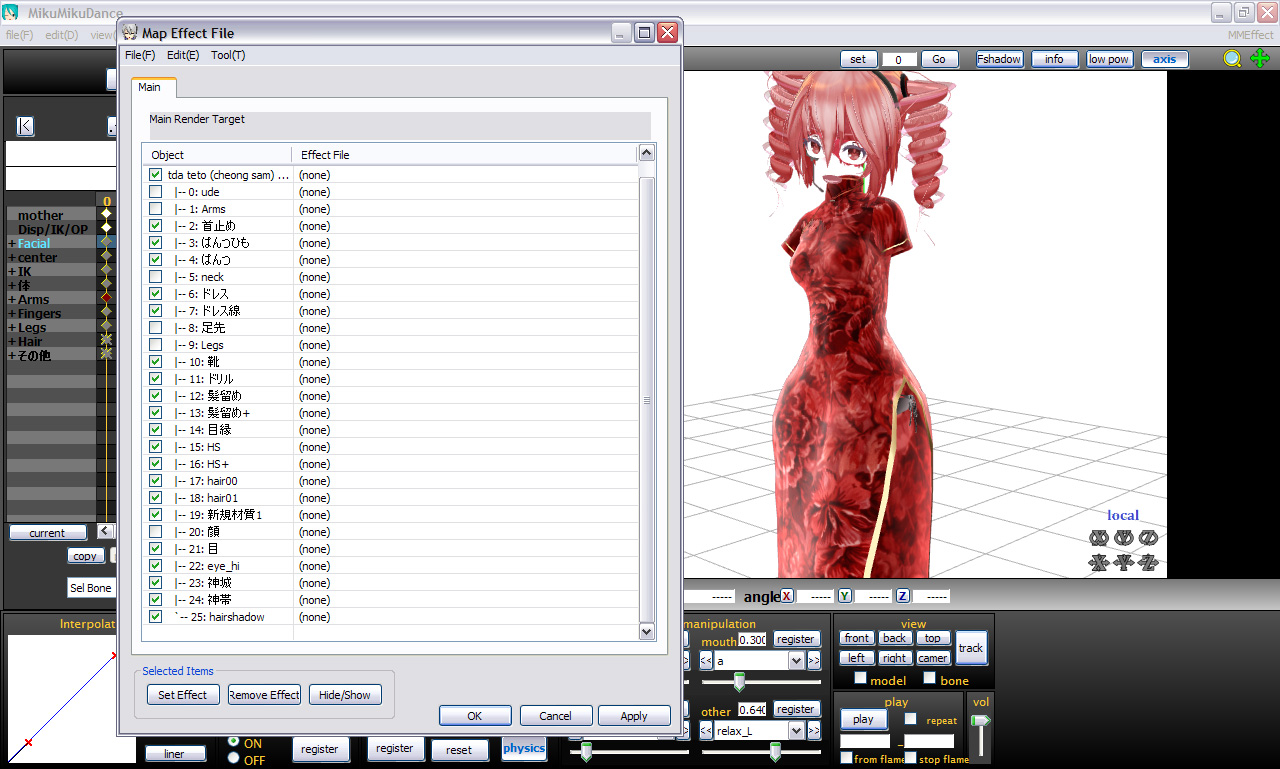
So before anything else, let’s work out what we have to do… and to do this we need to have a more careful look at Teto’s materials list and this is done by looking at the MME panel materials subset list. Note that I’ve unchecked all the materials pertaining to Teto’s flesh areas. All that is left are:
1. Her hair
2. Her dress
3. Other garments and accessories
4. Facial and expression details
The screenshot below is kinda creepy but at least we know what is what and what we will have to do.
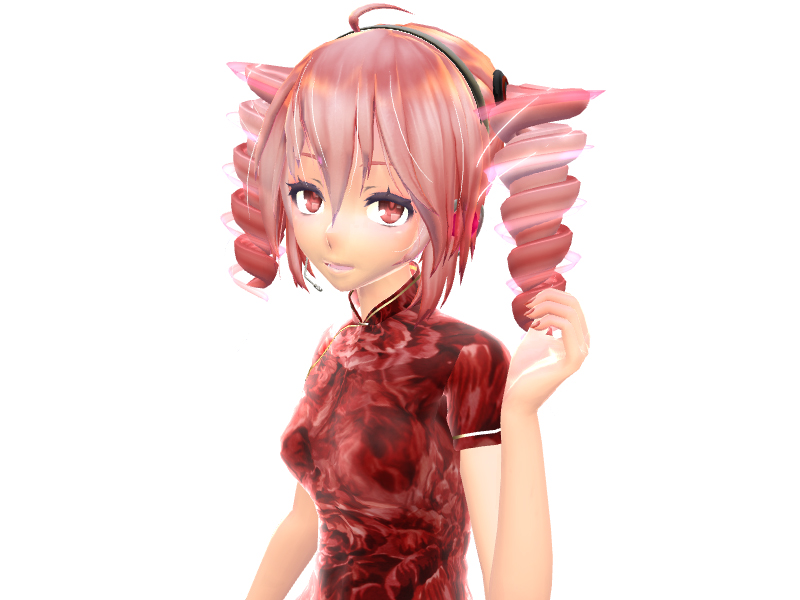
Now that we know what we need to shade, let’s get on with it! Let’s start off with her hair and flesh areas and what we’ve done is shown below. We used two types of shaders on these areas:
G_Shader_01_S1.fx for her hair and facial details
G_Shader_01_S1_Skin.fx for her flesh tone areas
G2 Shaders are grouped by the amount of shadow that is emphasized. S1 is for normal midday lighting (ie. the sun is overhead). S2 and higher increases the amount of shadow play on the model and mimics the sun at lower altitudes so are superb for mimicking lighting conditions at later (or earlier) hours of the day.
These shaders are superb for building her body form which will be the foundation for what we will be doing downstream. If you compare this image of her with her shown in the images above without any shading, you should be able to see the immediate improvements.

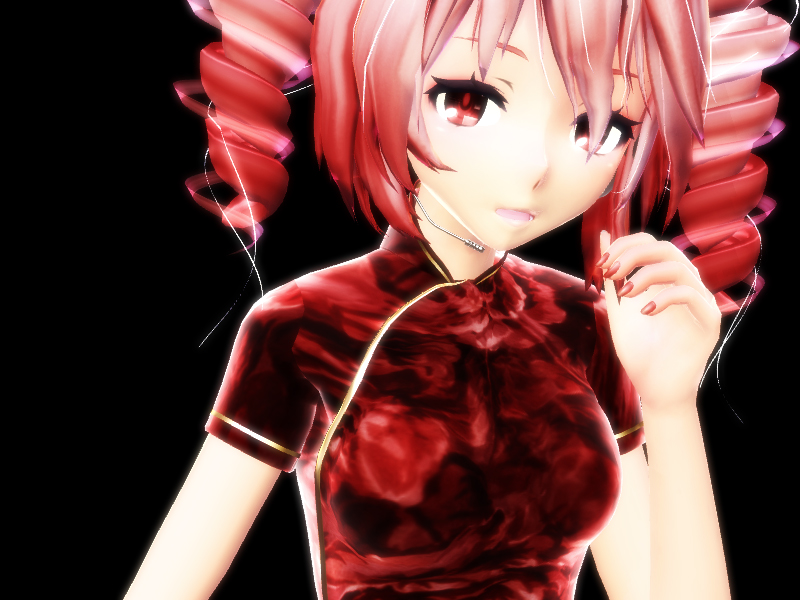
Next we deal with her clothing and accessories. Note that most of these materials already have been enhanced with either SPA or SPH files to make them more shiny. What we want to do is to emphasize these lighting effects but not overwhelm them with MMEs. To do this we use BeamMan’s masslight (or multiple light source) shaders. Specifically:
Dress and shoes – Multi-light source effect_in (normal) reflection.fx
Dress trim, headset, collar jewellery – Multi-light source effect_highly reflective.fx
Panties – Multi-light source effect – low reflection.fx
The effect names given here are translated from the Japanese. By default these effects are distributed using only Japanese named files.
The Masslight effect is designed primarily for dynamic imagery (ie. making videos) as it emphasizes the play of light on the materials to which the effect has been added. Used in still imagery can be a bit of a challenge to get the full benefits of the effect, but usually tweaking the lighting direction gives the best results.
Note that although her silk cheong-sam is shiny, we do not want her to look like she’s clad in vinyl. The dress already has a SPA file that makes it shiny and we don’t want her looking like she’s wearing something made out of plastic.
The screenshot below shows what she looks like with all the effects now in place, but at this point, although there is some visual improvements, there’s nothing spectacular. That comes next. But if you look at her shoes more carefully, you can see what exactly the masslight effect can do.

Since the model reacts to AutoLuminous we added that next and so here’s what she looks like with all MMEs that are directly applied to her. Note that we also removed Teto’s outlines.
Next we add global effects to really bring Teto to life and make her really look special. Specifically we added the following:
o_BleachByPass at 35% strength – this helps makes colors look more like they would in real life
o_SelfOverlay at 35% strength – this brings some of the colors back lost from applying the last effect
o_ToneMap at 30% strength – this brings some vividness to the colors
diffusion 7 (or o_diffusion) – softens the hard edges caused by the previous effects and adds a softer more dreamy look
Then we began to tweak the light settings to get the best possible look. Our results so far are shown below.
To finish off, what we did was to add a modifier controller to tweak the quality of the lighting and adjust how ambient lights interact with the model’s materials. The effect controller is called PostGammaLightVR and was written by ElleP. Finally we added a complementary background image by Anomaro. The final image is shown below.
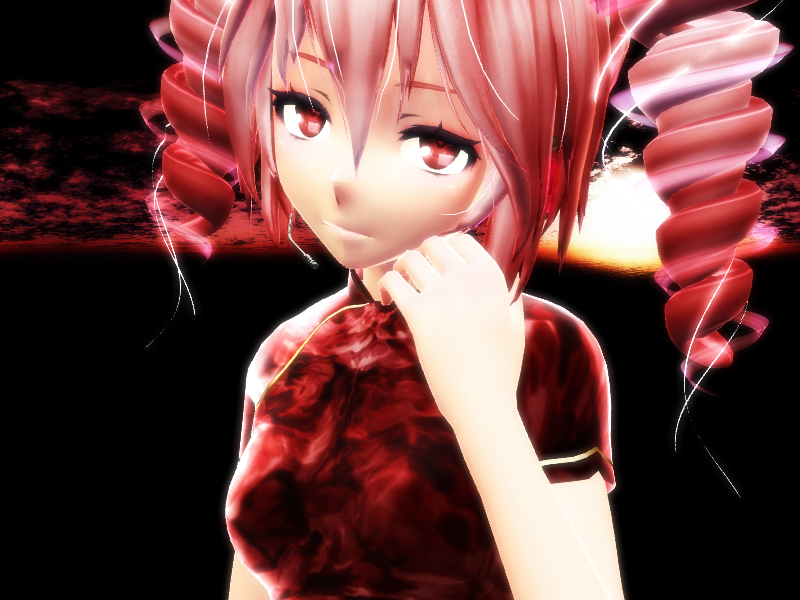
As we hope you can see, MMEs applied correctly to a model’s materials does make a difference to how real a model looks. We’ve only touched on some of the effects available. There are tons of them out there so by all means go get them and see what they can do. Our example does have a bit of a red bias. This is inherent in the model and I just went with it, but it is also possible to alter this for a different type of balance using different shaders. But do you know why there is a red bias in the first place? Well, the short answer is that some of the red is reflected off her dress and the tonemap and selfoverlay shaders emphasized them plus the bleachbypass dampened a lot of the blues in the color spectrum. So this raises the final point – try to understand exactly what each type of shader does and their intended and unintended side effects.
But it is too red so can anything be done about it? The answer is yes and without resorting to tweaking the image in Photoshop. The way to do it is to set the MMD global lighting to compensate for the red bias by making the red spectrum weaker and increasing the green and blue spectrums respectively. Once that is done, the values of the effects that caused the problem should be assigned new values.
So what we did for the final iteration was to reset the values of the 0_post effects after the global lights were reset. Our final settings were:
o_BleachByPass at 50%
0_SelfOverlay at 25%
o_ToneMap at 25%
To be clear, “at #%” means setting the Tr values of the effects in the Accessory Manipulations Panel to Tr=0.5, 0.25 and 0.25 respectively. The final image is shown below. Still a little on the red side but that is inherent in the material makeup of the model but at least Teto looks much more normal.

This type of shading schema work especially well for videos for which this type of shading scheme (dynamic) was originally designed. Check this video out for the proof as it uses a very similar setup and with the same model:
![[MMD][HD] Teto - Inuyasha's Theme](data:image/gif;base64,R0lGODlhAQABAAAAACH5BAEKAAEALAAAAAABAAEAAAICTAEAOw==)
Thanks for reading!
Credits:
Teto China Dress – Tda/Reyama090
Fashion image – DHGate.com
Sky background image – Anomaro
MMD 9.26
Photoshop 7
MMEs used:
G2 Shaders
Masslight
Diffusion 7
PostGammaLightVR
o_BleachByPass
o_SelfOverlay
o_ToneMap
AutoLuminous