


MMD Fill Lights Part 2 – (Ray-MMD)
Welcome back if you’ve read Part 1 of this series. But if you did not, no matter as this part will deal specifically with the application of fill lights in a Ray-MMD environment. I will be using some terminology and concepts introduced in the last part but this article can otherwise be read on it own.
Choosing the right models to use with Ray-MMD
Many models, especially the older ones like the default models do not look nice when you try to render them with Ray-MMD. However, the TDA style models, of which there are probably hundreds of variants, generally do work well. If you are new to MMD but want to use Ray-MMD, stick with the TDA style models until you have a better understanding on how the system works and its limitations.
Also, many models may need some editing work done on them to make them accept material specifications properly. TDA style models, generally are made from many separate parts so in general do not have these issues as individual materials can be easily isolated.
Also as a general rule, MMD models that uses texture maps to define their materials works best.
So let’s choose a model for our project…
Since it is summer and I have a weakness for Japanese anime girls in traditional costumes (if you haven’t figured that out already), I’m going with this one:

An important consideration about presenting your models
There is an important consideration that is applicable to most MMD applications, but arguably more so when you’re using it with Ray-MMD.
When you are working with still imagery there are no distractive elements such as the model doing a song and dance routine. People are going to be looking hard at your presentation. And when they do, if there are any flaws they’re going to pick up on it.
Yukata’s are special in Japan. There are considerations on how these dresses are worn, how they drape over the body and how they are presented. So, before I even posed Meiko, I did some research on the Internet to understand how real Japanese women wear and move in them. It is a light attire, but still a constrictive one so that mandates that the wearer moves in certain ways. So the pose Meiko uses is authentic because it is based on a stance adopted by a real woman wearing a yukata.
Why else is this important?
Ray-MMD is “photo-realistic“. So if something looks off, it will really look off. If you add fill lights into the equation, it only gets worse. So the best strategy when doing your poses is to do your research and pose the whole body. Doing this ensures that the model’s posture is correct regardless of how you crop your shots.
Models and resources you will need if you want to work along with the step-by-step tutorial
This will be one of the more complex Ray-MMD tutorials since to fully explain how to use fill lights using this system is necessarily lengthy. It is not hard, just that there is a lot of factors that you need to put together correctly to make these work well. So if you’ve never done this before it is worth working along with this tutorial. Once you “get it“, you’ll find that the process is actually really very easy.
You will need the following models:
- Either the Meiko model above or some other anime girl in a Japanese type costume.
- Specifically the Kyoto stage by Anonymous User(?)
If you want the pose used above you can get it here; but you can always make your own if you prefer.
With both models it is highly recommended that you use the PMXeditor to ensure that at least their materials list reads in English. If you do not know how to do this, I believe the method has been covered in another tutorial here on LearnMMD. If not, use Google to find one. This is not mandatory, it will just make things a lot easier.
You’re going to need the following software and effects:
- MMD
- Ray-MMD
- Either Diffusion7 or one of the equivalent Gaussian effects (optional)
Enable Bokeh Depth Of Field
(This next part is optional but highly recommended; my set up uses this option enabled)
You will need to edit one line of your ray.conf file so that Bokeh Depth Of Field is enabled. Use a text editor like Notepad or Notepad++ to do this edit. Simply change the last line to read as shown below.

Adding Fill Lights to your Ray-MMD renders
This tutorial will be assuming that you know at least the basic steps on how to use MMD and Ray-MMD. If not please read some of the beginner tutorials first.
The following are techniques that you will not easily find published elsewhere so load up MMD and add the following models. Preferably in this order but if not, sort out the model draw order so that it follows the order presented in the list below:
- Time of day.pmx
- The Kyoto stage (清水風固定影なし.pmx)
- Your yukari attired model
VERY IMPORTANT NOTE: The Kyoto stage comes in two versions. One with faux shadows and one without. Use the version without faux shadows. This one is labeled: 清水風固定影なし.pmx
With everything loaded you should see something like this on your MMD screen:

Setting up the scene
We’re going to turn the stage 180 degrees to get another view for our scene. You can do this either manually or by entering the requisite value into the y-axis field.
![]()

Next add or make a pose for your model. This version of Meiko has a slider that allows you to change the texture map of her yukata (浴衣) and obi (帯) as well as one that changes the texture map of the water balloon so she can have a matching set. Choose whichever you like, but the technique discussed here will be assuming a light colored ensemble.
Your scene should now look something like this. You can also turn off the axis display. Also you must turn off MMD’s default ground shadow.
Setting up Ray-MMD
- Load the ray_controller and ray.x.
- Add main.fx to both Meiko and the stage under the MME panel Main tab
- Add Time of lighting.fx to the skybox under the EnvLightMap tab
- Add material_skybox.fx to the skybox under the MaterialMap tab
You should now see something like this:
Fixing the sky
The Kyoto stage comes with it’s own skybox which we will need to knock out. This is easy to do. Simply identify the materials for the sky and the clouds under both the Main and MaterialMap tabs in the MME panel. Un-check the check boxes under both tabs and they will not display; this will reveal the Time of day skybox. These steps are mandatory.

Go over to the Time of day controls and set both Cloud+ and CloudTurbidity+ to their maximum value so that the clouds will be visible. At the end of these steps, your scene should look something like the image below.
The background is blurred due to the Bokeh DOF effect, but this can be easily adjusted at a later stage in this project.
Setting up the Key light
We will be using the Sun as the Key light since this is an outdoor scene. What we be doing is to adjust the position of the Sun and you will do this using MMD’s own light controls (the sliders at the bottom of the light manipulation panel).
To accomplish the next step you may want to change your view, so do whatever is comfortable.
There are some trees at the top of the path that Meiko is walking on, and this is the main reason why we turned this stage around. What we want to do now is to angle the sun so that it is shining through the trees and throwing their shadow on to Meiko’s yukata. Be careful that you don’t cast the shadows from the buildings on to her as well.
What you want to achieve is something like what is shown below. It should look absolutely gorgeous even without the other tweaks that we will be doing.
Note: holding the CTRL key while using the mouse on the lighting controls allows for more precise control.
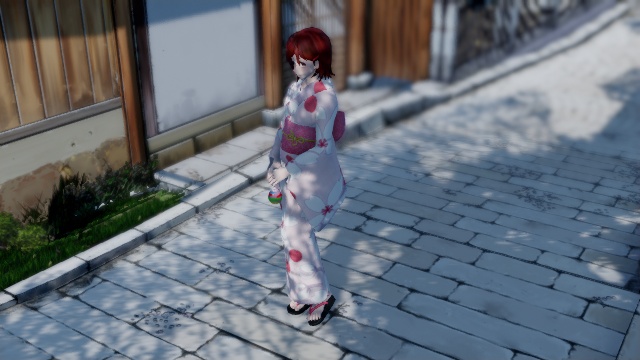


Isn’t that lovely? The play of the shadows on the yukata makes it looks so soft and light. You can almost feel a gentle breeze under the shade of those trees.
But we’re not done by a long shot…
Fixing the color temperature
At the moment, using the default values, there is too much blue in the light spectrum. Since this is a summer day, we want will want to raise the color temperature. While we are doing that we will fix some other issues as well such as correcting the depth of the shadows and the color saturation.
The values I am using are subjective. They are not a rule, so feel free to do otherwise if you prefer a different feel to your project. In all cases, when you make adjustments, make sure that the SELECT button is OFF and the TRACK button is ON. This will allow you to see your changes dynamically as you make them.

These were the values I used, just regard them as guidelines so feel free to experiment:
Time of day values
- RayleighColorV-: 0.15
- RayleighHeight+: 0.55
- EnvDiffLight+: 0.30
- EnvSpecLight+: 0.50
Ray_controller values
- SunLight+: 0.25
- SunShadowV-: 0.35
- Exposure-: 0.15
- Contrast+: 0.20
- Saturation+: 0.25
- Gamma-: 0.05
- Temperature+: 0.25
Your scene should now look similar to the one shown below. The colors are warmer and richer; the play of shadow and light is much more pronounced. This is how to create a Kodachrome look using Ray-MMD. (Kodachrome was a professional film that’s no longer manufactured but it used to be an industry standard; it was noted for its ability to retain rich colors).
Don’t worry about the harsh shadows on Meiko’s face; we will get to those in due course. Note that to help better illustrate the process, I am using screen captures that focuses on Meiko, but in reality I am actually working towards a full screen (1920 x 1080) high definition end result.
Add your materials to the models
This is a good point to add material specifications to your model; do whatever you want here with the Meiko model. The standard materials will work fine, but I will be using some materials by AONS. However, some materials on the model you might want to hide such as possibly the high-lights as they can look fake. But you will definitely want to hide the faux hair shadow which does not look right when using Ray-MMD. To hide a material just un-check it in the MaterialsMap tab.
Be careful with your choice of materials for the Yukata and Obi. These use either soft cotton or silk fabric which are both very fine. You do want some bumping but it should be subtle. Just using the default materials for these would be fine also as the texture maps already suggest the type of fabric used. The advantage of using the bump maps is that kills off some of the shine which would more accurately reflect the real material.

As for the stage model, if you want to take the time to find or make materials for it, have at it. I’m too lazy to bother but one thing you should do is to kill some of the shine coming off the stone walls and paving. There is a simple trick to this and that is to add material_skin_melanoderm.fx to them. Apply this to material subset #0, #1 and #9.

With these settings done the results should look something like the image below. The next step is to eliminate those harsh shadows on Meiko’s face which is where the use of fill lights come in.
Ray-MMD fill lights
In the Lighting folder there are several types of user configurable emissive lights that you can add to the Ray-MMD environment. For our purposes we are only interested in two types:
- PointLightIES.pmx
- SpotLightIES.pmx
These work similarly in that you load them, point them and then configure them. You can experiment with the other types on your own but in my own experience some of the other types can be problematic.
The main difference between the two lights we are going to use is that you can focus SpotLightIES. This makes the application of this light situational but incredibly useful in the correct application. We will have need for one here.
Basic application method
- Load the light
- Each light has two important bones (ignore the others), a root bone and a IK-directional bone
- To point the light, simply drag the directional bone in the desired direction
However, there is a simpler way. Simply OP attach the directional bone to one of the bones on the target model. This way it makes it much easier to point the light and it will always follow the model. Most usefully you will normally want to:
- Attach to the head bone if the light is shining from above
- Otherwise attach it to the neck bone

These lights do not cast extra shadows by default, but if you want shadows, you can specify them and specifically how heavy a shadow you want. All this will make much more sense once we do an actual set up. However, the light widget itself does cast a shadow and this should be disabled.
Fill Light Strategy
The strategy described here applies to this scene; other scene will require different strategies.
Our issue here is:
- Too much shadow on Meiko’s face
- We want to retain the shadows on her yukata
So basically, we have opposing requirements, but no problem…
We will use a single PointLightIES to be the primary fill light and this will be located to her right. We will then add a single SpotLightIES to her left side to augment and make up for the short falls of the key light.
Whenever you use fill lights, in general you want to be as subtle as possible. If it looks fake it will look bad. There is both a science and art to adding these lights but mostly this comes with experience. If you have any photographic background, these concepts will be second nature.
Adding PointLightIES
- Load a single instance of PointLightIES.pmx
- Attach it’s direction bone to Meiko’s neck bone using the OP function.
- Set the RGB colors to all to read 0.50 which gives us a neutral gray light color.
- Set the axis to GLOBAL mode and then move it to her front and right so that it has a 45 degree angle of attack, approximate is fine.
- Under the LightMap tab in the MME panel, swap out the default with IES_lighting_with_shadow_medium.fx
- The quality of the light is set using:
- Intensity-: 0.20
- BulbAttenuation-: 0.15
- MultiLight-: 0.30 (this setting is on the ray_controller panel)
- Hide the light by un-checking it’s display check boxes in the MME panel (using the same method to hide the stage’s skybox) and hide it’s shadow by deselecting the shadow button on the model manipulation panel.

Note 1: 6.3 controls the shadow specified in step 5. If you don’t change this value, you won’t see any difference.
Note 2: The position of the light source can be adjusted to “get it just right“, so feel free to move it. Just remember that moving it might require that you make additional tweaks to the settings.
If I haven’t completely confused you, then your scene should now look something like the image shown above. Additionally, if you didn’t tell anyone, no one should have guessed that a fill light was used. This is exactly what you want.
Add SpotLightIES
Adding the this light uses an identical procedure.
- Load one instance of SpotLightIES.pmx
- Attach it’s direction bone to Meiko’s neck bone.
- Set the RGB colors to 0.50
- Move the light into a position to her left and front. Aim for her lower jaw, which is where the shadows are harshest.
- Under the LightMap tab in the MME panel, swap out the default with IES_lighting_with_shadow_high.fx
- This light has a “beam” which can be focused using the angle+/- variable so the settings I used were:
- angle-: 0.15
- intensity+: 0.30
- AttenuationBulb-: 0.15
The values you use will largely be determined by where you placed your SpotLightIES. But because now we have two fill lights in the equation we need to revisit the settings in the Ray_controller panel to fine tune the settings to get things to look right.
- MultiLight-: 0.50
- SSAO+: 0.40
- Gamma-: 0.20
- Temperature+: 0.40
Once the adjustments were all made, the light was hidden using the method described previously. The images below shows the end results.
A closer view of Meiko’s face and upper torso, shows how the harsh shadows are now all gone giving her face a much more gentle play of shadow and light. We also managed to retain the natural shadows from the branches of the tree and her hair. Note that I triggered her faux eye highlight to show again to give some sparkle to her eyes.
The Finishing Touches
Now that we have all the lighting elements in place and correctly set up, we can now add the final flourishes to our project. Most of these steps are optional so, just use them as suggestions.
- Add Diffusion7 to soften the scene making it feel more gentle. This effect will saturate the colors. If you don’t want this you can either adjust the saturation levels using the ray_controller. Alternatively, use an equivalent effect like o_diffusion which by default does not change the color depth.
- In all cases, due to our other adjustments, the shadows around the buildings are probably too dark and we have lost a lost definition in these areas. To compensate for this, using the ray_controller, set these values: SunShadowR+/B+/G+: 0.20
- If the transparencies used by the background trees are giving you issues, try temporarily changing the view to force MMD to redraw the scene. But if it remains unstable, try adding: o_disAlphaBlend
- Once all these are done set up your final view and lock it. Note that you should also set the View angle of your MMD camera at this time. By default it is set to 30, bringing it down will make the view “telephoto“. This works really nicely as it reinforces the perception of 3D space which you really want here due to the depth of the stage.
- With this done, go back into the ray_controller panel to set up the depth of field settings. I am not going to explain these settings in any detail. Just play with them and it will be pretty obvious what each control does.
- The final settings used were:
- View angle: 18 (camera panel)
- Exposure-: 0.35
- Temperature+: 0.40
- AttenuationBulb-: 0.35 (SpotLightIES)
- Fstop-: 0.50
- FocalLength-: 0.70
Afterwords
Nothing written here is set in stone. The settings used in the tutorial are merely sufficient to illustrate the method. After I wrote the main segments I went back to rework the settings basically to show that by being willing to make adjustments after-the-fact, you can get very different and possibly better results.
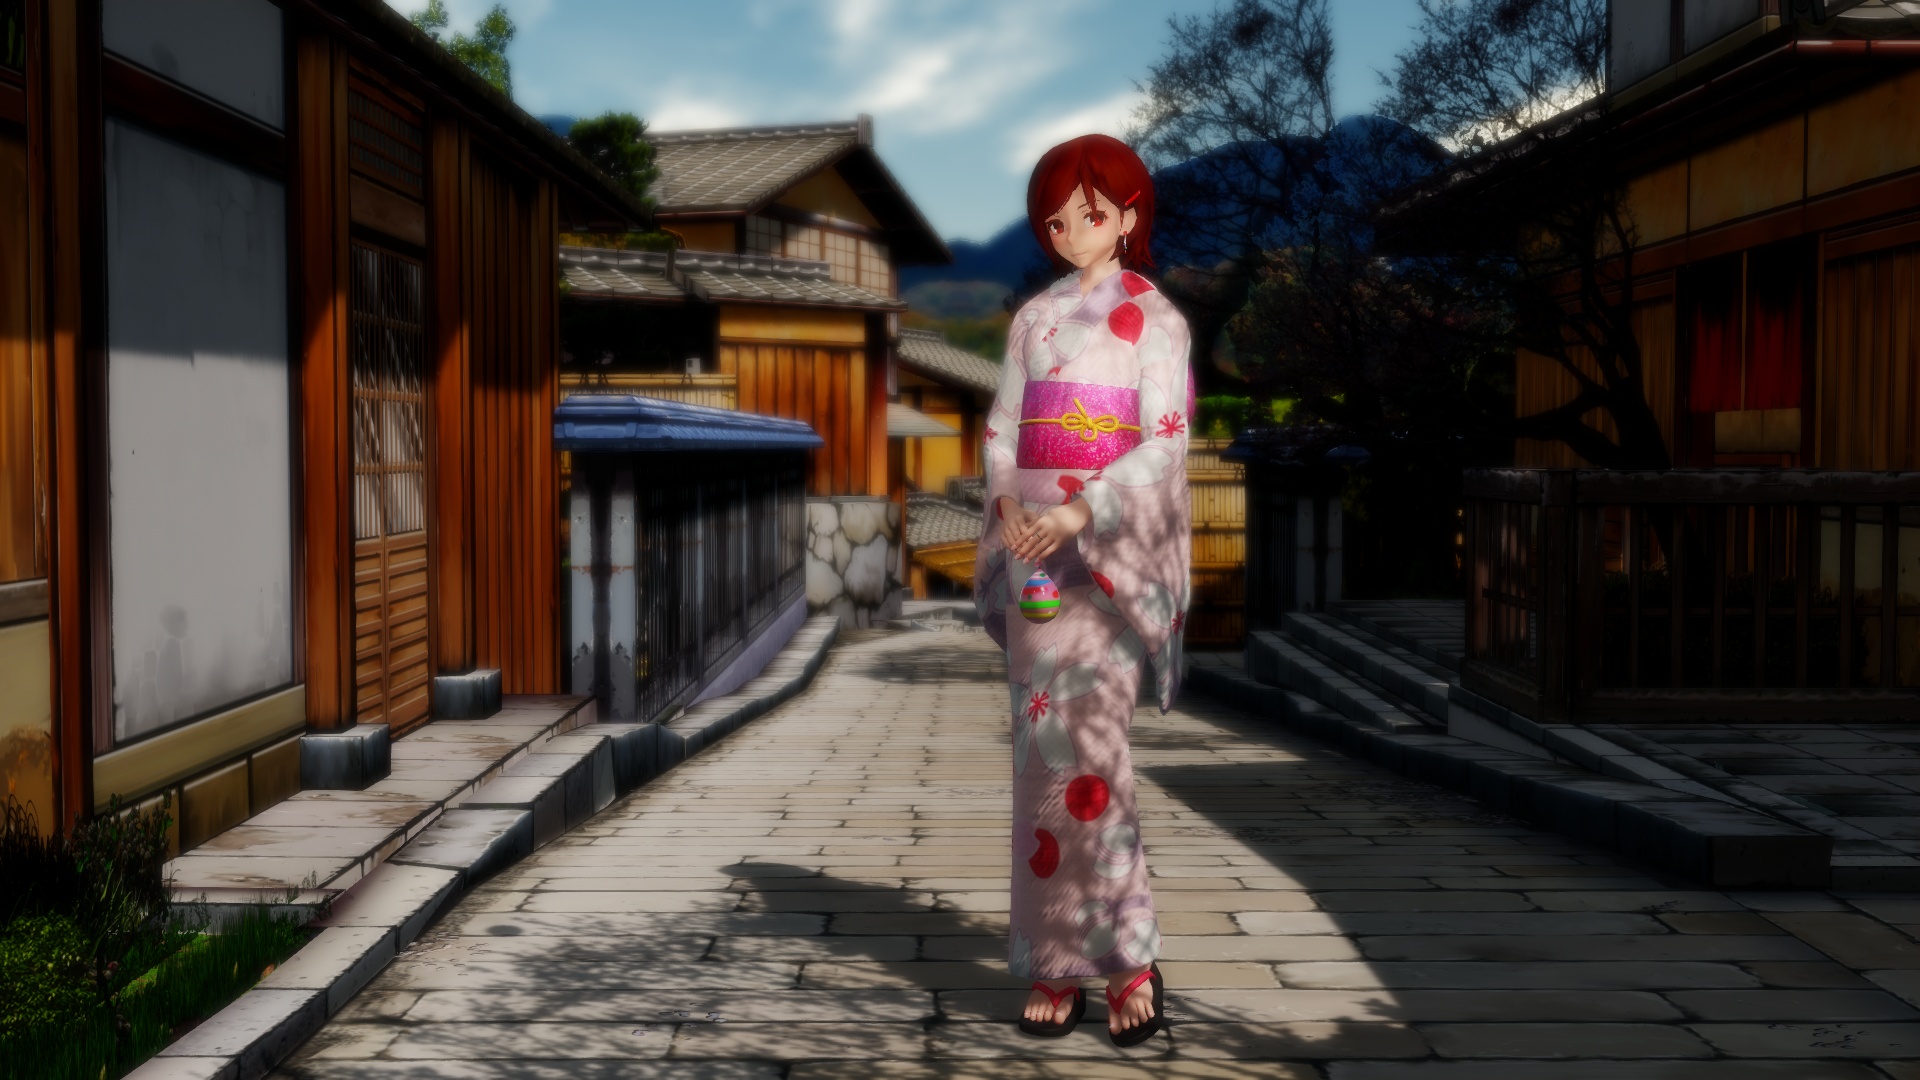
The following two images are thumbnails for 1920 x 1080 high resolution renders. Just click on them to see the original full screen renders. Ray-MMD is really flexible so it does pay to play around with settings to try to get the best results possible.
Note also that the final positions of the fill lights are different here with these two shots. Moving these lights around can have a dramatic difference on the final outcome.

CREDITS
Meiko: Murabito124 (www.deviantart.com/the-original-kopii/art/You-Require-Additional-Pylons-192126982l)
Kyoto Stage (清水風ステージ): Anonymous User (https://bowlroll.net/file/157896)
MMD 9.32
Ray-MMD 1.5.2
Diffusion 7
o_disAlphaBlend
SeriousShader
Materials by AONS
IrfanView64
– SEE BELOW for MORE MMD TUTORIALS…
— — —
– _ — –
![]()
