


RAY-MMD: Creating your own custom sky box
But before we get to the “how to“, let me briefly explain “why” you would want to do this. The answer simply is

The work around to not creating a custom sky box is to use either the Sky Hemisphere or the Sky Night sky boxes to set up the lighting environment and then load another skybox of your choosing on top of that. It works but the method is cumbersome and in some ways, redundant; why use two sky boxes to do the work of one?
Well you don’t have to, since RAY-MMD comes with the tools to create your own and it is actually very easy to do.
DO THIS FIRST
Look in the “Tools” folder under the main RAY-MMD folder and find a file called: cmft_rgbt_x1024.zip
Expand/unzip this file in the same folder; this will produce several additional files and a new folder named “Template“. The contents are as shown in the image below.

YOU’RE GOING TO NEED A HDR IMAGE FILE
An HDR image file is a High-Dynamic Range image of, in our case, a “sky”. So, you’re probably wondering where you’re going to get one of these. Fortunately, these are not as hard to find as you might think, and in fact, you can easily get some really great ones for free!
Just go here: https://aokcub.net/cg/incskies/#download
There are plenty of choices on this site, so choose any that you like. What you will want to download, however, is a HDR16 or HDR8 version of the sky that piques your interest. We are going to grab ++skies; 013.
These HDR images are heavy duty files, especially once expanded and can take awhile to download on a slow Internet connection.
In any case, once your download is complete just drag out the HDR file into the “Tools” folder as shown below; the rest of the contents of the zip package are not needed. In our example the file is: incskies_013_16k.hdr

MAKING THE CONVERSION
The next step is really easy if you follow the exact steps detailed below:
- Rename your hdr file: skybox.hdr
- Next DRAG it on to one of the cmft application files; specifically, select the skybox.hdr file and drop it on top of the cmft file.
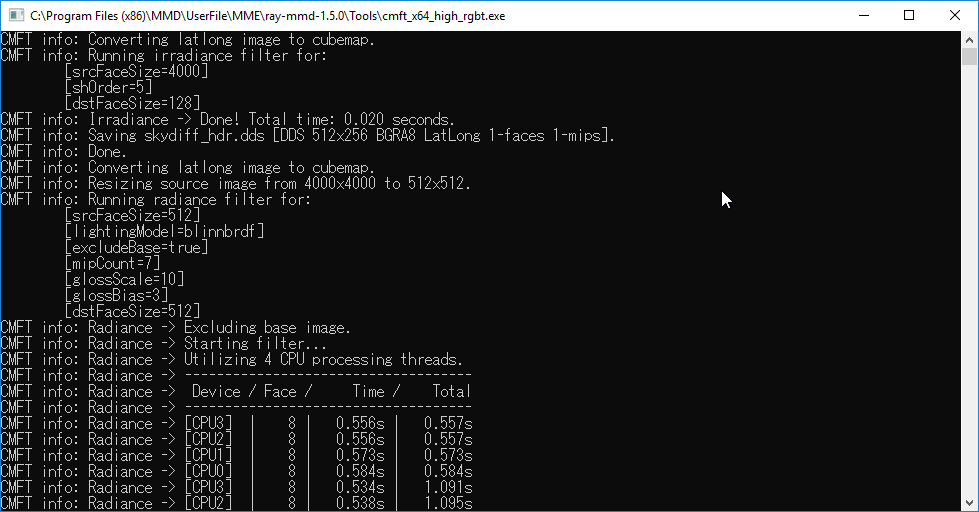
- This will open up a new DOS window and the conversion will begin. Just let the app run through the steps required; do not interrupt the process. This could take awhile depending on the speed of your computer and the size of the hdr file.
When the process starts you will get a line reading: “CMFT Info: Converting latlong image to cubemap.” Then it will seemingly stop for awhile as the process does background work, then it will begin to start reporting what it is doing. When the process is over it will report that it is “Done”. Then the app closes the window automatically.
Let this entire process run without interruptions!
The process will create three new dds files:
- skyspec_hdr.dds
- skydiff_hdr.dds
- skybox.dss

As for which CMFT app file to use, that depends on what type of sky box you want to create. There are six options:
- cmft_x86_medium_rgbt
- cmft_x86_high_rgbt
- cmft_x86_fast_rgbt
- cmft_x64_medium_rgbt
- cmft_x64_high_rgbt
- cmft_x64_fast_rgbt
If you are using a 64-bit, high spec computer and a HDR16 image, go with one of the x64 options. If you have an older PC or using a HDR8 image, try using one of the x86 options. If your PC cannot support the app functionality, the app will close automatically and do nothing, so just choose another option.
The difference between medium, high and fast is the resolution; for most purposes “fast” is good enough.
Once the conversion is complete you can safely (and should) delete all of the files in the Tools folder except:
- The two original zip files that were in this folder
- The “Template” folder
- The 3 new .dds files
As can be seen in the screen grabs included, hi-resolution HDR files can be huge so there is no sense keeping them since you will never use again.
To complete the conversion cut/paste or move all three .dds files into the “texture” folder inside the “Template” folder.

FINAL STEP
Move the entire “Template” folder into the Ray-MMD sky boxfolder. Rename this folder using whatever name you want. We renamed ours: incskies_013.

Your new sky box is now ready for use in MMD, so open that program and load the new sky box. You should be able to see your new custom sky box if you carried out the steps above successfully.
Note that you will have to repeat this entire sequence for each custom sky box you want to create.

USING YOUR NEW CUSTOM SKYBOX
Your new custom Ray-MMD sky box, like the other sky boxes supplied with this effect, offers special functions. First of all, you will have slider controls that are used to specify the lighting environment. These are basically the same as those provided with the standard Ray-MMD sky boxes and so will not be discussed here as I have covered these in my other tutorials in this series. However, a few functions need to be enabled before the sliders have any effect and these are detailed below.
When you first load the custom sky box, by default it will be configured with Sky with box.fx under the Main tab in the MME panel and material_skybox.fx under the materials tab. These will suffice in most situations.
To enable the lighting functions you must apply, as standard, Sky with lighting.fx to the sky box under the EnvLightMap tab. However, you have other options and these are explained below:
Options for the Main tab:
- Sky with box – default.
- Sky with box blur – use this if you want to blur the sky texture.
- Sky with box with rotation – use this if you want to be able to rotate the sky box; if used, the controls for these are under the facial controls that normally controls a model’s mouth facials. You will be able to rotate the sky box on all three axis.
- Sky with box blur with rotation – if you want to blur the sky texture and rotate the sky box, use this option. Honestly, this is fairly useless.
- Sky with dome – don’t use.
- Sky with dome with rotation – don’t use.
Options for the EnvLightMap tab:
- Sky with lighting – use this one by default.
- Sky with lighting fast – used for fast calculations. This one is situational; if you know what you’re doing, go ahead and try it.
- Sky with lighting with rotation – this option allows you to tweak the lighting direction independently of the global lighting direction. This functionality is extremely useful and was used to help tweak the lighting in the final image below. Likewise the controls for these functions are found under the mouth facial grouping.
In case you have problems finding these .fx files, they can be found in the same folder as your custom sky box.
IS IT WORTH MAKING YOUR OWN CUSTOM SKY BOXES?
The standard sky boxes that comes with the Ray-MMD are all very good and you can just use them for all your projects. However, for advanced users of this effect, probably this is something that you will eventually want to do. So the answer to the question is a definitive “yes“.
The final image in this article used a custom sky box created from the HDR16 graphic mentioned above and if you expand the image below, you will understand why I am making an argument in favor of going this extra “mile”.
CAUTIONARY NOTE: Custom sky boxes behave a little different from the standard ones and getting the lighting environment configured properly can be quite a challenge.
I highly recommend that you do not try going this route unless you have at least some familiarity with using the standard sky boxes as well a good understanding of how to use the Ray-MMD effect.
The image below, for example, required extensive tweaking including the need to use a fill light. If you are familiar with the Ray-MMD effect, it is well worth the extra effort, but for a beginner, using a custom sky box could be a big challenge.

CREDITS
- Fairy Miku – TDA, edit by Skary66
- ++incskies – aokcub
- Mountain stream stage – Yamado
- MMD 9.31
- Ray-MMD 1.5.0
- Irfanview
- Miku Hatsune © Crypton Future Media, Inc.
– SEE BELOW for MORE MMD TUTORIALS…
— — —
– _ — –
![]()
