


Godrays created by Ray-MMD are awesome but they come at a price. Wherein, they’re not really that hard to set up, the process can be extremely fiddly.
Ray-MMD Godrays… argggh!!!
But, it you were wondering about how some of the really beautiful MMD videos on YouTube that uses Ray-MMD Godrays were set up, this article will unlock some of those secrets for you.
If you are not familiar with using Ray-MMD, read one of the beginner tutorials before attempting to do this as this article will be assuming that the reader already has some familiarity with using the effect.
A wee bit of Theory…
Broken down to the its most basic element, Godrays are actually shafts of radiating light (or simulated ones with regards to MMD). Characteristics of how Godrays work is as follows.
- The light comes as a broad beam from behind the scene. This is opposite of the default behavior of the MMD primary light source which illuminates the scene from the front.
- There must be objects in the way that can block some of the light; the light that penetrates through the gaps are the actual light shafts or Godrays.
- Godrays can only be seen from certain angles.
- The more contrast that you have in a scene, the stronger the perception of the effect. So, dark interiors being illuminated by bright sunlight works well.
The method I’m using is one that I developed so as to be able to get predictable results relative quickly with the least amount of effort. Once you get the hang of making it work, you should find that the Ray-MMD Godray system is actually fairly flexible. The only real issue is to get them to work the in the first place.

However, once you have the basics down, it opens up a lot creative possibilities and you can easily start making images like the one featuring Yukari above. It honestly, is a lot of fun, once you get over the initial learning curve.
What you will need
You will need the resources listed below:
- Ray-MMD, preferably the latest version. But any version will work.
- An interior space model with “real” windows. By real window, what we mean is that there is an actual opening.
The effect does work in an open space if you have a model big enough with structures that can act as light blocks, but once you understand the method, you can do those easily. For now, we’re sticking to an interior space as it makes things easier to explain.
Warning: don’t use a small room stage model until you fully understand the how the effect actually works.
The basic set up
Load the Time of Day sky box but don’t do anything with it yet. Next load your stage and if necessary, which is probably most of the time, rotate it so that the windows are parallel to the front view. ie. 90 degrees.

This means we’re going to be using a back-light set up just to make things easier to see and understand, but it will work with some side lit situations as well.
Load the ray controller and ray.x, then do your basic set up; apply the primary materials, etc. Specifically, add:
- material_skybox.fx and Time of lighting.fx under the correct tabs to the sky box.
- main.fx to your stage.
- if you want, specify materials for your stage model.
Using the MMD light controls, move the Sun on the sky box to shine down from behind and roughly downwards at a 45-60 degree angle. More extreme angles do work but for now just do as we suggest. Use the shadows on the ground to figure out where the Sun is if you can’t see it through the windows. Zooming all the way out also works.
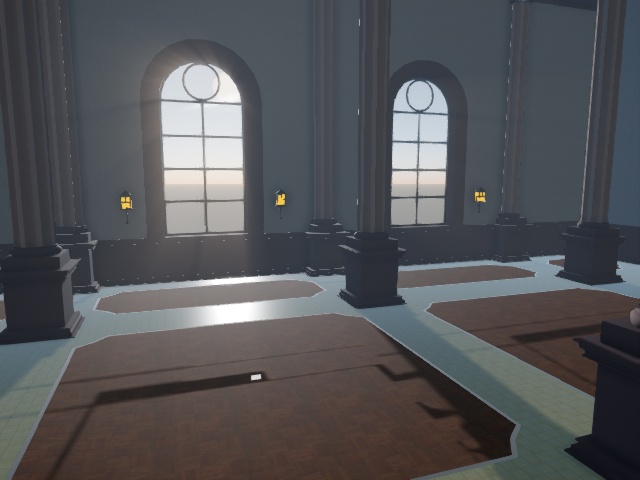
You should see something like this on your screen. The interior is dark but that’s fine. We can easily fix that later, but we want it dark initially as it makes it easier to do the next steps.
Adding the Godrays
If you are using the Time of day sky box you have two routes in order to get Godrays to work. You can use one of the Time of fog with godray.fx files or the method that we will be using which is easier and more predictable.
Find Atmospheric.pmx from the Fog folder and load it into MMD. Then go into the MME panel FogMap tab and swap out the default effect applied to that widget with atmospheric_fog with godray high.fx.
Note: atmospheric_fog with godray high.fx and the medium and low variants are the secret ingredients to getting Godrays to work using Ray-MMD.
The effects should be immediately apparent, at least in a subtle form. If you don’t immediately see the rays, try changing your camera’s POV or moving the sun. If none of this is happening, check the steps above.
Note that the controller for the fog is a white plane on the ground located at the axis origin. You can hide this using the controls in the MME panel but I highly advise you not to move it.
Fine tuning the effect…
OK, this the “fun” part … :)
Honestly, there is no way to explain how to fine tune the effect using text. Even if I tried to do this using a video, it will be hard to do. This is because you will need to use different controls across three separate widget and in different combinations to arrive at whatever result that you are trying to achieve.
This is the really, really, really fiddly part mention above. Just be patient, once you understand how one variable affects another, it will much easier to control the outcome.
Experiment: you can see the results of your changes immediately. Once you get a “feel” for how the variables are interrelated, literally the sky is the limit as to what you can do.
Specifically though, the tweaking is done using:
- The Time of day sky box sliders
- The Ray_controller sliders
- The AtmosphericFog controller sliders
- And also the position of the Sun using the MMD sliders
Tip 1: You aim the light shafts by moving the Sun. The MMD Sun is de facto the primary source of light in your scene, just like our Sun is in the real world.
Tip 2: If you don’t know what the terms on the controls mean (eg. MiePhase), Google the term. At the very least, it will give you a clue as to what variable a control impacts. But in very general terms most of the Ray-MMD controls affects how light behaves in the scene.
Tip 3: The ray-controller is your best friend. Things like the Gamma, Exposure, Saturation, Temperature and several other global color controls can drastically alter the nature of your scene.
Tip 4: The best method is to do your basic configuration with the sky box and atmospheric fog controls. Then use the ray-controller to do the actual fine tuning as this widget primarily works like an image editor.
So here’s what we came up with after 5 minutes of tweaking.
Or you could easily do something like this also:
Or even this…
An example of an actual performance set up
Where the sun is relative to the scene can have a dramatic effect on the outcome.
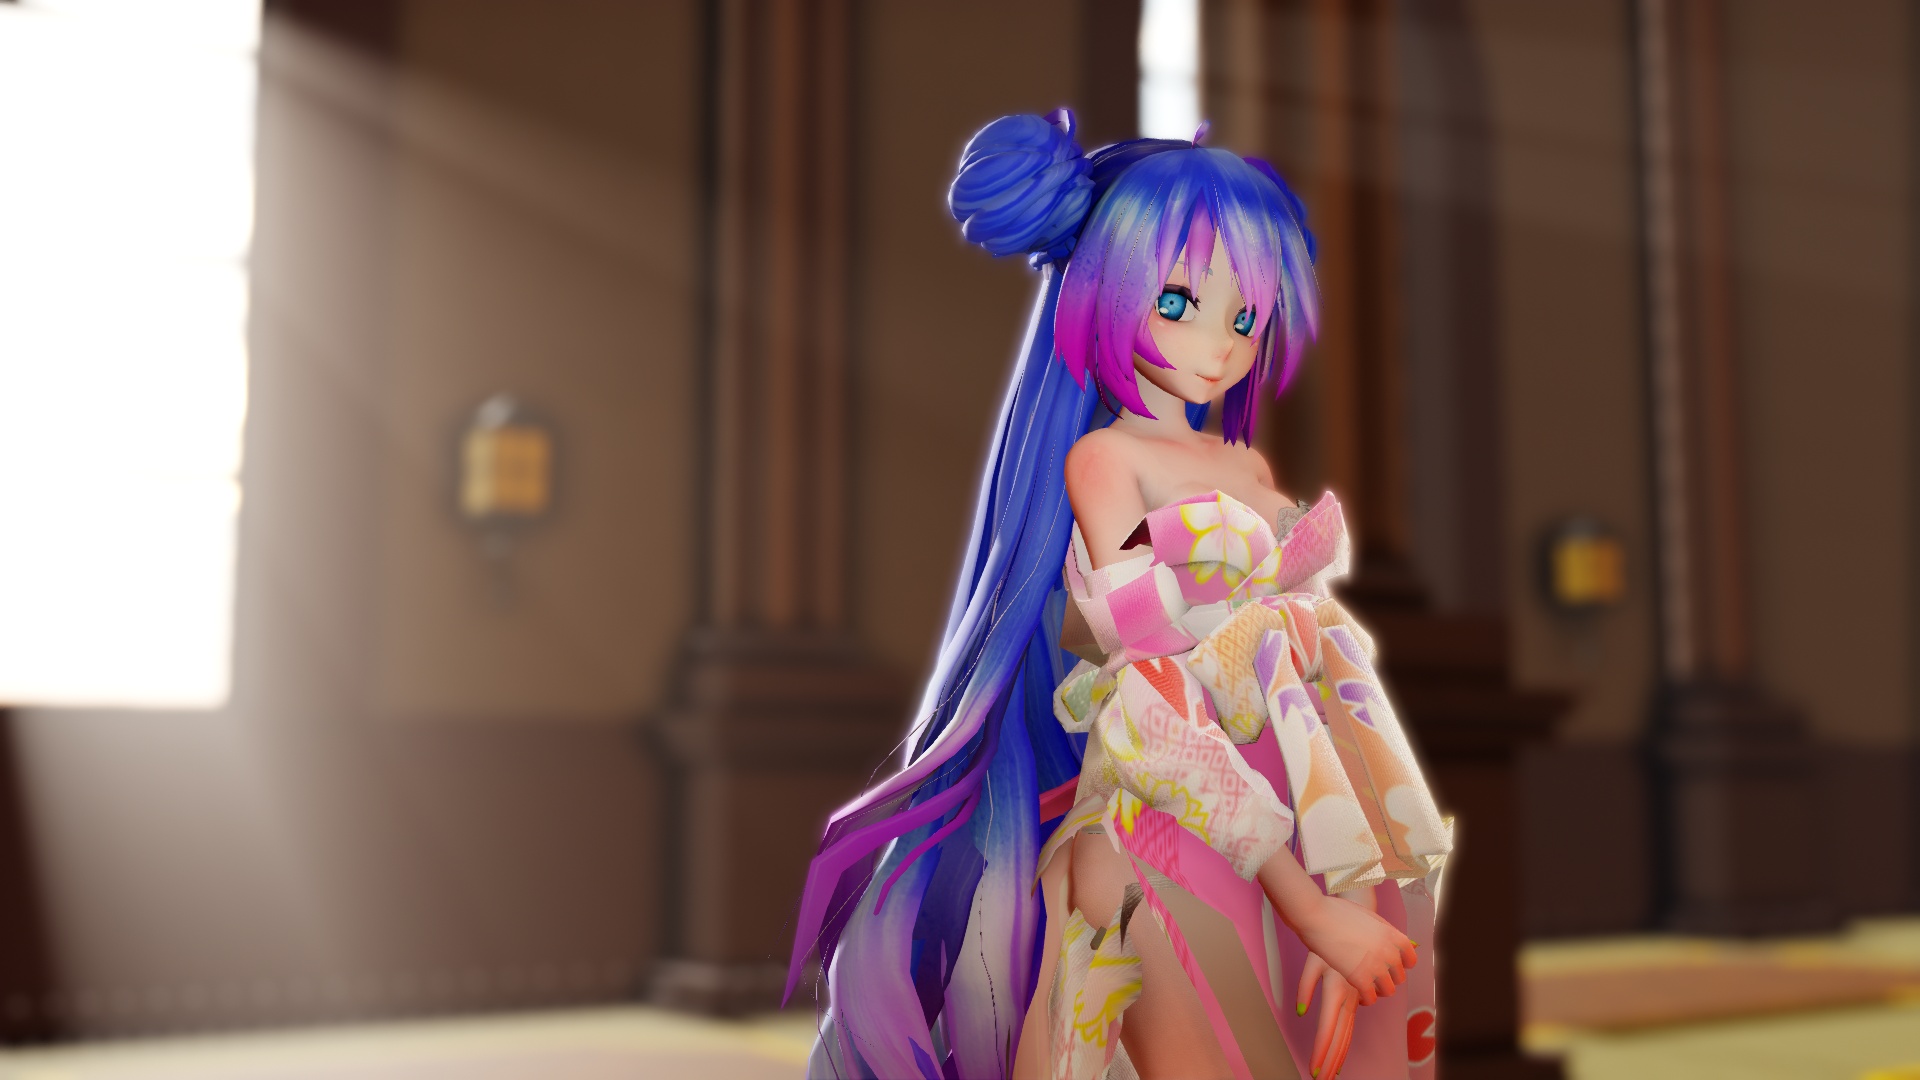
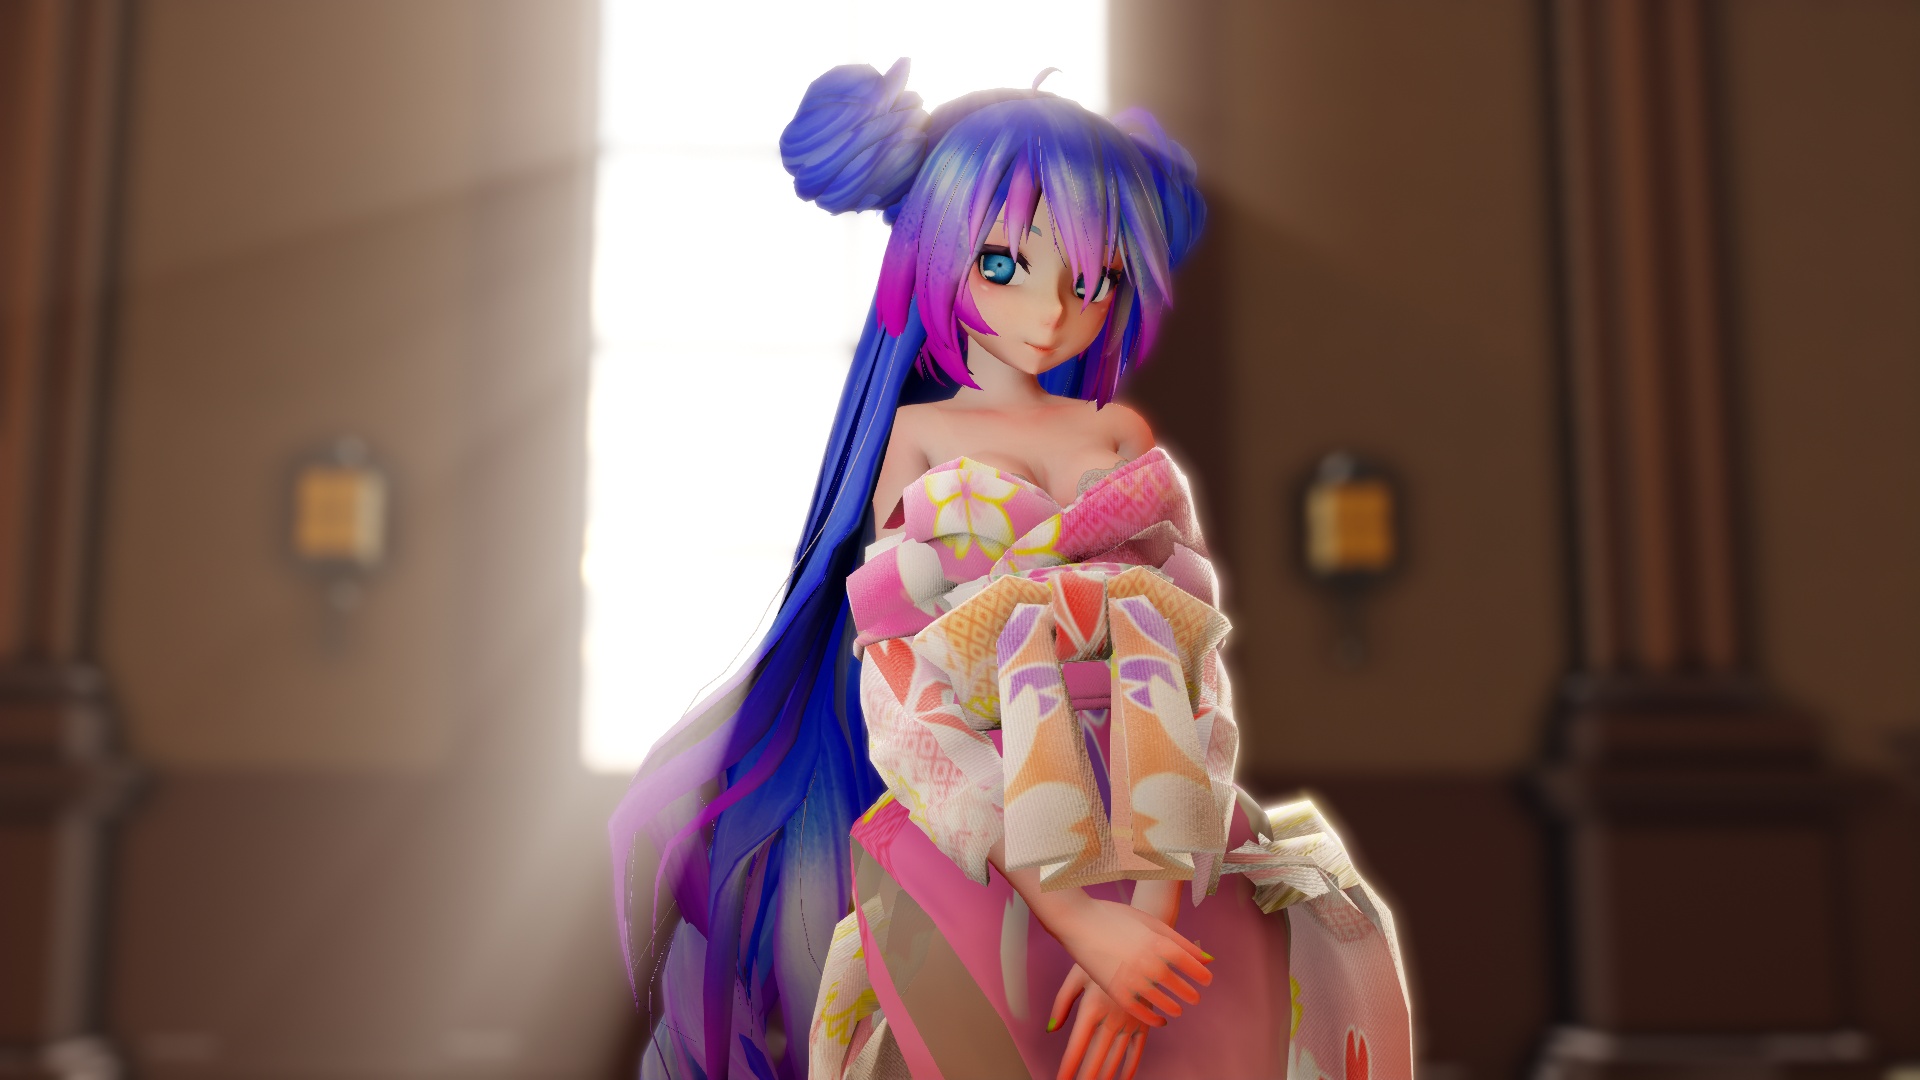
The stage used here is a good size, but you normally want to get much closer to your performer. So this is what we did with the following two images. The only difference between the two images is the camera’s POV.
Full disclosure: these took me over an hour to get right. This is why there’s an “argggh” in the title…
However, once you’ve got it figured, it really is not that hard.
Note also that because the primary light source is behind Miku, she’s actually being illuminated using a fill light.
Final notes
Alternative method
The alternative method to getting Godrays to work using Ray-MMD is to use Time of fog with godray.fx or its variant. This only works with the Time of day sky box.
The result is comparatively muted but arguably a little less fiddly. However, results are inconsistent. It also seems to get it to work easier in outdoor scenes where you use tall buildings as light blocks.
Cautionary note about using “canned” camera motions
Due to the light shafts only being visible from a rather narrow range of view points, most canned motions which really swing the camera around probably will not work too well.
So if you are planning to use Godrays in videos, you will need to make allowances for this and be prepared to either heavily edit the camera POVs or even having to create your own camera controls for the production.
System resource intensive advisory
Do be advised that the effect seems to be very system resource intensive. On my equipment, the variable throttle cooling fan was going full tilt to keep my system cool; this despite the fact that I also have an external cooling system in place.
Credits
Tda式改変 初音ミク Japanese Kimono v6.01 by elina002
Tda HighSchool Girl JKStyle
Yukari by Mamama
Paladio Stage: http://fav.me/d72vq0b
Kerorin Town 2.02: BTA Kerorin Jo
Small Bedroom Stage: 3DCG
Rip for MMD hosted on DA; there’s a couple of versions of this room with different furnishing.
MMD 9.32
Ray-MMD 1.5.2
Irfanview 64
– SEE BELOW for MORE MMD TUTORIALS…
— — —
– _ — –
![]()
