


But Haku, not being a big billing star with the funds to put on a big production number doesn’t have

RAY-MMD: Haku’s crazy light show
[PART 1]
This will be a big project to describe so it will be broken down into 3 parts, otherwise it will be too difficult to explain the entire process. In actual fact, it is not as hard to do as it is to describe, once you grasp the basic concepts. Since this is being written for essentially newcomers, we have chosen to go this route.
The three parts will be as follows:
- The initial set up plus shading Haku
- Setting up the stage
- Adding the special lighting and the finishing touches
If you have the patience to slog through all three parts of this series, you will gain some valuable information to take away and apply to your own projects and wow your audiences. Plus some of the information here you will not easily find elsewhere.
A prerequisite for this series is a basic knowledge on how to add models to MMD and how to use RAY-MMD (at least on a basic level). Since this is not the first article that I have written on using RAY-MMD, if you are an absolute beginner with this effect, please read the earlier tutorials on using this effect on this site before attempting to tackle this project.
What you are going to need for this project
Anyway, since we’re going to be working within her budget, your shopping list for this project (which we highly recommend that you duplicate as you read through this article) will be as follows:
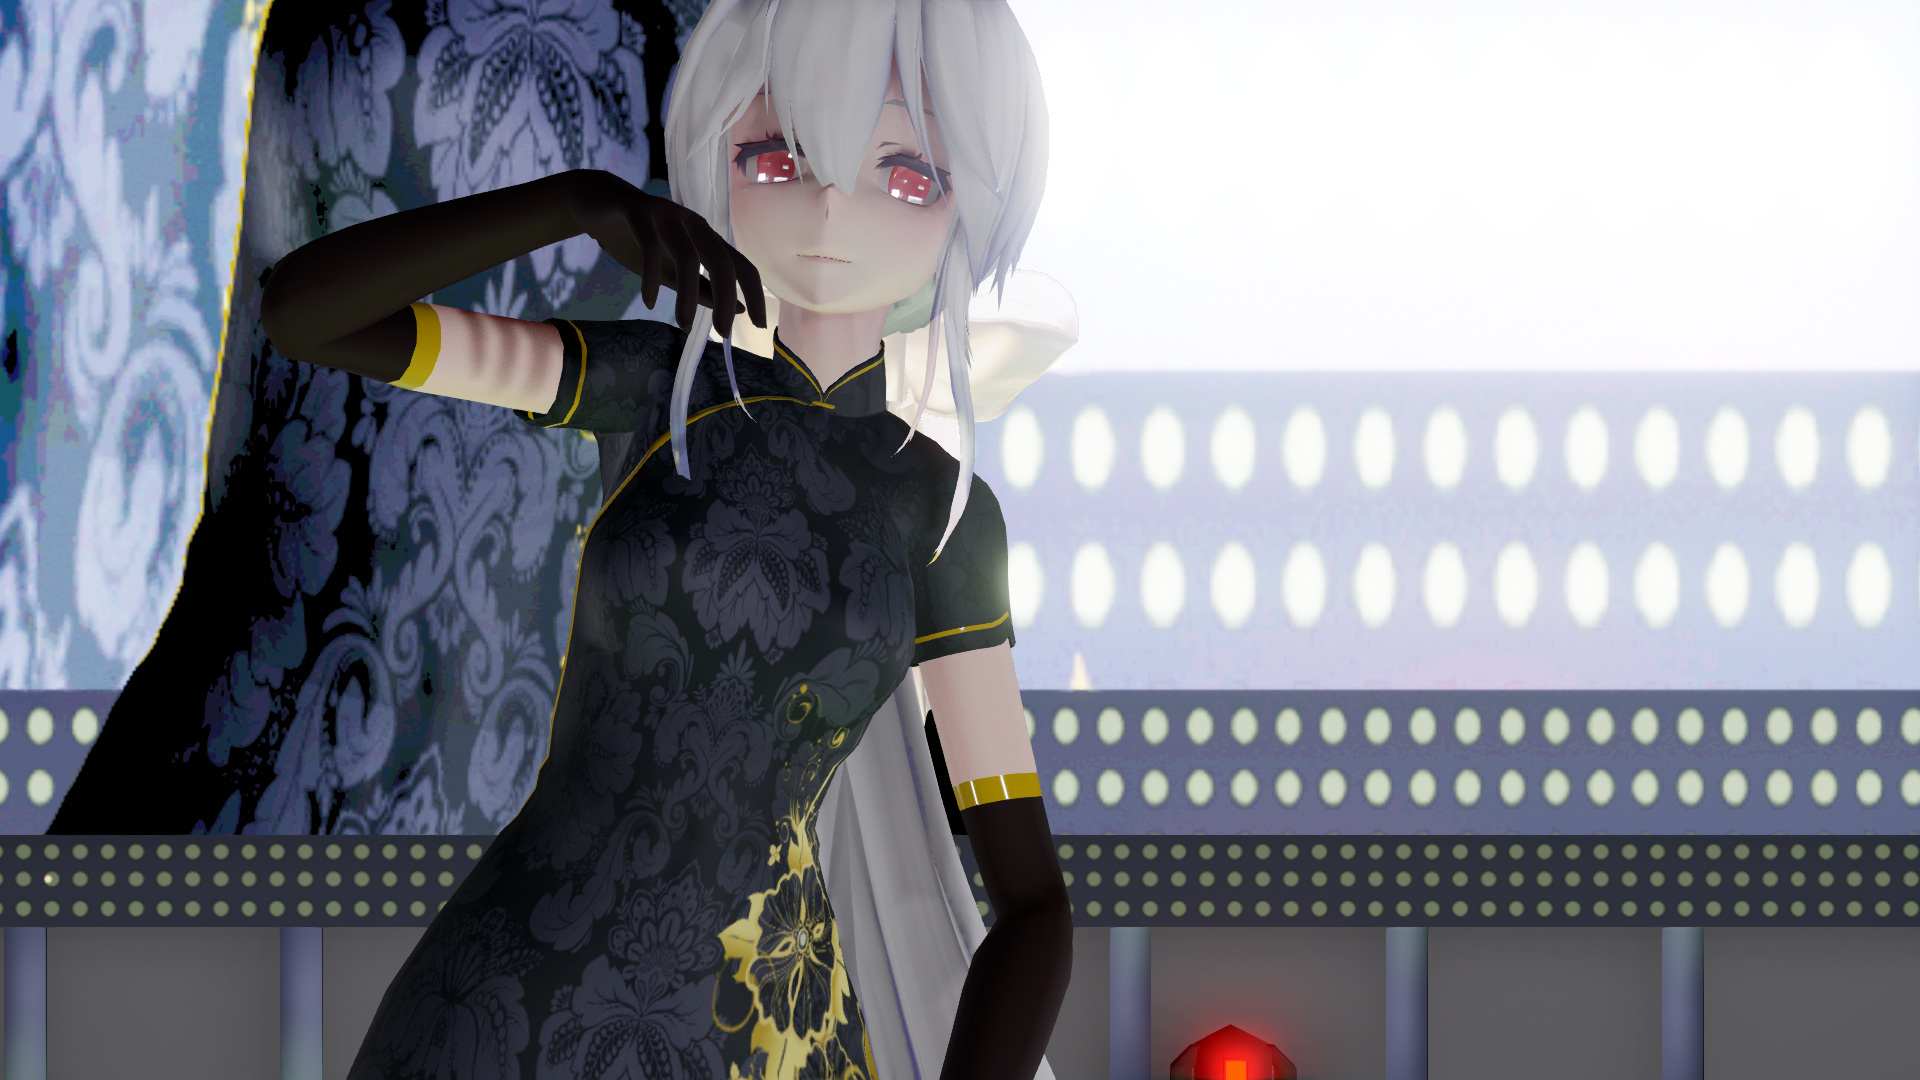
- We’re using the TDA style version of Haku by iRon0129 shown above. Now honestly, this model has been sitting on a thumb drive that I’ve had for years and I do not remember where I got her from. So, you can try and do a search for her or substitute with any other model of your choice.
- The default stage that comes with MMD. After we’re done with it, it will be almost unrecognizable!
- A spot light model which you can download from here: Articulated Stage Light . In this article, we will be showing you how to actually get something like this to really throw out light in MMD.
- This motion by Ureshiiiiii: I love you, my one and only . You can use another motion if you like but for our purposes here, this one works out great.
- MMD 9.31
- RAY-MMD 1.5.0
- A good deal of patience and plenty of hot coffee. The latter is optional, especially if you are still a minor.
The Initial Set Up
Once you have collected all of the required resources, load up the following into MMD first:
- The stage. That would be stage01.x that comes with the MMD program and which is in the Accessory folder. Toggle on the rear screen by turning on either ON.mode01 on ON.mode02.
- Load Haku (or your model) and the motion set if desired. Might as well have some fun from the start as the next part could take awhile.

Actually, YOU ALWAYS WANT THE BASIC SET UP TO PLAY WITH. This serves as a mental sketch pad. Play it through multiple times and look at all the elements critically. Understand how everything blends together and learn to identify the visual potentials. This helps with the planning of the application of MME effects (apart from other things). Make it a habit of playing with your initial set up and watching it with an analytical mind set.
In point of fact, in planning this article, I played with this exact set up for almost an entire evening. What I will be teaching you here would not have been possible without this initial investment in Time. A side benefit is that this process can help to identify issues before they become a problem; saving you much headache downstream.
The Plan
Always have a plan BEFORE you even apply the first MME effect. By the time you begin to load the first effect, you should already have a good idea of what the desired end results would look like.
Like we stated at the top of this article, Haku wants to put on the “SHOW OF THE CENTURY” on a shoestring budget. This is not just a flippant statement that we simply thought up to grab attention; it is actually our mission statement.
Our plan was all along to use the default stage, simply because everyone has it. It is not the best MMD stage in the world by a long stretch and purely as a model, it has issues. But, because we have a plan, we can teach you how to make it look like something really special. What we will be doing are things that are rarely, if ever, done with this stage and all of what we will be doing only requires the use of a single effect suite: RAY-MMD.
… all of what we will be doing only requires the use of a single effect suite: RAY-MMD.
In terms of the lighting plan, because the other part of our thinking is to teach you more about using RAY-MMD, we will show you how to use it to recreate an authentic stage lighting schema.
The logic works like this:
- The stage is in an indoor environment with the assumption that it is in some type of auditorium. Without lights, therefore, it will be dark.
- To light up the stage, we have ambient lighting to work with but these in a concert hall environment will still be very dim. So we will need to add supplementary lighting.
- The default MMD stage has a lot of features which can be accessed to easily and realistically add the required supplementary lighting required.
- Another thing about stage lights are “unintended consequences”. This is basically any illumination that results from any light source that was not deliberately planned for. These sources of illumination are great for our purposes as it is this type of lighting that will make our scene look “real“; even with a very basic model as the default MMD stage.
The application of the foundation effects
Applying MMEs to a scene is much like doing make up. If the foundation isn’t right the end results will not be either. So let’s get that done first, so…
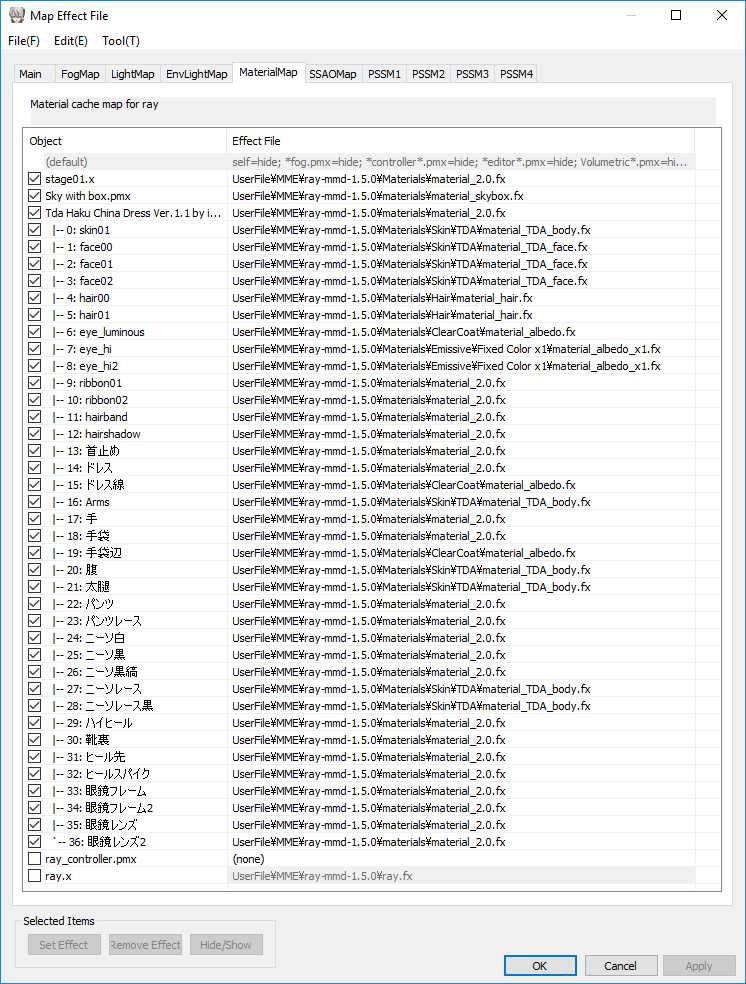
- Load the 3 components required for RAY-MMD to work: Sky with Box.pmx from the Sky Night folder, ray-controller.pmx and ray.x.
- Add main.fx to your performing model (Haku in our case).
- Add main.fx to stage01.x as well as material_2.0.fx to it under the MaterialMap tab (otherwise it just turns all black).
- Apply Sky with lighting.fx to the sky box under the EnvLightMap tab.
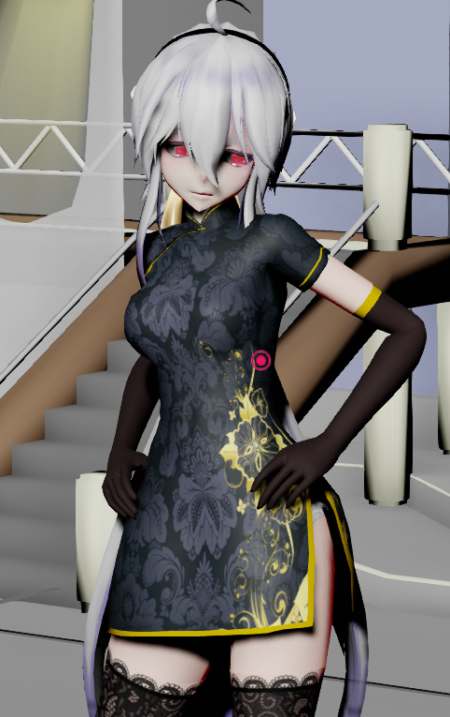
Haku in the dressing room…
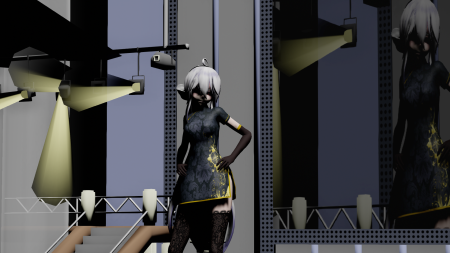
Well, in the interest of Haku’s modesty, we won’t show her dressing but what we did do was to apply the applicable RAY-MMD material maps/shaders to her. She looks as shown below when using the default light setting which of course we still have not touched. If she looks dark now, she’s going to look even darker soon and then she’ll glow like a goddess. But the foundation work has already been done here.
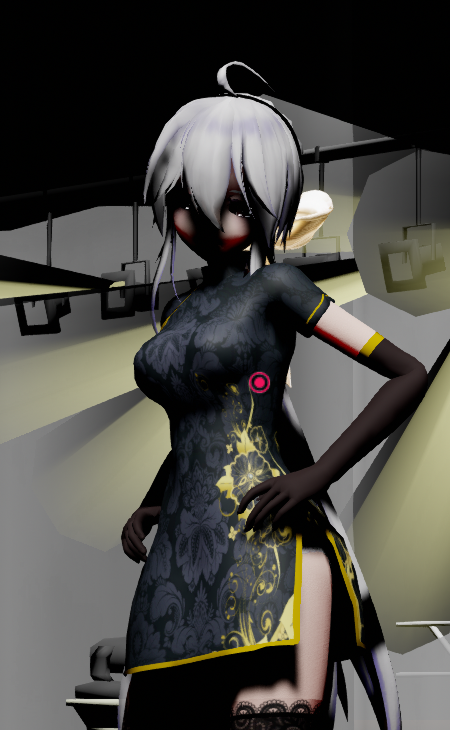
But in the interest of full disclosure we will show you exactly what was done. Click on the screen captures images to see them at the original size (and press the back button on your browser to return to this article).

Notes:
- Haku’s hair has transparencies so for the foundation, under the Main tab I used main_ex_noalpha.fx. This actually negates (some of) the transparency which was what I wanted to do to prevent issues downstream.
- main_ex_with_sphmap.fx was added to materials which uses spa maps and which I really wanted to be shiny. Specifically her shoes and hair ribbon. Her model actually does use more spa files than this, but I did not want her to be unnaturally shiny.
- If you study the specifications I used under the MaterialMap tab for Haku, it should be evident that I have been very conservative with the effects. Of note though, are materials to which I added material_albedo.fx. This makes the affected materials have the property of being highly reflective. These will play well with the final lighting specifications.
- material_albedo_x1.fx is an emissive material applied to her highlights. These serve to add some additional sparkle to her eyes and works especially well with this style of model.
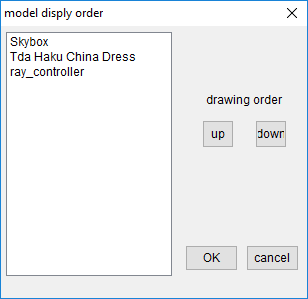
Draw Order priorities
Before we mess with the stage; which in this project is of vital importance; we want to sort out the model draw orders. I cannot emphasize how important this can be especially when working with models with transparent materials. Without further ado, here is the draw order for this project at this stage. It may need to be fine tuned but in theory, this should work. It is important to realize that the information in these two windows are actually part of a single list. It works like this:
MMD draws the stage first, then the Sky box and finally Haku. (ray.x and the controller don’t have models so should always be listed last in their lists). What we really want is for the Sky Box to be drawn before MMD draws the stage; but there is no way to tell MMD to do this given how this system is set up. If the Skybox was a .x model, we would not have this problem.
We still have to add the light models and lighting effects which will add more complications so we will go with the standard theory to start and amend the draw order if that becomes necessary.

End of Part 1
This is a good stopping point so we will end here. In the next part, we are going to work on giving the default stage a complete makeover just using RAY-MMD alone. If you are working along with us, this is a good point to save your work.
See you in Part 2!
– SEE BELOW for MORE MMD TUTORIALS…
— — —
– _ — –
![]()
