


RAY-MMD: Haku’s crazy light show
[PART 2]
Seriously though, what we did and what you should be doing if you are working along with us is to turn down the lights. We used the ray-controller widget to do this. You can actually turn the whole screen black with these controls and the RAY-MMD assets loaded but we want the stage lit by ambient lighting exactly as it should be in real life. We will use the stage’s own lights to bring the illumination level back up again.
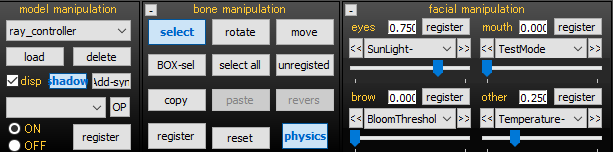
Here are the values used:
- SunLight- : 0.75
- Temperature- : 0.25
Please note those funny looking brown/yellow constructs behind Haku. These are the modeled “light beams” that are a part of the stage01.x model. Rather tacky approach, but back in 2008 or thereabouts when this stage was created, there was no such thing as RAY-MMD. But, we will use them and make them look like light beams!
The Big Screen
But before we address those, at the back of this stage, there is a very large motion capture screen. You turn on this screen’s function by setting either On.mode01 or On.mode02 on. If you want to play a pre-recorded video on this screen, you will use On.mode03. For now just use one of the first two options. The difference between them is a function of the type of screen your computer monitor is using. Either it is regularly proportioned screen or a wide screen and the two modes essentially account for these; choose one that looks best for your screen. However, with our current light set up this is what it looks like:
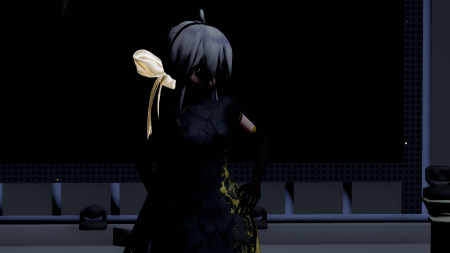
Ah… but this type of screen, if it had a real world equivalent, would be based on LCD/LED technology (and would be dang expensive too given it’s size). But, since we’re “cheap” we will do something to light up this screen that you probably will not have seen discussed elsewhere!
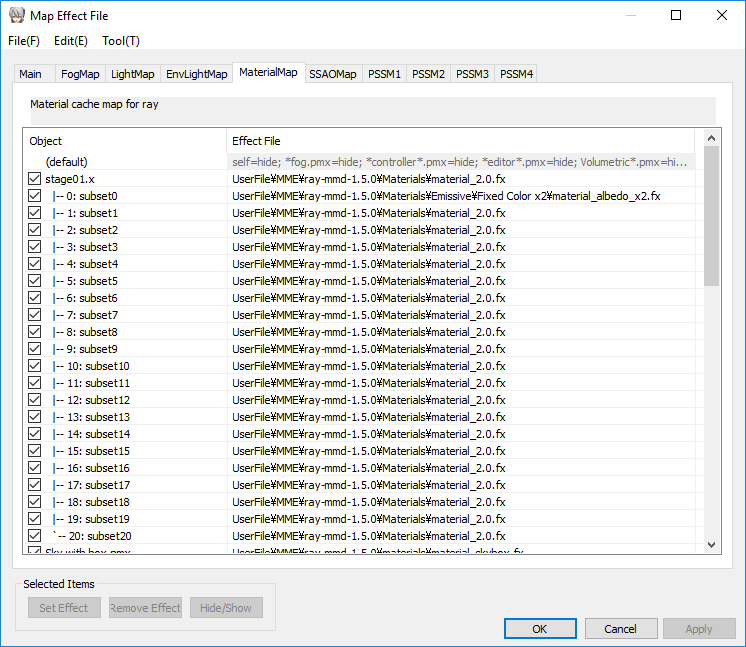
If you have not already done so as instructed in Part 1, add the main.fx file to the stage01.x model under the Main tab and material_2.0.fx file to it under the MaterialMap tab in the MME window. Once this done, pop open the materials sub list so that you can access the individual materials. Do this under the MaterialMap tab.
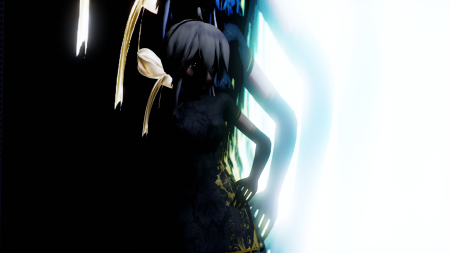
The screen material is subset0. Here you will have a choice. In real life, LCD screens emit light. If you want to be accurate, apply Emissive>Fixed Color x1>material_albedo_x1.fx to this screen. It will immediately light up. However, if you want to add some spice to this screen use Emissive>Fixed Color x2>material_albedo_x2.fx to it instead. We will go with the latter and here is what it can look like from certain angles as shown below. This will look amazing in the final production render for the video that we will making with this set up. But for now, play through the motion with the effect in place and see what a difference it makes to the scene. With RAY-MMD, this type of screen can now really look like their real world equivalents.
Handling the light beams
We will be using similar effects to deal with the faux light beams and leveraging them for maximum visual effect. It is not necessary to go into what we will be doing in detail. Conveniently, these beam materials are all listed together towards the bottom of the material list for the stage.
Just be aware that these beams do have draw issues due to their transparency characteristics and the model as issued has not been properly optimized, but for this project, we are using the stage as supplied.
Also, since these constructs do not exist in real life, we will take some liberties and go for maximum impact with them. This approach will also form the foundation of the BLOOM effects that we will be leveraging when we do the final adjustments to our scene in Part 3 of this series.
For now, add the following shaders to the materials subsets as indicated below. Click on the image to expand it to it’s original size for legibility, and the back button on your browser to return to this article.
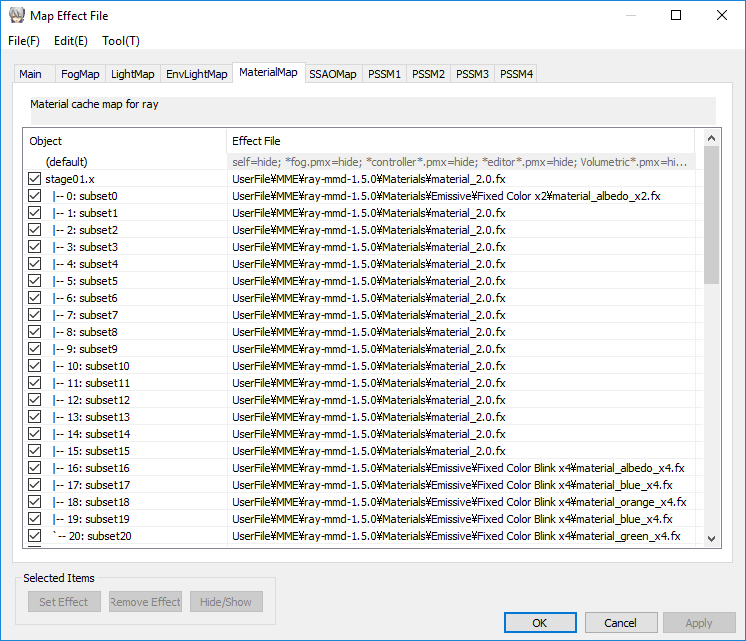
With the lights I have elected to use materials that blink. This makes the overall scene more dynamic. You do not have to go this route. You could use static materials instead. Also, you do not have to use the colors I chose. Feel free to do your own thing with these lights.
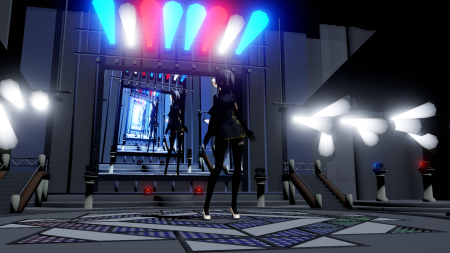
Now, to be blunt, these light glow models on this stage are problematic. For a start, they look fake even with these effects. But that does not matter, we are going with an overall strategy and these are but one element in the whole equation. As you are developing this project, because of the way human eyes work (they are drawn to bright light sources); at this stage they will be more noticeable. However, once we build up the lighting on Haku herself, the center of attention will change to her and the stage with its effects will only feature in the peripheral field of vision. Plus we will be adding BLOOM effects which will even further help mitigate the issue.
This is why I wrote in the last article that it is important to have a “plan“. You know what you will need to “fudge“. Anyway, at this point you should have something that looks like the image below.
Don’t forget the dance floor!
There is only one more thing we need to do with the stage model.
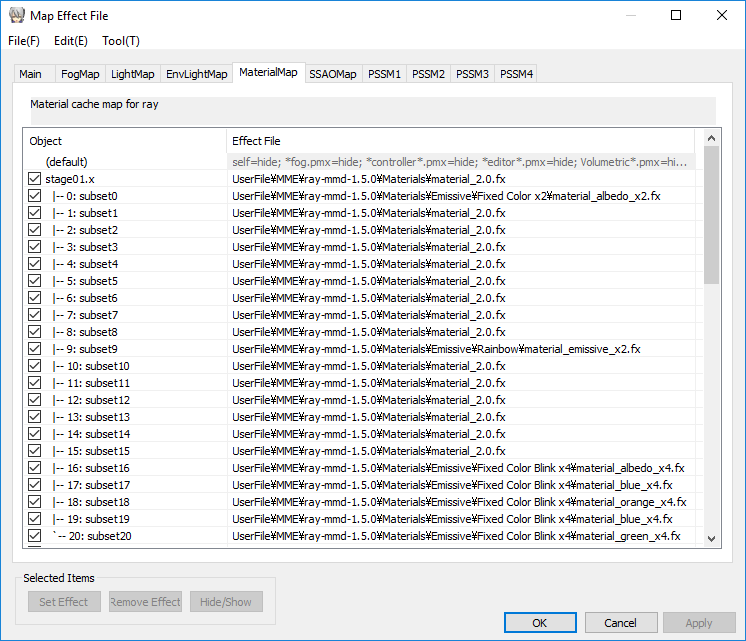
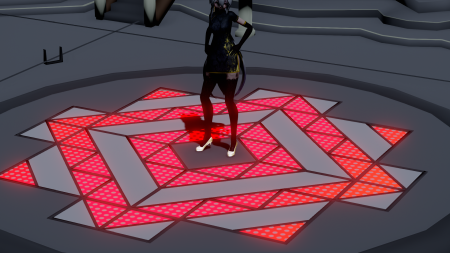
Add Emissive>Rainbow>material_emissive_x2.fx to material subset9. This is an interesting material in that similar to the blinking materials, its qualities are only revealed during an animation sequence. With this material it cycles through a spectrum of rainbow colors. It really spiffs up the dance area!
But Haku is still in the dark…
Not for much longer.
What I will be writing next is probably the most important part of this 3 part series. We will show you, if you have previous steps, how to unlock the true power of RAY-MMD. In my previous articles, I only discussed using RAY-MMD at a very basic level. But if you want to be able to achieve the kind of results as seen in the videos made using this effect by the best MMDers, you need to learn the basics first.
In this part, we will show exactly how to get those jaw dropping imagery seen in those videos made by the handful of MMD video makers who actually do understand how to unlock RAY-MMD’s most powerful features.
I will repeat what I stated in the very first article on this effect that I wrote for LearnMMD: RAY-MMD is an environmental lighting system; it is not merely an MME effect. It components are complex and intertwined with or overwrites many of the stock MMD rendering functions. For a start, it turns off (or you should manually turn off) the default ground shadow function. It turns off support for toon maps and by default spa/sph files, although, as show in this article, you can activate these again on a selective basis (refer to Haku’s gold hair ribbon). It also turns off the default anti-alias system and overwrites it with a much better system. But it still works with much of MMD’s lighting system. So, you will normally set the light direction using MMD’s own controls (but you can do this with functions built into the RAY-MMD sky boxes to essentially do the same thing).
But I like doing things the easy way so let’s get the light directions set up correctly first using MMD’s own controls. Make sure you are at frame 0 and set the light x, y, z values to that show in the capture below. Remember to click the register button.
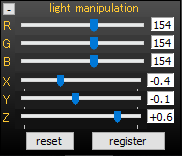
The immediate effect of this action should be as shown below.
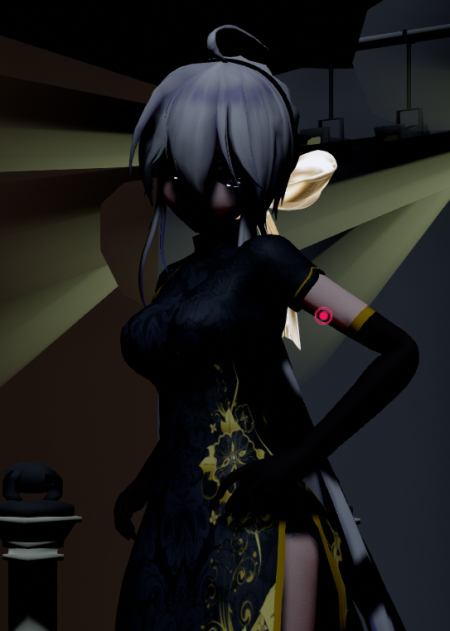
Still dim, but a lot better than before. At least you can begin to properly see Haku’s form and features properly now. But we will take a stop here to explain some important concepts.
The “natural” lighting level was set in Part 1 when we set the strength of the lighting using the ray-controller widget. Think of this as a “lighting budget“, the total amount of “natural” lighting that we are allocating to the scene. By natural lighting, what we mean is by light coming from environmental sources, primarily, the moon somewhere at the top of the sky box; but also from other sources, such as light bouncing off other surfaces such as walls.
But that is not the whole explanation. We have allocated a budget but we have not told RAY-MMD how to fully spend this allocation. We will do this next, through the sky box’s own controls. I keep telling people that RAY-MMD’s own sky boxes are “special“, the following steps will demonstrate exactly why this is the case.
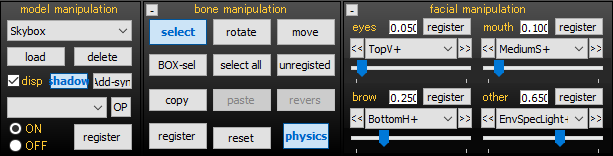
Each sky box may have different controls so we will keep our discussion specific to the one we are using here. There are four groups of controls. The “eyes” set controls highlights, the “mouth” set controls diffuse lights and the “brow” set controls shadows. The “other” set are used to set global variables.
For now do the following:
- TopH+, TopS+, TopV+ : set all to 0.05
- MediumH+, MediumS+, MediumV+ : set all to 0.10
- BottomH+, BottomS+, BottomV+ : set all to 0.25
- EnvDiffLight+ : set to 0.65
- EnvSpecLight- : set to 0.65
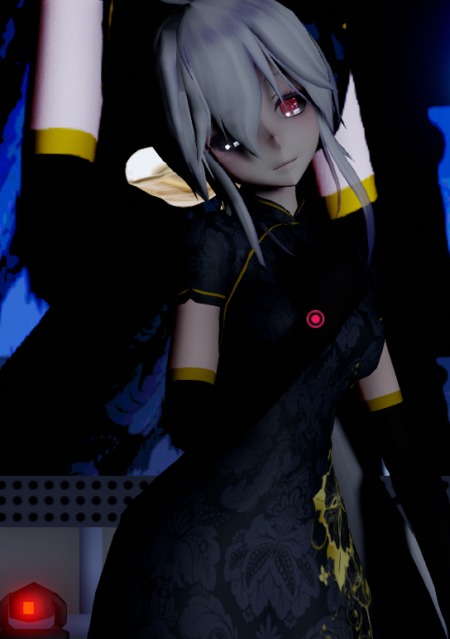
These are the settings that I specified for the type of lighting condition we planned for; but feel free to experiment. In fact, do so as it will show you exactly how these controls work. However, with the settings given here you should immediately get the results shown immediately below.

Surprised?
But it looks even better watching these settings in motion, so go watch your model perform and watch how the lighting really works. IF you followed our directions correctly, what you should be able to see is the full power of RAY-MMD at play.
The lights are dynamic; light from different sources are factored into the final scenes and play on the performing model illuminating her as well as her surroundings as if these whole scenes were actually in a real world environment. This is the true power of RAY-MMD on full display here.
But she is still a little dark…
Yes and as you should have figured out by now, it is by design. In Part 3 we will add the final elements. Specifically, real working stage lights which will bring her illumination level to more acceptable ranges plus other tweaks to make the entire production look “special“.
See you in the next part!
– SEE BELOW for MORE MMD TUTORIALS…
— — —
– _ — –
![]()
