


RAY-MMD: Lost in the Fog
RAY-MMD has some powerful and versatile fog effects which can all be leveraged to create emotive and atmospheric scenes. This article will briefly show you how to utilize some of these effects to enhance your projects. As with our previous articles on this effect, this one will also take a “hands-on-approach” that you can follow along while learning how to use the effect.
TYPES OF FOG
RAY-MMD has two types of fog effect offered in four separate packages. They are either global in nature as in that they affect the entire scene, or localized in which the fog only affects a part of the scene.
The controls for them are similar but honestly, there isn’t much that the global effects offer that other MME fog

What are more interesting are the localized fog effects. These are little more fiddly to set up but really worth the effort. Especially given the nature of RAY-MMD, which accounts for lights from multiple directions, these localized fog effects can be leveraged to create some stunning imagery; whether your project is a still image or a video.
In this article, we are going to focus on creating a still image with the effect as it makes things easier to explain. However, the same principles apply, in general, when using them for making a video presentation.
But before that, we will categorize the effects for you:
- AtmosphericFog and GroundFog are both global
- VolumetricCube and VolumetricSphere are both local
We will be using the VolumetricSphere effect in this article as it is most probably the best of the four; but that depends on what you are doing as all four are very good.
OTHER RESOURCES
We will be using the following resources. You can use the same ones or ones of your choice except otherwise noted below.
- Character model of your choice.
- Oguyara Village by BTA. If you choose another model, for this exercise, it is best to select a large town/temple model of which there are many excellent examples. Preferably, this should be a PMX format model.
- Time of Day sky box from the RAY-MMD 1.5.0 set. Although the fog effect works with the other sky boxes included, this one will work best with this project as it has some useful functionality that we will be leveraging.
- RAY-MMD 1.5.0 – the method here might not be applicable to earlier versions.
THE INITIAL SET UP
Load the Time of day sky box and your town model first. You should have something like the image shown below; but note that I rotated the Oguyara Village model -75 deg on the y-axis for my set up. This is deliberate and the reasoning will be apparent as you read on; also because otherwise one of the fences blocks the usual camera view.
Also make sure the sky box is drawn after the town model and turn off MMD’s ground shadow functions. This draw order is unusual as the stage vegetation has transparency concerns and the nature of the RAY-MMD sky box tends to exaggerate the effect and it will just look bad. But reversing the draw order solves this issue. Note that the “Null_00” model is the village model in the screen grab below. When we add the character model, it should be placed immediately under the Time of day model in this list.

If you are also using the Oguyara Village set, note that it comes in several seasonal flavors. You can choose whichever you like, but we are going with the winter daylight version: 古や村_集落v1.62_冬
NOTE: Most of the images below can be viewed full screen by clicking on them.

The next step is to set up the location of the sun. To do this, simply rotate the Sun’s position using MMD’s global light controls. Since localize fog tends to be more common either early mornings or late afternoon, the Sun’s position will be low, which means we can see it and we want to see it. This equation affects the lighting direction which will be back lighting; but we will eventually turn the camera view around for the final scene. In any case, your initial set up should look like the image shown below.
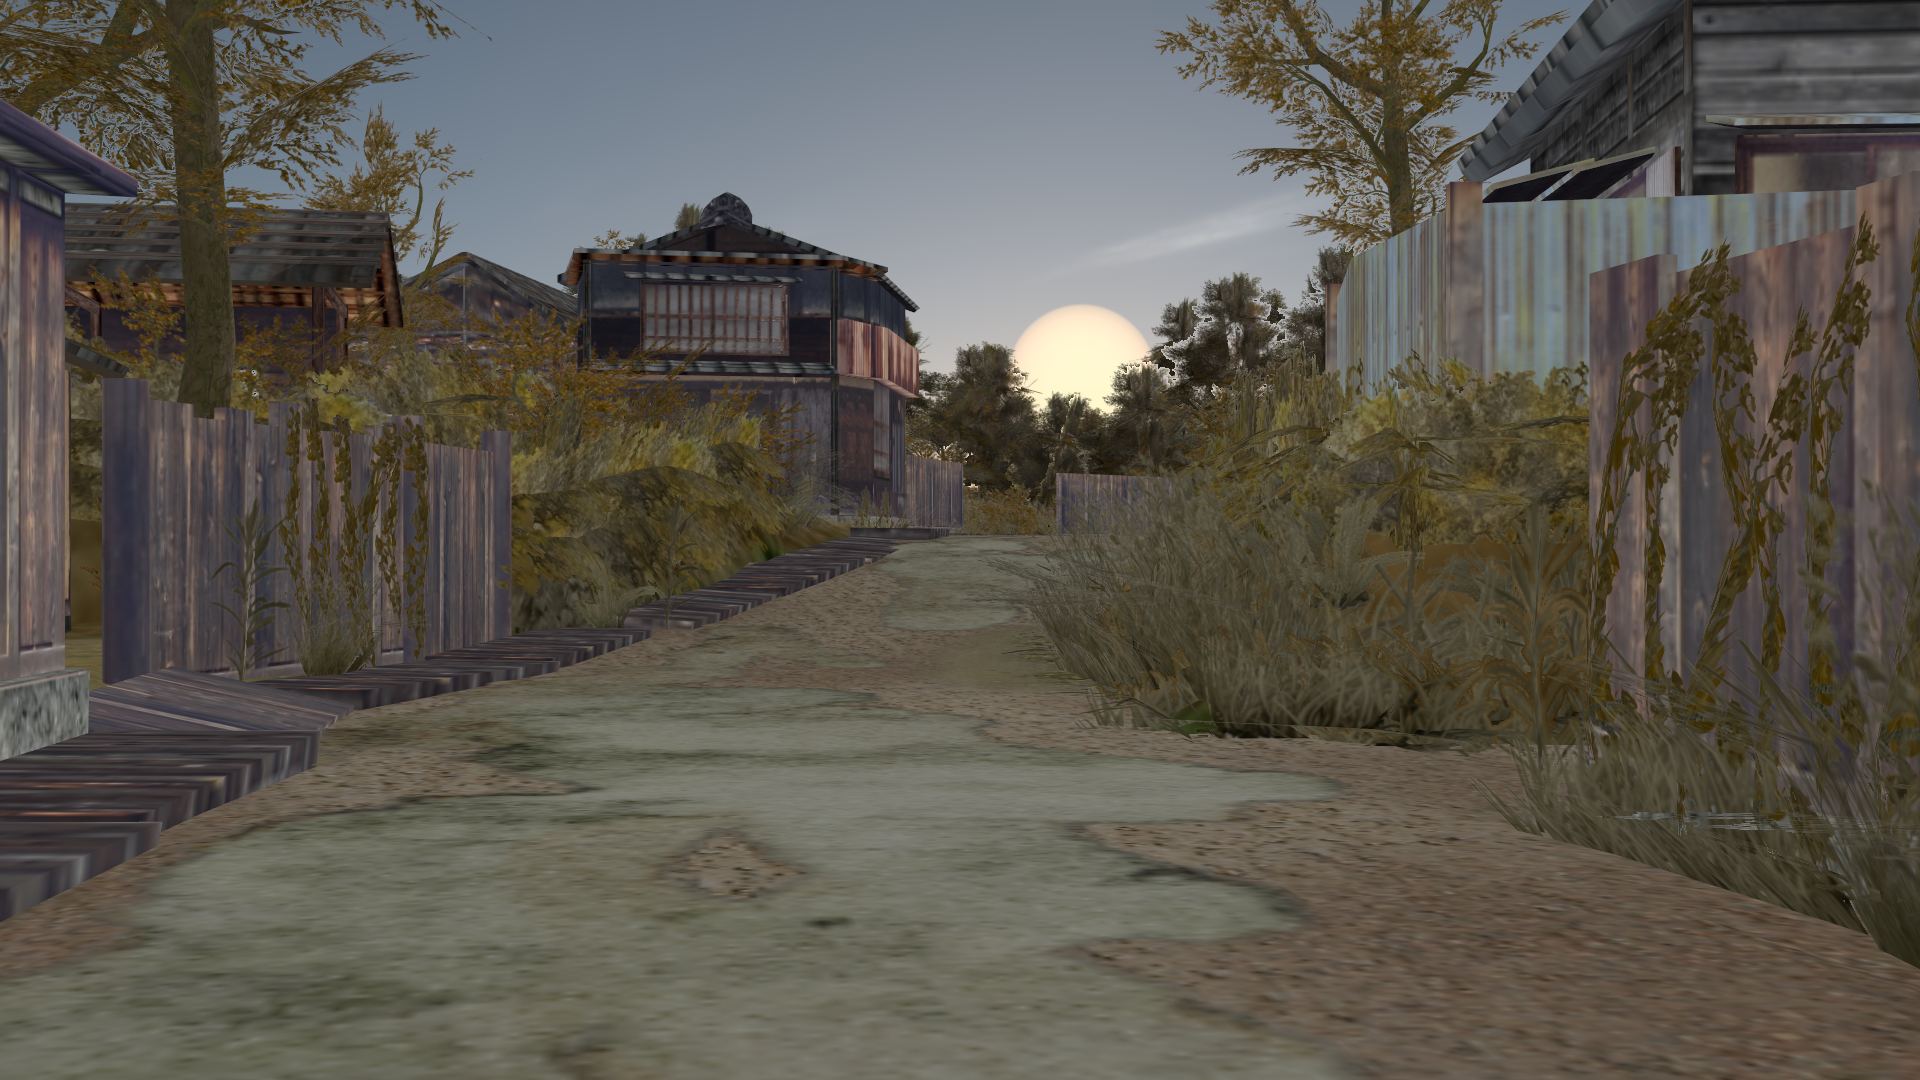

As you can see, even without any effects or adjustments, the scene is already quite “moody“; you can almost feel the chill in the air.
At this point, load the ray_controller.pmx widget as well as ray.x. There will be a lot to adjust to get our end results but it will be well worth the effort. Next open up the MME window and add Time of lighting.fx to the Time of day skybox under the EnvLightMap tab.
We just destroyed the lovely imagery above with these steps, so it is pointless to show what the screen looks like at the moment. Rather, we will show you how to fix it.

SETTING UP THE GLOBAL LIGHTING
We will be using both the facial controllers on the sky box as well as those supplied with the ray_controller widget to adjust the global lighting. It is important to know that these controls are inter-related; what you do on one set of controls affects variables on the other set of controls. They are extremely powerful in unison and can completely change the whole lighting characteristic of a scene. Since part of the purpose of this article is to demonstrate these controls, we will be using them to drastically, but realistically change the entire scene set up. By the time you finish, if you use the same settings we did, your scene should now look like the image shown below. You could choose to go with a colder schema if you prefer. Simply emphasize the blues to get that type of effect. The schema used here uses a red sunset bias.

PRO-TIP: When you are making these adjustments the smart way of doing things is to set the camera to track and deselect the model/bone. This way, you can see your adjustments as you work along without needing to keep jumping between the model view and camera view screens.

The settings we used to get the scene as shown above are as follows; remember we have already set up the lighting direction when we adjusted the Sun’s position above. For the Time of day controls, these are as listed immediately below.
- SunRadius + : 0.65
- SunPhase+ : 0.30
- SunTurbidity+ : 0.70
- RayleighColorH+ : 0.20
- RayleighColorS+ : 0.25
- RayleighColorV+ : 0.30
- RayleighHeight+ : 0.60
- EnvDiffLight- : 0.30
- EnvSpecLight- : 0.40
Note the last two settings. These values kills off some of the reflective light in the environment which helps up set up the type of lighting usually associated with fog. The settings above set up the characteristics of the sun and sky and to a degree the amount of light that these will affect the surroundings.
The main global lighting environment is set up using the ray_controller widget and the settings we used are shown below:
- SunLight- : 0.40
- SunShadowR+ : 0.55
- SunShadowG+ : 0.45
- SunShadowB+ : 0.35
- MultiLight- : 0.65
- BloomThreshold : 0.90
- BloomRadius+ : 0.50
- Exposure- : 0.70
- Contrast+ : 0.25
- Temperature+ : 0.55
- BalanceR+ : 0.50
- BalanceG+ : 0.45
- BalanceB+ : 0.40
ADDING THE CHARACTER MODEL
At this point you can add your model. We will not cover how to shade the model here as that has already been covered in other articles on this site. Point to note, however, is that in the screenshot shown below that the model is back lit, since the Sun is behind her; but that is fine. We will relocate her in due course, but as is, it is already a very nice image of her.
Incidentally, the model used here is Amaha Sora by Isao in an abbreviated yukata. This model used to feature a lot in MMD videos which used fan dance motions, since she comes with a pair. I am not sure if she is still distributed. But she fits this Japanese village scene; looking like she is ready to go visit some festival held at the local village shrine.
As with Amaha Sora here, just treat your model with the usual RAY-MMD methods with regards to materials. No special handling is required. Also, your character model should be drawn after the sky box in the Draw Order list shown above.

THEN THE FOG COMES ROLLING IN…
Add the VolumetricSphere.pmx model to your scene next. This loads as a widget at Sora’s feet and because we have already done the steps above it should look something like this:

Fog should not normally be black but that is the way it comes with RAY-MMD by default. Before we fix that there are somethings that we need to cover first. The fog loads as a widget; this is the white ball between Sora’s feet above. We want to hide this, and the easiest way to do this is to un-check it in the MME window under the Main tab.

Before we configure the fog, there are several things that you need to know about both the VolumetricCube and VolumetricSphere widgets that comes with RAY-MMD.
- Think of them as a sky box/sphere under the main sky box.
- Also they have a perimeter that you can set and will only affect the environment which they enclose. If you zoom out far enough, you can see exactly the extent of the area that they cover.
- Wherein, you can more or less see the VolumetricSphere when it is first loaded, this is not true with the VolumetricCube. The latter needs its size set before you can see anything. Plus you will also need to change the fog color with both widgets as otherwise they will just turn the screen pitch black.
- Where the fog is, has a direct correlation with where the main direction of light is coming is from. Specifically, the Sun or Moon’s position with reference to the RAY-MMD sky box. The fog will always be thickest on the opposite side to the primary light source. This is what you normally want; the fog behind the character model. In our set up, the fog is thickest where we can’t see it because we are using a back light set up.
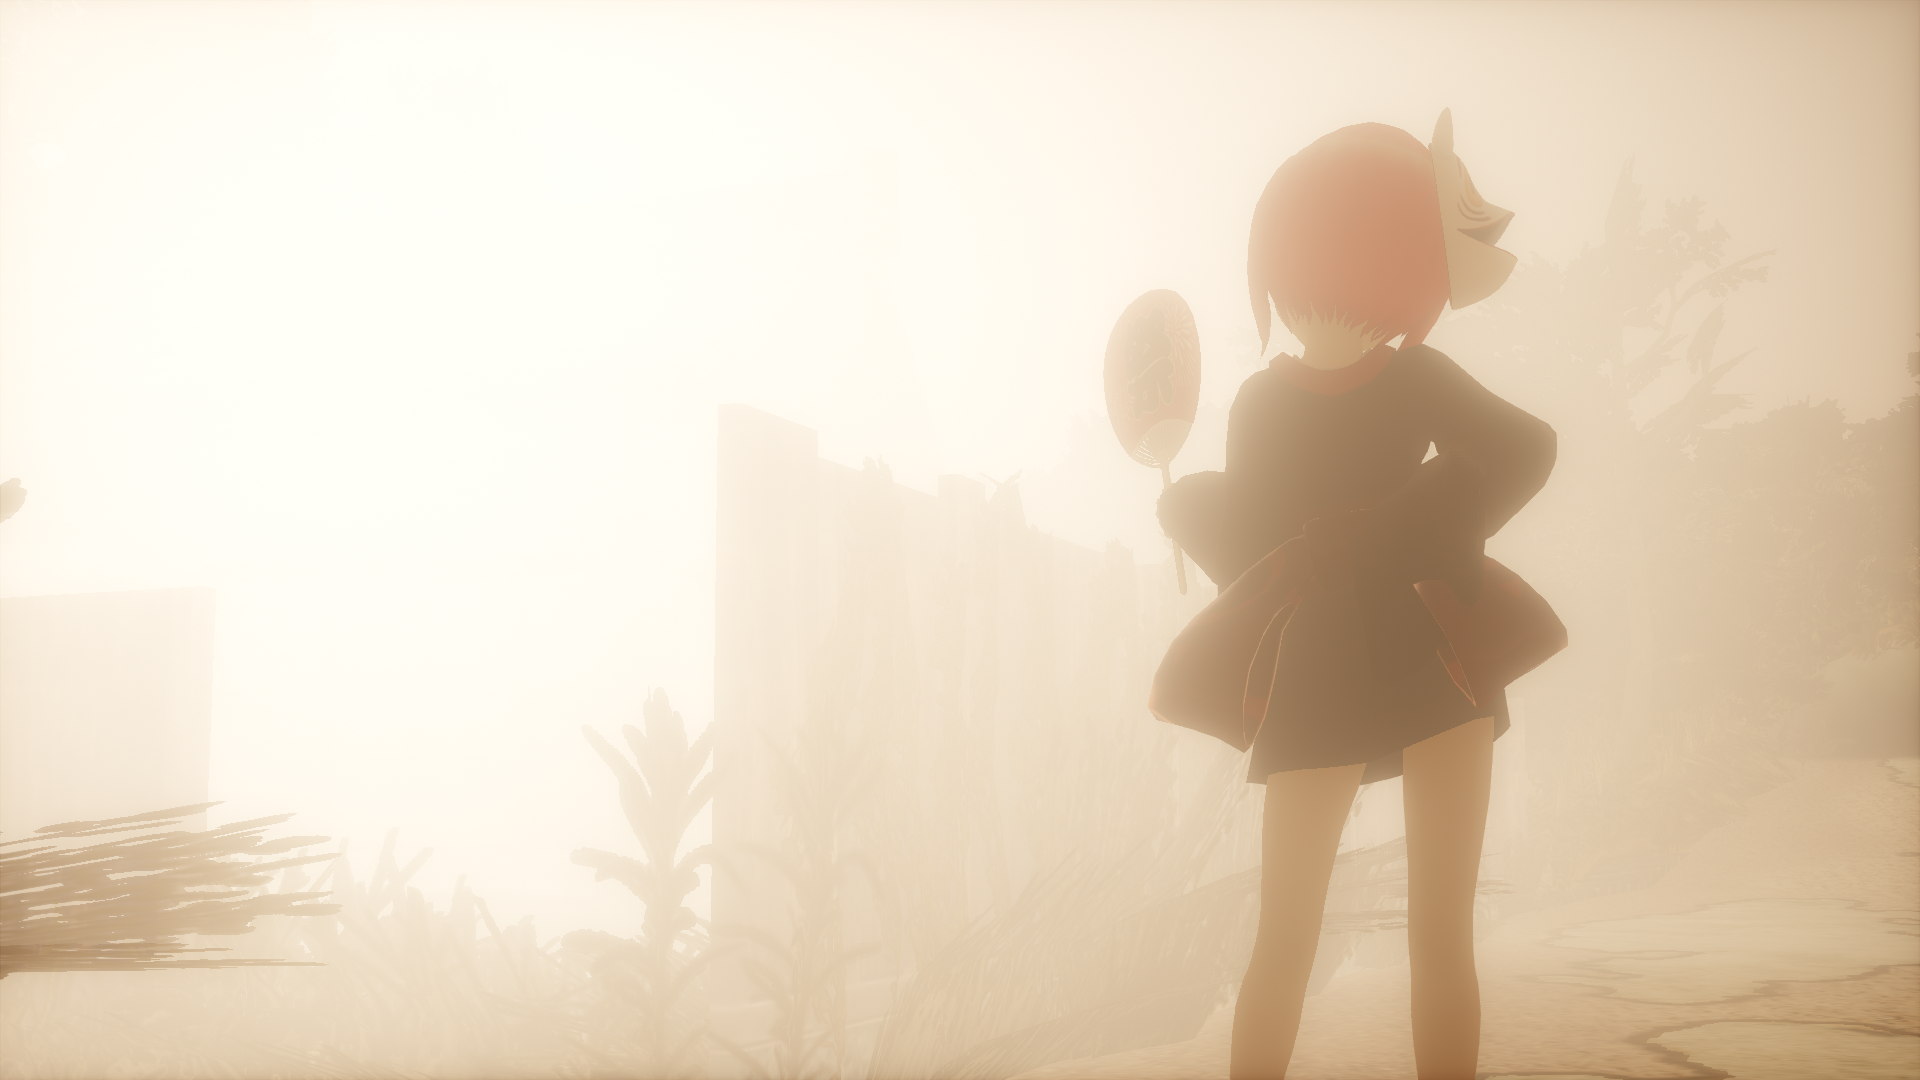
With reference to the last bullet point above see the two images below taken after I configured the fog (and I will share the settings below).
This is the view from more or less the angle that we have been working with all along. The fog is hardly noticeable but it has killed off the view of the lovely sunset sky. But that’s fine as one of the purposes of using this set up was also to show you some of the lovely things that can be done with that particular sky box on its own.
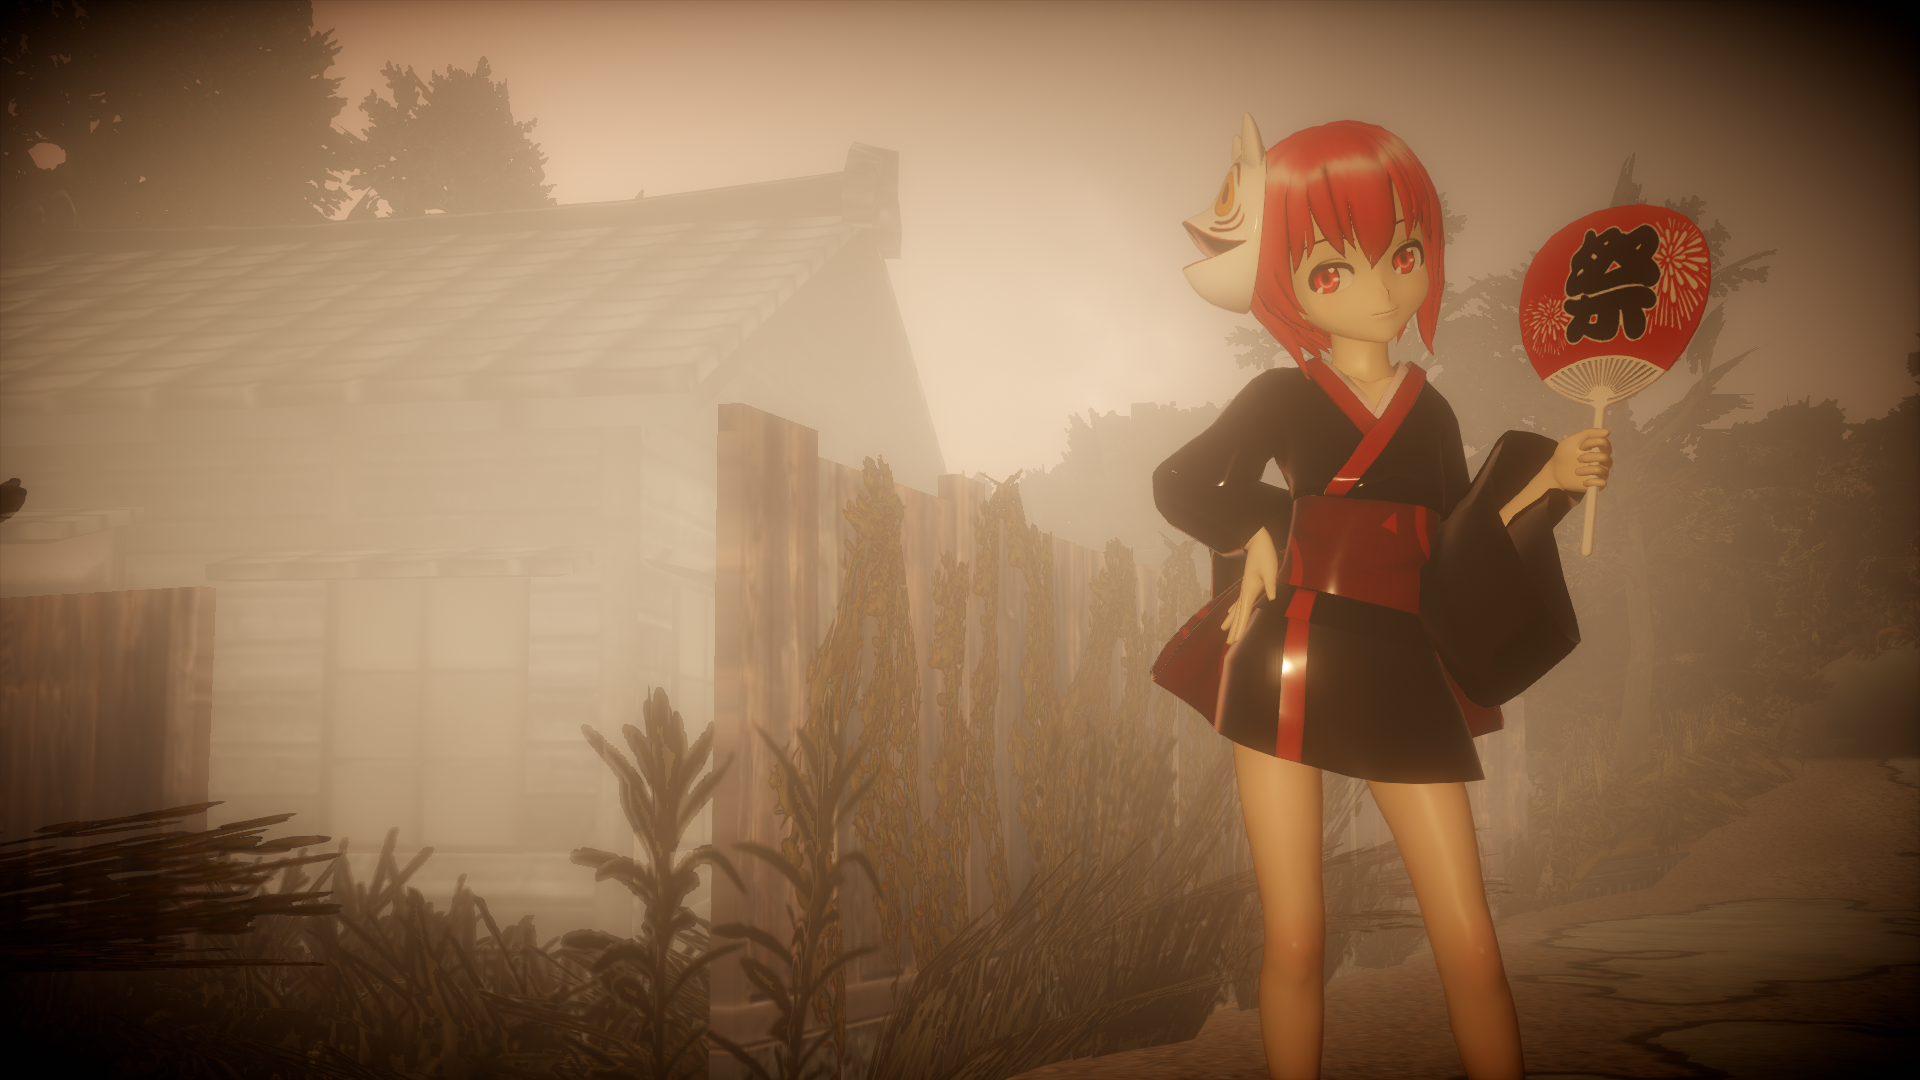
When we swing the camera right around we can see exactly what we were setting out to do with this set up in the first place. The beauty of this set up is that it is transitional and you can see this in your own set up as you swing your camera around.
The other nice feature of this system is that you have full control. Unlike the global fog effects, which covers everything, these localized fog widgets allows for full control as to where the fog occurs as well as what its characteristics are like. So in our example here, Sora looks like she is walking into the mist and not smothered by it. Plus we can do more with this set up for even better visual clarity.
These were the settings that were used under the VolumetricSphere controls. Use these for now, but as always, feel free to experiment.
- R+ : 0.65
- G+ : 0.55
- B+ : 0.50
- Range+ : 1.0 (this controls the size of the sphere)
- Intensity- : 0.55 (this controls the intensity of the fog)
- MiePhase- : 0.75 (this controls the transparency of the fog)
Note that the image above used a different MiePhase- value. Since we wanted more of the background to show and are aiming for more of a low hanging mist rather than a thick fog we used the value given above. The image above used a MiePhase- value of 0.55 and the image below uses a value of 0.75, which increases the transparency allowing for more of the background to be seen.

ENHANCING THE SCENE
In our set up, originally the main light source is the setting Sun. This still is the case but the VolumetricSphere has lowered the illumination level, or rather it has diffused it and in some applications this is acceptable.
However, we want Sora to be slightly more discernible and to achieve this we will use one of the light widgets to repair the light coming from the Sun (or you can use this type of light to replicate alternate light sources as well).
First of all, we will turn Sora around. Bear in mind that with the set up used here, we have turned everything back-to-front. Unless you are wanting exactly this type of set up, you do not have to use such a convoluted method as exhibited here.
We are going to use the SpotLightIES.pmx widget to rebuild some of the light lost from the Sun. Locate it “somewhere” in the general direction of where the Sun is located in the sky. Just an approximate placement will be fine (as you will want to adjust its final location for best effect).
As with any of the RAY-MMD widgets, you can hide it by un-checking the box next to its label under the Main tab of the MME window; or since you will never see it anyway, you can just leave it showing. The working set up should now look something like my MMD screen:

SpotLightIES.pmx is a directional light which needs to be aimed. This is actually easy to do. The widget has 3 bones: direction, an Asian named bone, and a bone with no label as can be seen in the image above. The direction bone you normally do not want to touch. Use the bone with the Asian name to aim the light. Simply drag it to where you want the light to hit. Incidentally, you can OP attach this bone to a model so that when the model is in motion, the light will follow the model.
You will want to toggle your MMD coordinate controls at the lower right of the screen from “Local” to “Global” and use those controls to fine tune the location of the light source. It is easiest to do this after you set up the characteristics of the light. We used the following values:
- R+ : 0.75
- G+ : 0.55
- B+ : 0.35
- Range+ : 1.0
- Angle- : 0.50
- Intensity+ : 1.0
- AttentuationBulb+ :0.35
Your scene should now look something like the image immediately below:
I chose this color schema simply because I wanted a warmer, more vintage look. However, RAY-MMD is so flexible that simply by tweaking some values we can fairly easily change the color of the prevalent light sources in order to achieve a different look as exhibited below.

AFTERWORDS AND CREDITS
Thank you for reading. We hope you found the information given in this article. RAY-MMD is a lot of fun to tinker with, so our best advice is to read some of our articles on this effect and take some of what you learn here to experiment with and a style of application of your own.
Cheers.
CREDITS
- Amaha Sora: Isao
- Oyugara Village: BTA
- RAY-MMD 1.5.0
- MMD 9.31
- IrfanView
– SEE BELOW for MORE MMD TUTORIALS…
— — —
– _ — –
![]()
