The GIMP Crop tool...

Flatten the image...
Let's FLATTEN the image to get rid of that Background layer.
RIGHT CLICK on that Background layer and choose "Flatten Image" in the pop-up. ... Now the image is only a single layer.
The CROP tool
The crop tool lets you drag a selection rectangle over your image... and when you push ENTER, your image is cut to that selected shape.
You can do it free-hand... just drag until
it "looks right."
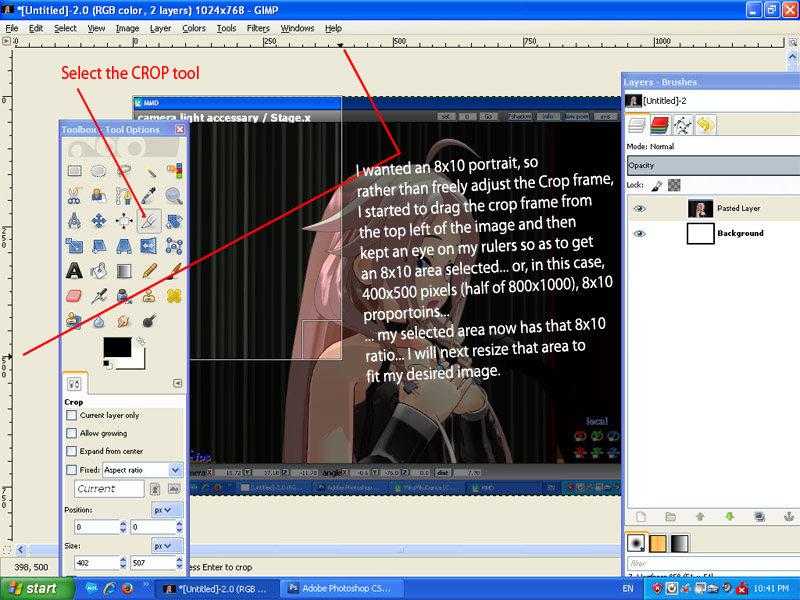
in THIS case, I wanted a nice 8x10 portrait... and I wanted to control the proportions of the crop tool at that 8-units x 10-units shape.
The rulers are calibrated in pixels... but the units don't matter to us in this project... yet. ... I couldn't see how to get 8 across the top and 10 down the depth... so I used 4x5... found 400x500 on the scales and starting form the upper left corner (0,0 on the rulers) I dragged the shape to be a rectangle 400x500 pixels... and I released the mouse button.

HOW TO DRAG THE GIMP CROP TOOL AT A FIXED PROPORTION...
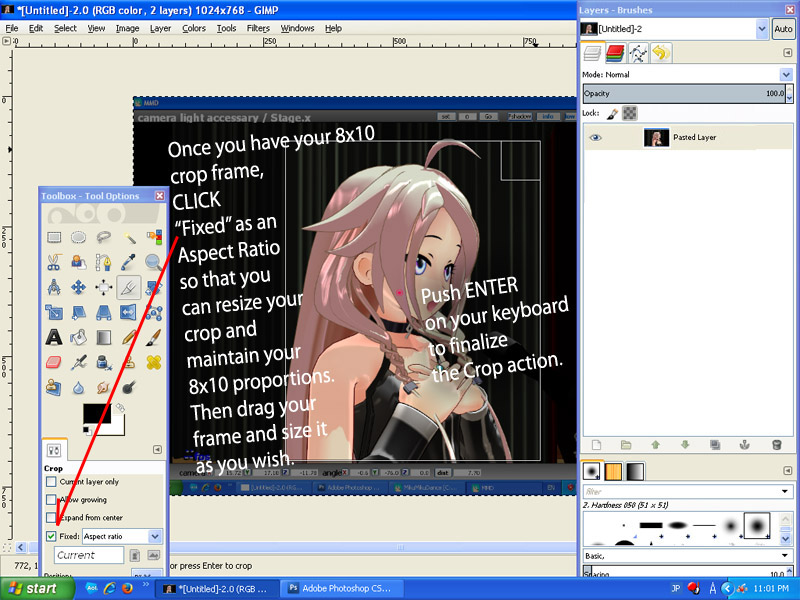
Now that the crop is at 4x5 (8x10) proportion, select ASPECT RATIO next to the FIXED checkbox... and check the box.
Now when you drag the crop window larger or smaller, it automatically keeps that same proportion... in my case, 8x10.
I maneuvered the box until I had it placed just right... and pushed ENTER on the keyboard to crop the picture.
NEXT
... we will take a look at GIMP's Tool Box and use the CLONE TOOL to clean up that Red Dot.
Presented by LearnMMD.com
The most complete MikuMikuDance resource on
 the web!