 How can I use Blender to make
a model for MMD? How do I add a bracelet and earrings to my MMD model?
How do I shape a necklace in Blender? How do i create fingernals for my MMD model in Blender? How can I use Blender to make
a model for MMD? How do I add a bracelet and earrings to my MMD model?
How do I shape a necklace in Blender? How do i create fingernals for my MMD model in Blender?
Making Your First Model Part 10
Adding the Accessories
Wait, she has shoes and bows . . . What’s left?
Well, she still has a few things we need to add! But we
also have to ask . . . Should we
add them? Should we model them? Should we add them as textures?
Let’s first start by establishing what’s left. (The
eyes, facial features, and the inside of the mouth are also left . . .
but we’ll cover those later.)
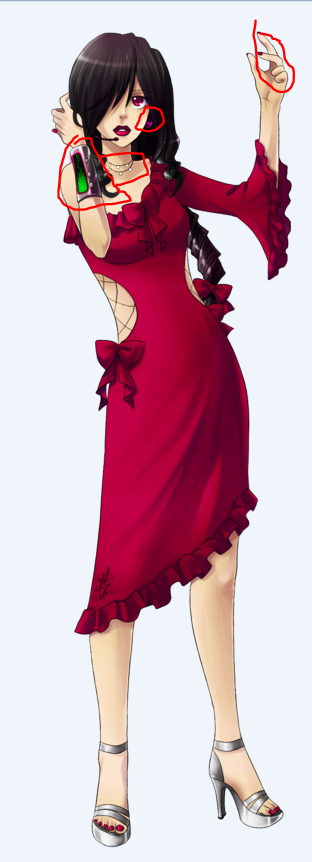 The first is the extremely
chunky bracelet. Since we did the easy thing for
connecting her wrist to her arm, we kind of need it! This will be
pretty easy. Make a cylinder with the SubSurf modifier and add the
little details. The first is the extremely
chunky bracelet. Since we did the easy thing for
connecting her wrist to her arm, we kind of need it! This will be
pretty easy. Make a cylinder with the SubSurf modifier and add the
little details.
The next is the necklace. The easiest way to make the
necklace is to just draw it on the texture. The second easiest way is
to draw it on a decal . . . the hardest is to actually model the thing.
If we knew how to use curves . . . You know by
now, everything would be easier!
And then there’s the ear area. Because many of Yesi’s
drawings of Camila lack ears, I didn’t add them. However, Camila’s
design flip-flops between earrings and headphones.
Let’s be honest here – everyone secretly regrets giving
their UTAUs headphones. How else do you explain the fact that all of
the OG overseas UTAUs lost them with age?
For that reason, we’re either going to give her pearl
earrings or nothing. What’s the problem with pearl earrings, though?
Her ears are covered, so she’ll need to have earrings that hang down
quite a bit.
This comes down to whether the ear placement works out
or not. In this image of Camila, she
has pearl earrings that are visible, but no indication of how they’re
even connected to her ears.
Yesi has drawn more images of Camila with no ear
accessories than with them, so it’s not too much of a cop-out to say
that they’re just covered by her hair.
And then there’s the nails. Again, adding them via
texture is no issue. You can also just change the material on her hands
where the nails will go. Changing the texture will allow you to add sph
files and change the reflection properties . . . But if someone wants
to get rid of the nails, it will leave her with holes in her hands. For
that reason, I’m thinking of adding a decal to her fingers to make it
so that people can easily remove the nails.
Alright! So we have a game plan!
Indeed we do! Let’s get started with the “bracelet”.
First, I added a cylinder and cut the number of vertices
to 8.
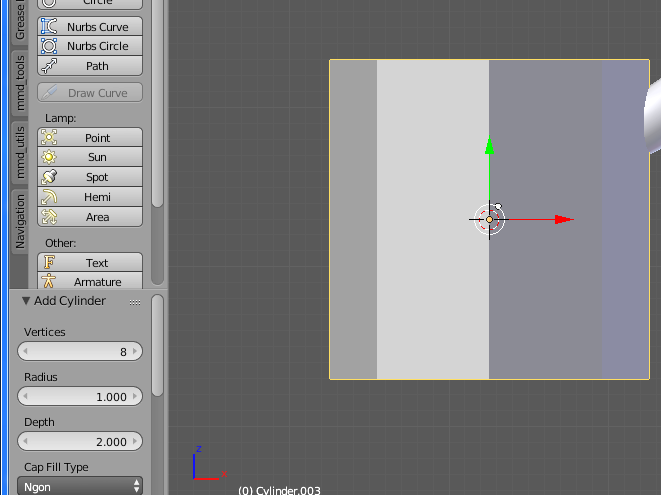
Then, let’s go into edit mode. We’ll rotate and resize
it to fit on her wrist.
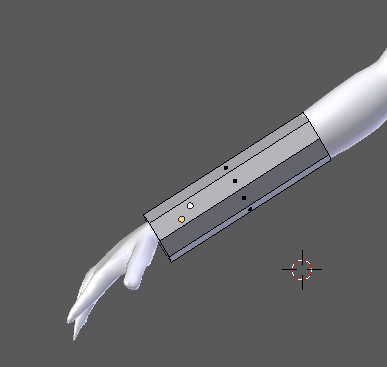
Now, let’s add the SubSurf modifier and playing with
loop cuts!
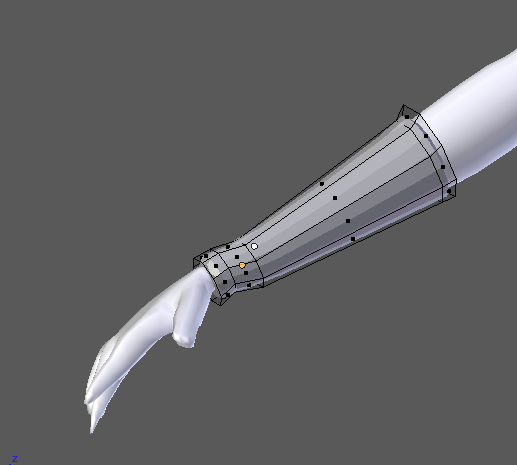
Now that we have about the right size, we need to add
the details that I’m pretty sure we all regret by now.
Why is there a random glowing panel on the
wrist? Why did it go missing?!
Let’s start by making two loop cuts about where we want
the panel to start and end.
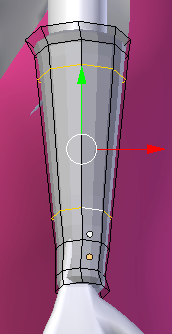
Now, let’s simply add more loop cuts to give us a
sharper edge and depress the panel.
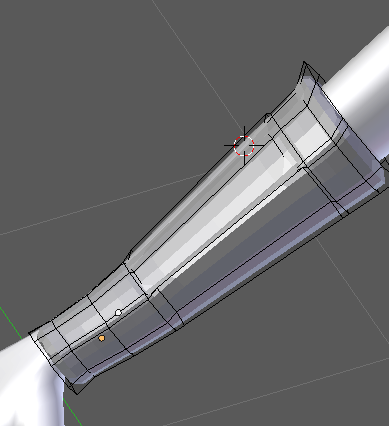
It’s a bit hard to see, but we’ve created not only a
place for the panel, but also a border to go around it. This will come
in very handy when it comes time for materials!
With that, I think the arm-piece is done. Let’s move on
to something trickier.
Is it a good idea to make the necklace?
Well, if you make the necklace, then it can interact
with the light in a way a texture couldn’t.
Camila’s necklace is a constant, so we need to include
it somehow.
Let’s start by making a teeny-tiny spaghetti thin plane
on her neck.
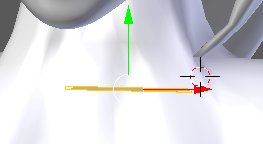
Next, let’s loop cut and extrude until it resembles a
necklace.
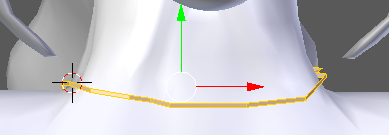
For now, let’s change the material so that we can better
see what we’re doing. I’m going to choose a color that’s wrong just for
the best possible contrast.

I used “W > Smooth” to smooth it out, and then I
just moved it around a bit. I added a loop cut to the center and sized
it a bit bigger to give it a tiny bit of depth. Let’s see if we can
“Shift + D” our way to her full necklace ensemble. . .
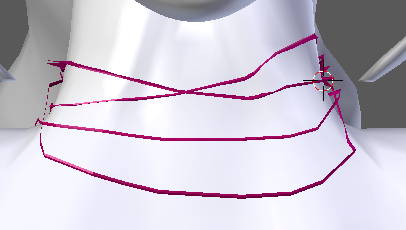
Whoops!
I got carried away . . . she’s supposed to have two
strands, and I gave her four! Also, they look pretty bad . . . but hey!
This is a series for n00bs, right? Anything is better than nothing!
In the reference images, her necklace has three pearls
per strand. We’ll treat the top two strands as if they weren’t there –
they’re just there to double over excess material, perhaps! We’ll add
three pearls to each bottom strand now.
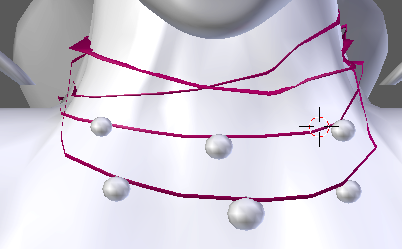
To add the pearls, I simply plopped down a sphere and
sized it to a more pearl-like size. Instead of doing that over and
over, I used “Shift + D” to resize each one.
Before calling it done, make sure that all of your
pearls are aligned with either the string of the necklace or her body.
Now . . . Let’s circle back to the earrings. Since I had
already made the pearls, all I had to do was move one of them and
create a “string” of some sort to attach them to her head. With a bit
of fiddling, I think I came up with something that looked at
least half decent!
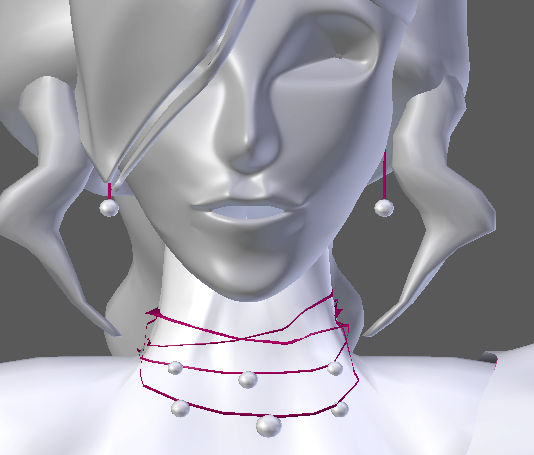
Of course, the red material used in the necklace and the
earring were just placeholders! It will be changed to fit her design
better later.
Now . . .
As far as the nails go . . .
Let’s start with my paranoia cube! Go to object mode,
hit “Shift + C” to move the cursor to the origin point, and add a cube.
Loop cut, select all faces on half, delete them, add the
modifier. Now, all of the things we do to one hand will be done to the
other!
So, lets start with a plane. Then let’s loop cut it up!
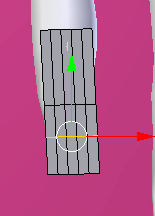
Let me explain myself – for this, I’m planning on using
the vertical lines to shape the nail into an oval. I’m planning on
using the horizontal lines to give it some depth.
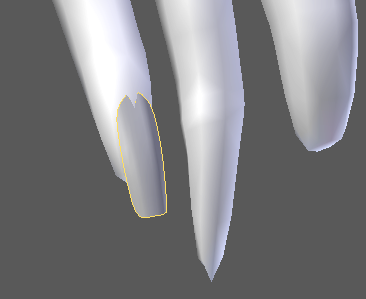
All I did was move
around vertices and apply “W > Smooth”! Now, we have a magical
tool to finish this easily . . . “Shift + D”!
And after about five minutes of duplicating, resizing,
rotating . . .
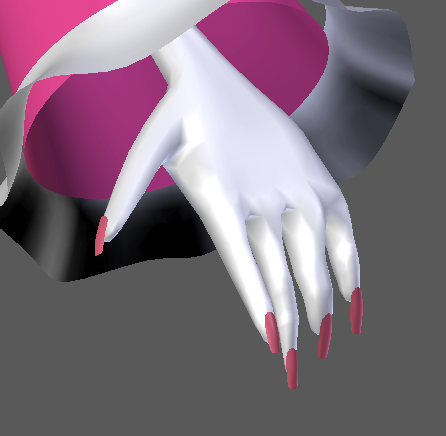
Always remember – there might be a shortcut, and it
might be worth it to search for it. If it weren’t for the mirror
modifier and the duplicate feature . . . I would have had to spend a
lot more time to get a result barely better than those! (And remember, delete
your paranoia cube when you’re done!)
As a note, if you don’t like the nails . . . It’s super
easy to delete them! In PMXe, all you would need to do is mask every
material except for the nails.
Then you just select the nails and delete them! Easy-peasy.
Ironically, I was dreading this part the most. I was
really concerned about adding the accessories and I thought I’d get
really frustrated. Instead, I had a lot of fun!
Hopefully I’ll have as much fun next time when I finish
her face! Tune in next time!
<
Previous Tutorial CONTENTS PAGE Next
Tutorial >
|

