
 |
Making Your First Model Part 21 |
| Morph Name | English Name | Panel |
|---|---|---|
| 困る | sadness | Eyebrow |
| 怒り | anger | Eyebrow |
| 上 | go up | Eyebrow |
| 下 | go down | Eyebrow |
| 眉上げ | go up 2 | Eyebrow |
| 不機嫌 | sullen | Eyebrow |
| 左眉上げ | go up L | Eyebrow |
| 左眉不機嫌 | sullen L | Eyebrow |
| 左眉怒り | anger L | Eyebrow |
| 左眉困り | sadness L | Eyebrow |
| 右眉上げ | go up R | Eyebrow |
| 右眉不機嫌 | sullen R | Eyebrow |
| 右眉怒り | anger R | Eyebrow |
| 右眉困り | sadness R | Eyebrow |
| まばたき | blink | Eye |
| 笑い | smile | Eye |
| ウィンク | wink | Eye |
| ウィンク2 | wink2 | Eye |
| ウインク右 | wink_R | Eye |
| ウィンク右2 | wink2_R | Eye |
| なごみ | calm | Eye |
| はぅ | close>< | Eye |
| こらっ | eyes anger | Eye |
| くわっ | eyes open widely | Eye |
| じと目 | doubt | Eye |
| あ | a | Mouth |
| い | i | Mouth |
| う | u | Mouth |
| え | e | Mouth |
| お | o | Mouth |
| ▲ | triangle | Mouth |
| δ | delta | Mouth |
| ∧ | regret | Mouth |
| あ2 | a2 | Mouth |
| ああ | a3 | Mouth |
| いい | i2 | Mouth |
| 瞳小 | pupil | Other |
Alright! All those words and no actual work!
You are one hundred percent capable of making shape keys in PMXe. However, my knowledge of it is that it is painful and not worth doing. Instead, we’ll be using Blender.
Another note is just that you need to give your shape keys the proper Japanese names. However, this poses a few problems at first. There’s a good chance that Blender will display Japanese text as “mojibake”. Well, not as much “mojibake” as boxes!
To turn on International Fonts, open “User Preferences”. Go to the “System” tab and scroll until you see “International Fonts”.
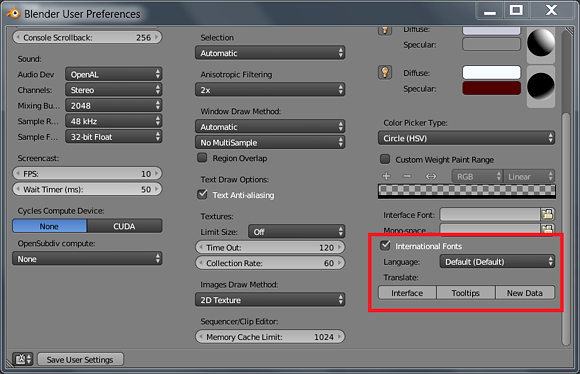
Once you do that, Japanese text should show up.
Another note is that it’s hard to type Japanese in Blender. That sounds like a strange thing to say . . . but it’s true! Something about the interface messes with your ability to type in Japanese in certain areas. For that reason, it’s a good idea to copy and paste the names. (This comes with the added benefit of insuring that other people’s motion data will utilize your shape keys!)
Now . . . Import your model into Blender using MMD_Tools and let’s get started!
. . . However, before we actually get started, let’s discuss proportional editing.
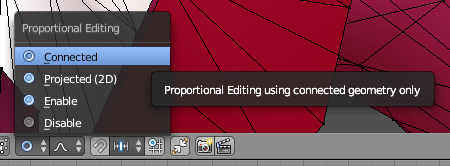
Proportional editing is an amazing miracle and I love it!
When you use proportional editing . . . things move proportionally!
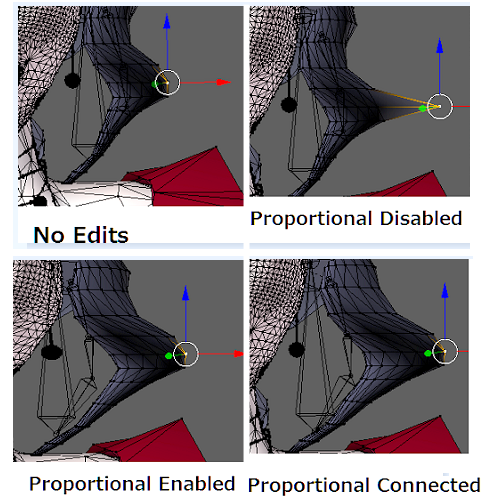
Without it, moving one vertex would cause an unseemly spike. With it, moving just one vertex will allow you to move everything around it in a smooth manner.
As you can see, though, moving the fringe with old fashioned proportional editing on also moved Camila’s face. This is where “Connected” comes in. The proportional editing tool will only move things that are connected to the selection you are moving. This is great news for facials as it will allow you to manipulate the eyebrow (which isn’t connected to anything) with proportional editing without affecting the rest of the face . . . or the hair!
To change the sphere of influence your proportional editing has, press “g” and then roll your mouse’s wheel up and down to make the circle bigger or smaller . . . If you’re on a laptop and have no mouse wheel . . . buy a mouse. I tried to use Blender years ago before I got a mouse, and I had to stop because it was impossible to do half of the stuff I had to. While there were workarounds to make a trackpad work, they were just too difficult to work with.
By far, the easiest shape keys to make will be the eyebrows. They are not connected to anything . . . and good lot of their shape keys are just “go up” or “go down”! Luckily for us, they’re the first on this list.
Start in Object Mode. Select your model by right clicking, then go to the “Data Tab” in the bar properties bar.
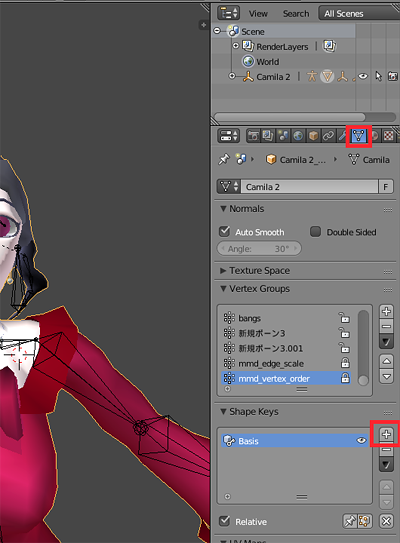
To add a shape key, press the plus sign under “Shape Keys”. A new key called “Key 1” should appear. Double click on it to edit the name. We’ll rename it as “困る” for “Sad Eyebrows”.
As a note, there is a morph tools in MMD_Tools. I still don’t have that figured out. Using the “Shape Keys” panel works well enough. The downside is that you need to both add the English name and sort them later . . . But that’s not at all tough to do in PMXe!
Check the bottom of the editing window; above the box where you choose from object and edit mode, the name of the current active shape key will be present.
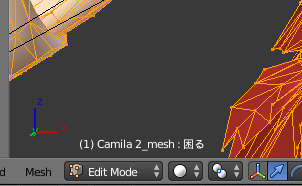
Choose the shape key you want to edit and go in to edit mode.
Her bangs are in the way . . . Press “a” twice to deselect everything, then select one face, edge, or vertices on her bangs and press “L”. This will select her entire bangs. Press “h” to hide them! Once you’re finished, remember to press “Alt + H” to bring them back!
Be warned . . . Popping in to Edit Mode might be pretty scary!
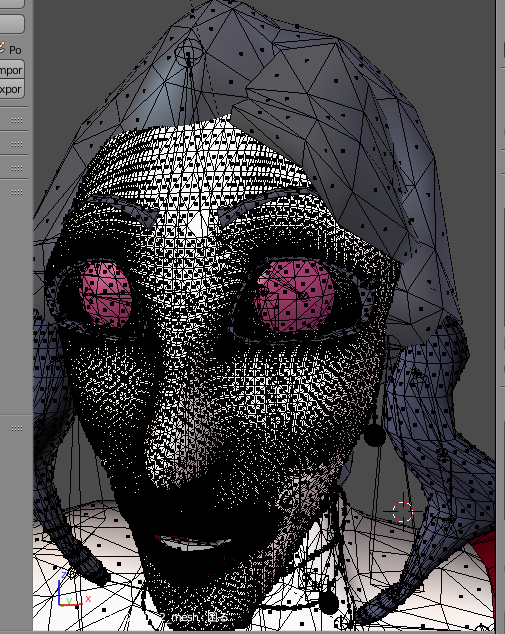
Edit to your heart’s content! Once you are happy with your shape key, go back into Object Mode. You can use the slider in the “Shape Keys” panel to test how it looks.
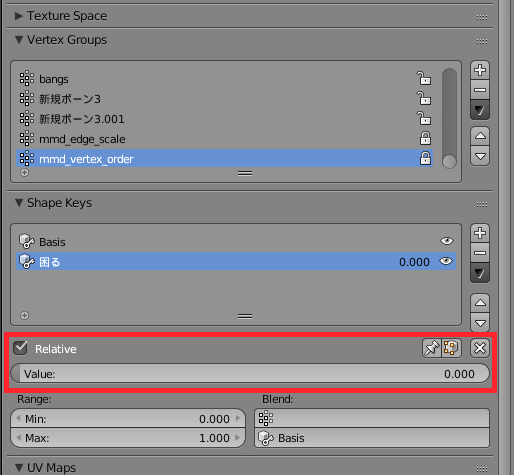
Now, I’ve gotten down to the individual eyebrow shape keys. There is a way to mirror the shape keys in PMX, but the only video I found on it was literally nine minutes. That isn’t to say long videos are bad . . . It’s just to say that, wow, that takes more effort than making a new shape key.
Here’s how to make a left eyebrow shape key out of the left one. First, let’s set the eyebrow we want to mirror’s value to 1.
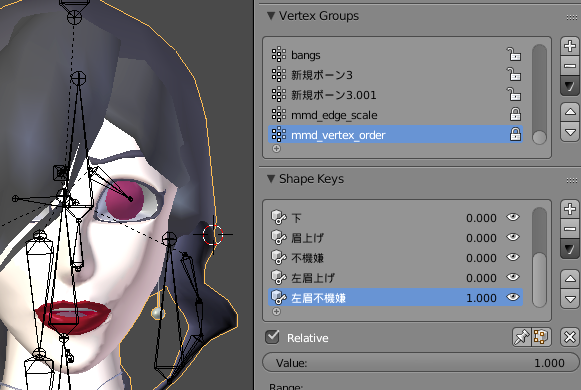
Now, let’s click on the drop down under the ‘add and remove shape key’ buttons.
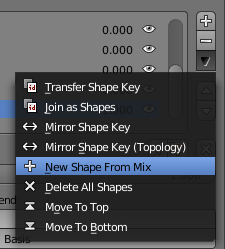
Choose “New Shape from Mix”. This will create a copy of the shape key! Now, in the same menu as “New Shape from Mix”, click on “Mirror Shape Key”. (Mirror shape key only works if your topology is perfectly mirrored. If it isn’t, you can choose the other mirror shape key option.)
Because of her bangs, we can’t see if it worked or not. However, if we go into Edit Mode . . .
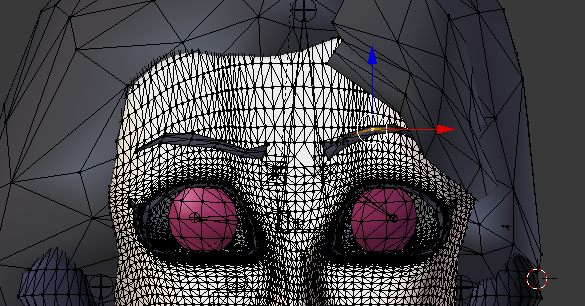
Now, here’s the cool thing that I wish I knew earlier . . . Using the mirror tool, you could create the shape key for the left . . . mirror it for the right . . . and create a new shape key from the mix with the left and right at one!
Guys, I feel like such a smart cookie for looking that up!! I am 100% using that on the eyes!
. . .
actually, scratch that! I’m running into a bit of problems with mirroring making the other side wonky! So, we’ll be doing a lot of stuff by hand. Blergh!
Well, now that we know the basics . . . We can move on to more advanced stuff! Like eyes . . . and mouths . . . And advanced stuff no one else uses!
So tune in next time when we really sink our teeth into making shape keys!