![]() How can I use Blender to make
a model for MMD? How can the “Joan of Arc Maya” tutorial help me make a
model? How do I use Loop Tools in Blender?
How can I use Blender to make
a model for MMD? How can the “Joan of Arc Maya” tutorial help me make a
model? How do I use Loop Tools in Blender?
Making Your First Model Part 3
Modeling the Lower Body
Finally! Modeling! What I came for!
Yep! Now we’re finally going to start modeling!
Now, if you asked me what the most famous 3D modeling tutorial was, you’d likely expect me to tell you about a teapot or a coffee mug. No . . . I believe it is the Joan of Arc Maya tutorial.
It is written for software I don’t use and with a lot of words I plain don’t understand. But there is one part that I do use and does help me. The foot.
You’d think that with a human, you would start with anything but the foot . . . But it just makes so much sense to start that way! So click the first link in the table of contents, and let’s get to modeling!
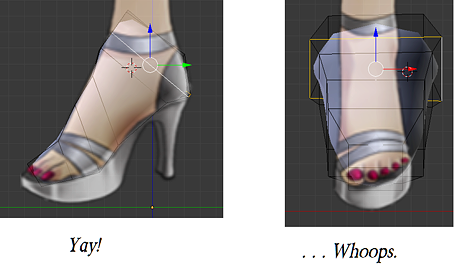
Let’s start in front view and click off to the side of her foot. While it would make sense to click on her foot, there’s an issue with that. The cubes are so big, they would be caught up in the mirror modifier and we wouldn’t be able to pull them apart again!
Press “s” to size the cube. Remember that pressing “s” then x, y, or z will allow you to scale on that axis.
Scale the cube so that it covers her toes in front view, and then do the same in side view.
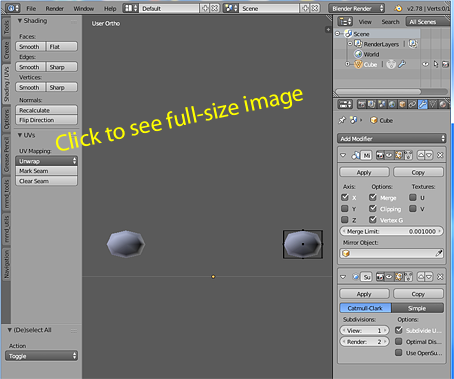
Let’s go a little out of order and add the Subdivision Surface modifier right now. It’s always nice to have a smooth surface, and adding this after making the model will mess with the shapes quite a bit. For an extra level of niceness, go over to the “Shading / UVs” tab on the toolbar and press “Faces: Smooth”. This will make it look even nicer.
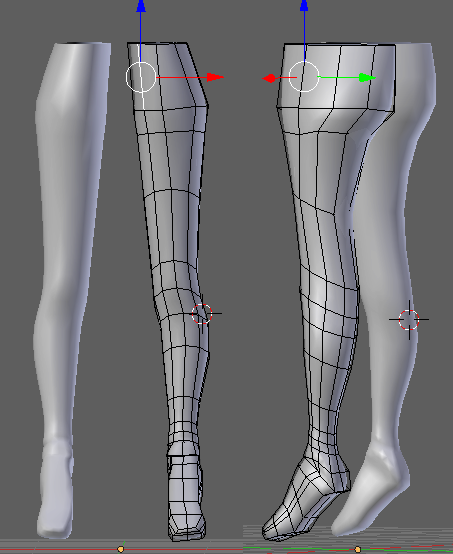
Ok, nicer may have been an overstatement. Let’s jump back into “Right” view. Let’s follow along with the Joan of Arc tutorial and extrude her foot to the ankle. To do this, mash “e” to extrude, then “s” to size. Click to confirm and then continue on.
If at any point you mess up the process, don’t fear! Switch to “Edge Select” and then “Alt + Right Click” on any of the vertical edges. This will allow you to move and size the entire edge loop and not just one edge or face.
Once you’re relatively happy with the shape from the side. Switch to front view.

That looks pretty awful! But don’t worry! Just select edge loops and size using “s + x”. Of course, you can shimmy it on the X axis without messing with the side view.
After adjusting the size of the edges, instead of extruding the leg and then adding loop cuts, let’s add loop cuts now.
Why would we want to add random loop cuts? So that we can use “Loop Tools: Circle” and get a pretty good circle.
The Maya tutorial says nothing of it, but the “Loop Tools: Circle” is an amazing feature that allows you to make things round. That sounds a little silly, but it’s the truth! For a n00b like me, it’s an amazing tool. To use it, select the edges of the beginning of the ankle and press “w”, and then select “LoopTools”, then “Circle.”
Now, extrude the leg as you did the foot.
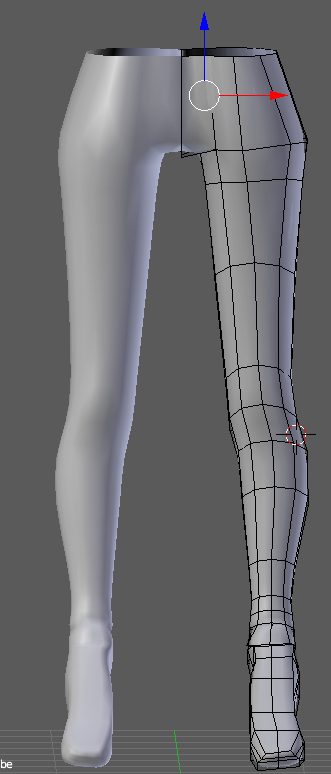
For this model in particular, we reach a fork in the road. Do we model full legs even though they’ll be hidden under the skirt? Do we model a full body, even though she’ll be wearing clothes? The Joan of Arc tutorial would tell you to model the full body even if it will be covered, whereas “undressing” MMD models with the material masking panel in PMXe would often tell you not to bother.
For this model, I believe that it’s rather important to model the full leg even though it will be hidden. That is because we’ll know where to put the leg bone when it comes time to rig the thing.
(Note, if one part of your model looks different than the rest of it at this stage, select everything and press “Ctrl + N” to flip the messed up normals around. That may not make sense, but it works to make the weird dark grey parts turn light grey again.)
Now comes the downfall for the Joan of Arc tutorial for me . . . Once it gets to the crotch area, I’m lost.
To make things easier, we can select an edge loop hidden under her dress and press “s” then “z” then “0”. This will flatten the edges so that we aren’t dealing with anything that is slanted to the side.
Now let’s stop and think.
Do we want her to have a bum? Do we want her to have massive hips? If we do, we’ll have to think hard about how exactly we’ll extrude. If we simply size the edge in all directions, the mesh will clip in the middle, way before where her crotch would go. So we can go into side view and scale in only the “y” axis. Then we can switch to front and select edges on the side furthest from the center and pull them out to form hips that hug the side of her dress.
Some creative extruding, edge loops, and pushing around will get you pretty close to a decent bum!

But for the crotch . . .
You need to ask yourself if it’s worth it to do it.
For Camila, if we were to simplify her design and remove the cutouts in her dress, her abdomen is completely covered. We could simply leave the legs hanging on their own and model the dress as something else entirely. The problem with that, however, is simply that it would be slightly difficult to get started with a good shape. For that reason, I always struggle against the Joan of Arc tutorial at this part.
I extruded to the crotch area and then dissolved the
edge between the two faces that I’d extrude to make the crotch, then
extruded them.
I apologize
for a lack of images – I did all of that to see if it would work
without thinking to document it!

With some creative moving around, this actually allowed me to create a decent rump!
Now, on to the waist. . . Since this is running long, I should probably wrap this up for now.
Check in next time when I start modeling the upper body!

