 How
can I use Blender to make
a model for MMD? How do I shape the clothes for my new MMD model using
Blender? How can I make ruffles for the collar on my new MMD model? How
can I use Blender to make
a model for MMD? How do I shape the clothes for my new MMD model using
Blender? How can I make ruffles for the collar on my new MMD model?
Making Your First Model Part 8
Modeling The Clothes
Uh, Mae, are you ok?
I promised myself! I promised! “I’ll figure out the cloth simulation
before we get to that part! I’ll look smart and tell everyone how to
make clothes!”
Nope.
So . . .
We’ll still make clothes! But gosh darn it! I really wanted to figure out the cloth simulation!
In Blender, there are a lot of really cool modifiers, physics, what have you, that will make your meshes look really cool. One of them is the cloth simulation. See, here’s a tutorial that literally shows you how to do it step by step (warning,
uncensored 3D model breasts) and I still can’t get it done! So, sadly,
we’re going to have to do it the old fashioned way.
In one way, this is actually a bit of a good thing. If the skirt were
clinging to the legs, then it would be a little tricky actually making
the skirt physics work in MMD . . . yeah . . . I’ll tell myself it’s for
the better . . .
Alright. Remember the don’t bug me boxes from the faces tutorial?
Let’s use “Shift + D” in Object Mode to move a copy of the body to
another layer.
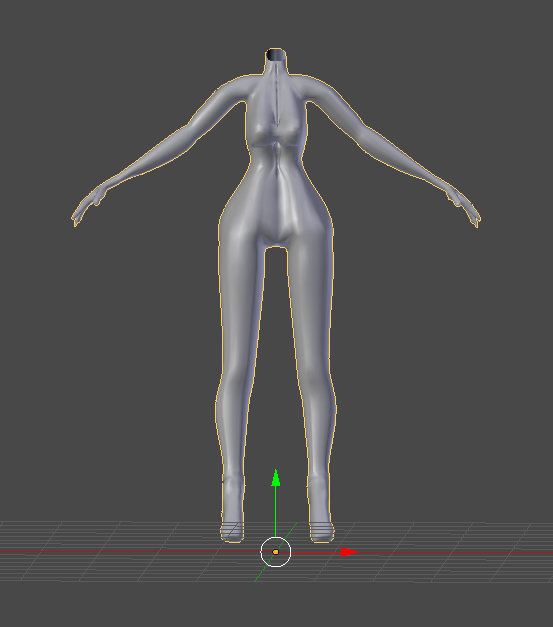
Now . . . let’s make it a tiny bit bigger and start deleting things we don’t need.
For her dress, we don’t need to keep anything below her hips. We’ll extrude a skirt out later.
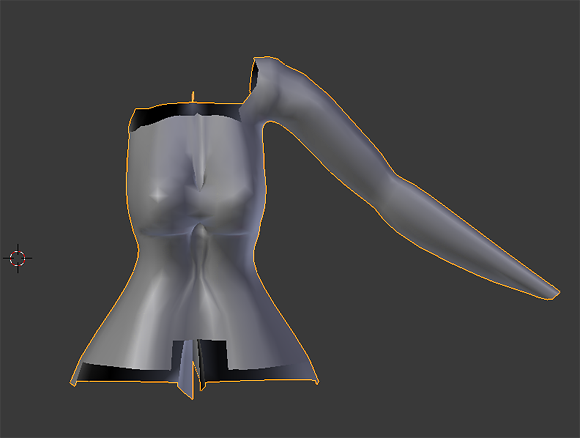
Alright! We have basically everything we need. I couldn’t get the
neckline of the dress to line up exactly with the reference images show.
But, the reference images tend to be really inconsistent, so I can’t
feel too bad!
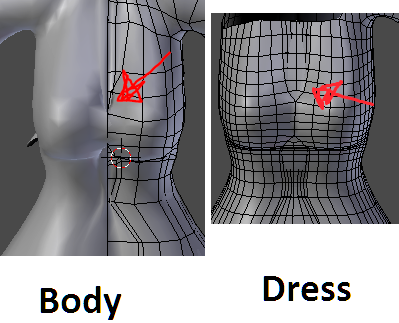
While working with the mirror modifier, it’s difficult to not
accidentally make a giant trench running down someone’s body. While
working on the detached torso that would become her dress, I selected
some edges and pressed “f” to create faces. This made her bust
topography a quite bit nicer!
Quick aside – when you’re bad at art and trying to get good at
it, you memorize ratios. One ratio for women is that, generally, the
distance between the fullest part of the bust and the head is one head.
The reference image I was using got that ratio wrong. I don’t know how,
but I got the ratio right. I’m bad at art and I’m bad at tracing, but
apparently ratios follow me!
After some careful fiddling around, I was ready to extrude the skirt.
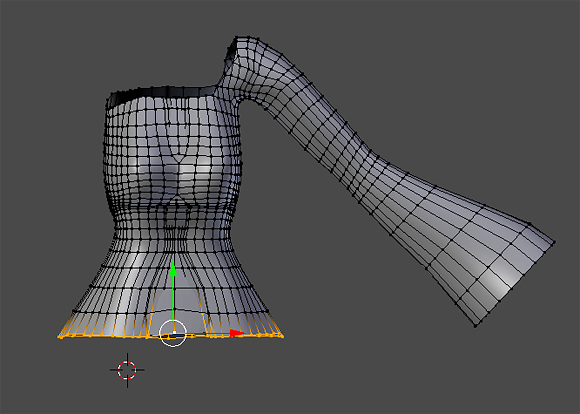
So, I was staring at the dress trying to figure out how to do the leg
slit. I thought about cutting out a few faces and then trying to cut
them so that they were at an angle . . . and then I realized I was being
a big dummy! Just rotate the bottom edgeloop with proportional editing
on!
After spending way too much time on topography because it was bugging me . . . It was the moment of truth!
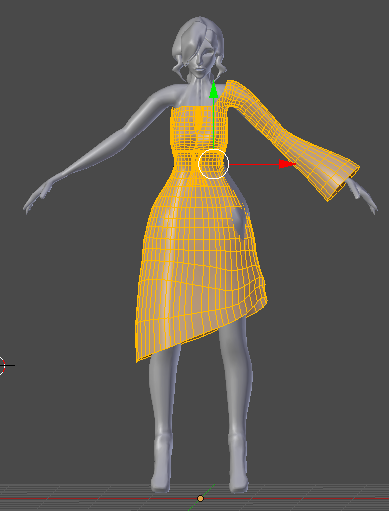
Well . . . Time to fix it!
I told myself I’d save materials for later, but this seems like a
good time to add materials for the sole purpose of seeing if anything is
sticking out of the dress.
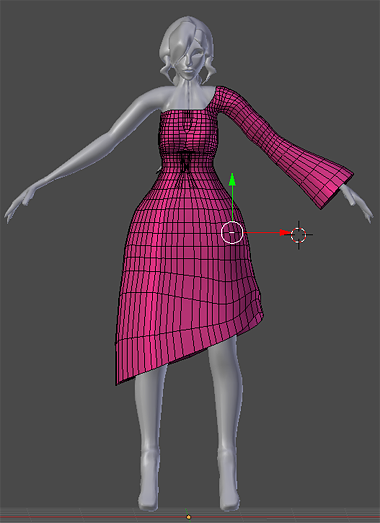
Hey! Camila’s looking pretty good with her red dress!
Now . . . let’s see about cutouts. Nope. Nope to the cutouts because I
am not ashamed to say that this is a tutorial for people who aren’t
pros.
Even if I got the topography of the cutouts right, I’d need to figure
out a way to get the threading on top of them. While I understand the
various ways to do that, it’s just easier to not for now. I’ll just say
Camila is being modest.
So . . . what is next?
Ruffles.
Ayayay! Why did I pick Camila?!
Well, let’s get started on ruffles.
Let’s start by duplicating the neckline of the dress in edit mode.
Let’s move the duplicated edge up so that the ruffles have a place to
start above the neckline.
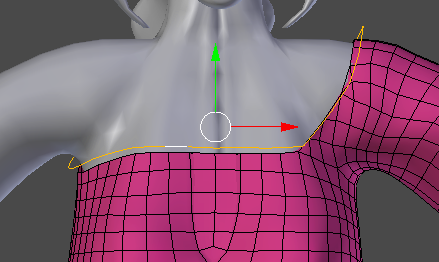
Alright. So I extruded the duplicated neckline. I adjusted some of
the lines closer to the body to be . . . closer to the body. Then I
created a new material and assigned it to the ruffle so that if I wanted
to remove the ruffles, it would be a lot easier.
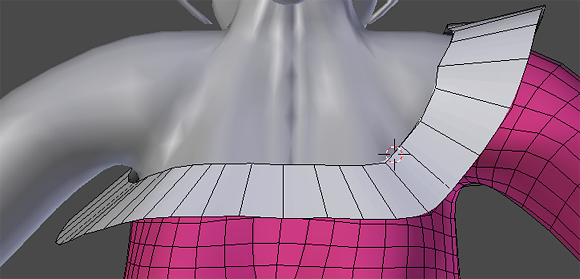
Now, all that’s left to do is get to ruffling!
The key to ruffling something is just . . . move the vertices up and
down until you get a wavelike pattern. I know it sounds way too simple,
but that’s all there is to it! If you were being hired by a firm to make
a Lolita dress in Blender, these results might get you fired for
incompetence . . . but here, what’s wrong with ’em?
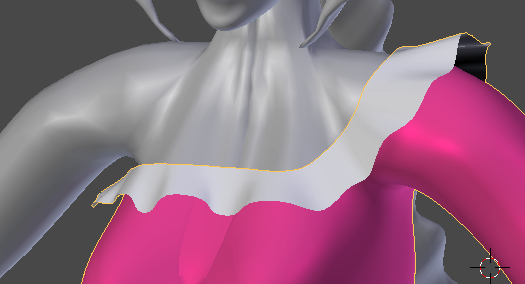
Now, we just need to repeat that for her sleeve and her skirt.
After extruding the edge loops, remember to select the entire
extrusion by selecting a vertex, edge, or face and then pressing “l”.
Press “Ctrl + N” to fix the normals.
In Edit Mode, you can move a vertex freely as opposed to using the
handles by just right clicking to select it and then move it while
holding the right mouse button. Be careful and click the left mouse
button to release it, as clicking the right mouse button will cancel
what you had just done.
Alright! I got all of the ruffles done!
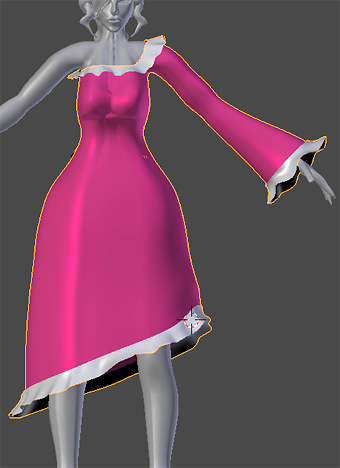
I added a loop cut running parallel to the extruded edge and sized it a bit to give the ruffles a bit more depth.
Let’s try again to add the bows!
If they turn out well, we can plop one on her hair tie!
I keep forgetting I’m writing a tutorial and I keep just going at it!
First, I added a plane as a new object. I then sized the plane down
and extruded one edge. I then pressed “s” and made the new edge wider. I
repeated the steps on the opposite side and then extruded the whole
bow. After adding some loop cuts, this is what I have . . .
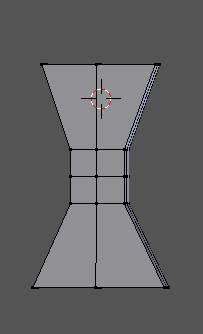
Now, I’m going to just add the subsurf modifier and play with the vertices.
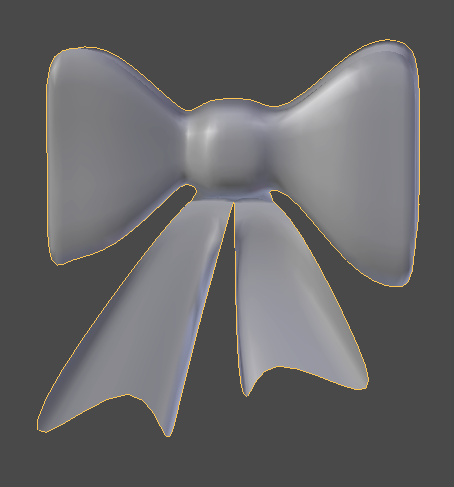
And that’s how you make a deformed elephant! Oh . . . That’s supposed to be a bow? It is!
After struggling so much earlier, making this bow felt a lot easier.
Well . . . After a bit of rotating, resizing, and re-positioning . . . Camila has all of her bows!
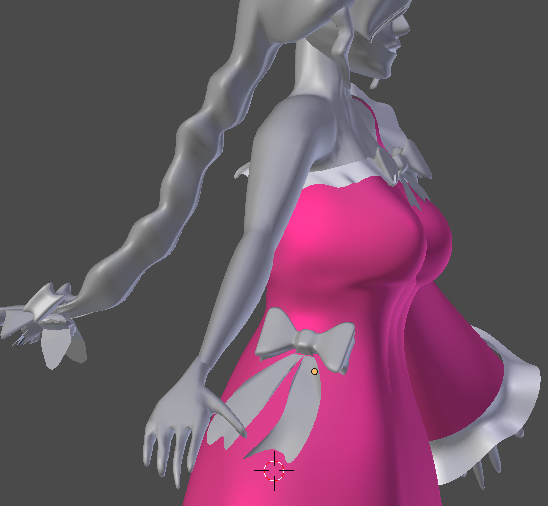
Whoo! That was quite a bit of work. But we’re very, very close to the home stretch.
Tune in next time for when we add accessories!
<
Previous Tutorial CONTENTS PAGE Next
Tutorial >
|

