 How can I use Blender to make
a model for MMD? We will study Camila's hair and create/extrude the shapes in Blender. How can I use Blender to make
a model for MMD? We will study Camila's hair and create/extrude the shapes in Blender.
Making Your First Model Part 7
Modeling Hair the Old Fashioned Way-
Finally! We’re going to give her hair!
Yes! Well, not just yet.
Why?!
First, we need to make some choices. Let’s study Camila’s hair, shall we?
Let me start by saying that with curves, this would likely be a breeze. I want to search how to make curves to make it a breeze. But this is for n00bs, not pros. I want as few glazed eyes as possible here!
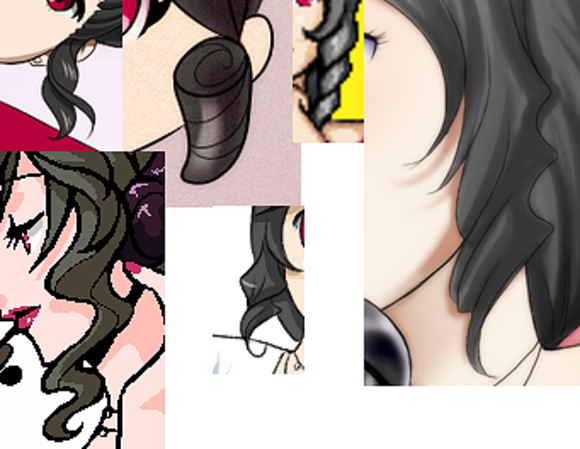
The first thing you might notice is that Camila has no one defined fringe.
I’m thinking that I will use the reference image I used for her face to create waving tendrils. So let’s get started!
Jump into object mode if you aren’t already and make a new object by picking a primitive mesh to add to the scene.
While picking a plane seems like the best option after how well the
bangs turned out, I picked a cylinder. Why? It just spoke to me.
That’s something about all art – you do what speaks to you.
Let’s position the cylinder near her head. It’s up to you whether you
want to add a mirror modifier or if you want to duplicate the fringe
for the other side. Duplicating and editing would look the best, of
course . . . but mirroring is much easier!
. . . Unless you’re like me. I constantly struggle with getting the origin point lined up correctly to make it mirror correctly!
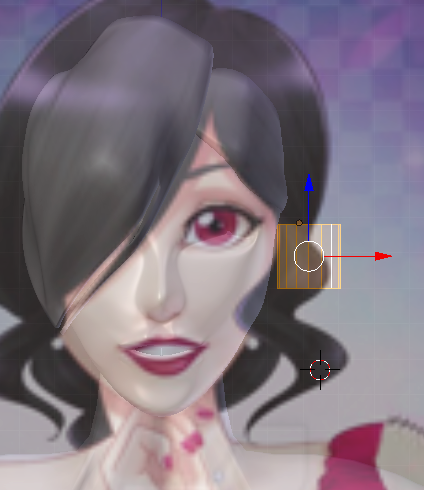
Let’s move it around and get started with my favorite thing . . . Loop cuts!
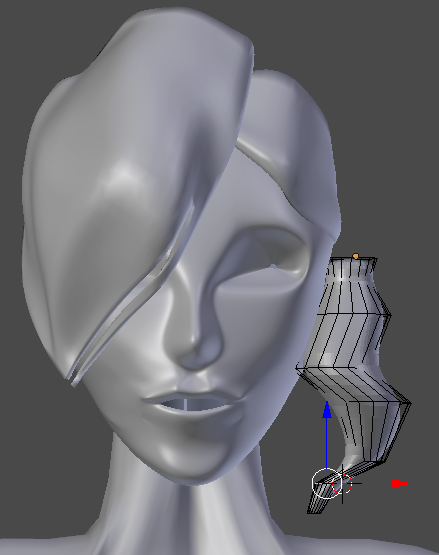
Now, that looks bad! But don’t fret. There are two things I know I
need to fix immediately. The first is that the fringe is intersecting
with the face. If you do that, adding hair physics to the hair is almost
certainly out.
Let’s size it on the X axis and then rotate it to make it look better and not intersect with the face.
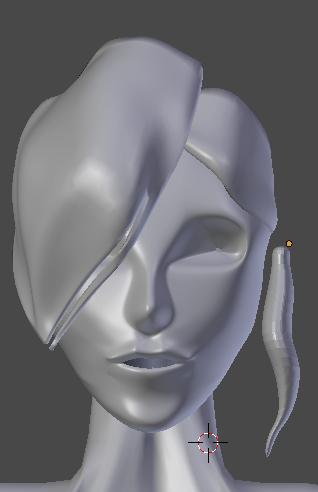
Already it’s much better! Now, let’s just edit it a bit more to try and make it look nicer.
To duplicate a part and then move it, select the entire part to be
moved. Then press “Shift + D”. Press X to lock it to the X axis if you
want to move it to the side. Move it to the proper place and then press
“S, X, -1”. Press “Ctrl + N” to fix the normals.
Alright . . .
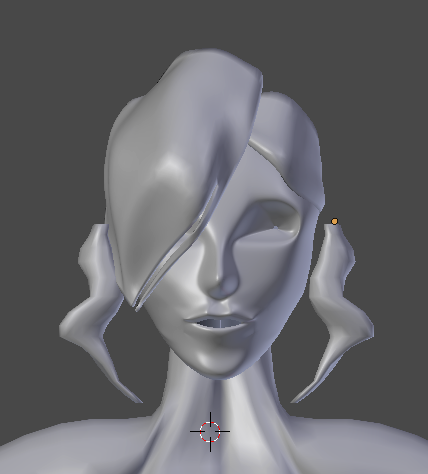
So, the other ones looked better. But when you’re making a model or a
drawing of a character, you should usually try and do everything you
can to make it look like the character. I think that these are close
enough when it comes to the fringe. Now . . . Actual hair!
Wait, no, more studying.
A way to describe Camila’s hair is as a bob-cut that terminates into a braid.
Let’s make a new object and make the basic shape of the “bob”.
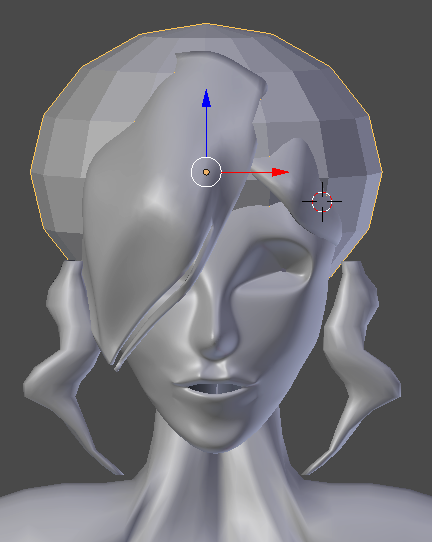
So, Camila has a disco-ball on her head now! Using the proportional editing tool, let’s shape it more like a head of hair.
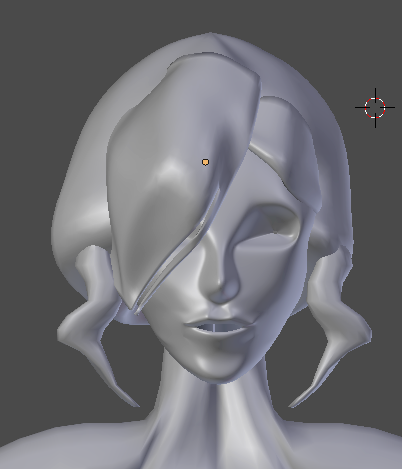
I’m sorry that I don’t have anything to say about this process –
there just isn’t much to say. Just add a Subdivision Surface modifier,
use Solid View, and make sure the mesh lines up with the reference. Turn
on and off Proportional Editing depending on what you need to do.
Moving the entire side of the head over needs proportional editing.
Moving one errant vertex means you need to turn it off.
Now for the braid . . .
Camila was a bit of a bad idea to make a model from because she has
quite a few features that make it hard. One of them is the braid.
Let’s stop and think. Camila’s braid never actually looks like a
braid. Half of the time it looks closer to Teto’s twin-drills, and half
of the time it just doesn’t make much sense.
Again, if I were to use curves, this would go a lot faster. But I’m
still stumped on those! So let’s try a theory I was mulling around.
Let’s start by selecting faces on the bottom of the back of the head
and extruding them. Once they are extruded, move them downward.
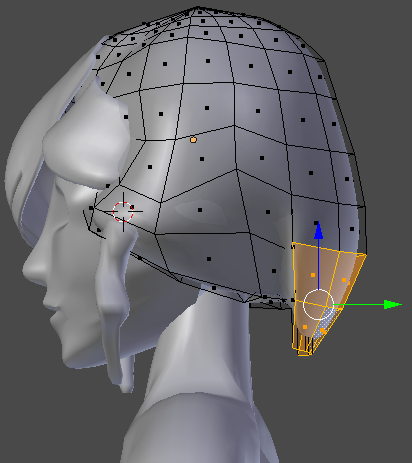
Let’s extrude again, this time sizing the faces down. Then let’s try extruding again and sizing them up . . .
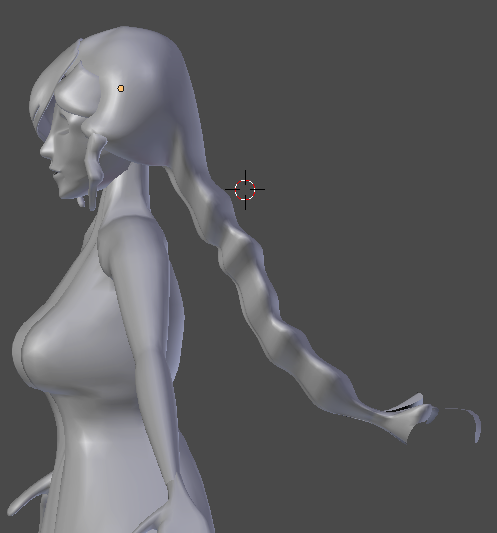
I think I am proud to say . . . This is close enough!
I also thought about how useful the sculpt tools are and used it as a
chance to make the anatomy on the shoulders a little better.
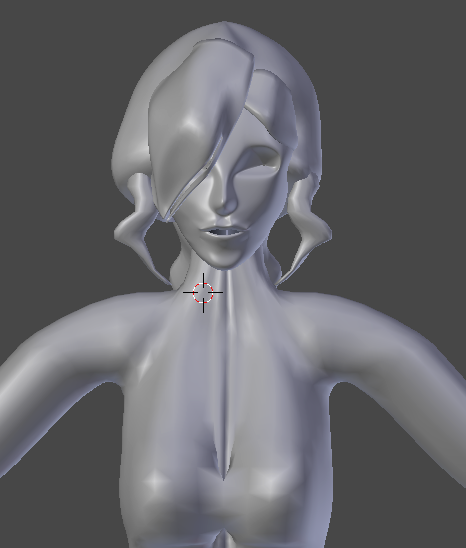
Before we go, let’s add the last piece of the hair . . . the bow.
Again, curves would make this a lot easier . . . Man! You must get
tired of hearing that! So we’re going to freehand it. First, let’s put
this in a new object so that we won’t mess up the braid.
I added a cylinder, resized it, and then added a subsurface modifier.
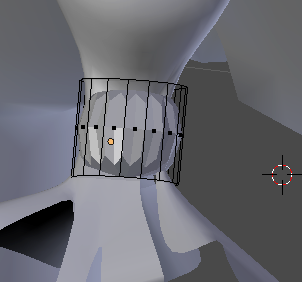
Let’s extrude a few faces from the side to start the bow. Then let’s loop cut, resize, loop cut . . .
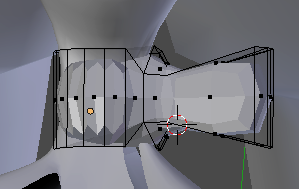
. . . Let’s just leave her with a hair tie for now.
Now that we’ve done all I can think to do to the hair . . . We can move on to clothes!
Check in next time where I try to give Camila a pretty dress!
<
Previous
Tutorial CONTENTS
PAGE Next
Tutorial >
|

