Using the GIMP Levels and Hue-Saturation tools
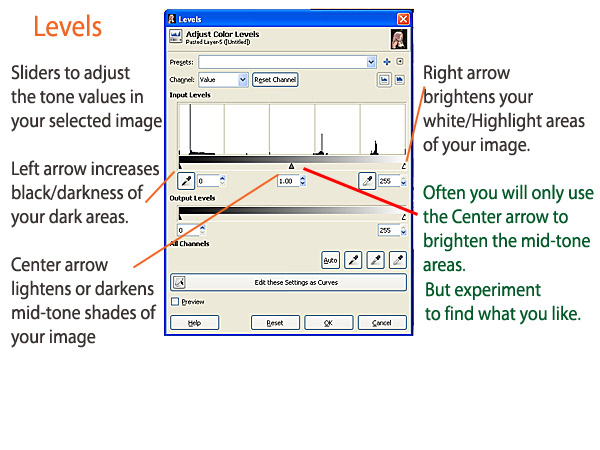
The GIMP Levels tool...
... lets you adjust "the look" of your image... you can brighten the shadows, shift the shadows darker... make muddy mid-tone details brighter... make the whites and highlights brighter.
Often, LEVELS is the only command required to turn a so-so picture into a stunner!
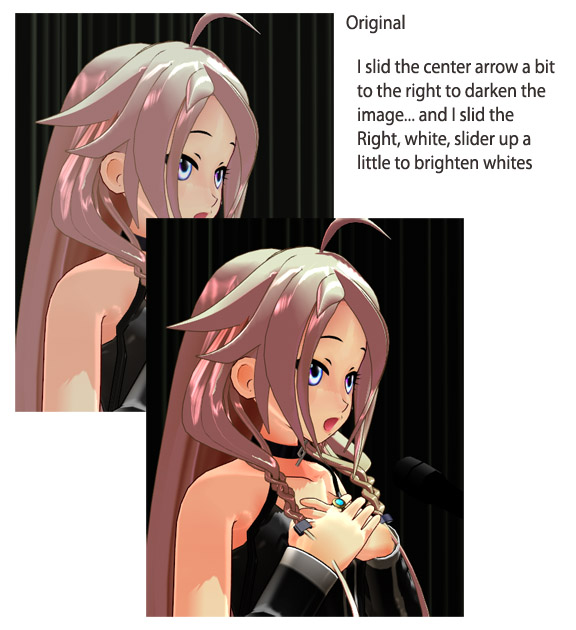
You can select only particular areas of your image to be affected by Levels... or you can Control-a to select-all of the image.
Control-a
Go to the COLORS tab and choose Levels.
See the illustration at the left. I almost ever only use the three arrow-sliders to adjust the levels. There are plenty of other setting adjustments there... but just use the three arrow-sliders ":o).


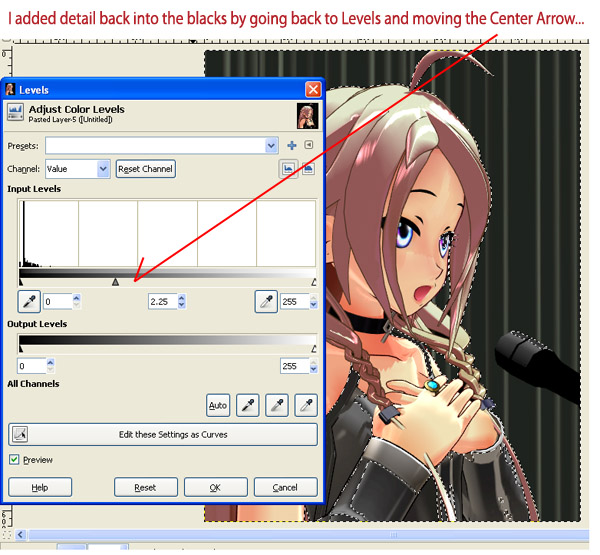
I used the Fuzzy-Select tool... the Magic Wand...
to select those dark areas.
First, I selected the tool... and clicked on a black background area... and I saw that only a small area was selected. ... That meant that my Threshold value was too low... I needed the wand to be less specific about its choice... setting a larger threshold number allows your wand to generalize more... to include more areas that are close-enough to the color you selected. That Threshold value covers RGB colors of from 0 up to 255... with 255 selecting ALL colors. Setting it to zero will allow the wand to select only that exact color... while a value like 15 or 22 generally gives you nice coverage... and a big number like 60 will grab a huge area!
I wanted to select most of the black/dark areas... so I clicked the wand all around the picture... holding down the shift key allows you to add to your original selection. ... If you click a point and the wrong thing is selected, you can Control-z to Undo.
See the illustration at the left.
| Note... If all of those dotted-lines are in your way... Go to VIEW and choose "Hide Selection"... and the dots will be hidden from view. The Selection didn't change... just the annoying dots are invisible. |
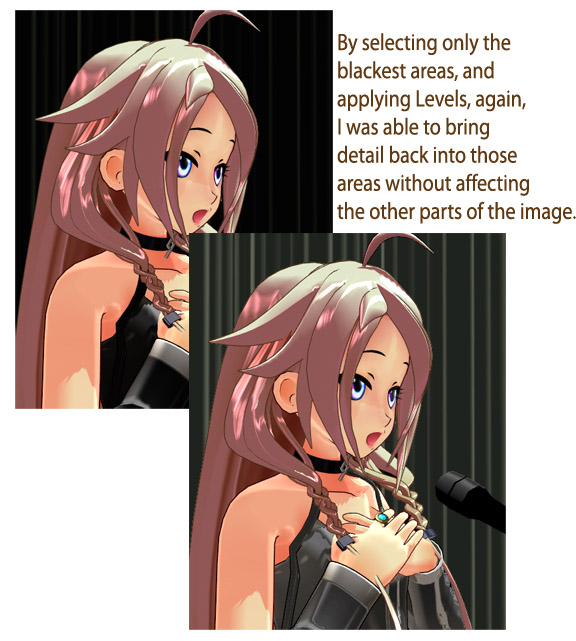
With all of those dark areas selected, I opened LEVELS ... Colors>Levels... and slid the center arrow to the left to brighten the shadows I had selected... you can see in the picture that I was able to pull out some hidden shadow detail.
I clicked OK.
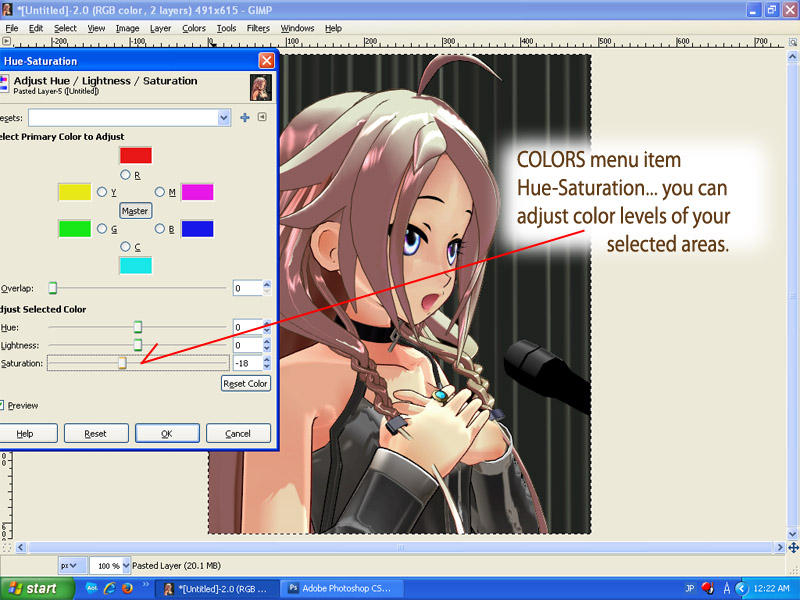
The Hue-Saturation tool is powerful... had to include it in the GIMP tutorial because you will be using it all the time.
Yes... you can use it to shift red to blue and then to yellow... but you can also use it in very subtle ways... I want to use it, here, to soften some of that increased color we got when adjusting the Levels.
I did a Control-a to Select All
Then go to the Colors tab and select Hue-Saturation... see the illustration to the left.
... and see below, left, for the nice little adjustment this action makes...
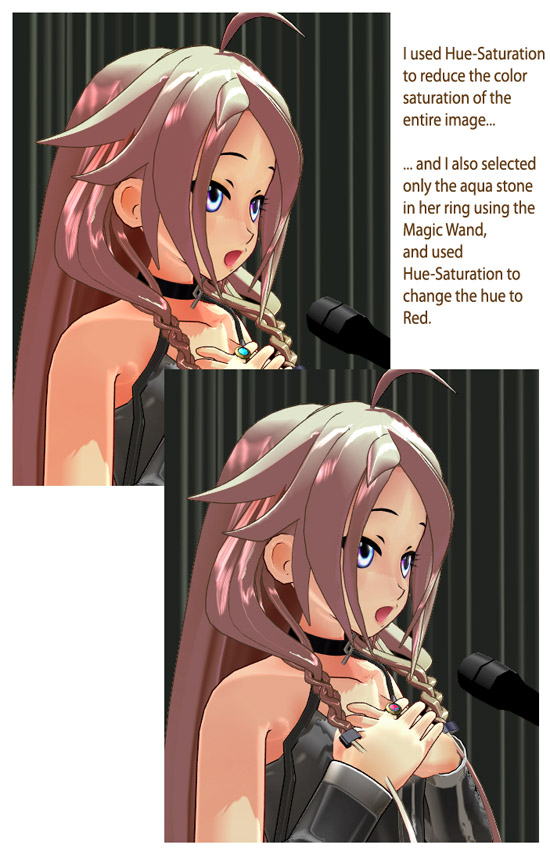
I selected only the blue stone in her ring and adjusted the Hue to red! ... easy! If you had a picture of red sports car you could select all of the red areas and make it into a blue sports car.
Easy!
In OUR image, I softened the colors everywhere to look the way I wanted it.
NEXT
... we will learn how to resize our image using the SCALE command.
Presented by LearnMMD.com
The most complete MikuMikuDance resource on
 the web!