What Happens when you Delete part of a Layer?
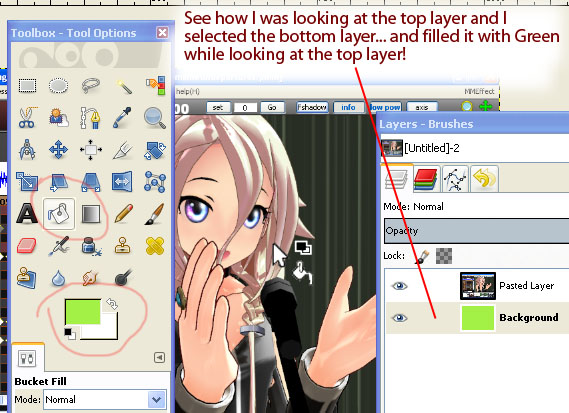

Color-Fill a layer you cannot see!
In the previous step, we pasted a new layer... and so now we have two layers: the new layer and the original Background layer.
I chose the bucket tool and picked that bright-green color...
I selected the Background layer and filled it with Green from that bucket tool.
SEE HOW GIMP LETS YOU WORK ON LAYERS YOU CANNOT SEE... You may find a time when you are trying to use your brush or bucket tool... and it is just not DOING anything! ... Check to see which layer you are on. You may have been scribbling all over some layer underneath the one you were getting frustrated about!

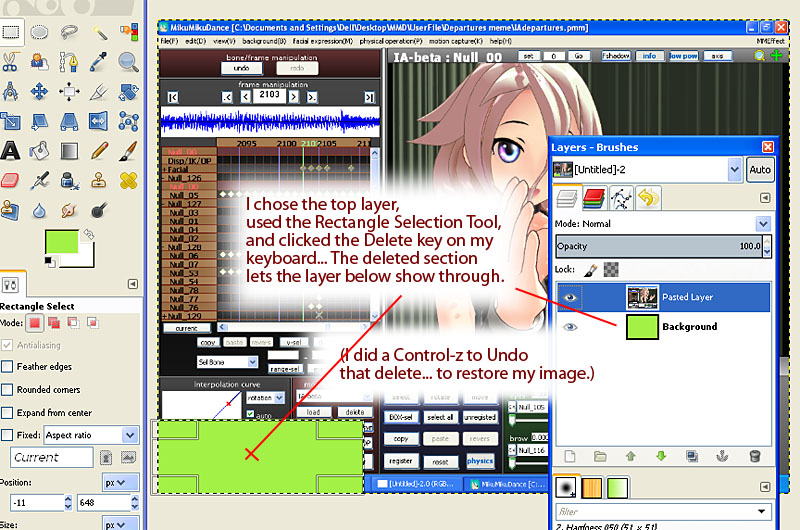
When you have one layer above another, you can select an area and push the Delete key on your keyboard... and find that there is now a hole in your layer... the layer below is now visible through the hole.
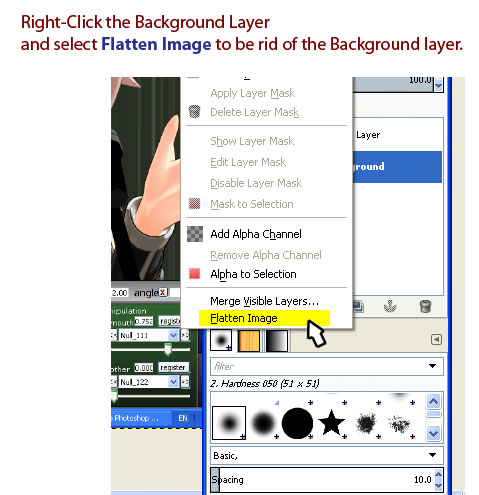
Whenever you are ready... you can Right-click on any of the image layers showing in that Layer Toolbox... and choose Flatten Image... dropping your image into a single layer.
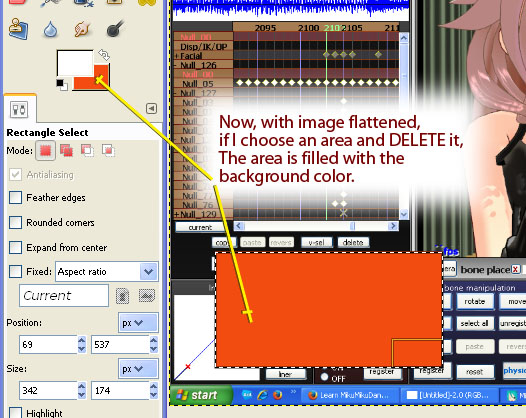
If you have only a single layer...
... the area you delete will be filled with the Background color (usually white... unless you make it red, like I just did!)
NEXT...
We will paste a new image on top of what we have... cut-out only the part we want... and move it around.
Return to Using Layers in GIMP
Return to Getting Started with GIMP
Presented by LearnMMD.com
The most complete MikuMikuDance resource on
 the web!