Paste a layer in GIMP and edit that layer...


Make a vignette portrait in GIMP
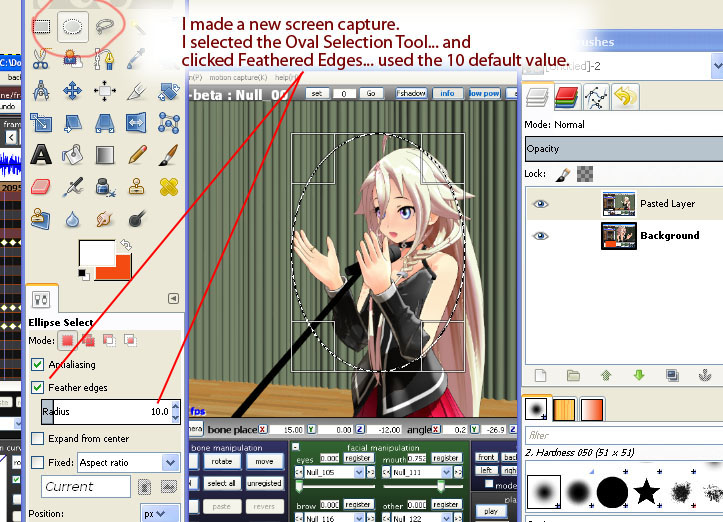
I went into MMD and made another screen capture... same model, different camera angle... and pasted it on top of what we already have, so far. ... see the two layers in the Layer Toolbox.
I wanted to make a soft-edged oval portrait... a vignette. I chose the Oval Selection Tool and checked the Feathered Edges box... and set a Radius value of 10. That means that the oval I draw will have a 10-pixel-wide fade-out around its edges. You can experiment to find the value that works best for you.
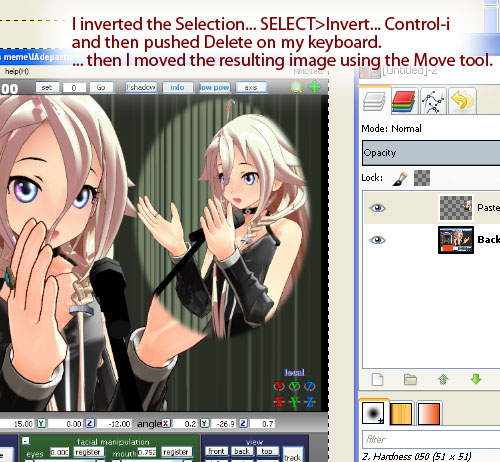
Invert Selection and Delete the background of your image.
Now that I had my oval selected... I wanted to delete everything EXCEPT that oval... so I went to the SELECT and chose INVERT...
... so now my oval is still there, but it's the background that is selected... so when I click DELETE on my keyboard, the background is gone and my oval is finished.


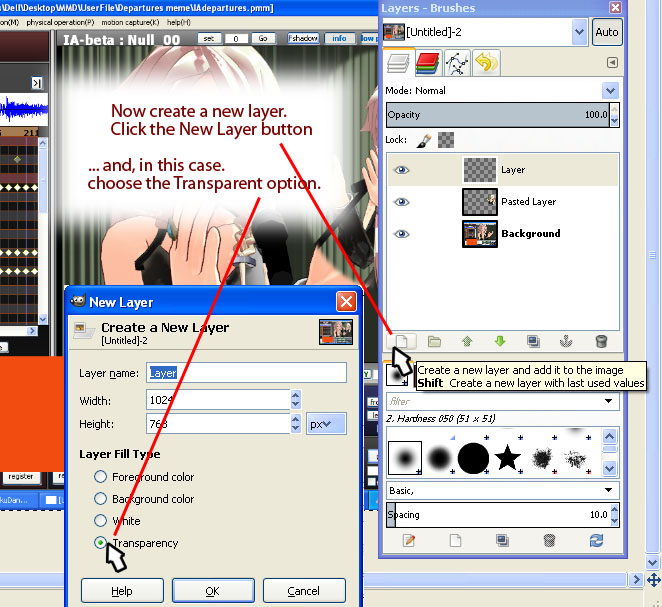
Click the New Layer button to get... a new layer.
The new layer comes in on top of your stack of layers.
You can choose to have that new layer filled with one of your colors... or have it be transparent.
I chose transparent.

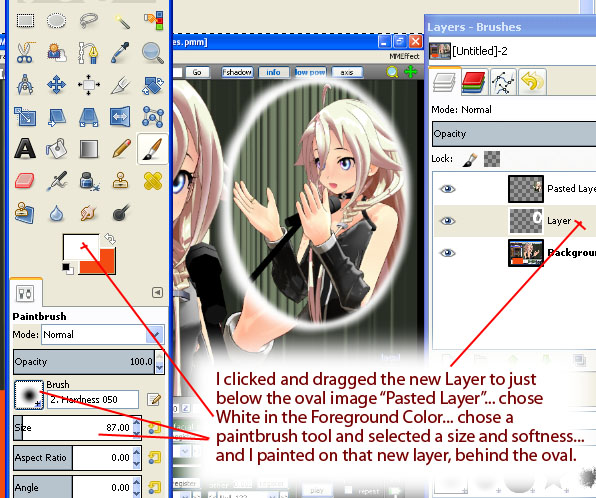
I chose to simply paint it using a soft brush tool.
First, drag the blank new layer we just made below the layer containing the oval image.
Select a paintbrush size and softness that you like and take advantage of the fact that GIMP let's you work on the selected layer behind the layers, above... and paint that white border... I used a large brush and hid most of the paint beneath that oval image. You can see it on that little image of the layer in the Toolbox.
NEXT...
... we will cut a piece from one layer and paste it back onto a new layer... and move it around.
Return to Using Layers in GIMP
Return to Getting Started with GIMP
Presented by LearnMMD.com
The most complete MikuMikuDance resource on
 the web!