 How can I add hair to the
model I am making in Blender? How can I add hair to the
model I am making in Blender?
Making Your First Model Part 6
Modeling Bangs the Old
Fashioned Way-
There’s a right way
and a wrong way to make hair.
We’re going to use the wrong way!
Wait, What?!
Well, let me rephrase. In Blender, there are three main
ways to make hair in Blender. The first may hurt your jaw when it
drops to the floor. However, there’s a problem with that method . . .
there’s literally no way that you can use the Cycles Engine in MMD.
(Paging Bandages . . . Your crazy experiments are requested in aisle
four . . .)
The second way is with curves. My initial
response to that video is simply “Look at it!! Look how pretty it is!!
I want to do that!!” After trying to follow the tutorial, my response
changed to “. . . What??”
I would love to teach you that method, but the truth is
that I still can’t wrap my head around curves. All of my knowledge on
Blender is on a very superficial level. I still don’t know how to set
up any of those boxes in the Cycles engine!
Looking at my favorite tutorials, I can easily see why.
While I’m subscribed to Blender Guru’s newsletter, I usually rage-quit
his tutorials almost every single time. He’s focused on the Cycles
Engine and making photorealistic scenes. In his tutorial I linked to
earlier, he downloaded the model instead of making it himself. I have
too much interest in making models to spend time watching someone play
with someone else’s model instead of making them!
So we’re going to do it the old fashioned way. This
method was used by the Joan of Arc tutorial and is
demonstrated in video form here.
As a quick aside, when you’re trying to find tutorials
for polygon hair, you’re better off searching for The
Sims as opposed to MMD. Once you ignore all of the
parts concerning the process of exporting and importing the mesh from
and to the game, you’re left with tutorials that cover making hair that
will work with MMD!
So, we’re going to model hair now?!
Not quite yet. Before starting, I want to tell all of
you guys about something extremely important!
Objects are a little hard to wrap your head around at
first. When you start out, you think that everything needs to be
connected. Not so! It’s actually easier on you as a modeler if you
create separate parts as separate objects. The MMD Export feature of
MMD_Tools will consolidate all of the objects in the end, so the number
of objects isn’t too big of a deal.
For my head tutorial, I created each head as its own
object. That way, I could move them into other layers independent of
the body.
To create a new object, go into “Object Mode” and click
any of the primitive meshes.
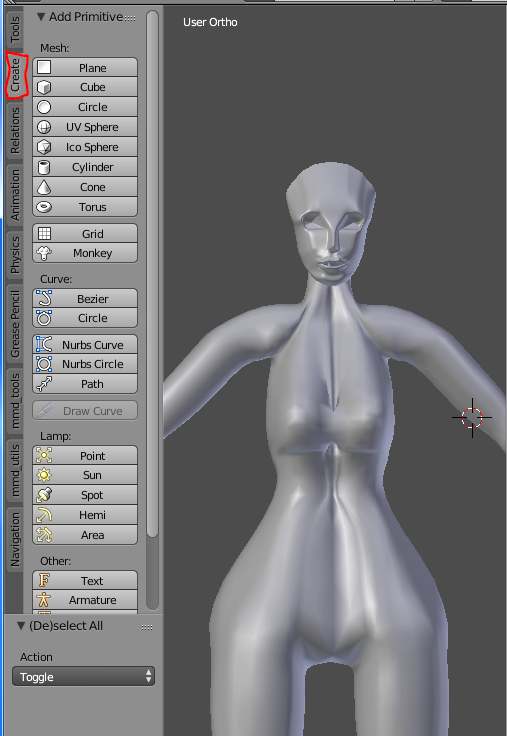
Select the mesh you just added to the scene and enter
“Edit Mode.”
Why is this important and a good idea? Simple! You can
do whatever you want to that object and it won’t affect the parts of
the model you already created.
(As a note, there are modifiers where you can use one
object to deform or move another object. For now, that’s outside of our
scope.)
(As another note, I edited the face from the last
tutorial a bit to just look better in general!)
Now we’re going to model
hair?!
Yes! Let’s start with the bangs.
Because her bangs are asymmetric, we can’t use the
mirror modifier here.
I’m starting with a plane. Here’s a quick tip for when
you need to add a flat object – “R + X + 90”. Press them in that order,
one at a time. This will tell Blender to first rotate the mesh, then to
do it only on the X axis, and then to do it by 90 degrees.
Let’s start by moving the vertices to very, very vaguely
resemble the shape of her bangs.
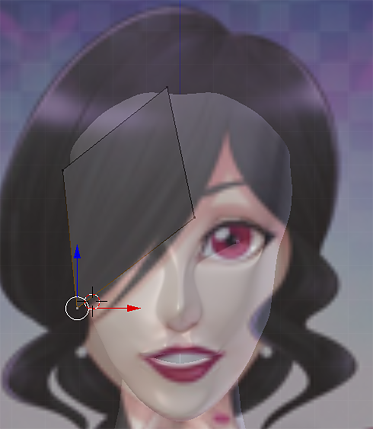
Now, let’s get one thing out of the way. It is
completely possible to trace the edges of her bangs with extruded
vertices. However, you can’t use loop cuts on those and have to use the
knife tool. I’m not the biggest fan of the knife tool . . . but if you
are, here’s what you should know.
- Pressing the “k” key activates knife mode.
- It’s okay to call it the “k for cut” mode in your
head.
- Using it may make it impossible to use the loop cut
tool.
- Use the left click to set where you want the cuts to
be made.
- Right clicking will abort the knife tool without
making any changes.
- Press “Enter” to commit the cuts.
- Each box you make will be a vertex along the edge the
knife tool creates.
Alright! Now that that is out of the way, let’s add some
loop cuts.
If you’ve forgotten how to do loop cuts, press “Ctrl +
R” and hover over the faces you want to cut. Roll your mouse wheel to
change the number of cuts while the lines are purple. Once you’re happy
with the amount of cuts, click the left mouse button. Then the lines
will be yellow and you can shift them around. Left click again to
commit.
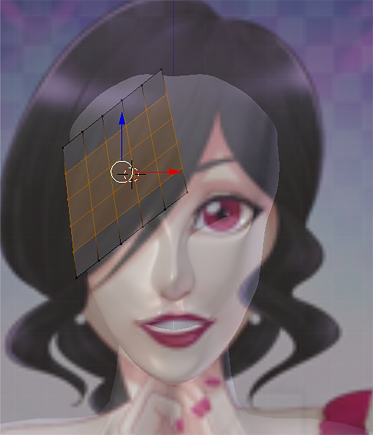
As you can see, I went a little crazy with loop cuts.
There’s a reason for it! You’ll see in a bit.
Now that we have more vertices to work with, let’s get
started moving them around.
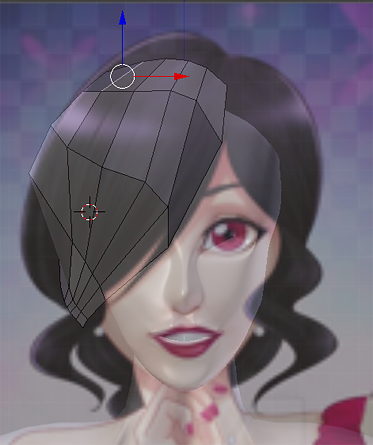
Much better!
Let me point out that it would have been nearly
impossible for me to do what I just did without the proportional
editing tool. To turn it on and off, either go down to the toolbar and
change it there . .

Or simply press the “O” key on your keyboard.
Now, we want the bangs to be fluffy!
In Blender, there is a mode called “Sculpt Mode.” There
are people who make entire models in that mode as if they were a modern
day Michelangelo.
Before you get started, make sure to do plenty of loop
cuts to give us plenty of vertices to work with.
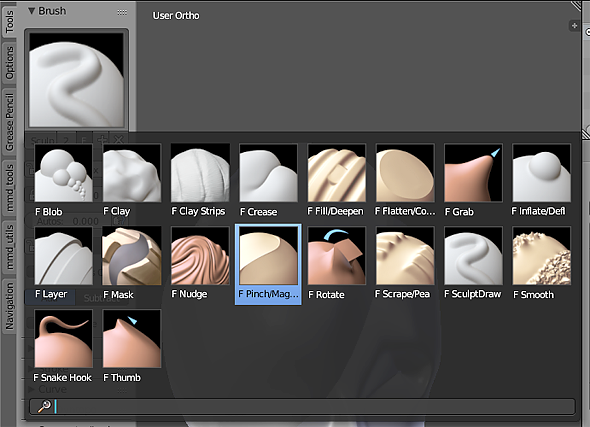
When doing something artistic like working in sculpt
mode, you just have to look at the tools and ask yourself what you
want. Do you want to add definition? Do you want to smooth things over?
The “Inflate Tool” will puff things up, the “Smooth
Tool” will smooth things over . . . But I’ve gotten the best
results so far with the “Sculpt” tool.
If you prefer a more smooth look, then using the sculpt
mode might not be the best idea for you. However, I like how my
doodling around in sculpt mode turned out.
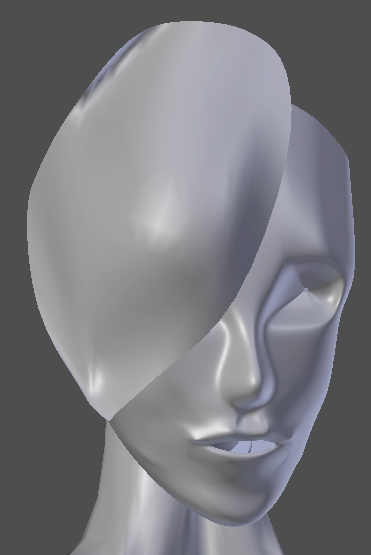
Before
Using Sculpt Mode
-
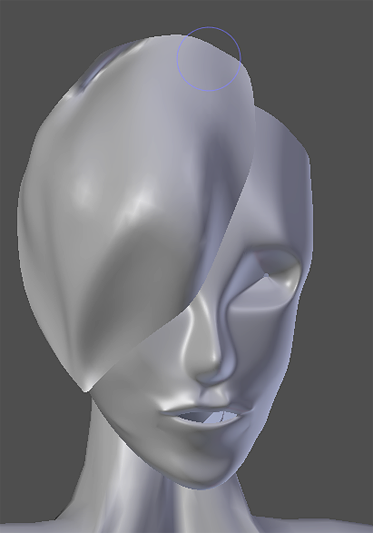
After
Using Sculpt Mode
A fun tool that is very useful for hair is the “press V”
tool. I haven’t actually found out its name, but you activate it by
selecting edges that are connected to other edges. When you press V,
those edges separate so that you can add things like the one flyaway
strand in Camila’s bangs.
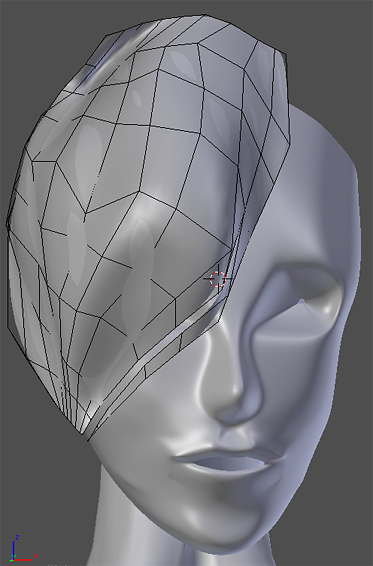
Now, we need to do pretty much the same thing to the
other side of her fringe.
We know that the opposite side of her fringe is layered
beneath her main bangs. So I selected two faces at the edge of her main
bangs and pressed “Shift + D”. This duplicated those two faces so that
I could place them beneath the main bangs so that I could extrude the
edges of those bangs and create that section.
To make it easier to work on the bottom fringe, I hid
the main bangs by selecting one edge, then pressed “L” to select the
“linked” selection. I then pressed “H” to hide. Once you want it back,
press “Alt + H” to get it back.
Because the lower bangs are less important, let’s use a
different method.
I swore I found it in a tutorial, but I couldn’t find
any mentions of it in the tutorials I thought it was from!
First, make loop cuts that are parallel to the edge of
the hair. For these bangs that are swept to the side, that means going
almost horizontal.
Once you make those loop cuts, move the edges front and
back to give it depth.
Going overboard will give you weirdly pointy hair, but
not doing enough will give you flat hair.
Check your front and side view, and then press “Alt + H”
if you hid the main bangs.
Adjust any little things that are bugging you and . . .
Bam! You have bangs!
If it bothers you how paper thing your bangs are, you
can add the Solidify modifier to give them depth.
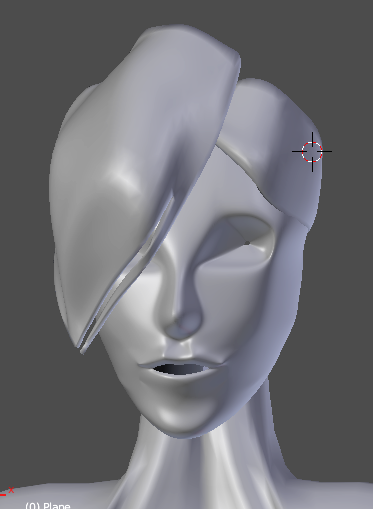
Now Camila has bangs!
Tune in next time when we give her more hair!
<
Previous
Tutorial CONTENTS
PAGE Next
Tutorial >
|

