
 |
||
|
LearnMMD.com's START HERE Page ... PAGE 4 Step-by-Step instructions for MikuMikuDance |
|||
|
|
|||
|
Page 1 covered some basic-basics. Page 2 covered Diamonds and loading a Stage and Accessories. Page 3 introduced us to making saved Poses, making and using saved Motions, and downloading Motion files. Here on Page 4, we will look at Saving your animation and making your video... and then we back-up a little bit and get into Dummy Bones and Adjusting the parameters of the those .x Accessories. Page 5 looks at Making an MMD model, Downloading models and Translating models...with the most brief intro to PMDE/PMXE Page 6 we introduce you to MikuMikuEffects: MME and suggest a few effects you will want to have in your MME arsenal. AND... we will download, install and and light-up Trackdancer's LearnMMD Stage! Page 7 takes a look at having multiple models on-stage using the same motion data by using Apply Center Position Bias and by using Mother bones. Page 8 discusses "smooth motions" and "interpolation curves" to control a motion's acceleration. Under the FILE menu is Render to AVI. This command starts you on the process of converting your animation. First SAVE your animation. The default folder is the UserFile folder. MMD saves the files into that folder... and it is saved as a .pmm file; a PolygonMovieMaker file. NOTE: if
you have installed MME MikuMikuEffects,
MMD will save your animation as TWO files... a .PMM and a .EMM.
The .pmm file is the saved "dance"... your animation. The .EMM file is a text file that you can open in Notepad or Notepad++. (We recommend the use of Notepad++... more powerful than the simple Notepad.) ... that EMM file is a list of all of the elements you have used in your animation... it can help you "find something" if you forget the name of it. Go ahead, if using Notepad, right-click that EMM file and try to OPEN WITH Notepad... if that doesn't work, change that .emm into .txt... that will let Notepad read it. Determine the exact length of your animation. MMD needs to know how many frames to include in your video. Under the Play button are two windows. Enter 0 in the first window... and enter the last frame of your animation into that second window. ... Actually, you can enter any number you wish into those windows... maybe you want to test only a portion of your whole animation, just to see how that part looks. KNOW that if you do not start from Frame Zero, no sound will be recorded. ... you gotta start from frame zero to catch the audio track. Now... go into Camera mode (not Model mode), best if you go to Frame Zero on the Frame Chart. 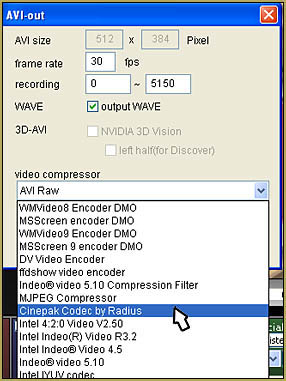 All
ready? All
ready?Go to Render to AVI in the File menu. A navigation window pops-up asking you to name your new file and where to put it. then THIS window, at right, pops-up. You need to choose the best compressor for your video render. Microsoft Video 1 is going to work, no problem... it offers a small file size but it DOES have a coarse resolution, not very good for showing-off your work! RAW is the finest rendition... but it makes HUGE file-sizes... like Gigs... huge! It might lock-up your computer when you try to play that finished video. Cinepak Codec by Radius is one included in MY set-up and it has worked very well for me, giving nice sharpness and reasonable file size. As you become more competent with MikuMikuDance and need to improve the quality of your finished product, you will want to research the best Codecs for your use. Search LearnMMD.com for CODECS to see our several articles. ... I am using the UTvideo codec these days... fast and sharp-looking. TODAY... right now... use that Cinepak codec or choose the Microsoft video 1. ... You will get good results with no hassle.  Take a look at that Tutorial... it shows you all of the steps you need to do to find a suitable MMD project and put it together so as to create your own music video from pieces downloaded off the web. Have fun with MikuMikuDance! MMD IS FUN once you start to understand the basics. The more you learn, the more you will want to know... and so the more you will learn... and the more fun it becomes! |
 |
||
| Dammy_Bone.pmd Inside your MODEL folder you will find Dammy_Bone.pmd The "Dummy Bone" is not a WHO... it's a WHAT! ... Not a character but a very handy tool. 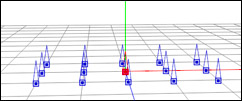 LOAD the Dummy Bone through the LOAD button, like any other model. You will see 15 bones, invisible bones... and each is addressable from the Bone Chart. In Page 3 we attached a Negi to Miku's finger... but suppose you wanted to MOVE that Negi separately from Miku... maybe have Miku drop it on the floor or make her throw it at Kaito! ... How do you move that Negi accessory?... ... 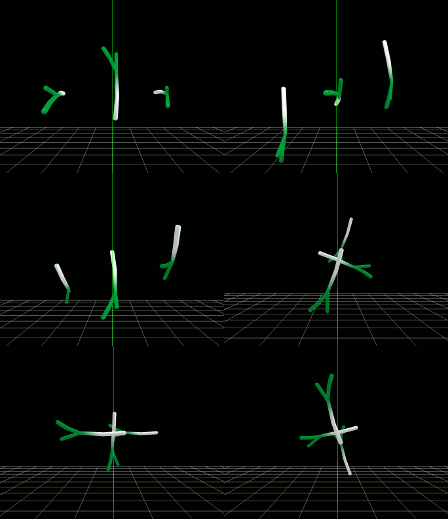 You
attach the Negi (or any other .x Accessory) to an invisible Dummy Bone
and then you move the Dummy Bone! The dummy bone is animated like any
other bone. Move it where you want it, maybe rotate it, a bit,
and then
REGISTER it's position. ... and then, some frames, later, REGISTER it,
again... and push PLAY and watch as your Negi moves smoothly between
your registered points. You
attach the Negi (or any other .x Accessory) to an invisible Dummy Bone
and then you move the Dummy Bone! The dummy bone is animated like any
other bone. Move it where you want it, maybe rotate it, a bit,
and then
REGISTER it's position. ... and then, some frames, later, REGISTER it,
again... and push PLAY and watch as your Negi moves smoothly between
your registered points.Included in MMD's basic accessories are Lights and Lasers. They are all .x accessories. To animate them, attach them to dummy bones. In a complicated stage set-up, it's not uncommon to load a dummy bone several times... giving you, maybe, 45 invisible bones (each with a light or an accessory) to control. LearnMMD.com has SEVERAL Articles/Tutorials about Dummy Bones. |
|
||
Adjust Accessory Parameters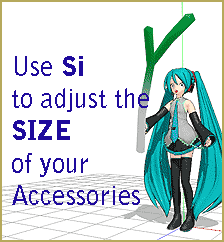 What
happens if you load your Negi accessory... and it is too big! What
happens if you load your Negi accessory... and it is too big!You will need to FIX it. 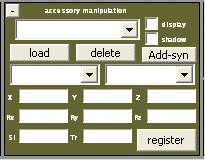 Si is the SIZE box... enter 1.0 inside that box for "actual size" or enter decimal fractions for smaller (0.8 = 80% size) or larger numbers for larger sizes (3.40 = 3.4 times larger than the original size) The Tr box controls the transparency of your accessory. Generally, the values Registered there will "move" like other registered bones. If you enter a small Si size value in frame 52 and then a large size in frame 150... and push Play, you will see the item smoothly grow in size in-between those two registered points. Transparency works that way, as well: You can start with a value of 1.0 and then, later, a value of zero... push PLAY, and by the time you reach THAT frame, the object will have faded-out, altogether. |
|
||
|
...
on Page 5,
we will look at Making an MMD model, Downloading models and Translating models... with the most brief intro to PMDE/PMXE - |
|
||
| Step-by-Step instructions for MikuMikuDance | |||
 |
|||