
 |
||
|
LearnMMD.com's START HERE Page ... PAGE 8 Step-by-Step instructions for MikuMikuDance |
|||
|
|
|||
|
Page 1 covered some basic-basics. Page 2 covered Diamonds and loading a Stage and Accessories. Page 3 introduced us to making saved Poses, making and using saved Motions, and downloading Motion files. Page 4 looked at Saving your animation and making your video... and Dummy Bones and Adjusting the parameters of .x Accessories. Page 5 looked at Making an MMD model, Downloading models and Translating models... ... with the most brief intro to PMDE/PMXE Page 6 introduced MikuMikuEffects: MME and suggested a few effects you will want to have in your MME arsenal. AND... we lit-up Trackdancer's LearnMMD Stage using the AutoLuminous effect. Page 7 took a look at having multiple models on-stage using the same motion data by using Apply Center Position Bias and by using Motherbones. Here on Page 8 we discuss "smooth motions" and "interpolation curves" to control a motion's acceleration. You might think that since MMD makes smooth motions from one registered diamond to another, that a "smooth motion" would be easy to create... and... it is... but you have to do it properly. Each motion has a set-up, a duration, and an end/or set-up for the NEXT motion. See this Motion Making article. The Set-up is your preperation for the new motion. If your model is standing there in Frame zero... and you want her to suddenly reach above her head in frame 80, you make that new pose in Frame 80. If you push PLAY, you will watch the smooth motion as the arms raise from Frames zero thru 80. To make the arms seem to pop-up, you will want to keep the arms down until about Frame 70. So, you can copy her Frame zero pose into frame 70... NOW push play and watch the arms stay down until they suddenly fly-up! |
 |
||
| When
doing Lip-Syncs... it is very important to create short, sharp
lip-flapping motions. You DO that by setting-up each mouth
position before making a new position. Duration is how long you want that model to hold her arms up! If you want her to hold her arms up for a full second before moving them again, you need to copy the diamonds of that pose and paste them into place 30-frames later. That can be the end of the motion... or you can now get ready for the NEXT motion. Timing is everything... MikuMikuDance runs at 30fps... so, as you plan to move your model, you must know that 30-frames will equal one second of animation. 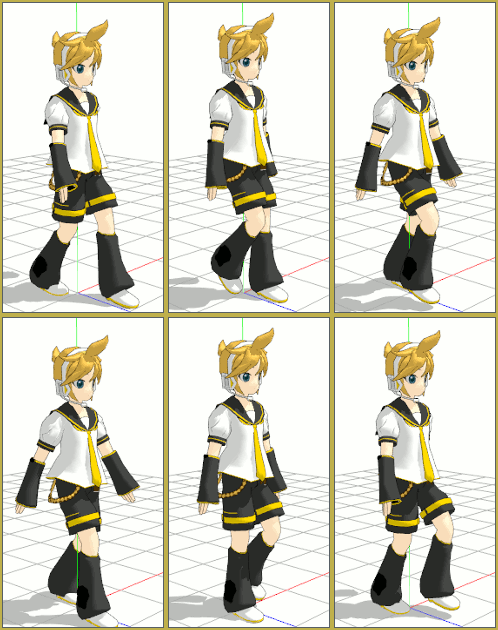 This walking motion was designed around one full cycle per second... 30 frames per cycle. If I had chosen to do it within only 20 frames, he'd be walking too fast... or in 45 frames, he'd be slow-poking along. That walk is pretty nice... and it's only 30-frames long... (only 29, actually as it is a repeating cycle with frame 30 being identical to frame zero.) I could select all of the diamonds in that animation, frames 0 thru 29 and copy/paste at frame 30 and again at frame 60 for a 3-second, 3-steps animation. |
|
||
| My "The Wind-up and the Pitch!"
animation is 222 frames long. I started by going online to find a reference image... something I could use as a model as I set-up my poses. I was lucky and found a nice sketch of a baseball pitch, step-by-step. I added that red dot to indicate the positions I chose as key frames: 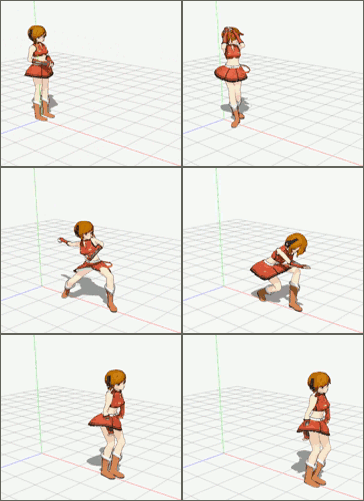 Note that our MMD models are not necessarily human-proportioned... you always need to work-around the fact that, maybe, the arms are not long enough or her legs are too long or her head too large.  TIMING is Everything! How far apart are those pose frames? ... How do you know how many frames apart they should be? I used myself as a reference... I pantomimed that pitching action, trying to get a feeling for my body's motion and timing. After making those key-frame poses where I thought they belonged on the Frame Chart, I was able to copy/paste/move each one, a little closer together or a little farther apart, until the timing "looked right" when I pushed PLAY. |
|
||
Acceleration:
The interpolation Curve!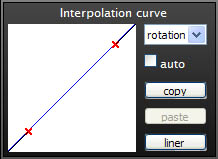 The
interpolation curve gives you a visual for the acceleration of a bone's
motion. The
interpolation curve gives you a visual for the acceleration of a bone's
motion. The default curve is this "straight-line" curve. It shows that a bone's motion starts, proceeds, and ends at a steady rate. The next motion will start abruptly when this motion is finished. 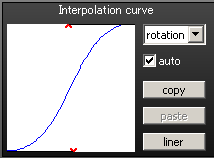 The
NATURAL curve... The
NATURAL curve...This curve, at left, is a nice, typical, natural motion curve. We see a bit of acceleration into the motion and a slowing of the motion as it nears completion. This curve works well for Camera motions as well as most model motions. READING the curve... The motion starts at the bottom of the chart and moves to the top. In that Natural Curve, the motion starts nearly horizontal... almost no motion at the start. Then as the line gets steeper, the motion is accelerating. At the top of the curve, the line starts to go horizontal, again, meaning the motion is slowing at the end of the curve. 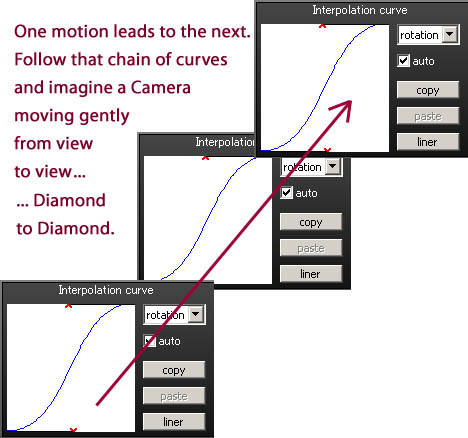 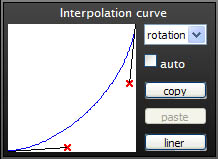 This
setting yields a slow start to a high-speed finish... imagine a
hammer-swing motion! This
setting yields a slow start to a high-speed finish... imagine a
hammer-swing motion!... starts slow and accelerates to the end of the motion.  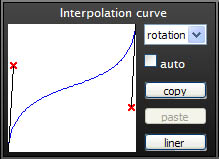 This is an
interpolation curve for a motion with a sudden start and a sudden
finish. Because the curve is almost horizontal in the middle, the
motion will appear to "slow" after that hot start... and then speed-up
at the end of the motion. This is an
interpolation curve for a motion with a sudden start and a sudden
finish. Because the curve is almost horizontal in the middle, the
motion will appear to "slow" after that hot start... and then speed-up
at the end of the motion. USING the CURVE USING the CURVEThe interpolation curve must be added to every diamond in which you wish to see an acceleration. That straight-line is the default curve. See that drop-down in the upper right, there... you can choose to affect only one of the X, Y, or Z motions, only bone rotations, or All. I try to remember to click All. To apply a curve to a diamond, highlight that diamond (make it red) and then adjust the curve as you wish for that diamond. I click COPY and then Paste on that same diamond to be sure it is there. Now that the curve is Copied, you can select a new diamond and click Paste to apply that same curve to THAT diamond. Do that repeatedly to add the same curve to multiple diamonds. 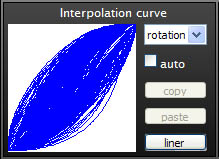 When you download a complicated motion file, and
apply it to a model, you will see ALL of the curves overlapped as a
single image. When you download a complicated motion file, and
apply it to a model, you will see ALL of the curves overlapped as a
single image.Amazing!  LearnMMD.com has MANY interpolation curve articles. |
|||
|
...
More to come... soon!
- |
|
||
| Step-by-Step instructions for MikuMikuDance | |||
 |
|||