
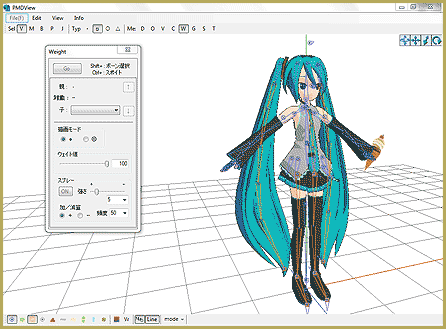


![]() Natural sunlight as interpreted by MMD is not white light. MMD by default uses a neutral grey light which emulates the photographic standard of mid-day sunlight in a temperate climate.
Natural sunlight as interpreted by MMD is not white light. MMD by default uses a neutral grey light which emulates the photographic standard of mid-day sunlight in a temperate climate.
But why is this important?
If your objective is to create photo-real images using MMD, this is of paramount importance, especially when used in conjunction with effects like Ray-MMD.
Ray-MMD: The Art of painting with Light
But, before we even get to the fine details, the most important thing is to understand how the default lighting effect works and what happens when Ray-MMD is added. If you understand these two key concepts, you will be able to render almost any scene under any type of lighting conditions.
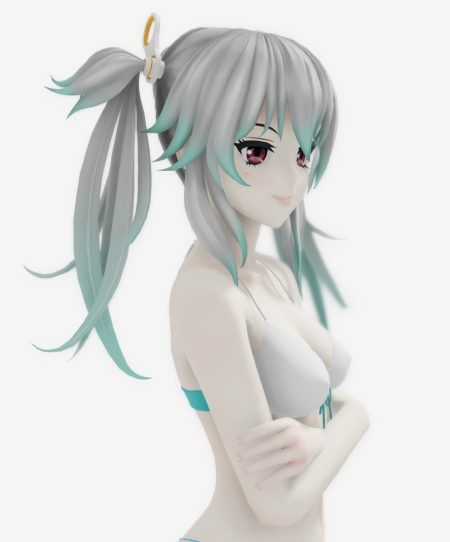
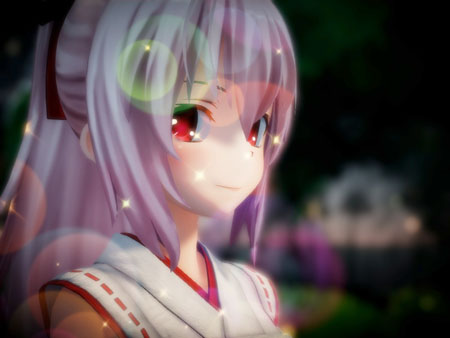
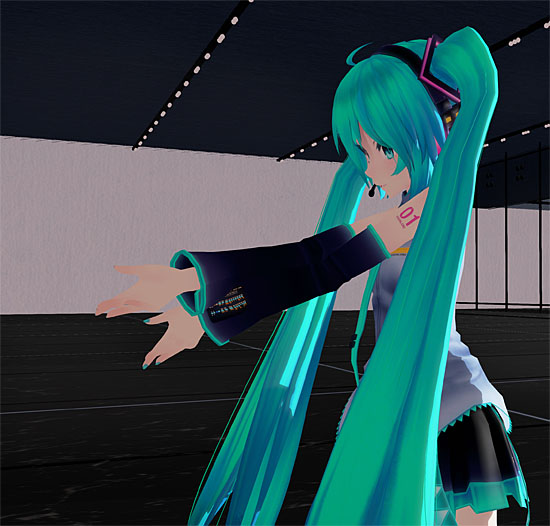
So let us look at Kanon, our model for this article, posed and rendered using just the default lighting system.
Pay close attention to what is happening in this image. It is key in fully understanding and mastering the MMD lighting system. Bear in mind that the render only uses the default lighting set up. Look very closely at how the light works on the Kanon model. The skin tones especially are not one homogeneous color but works on a scale of light and dark tones. This is good as this is how real light works on objects in real life. If you look at your arm for a moment, you will see the exact same type of light play at work with one major exception: the default lighting engine used by MMD does not factor in ambient lighting.
In the real world, objects, including ourselves, are illuminated by direct light sources as well as reflected and ambient light sources. Basic lighting systems in 3D programs do not generally factor in the effect of ambient light sources. This is because of the huge amount of calculations necessary which will tax the capabilities of most graphic cards to their maximum potential and with most graphic cards, is not a workable solution as performance will be hugely negatively impacted.
For computers to generate photo-real imagery, the best systems use a method known as ray tracing. In a nutshell, these systems emulate how light works in a virtual world much like it works in the real world: it calculates how light falls directly on objects and how they are reflected back from one surface to another. This type of calculation is very slow and will not work for dynamic lighting systems where models need to move around such as in computer games and MMD.
This is why you need to use lighting augmentation systems such as Ray-MMD.
Painting with light…
What Ray-MMD actually does is exactly what is stated above; it factors in both light directly falling on surfaces as well as light reflected off surfaces but unlike a true ray tracing system, it uses an aggregate calculation system. It is rather crude but the method works and it is fast and results in very credible renders.
For Ray-MMD to work properly, it must have an environment to work with, it cannot just use the default set up. Forget anything you may have read or learned about using Ray-MMD elsewhere on the Internet and especially on YouTube where claims are made that you can use the effect without a sky box. Ray-MMD sky boxes are special and are used as an integral part of the system in calculations. Anyone who claims otherwise does not know what they are talking about. But you may not always want the sky box to show and there is one actually provided for this purpose: Sky Hemisphere / sky with box.pmx
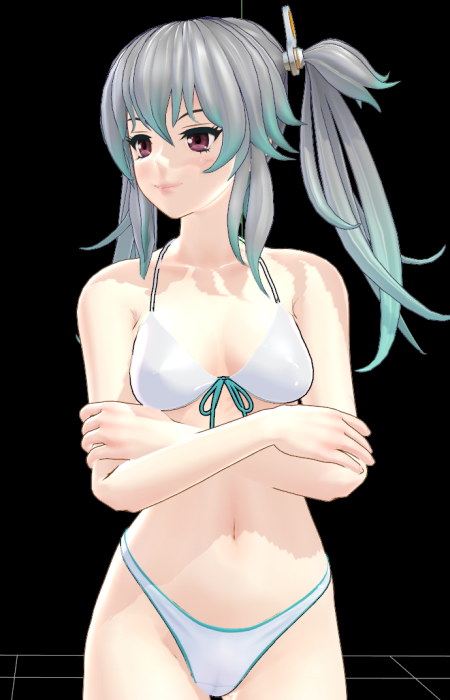
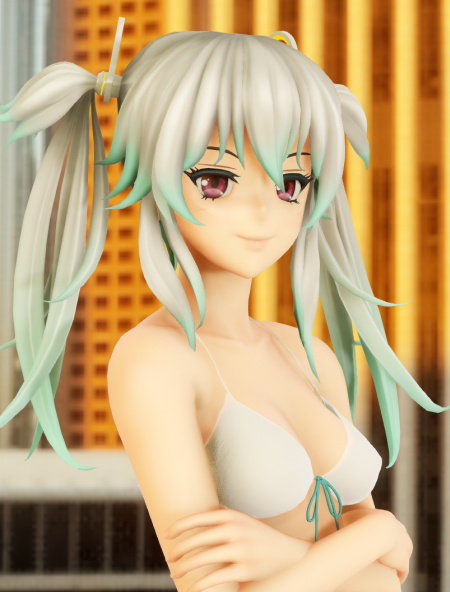
The image above is Kanon again with the sky box loaded as well as ray.x and ray_controller.pmx. The same MMD default lighting is used as before; also we have switched off anti-aliasing, the axis display as well as the default ground shadow. Here we have a very good illustration that shows exactly how Ray-MMD works.
For the moment, the system treats the Kanon model exactly as if she were just a part of the background. But notice how much smoother the lighting is overall and this is because the system has also factored in the environment immediately around her. However, it has not yet factored in the qualities of the materials that makes up her model, such as her skin, hair and clothing.
Different materials have different lighting behaviors. A piece of white tissue is not as reflective as a piece of white letter paper; plus it has more grains and other factors that helps us visually differentiate between the two. Ray-MMD materials which you add to the model’s parts tells the program exactly how each material reacts to light.
To make Ray-MMD react to, or rather, factor in Kanon we need to do two things:
- Add the Main.fx to her model to tell the system that her model needs to be accounted for as a major entity.
- Turn on the sky box lighting environment by adding skybox with lighting.fx to the sky box.
Once these have been added, Ray-MMD we will immediately see a dramatic difference in how she is rendered as shown below.
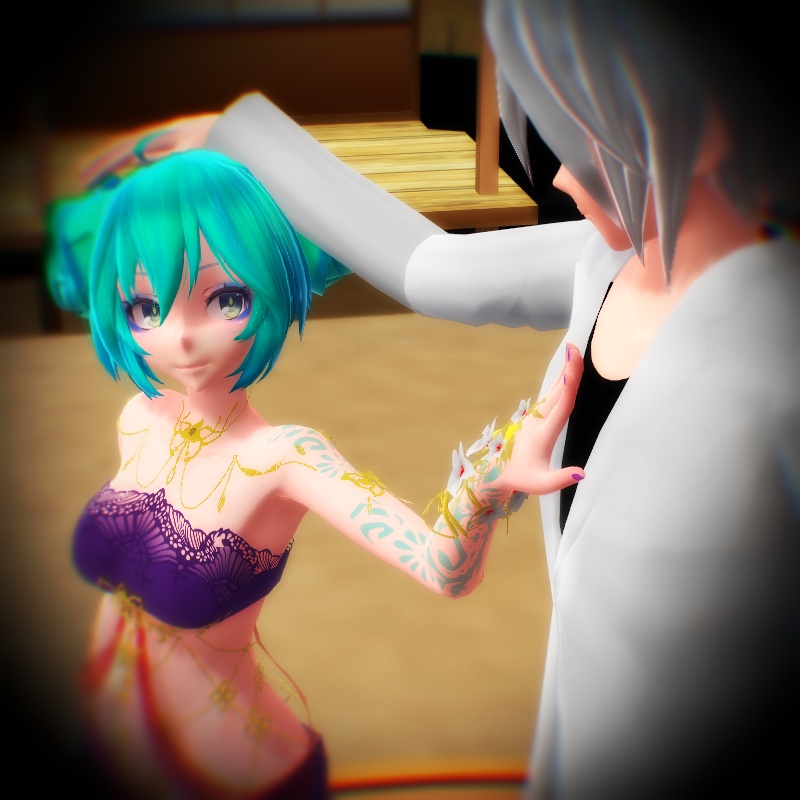
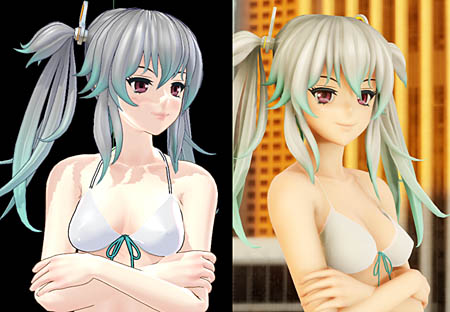
But to prove to you that what is being stated is absolutely accurate, for the moment, let us switch out the sky box using one with a much more colorful environment.

Because we have not specified specific materials to the Kanon model nor correctly set up the lighting environment, the full effect of using an environmental sky box might not immediately be apparent. But even a cursory examination of the image should reveal that the Kanon model has picked up some of the hues from the surrounding simulated environment.
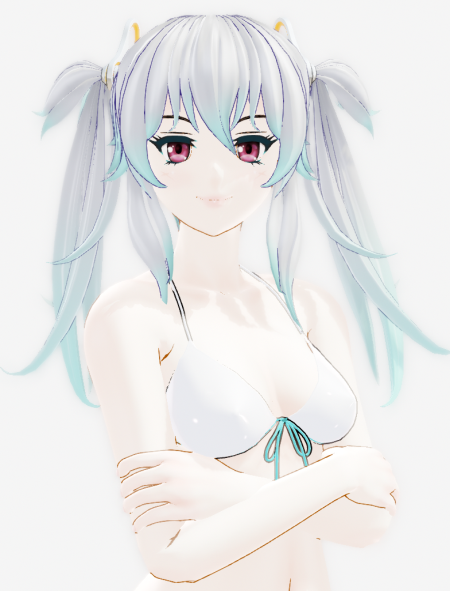
After the material specifications have been applied the next step usually is to adjust the environmental lighting using the controls available via the sky box and ray_controller facial controls. These controls are used to set up the behavior of the lighting environment.
As there are other articles on this site that cover the applications of materials and how to tweak the environment; this will not be covered in this article. For our purposes, please look at the image below or at the top of the article as examples of what we have done. Note that although the materials specifications for both images are identical, the lighting environments are different. The top image uses a cooler approach wherein the image below uses a warmer scheme. We did it this way just so that you can see that we can actually “paint” with light. Similar set ups but very different, if subtle, outcomes.
This concept of painting with light is not new. Artists since at least the late Renaissance have been studying how light behaves on different types of scenes. The image below shows exactly the type of effect that classic artists were trying to achieve with pigments alone in trying to faithfully capture or recreate lighting in their scenes to create realistic imagery.

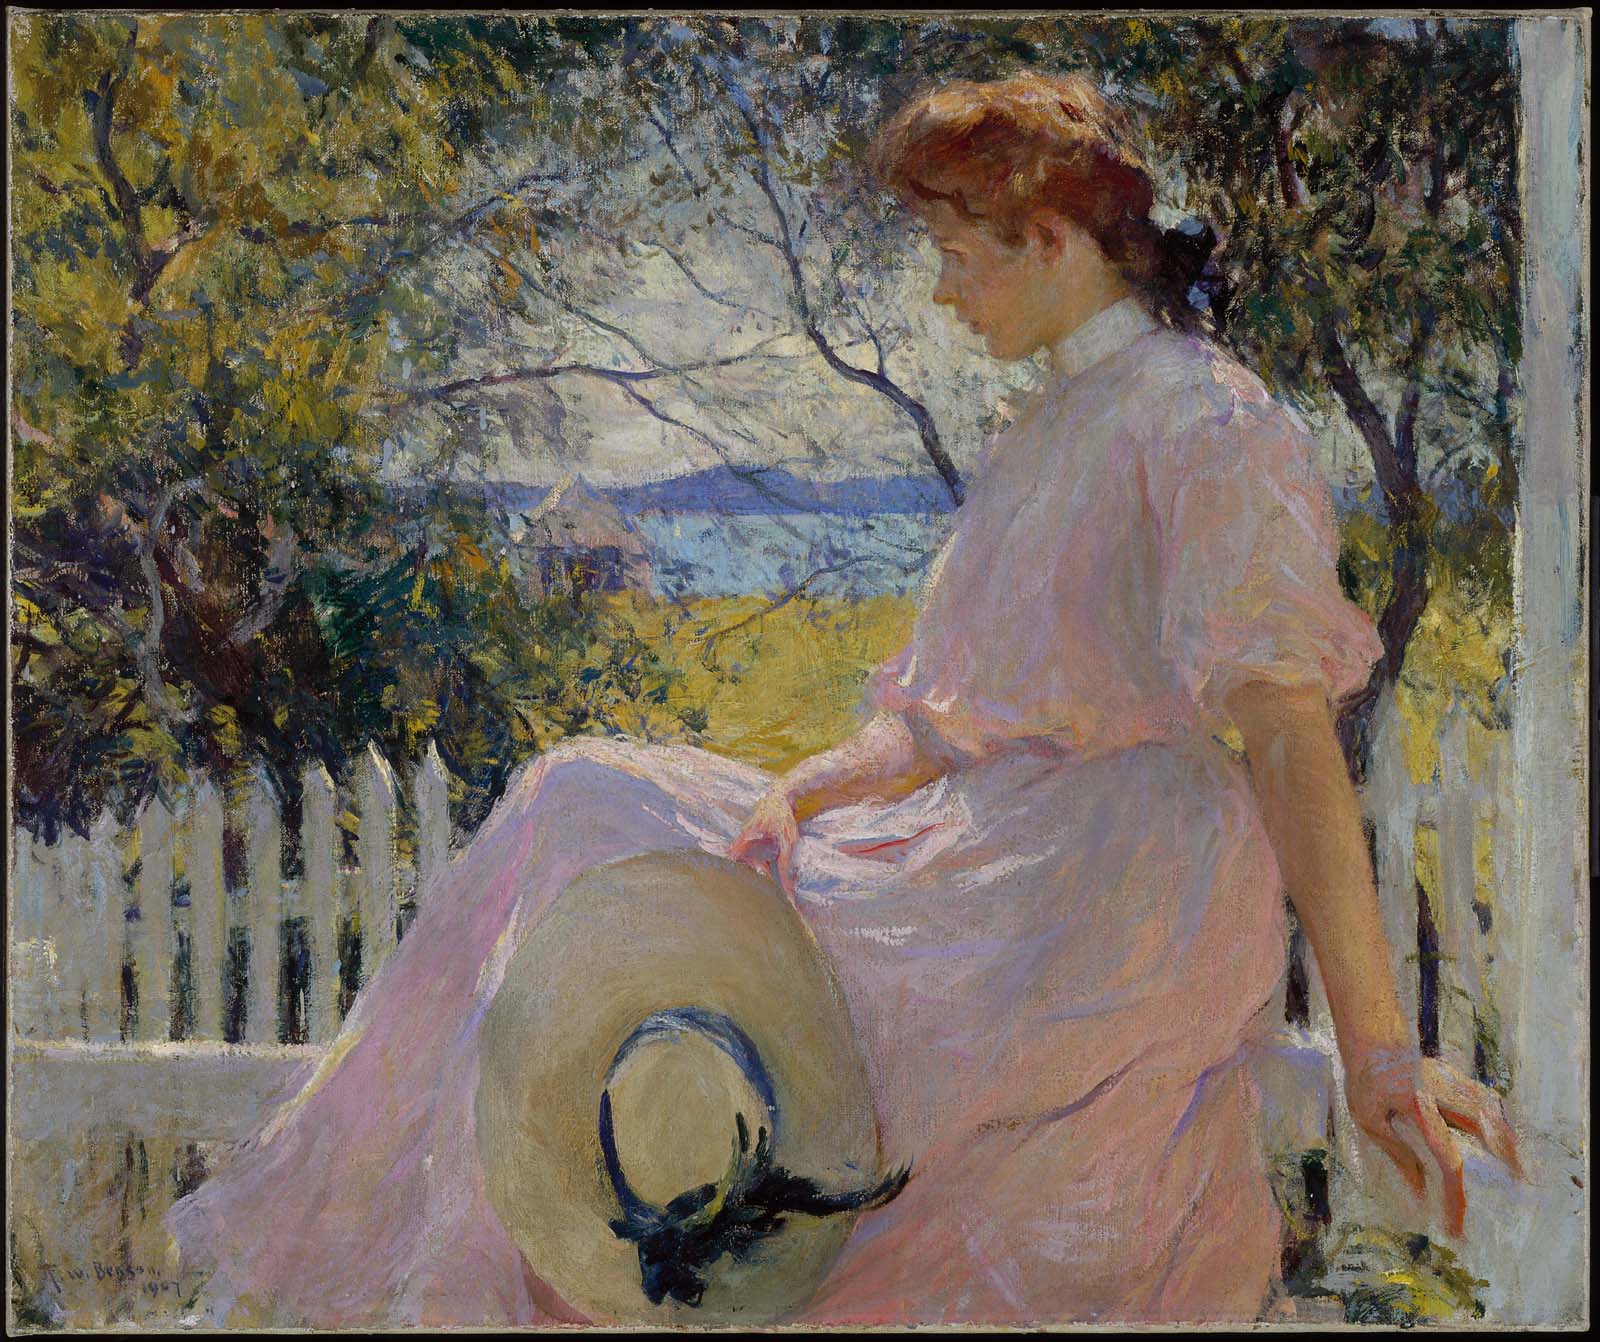
We on the other hand, with tools like 3D modeling programs such as MMD with Ray-MMD or similar effects, have at our hands, the means to completely control the lighting environment using “scientific” methods. Like artists of the past and a lesser extent photographers, using computer imagery tools we can also create any lighting situation we could choose to imagine or simulate, but arguably with much less effort.
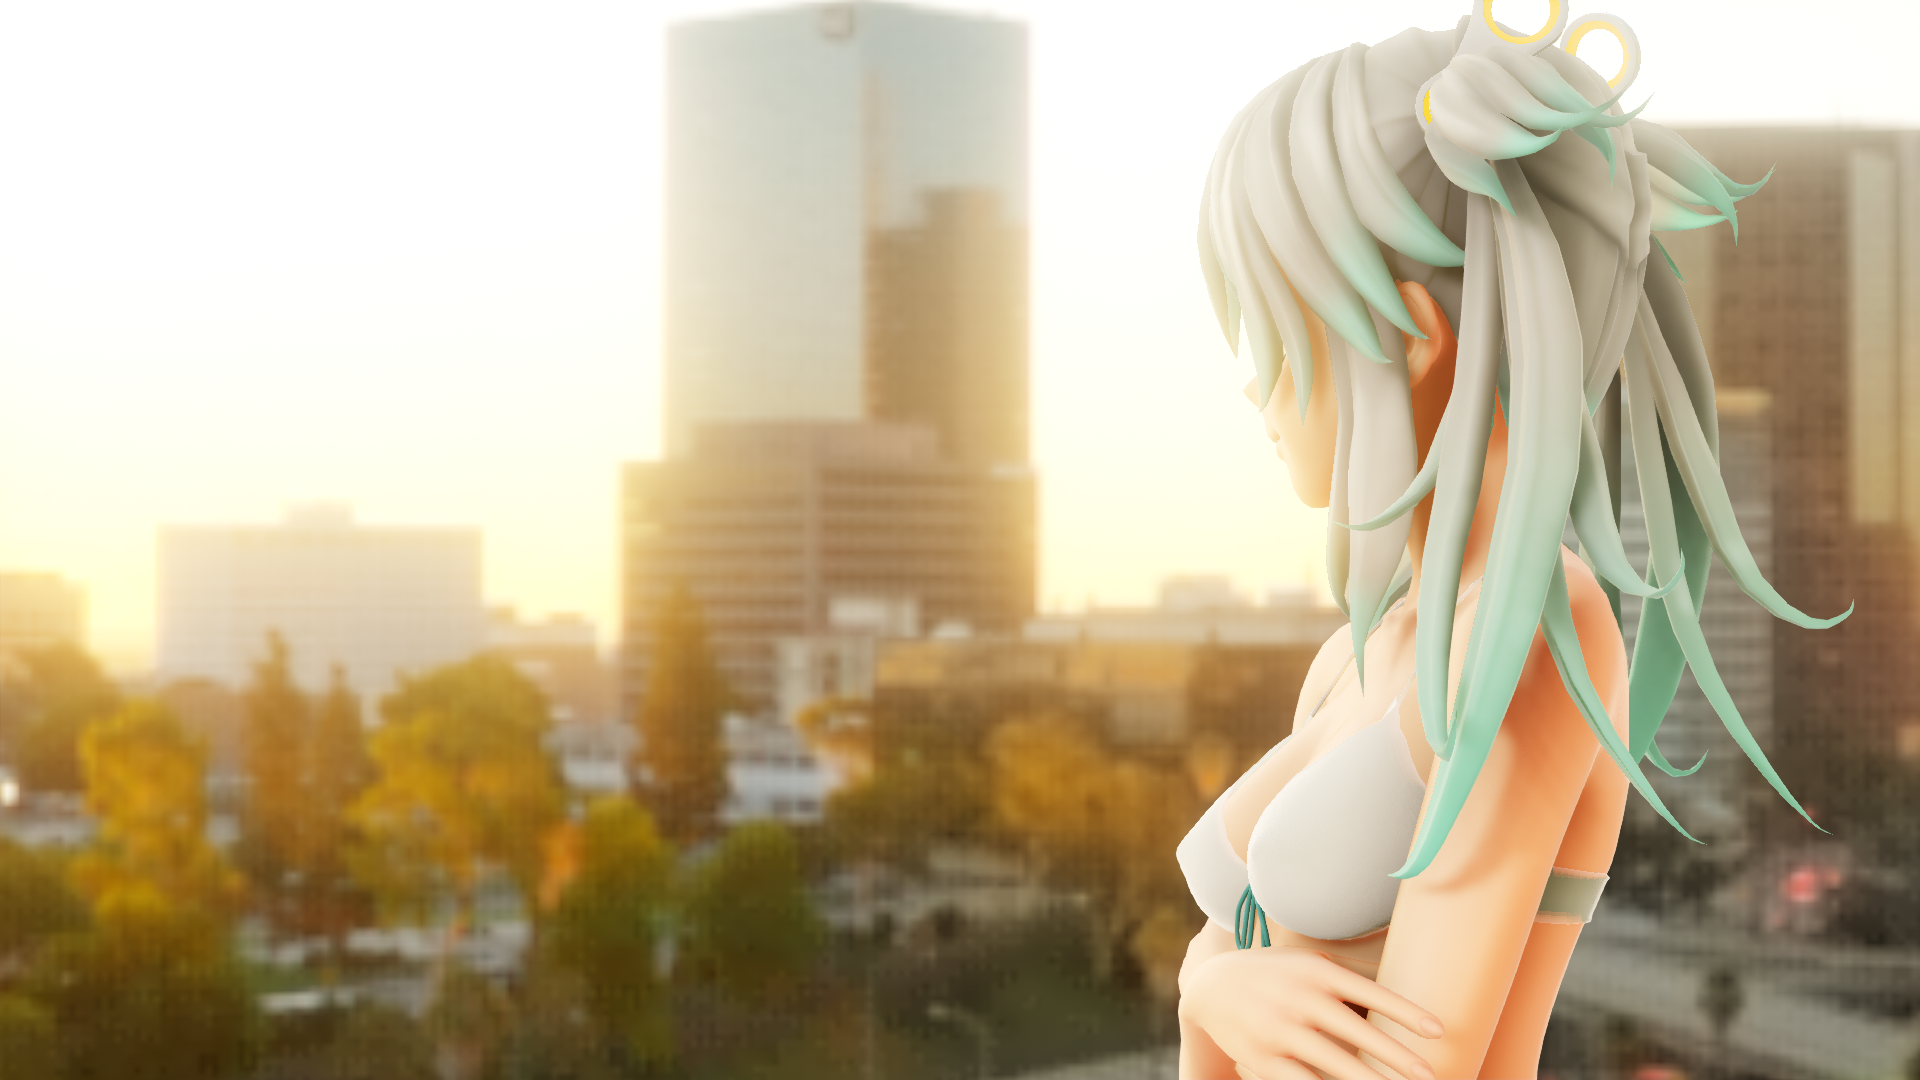
The last image below uses exactly the same set up as the last picture of Kanon shown above. The only difference, is the angle of the shot.
In all honesty, setting up scenes in MMD using Ray-MMD is really stupidly simple; the real trick is getting the most out of it to create really powerful imagery. Neither do I pretend that what is presented here is even competitive to the works of the examples by the master works shown above, but to fully understand what I am trying to say here, please click on the thumb image below to see what the “whole” picture actually looks like.
The main point here is that in our modern era, with easy access to powerful render systems, even with anime girl models, one can achieve really impressive and meaningful results.
As always, thanks for reading.
CREDITS
Kanon model by Kakomiki
MMD 9.31
Ray-MMD 1.5.0
Art images were sourced from the websites linked to the images and displayed here under Fair Use guidelines.
– SEE BELOW for MORE MMD TUTORIALS…
— — —
– _ — –
![]()


and this gave absolutely no tips on how to REACH that setting. please guide us from point A to point B, not just show the before and after. “play with the settings” does not help one bit. this is not a tutorial, this is a showcase. as it is on learnmmd.com, it should be a tutorial.
Thanks for that note! We DO have many Raycast/Ray-MMD tutorials on LearnMMD.com… maybe one of those will help you… ?
I’ve searched, but none of them actually truly help with getting the results displayed in this article. It’s not a personal jab at the website, I appreciate what you guys do… It’s more frustration with Trackdancer for posting a tutorial in name only.
Thank you for sticking with us at LearnMMD! … You can contact Trackdancer directly through his Deviant Art pages. … Be pleasant and proper and you will have good communication. Don’t point out that his tutorial wasn’t a tutorial… just ask him your questions. (If you bite at him, he tends to be offended.) “:o).
Ray-MMD 1.5.0 – 11.1.2018.
Ray-MMD 1.5.2 – 13.3.2018.