Raycast / Ray-MMD
is a powerful, complicated MME effect…
… so much MORE than an “effect”!
We have been getting MANY Comments from our readers about how to use Raycast and then, “Why doesn’t Raycast work?”
The answer:
Raycast / Ray-MMD doesn’t work like any effect you have ever tried, before. – Raycast is NOT an effect, at least not “just” an effect… It is not “just” a “shader”. Raycast is a full, global environment control system for MMD involving image rendering with total control of textures, light and shadow. – You cannot just load it to see the effect; it does not work that way. Raycast / Ray-MMD is a complicated system that requires your trained, practiced adjustment of the many settings and tools.
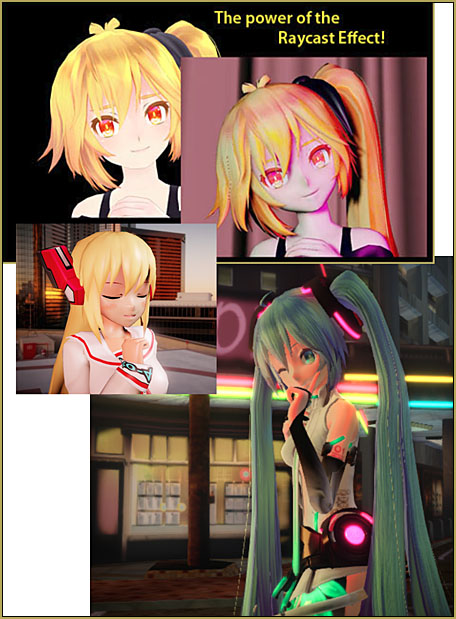
So… Let’s DO it!
To use Ray-MMD, you should be running a 64-bit Windows 10 PC. I used to run it on an older standard 32-bit XP machine, and I did see some of the photographic rendering of my models, but I could not control and had no access to the many tools that a Win 10 64-bit machine will allow you.
Basic instructions in the most simplistic form:
I find that Raycast is a complicated effect with “more than one way to skin a cat”… so these are the steps I go through to invoke Raycast:
- Open MMD and create your entire animation, saving Raycast as a final step. (Raycast is “computer intensive” and your machine will hardly be able to crawl once you load Raycast. If you load it early in your project, you will go crazy waiting for your computer to do every little step. Save Raycast for last.)
- Load a Skybox model… and ignore it, for now… just let it be there, in the way.
- In the MME menu (upper right of MMD screen) Select Effect Mapping, select your model, and Set Effect by navigating to your Raycast folder and inside the Main folder, choose main.fx. Your chosen model turns black. Close the MME menu.
- Now, as an Accessory, load the ray.x included in your Raycast folder. Your computer, at least MY computer, will lock up for several minutes as it crunches the numbers for you. When it comes back to life, you will see your model is now enhanced; dark, but enhanced.
- Load the ray_controller.pmx model. Fiddle with the many morph-slider options. Build the light on the stage and model… no “tutorial” here for that… you just need to try everything and see what you like.
That got you the most basic start…
While working with my Windows XP computer, I had almost no control of the settings in that PMX Controller model… but I DID discover how to add some lighting… (NOTE: The following steps will, indeed, add light to your picture… but the PROPER way is to use more powerful tools.)
- From inside the Lighting folder, load the DirectionalLight.pmx model. Before you do anything else, turn up the R+, G+, and B+ morph sliders to mid range. You will see nothing on-screen… until you use the Y-Rotate bone control to swing the light around so that it shines on your model. Use the XYZ rollers to aim and position the light on your model… and now go back to those R+, G+, and B+ sliders to get the color of light you desire… go back to the Ray_Controller model adjustments to modify what you see… keep working both ends against the middle until you like what you see. Remember to go back into Camera mode to see the REAL look of your project. You will be striking a balance between the Camera view and your Ray_Controller view. Keep at it… this is the “fun”… yes?
- Load a second DirectionalLight.pmx model to light the OTHER side of your model… and go through all of those adjustments, again… Looking good, right?
- See the GTA tutorial for a method to hide from sight the Skybox model, the Raycast_Controller and the DirectionalLight models.
So, we got your feet wet…
ALL of that, above, just scratches the door open for you. If you want too learn to run Raycast / RayMMD, you will have to study all you can find on these pages… as well as what you can find as you search the web.
Learn by DOING!
We cannot give you the answers… almost no point in ASKING! … There are many ways to approach your project, many ways to mix and match the many tools and sub-effects within Raycast… and everyone’s experience differs from the next person’s. So, learn by doing… experiment, see what works, if it doesn’t work the way you want, dig more deeply until you find your solutions.
SEE the many Ray-MMD articles/tutorials by Trackdancer on LearnMMD… he has worked with MANY aspects of Raycast, getting fantastic results!… and is he still uncovering, learning and sharing more knowledge, all the time.
Good luck! … Have fun with MMD!
– SEE BELOW for MORE MMD TUTORIALS…
— — —
– _ — –







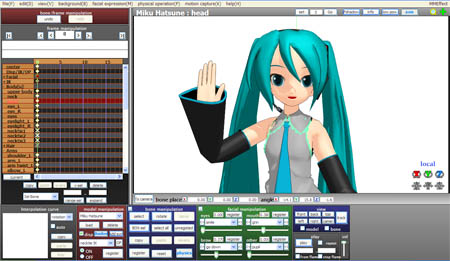


could someone help me? i’ll try to describe my problem as detailed as possible-
raycast doesn’t seem to work on my mmd. i have the correct versions, so i’m sure it’s not an issue with those.
everytime i try to load in any effect, nothing happens. nothing changes when i load in effects -this includes main.fx- , nothing happens when i load in the ray controller and fiddle with its settings, hell, nothing happens with the skyboxes and etcetera.
as for the mme tab, whenever i open it with the intent of looking for my model, it does not have any name. no matter what the thing is, it would not have names. any additional tabs aside from “main” would not appear as well.
nothing appears on my model, may it be light or darkness. it’s just the same old mmd.
So I use raycast for everything I do. Recently I spent a few months off MMD and now whenever I try to use raycast after I put in raycontroller it closes my MMD and says “Failed to reset MikuMikuEffect”. This is on any model.
Also whenever I open old motions with raycast it works just fine.
I’m using 64 bit MMD and MME on a Windows 10.
I just want good looking models back man.
Do you mean you load the controller before ray.x? Could you give me a more detailed explanation so I can try to help you please?
I have the exact same issue, except this is my first time using raycast, someone told me that my pc couldn’t handle it so I’m stuck using 4.0 beta raycast, my pc is also windows 10 and a 64 bit. it says this whenever I go into the accessory area and try to load the ray.x file