


![]() What are Cycles Materials? How do you use cycle materials for textures? What’s the fastest way to make realistic textures?
What are Cycles Materials? How do you use cycle materials for textures? What’s the fastest way to make realistic textures?
I’m in a bit of a “little old lady who swallowed a fly” situation.
This article is about using cycles materials for textures. Cycles Render is an engine within Blender. So, you guessed it. It’s another Blender tutorial! I’m using version 2.78c.
Cycles Materials For Textures in Blender…
Nice Textures for MMD Fast!
Generally, I’d start right off the bat. But, I want to explain what’s going on. I have plans for a zero-to-450 animation, but before that I need to learn MMD effects and make models for the video. I’ve had some success with Ray-MMD.
THANK THE GOOD LORD FOR INDONESIAN MMD
Thanks to one of their videos, I was able to actually GET MY SKYBOX TO WORK!!!
Old models aren't made for effects in that NONE OF THE MATERIALS ARE NAMED, so I just applied one effect to the entire model and she's a pretty statue now. pic.twitter.com/dDmBxkYZ83
— Mae Blythe (@annamaeblythe) December 5, 2018
And that success came from watching a YouTube video five hundred times, so I will need to write an article based on that video so that I have it for reference. Then, I need to make bases for the models I will make for the zero-to-450 video. Why bases? So that I can use them to write articles for Models and Creators, of course!
Of course, to properly immerse myself in bases, I need to practice making parts for existing bases. I finally vanquished skirt physics, but I want to save writing about that for after I’ve done articles about textures and spheres.
And maybe I’ll be cheeky and insert links to all of those articles after they’re written! But for now, let’s start with textures.
How can you use Cycles Materials for Textures Without Permission?!
All of the materials I will use have been licensed under CC-Zero.

That means that anyone can take the materials provided and do anything with them. In other words, these files are in the public domain. If I wanted to, I could take a screenshot of the nodes and noodles and put them on a t-shirt. I could sell the t-shirts and no one could stop me! Don’t be afraid to use things in the public domain. You do not need to credit anyone when you can verify the licence is CC-Zero.
However, always double check the licence is CC-Zero. If it is not, always follow the rules of the creator and the terms of the licence.
Where do you get Cycles Materials for Textures?
Today, I will be using Fabric Materials Pack for Cycles created by Eduardo Maldonado Malo.
However, there are tons of cycles materials for textures floating around the internet! In addition to the materials on Blendswap, there are entire sites dedicated to cycles materials! Blendermada is dedicated solely to materials, with the bulk of them being for the cycles engine!
Now to Begin!
As an experiment, I created a tank top mostly using the shrinkwrap modifier. It’s not great, but it will work well enough for this tutorial!

I’ll skip straight to the cycles materials for textures part. For a brief walk-through of UV mapping, you can check out this part of my model making tutorial. For an objectively better explanation, read through Bandage’s tutorial on UV mapping.
The first thing we need to do is, of course, change the render engine to Cycles. It’s as simple as pressing one button!

Now that the engine is changed, we need to add the material to our blend file. The best way to do this is to append the material from the file you want to use. While in “Object Mode”, go to “File”, then “Append”.

Select the Blend file the material you want is in. You’ll be greeted by this screen:

Click on Materials and then select the material you wish to use. I’m choosing one of the satin materials. Next, we need to assign the material to the top. In Object Mode, select the top. Go to the Materials tab and click the orb next to the “New” button. Scroll through the list to find the name of the material you just added.

Now, all you need to do is change the view port shading to Rendered and you can see your part with new texture!

However, it doesn’t look so great. Let’s fix that!
Setting up Lighting
There are many, many ways to set up lighting in Blender.
One way is simply to add a lamp. In this example, I added a Sun and left all of the settings as default.

However, the most fun way is to use an HDRi. An HDRi can be any image at all. The way you add one is by first going to the World tab and clicking “Use Nodes”.

Click on the little arrow button next to the grey color blank and choose “Environment Texture”.

Now, just click the open button and find the image you want to use! If everything went right, you’ll be looking at something super cool like this: 
Don’t worry about the graininess. That is just Blender being a friend and not using too many resources!
Baking the Cycles Material for Textures
Alright! Now we just need to bake the texture! But there’s an issue.
![]()
This drove me bananas! Absolutely bonkers. To bake your materials to images for use in MMD, you first need to add an image to the material.
For this, my suggestion is to go to the UV editor view and create a new image and save it as an image. Once you’ve got that done, you can go into the Node Editor.


To add a node, you press “Shift + A”. Add an “Image Texture” node and load the image you created in the UV editor view.

For someone who has never heard of Nodes, I’ll make it simple. To break a noodle, click on the end point and drag it away from the node it’s touching. To connect two nodes with a noodle, click and drag so you make a noodle connect the two boxes.
Click and drag around the noodles until you find a place where you can put the image texture so that it affects nothing while still being part of the material. A hint for people who are having trouble is the “Mix Shader”, but hopefully it won’t come to that.
Once you’ve done all that, you can bake!

The best way to approach this is to render off different bake types and then overlay them in GIMP or Photoshop. Or you can just use the “Combined” bake type!
And then you wait. Once it is done, you’ll be looking at your new texture, ready to be slapped on in PMX Editor!

You can bake the different bake types if you want to do some editing using them later, as Bandages does in his skin tutorial.
Add the Material in PMX Editor . . .

And you’re done!
There’s a lot more work you can do to make it better. Sph files, toon files . . . But this is an awesome start that took almost no effort! Next time you’re making a model, think about using cycles materials for textures.
See you next time when I probably tackle making Sph files using cycles materials!
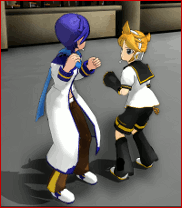
The base used is a TDA edit by Nashie-C. The cube was added for modesty.
– SEE BELOW for MORE MMD TUTORIALS…
— — —
– _ — –
![]()