![]() How can I rip models from Half-Life 2 into MMD? What programs do I need beside Blender to import models?
How can I rip models from Half-Life 2 into MMD? What programs do I need beside Blender to import models?
Make your own ripped models
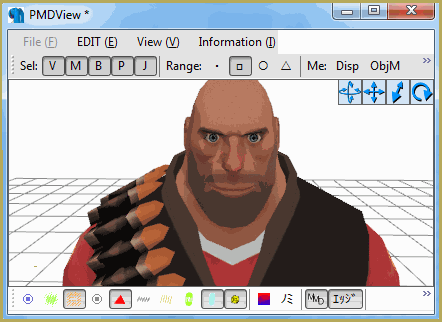
Recently, ZoidsFanatic already published an article about importing models from .OBJ files, which gives us a taste of using Blender as a medium to import models we like into MMD-friendly format with minimal effort. But what if some very particular model you wish to use is simply not available as an .OBJ? Obviously, you’d have to use more superstructure around Blender to make your model exactly from the source you need. In this article we’ll explore a process of importing models from Valve’s games family based on Source engine.
Step 0: prepare Blender
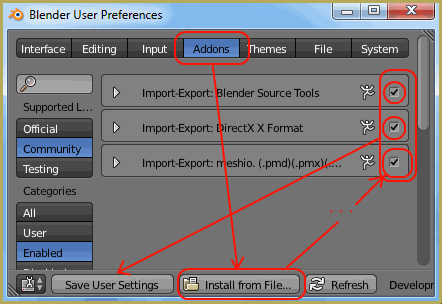 First, you need to download and install Blender. I recommend you to use the latest version (you actually do *not* need an additional plugin to export .X accessories, so no need to have an obsolete install just for that). Then you will also need two import/export plugins. There’s no Blender plugin for importing models straight from the proprietary .MDL format that Source games use (at least, to my knowledge), so we’ll have to resort to one more intermediate transaction. The plugin we’ll use for input is Blender Source Tools, which feeds on .SMD files that often work as a middleman between various 3D modeling formats. For output, we’ll need pymeshio plugin… http://sourceforge.jp/projects/meshio/releases/ … that produces .PMD and PMX files. Download both plugins, launch Blender, select File->User Preferences->Addons, and click Install from File. Find one of .zip’s you downloaded and install it, then do the same for another. After that, find both titles in the list of installed plugins (it will be a lot longer than presented in the filtered screenshot above) and enable them. Wait some time for them to activate, and you’re good to go.
Step 1: unpack .MDL game files
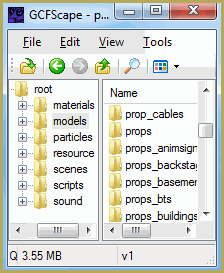 Some of Source games do not pack their files into archives; if so, you can skip this step. For others, you’ll have to unpack them first using GCFScape, one of “Nem’s tools” packages: nemesis.thewavelength.net/index.php?c=265#p265. Launch it, then find and open the directory file that contains file structure for the whole multi-part archive (in Portal 2’s case, it will be called “pak01_dir.vpk”, but there might be other variations). Models will be in the “models” folder (aside from .MDL files, there will be .VVD, .VTX and probably some more files with same first names, and you will need them all), and textures will be .VTF files in “materials/models” folder. Folder trees of these two trunks will be similar, but not necessarily the same, and file names for models and respective textures might differ. There might be some models that use several textures, and models that share certain textures; more than that, models themselves might be represented by several .mdl files, some of which would be useful to you, and others not. You can find and export those files you need, or you can export both trunks in toto and then look for what you need later (recommended).
Step 2: .MDL -> .SMD
 There are several tools that are able to do it, but I’d recommend Crowbar model decompiler, which requires less actions on user side, produces less junk files, and isn’t prone to crashing, unlike other programs known to me. Setup its options as shown in the picture. You may choose to decompile a single model whose address you feed to the program, or all models in its home folder, with or without subfolders, at once (unfortunately, subfolder structure will not be preserved in the output folder). Depending on what 3D graphic program will be using the decompiled product, there may be various types of files produced, but for creating .PMD files you will only need “Reference mesh SMD file” option. Hint: if you wish to decompile a particular model, but not sure where to look for it, you can use Nem’s Crafty Object Viewer: nemesis.thewavelength.net/index.php?p=45 to preview the .MDL file and ensure that it is indeed the one you’re looking for (if you only see empty screen when opening the file, press the down arrow key to make the model shift into focus).
Step 3: .SMD -> .PMD
Now it’s time to actually use Blender. Launch it, select (right-click) the obligatory Cube Primitive that is loaded by default, and press Del to wipe it to oblivion. Choose File->Import->Source Engine (.smd, .vta, .dmx,.qc), and look for a model you need in a folder produced by Crowbar. Then select File->Export->MikuMikuDance Model (.pmd), and type a new file name into a respective field. Hint: there’s a “Recent” panel on the left side of an Open/Save/Import/Export window. You can use it to memorize recently used folders and quickly switch between them.
That’s actually all you needed Blender for.
Step 4: Textures
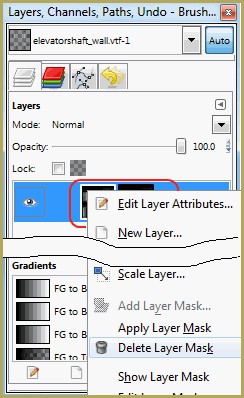 The model is practically ready, now you will need a texture to drape it. First, you may install Windows VTF Shell Extensions, which allows you to quickly browse folders with .VTF files right in Windows Explorer to find necessary files. Simply launch the program, and then switch Explorer into Thumbnails mode. To actually open files you need, though, you will need a gimp-vtf plugin for GIMP. Open a file, and check GIMP’s Layers window. If you see that a file is presented by two picture thumbnail side by side, right-click on any of them and select “Delete Layer Mask”. Then save the picture as a .PNG or .JPG file.
Your texture is ready.
So, what now?
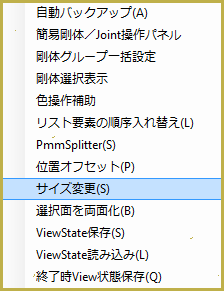
Now that you have both a model and a texture, open the former in PMDE and assign the texture to a material in “Material” tab’s “Tex” field. Warning: if texture’s name is longer than 10 symbols (not including the extension), the field will be truncated next time you load the model and it’ll look white again. And if you plan to apply a sphere to the model, then the sum of *both* file names’ lengths must not exceed 10 characters, otherwise the sphere will not be applied due to the so-called “Saizuo-bar!” bug. So you better watch your texture file name and rename it if necessary (you don’t have to worry about it if you save the model as .PMX, though). Next thing, you will notice that the model is unusually big. Resize the model to a necessary size – a 0.2 coefficient is more or less okay (the list of plugins is not translated in the new PMDE v0139, so look at the picture to the left to find the one you need).
10/08/2017: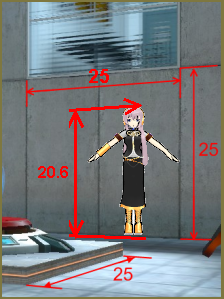 While working with Portal-based models, after some trial and error, I settled for 25*25 points to be an optimal size for a standard cubic unit, both reasonably close to most regular MMD models’ height and easy to use in calculations. For ripped models to match that size, you’d need a resizing coefficient to be equal 0.1928. For other Source games, though, you may need to find out your own value. While working with Portal-based models, after some trial and error, I settled for 25*25 points to be an optimal size for a standard cubic unit, both reasonably close to most regular MMD models’ height and easy to use in calculations. For ripped models to match that size, you’d need a resizing coefficient to be equal 0.1928. For other Source games, though, you may need to find out your own value. |
What you may notice next… is that the model already has bones! That’s right, the described combination of plugins and programs provides you not just with the shape of the model itself, but with semi-rigged *and* weighted bone structure as well. Of course, you’ll have to refine it to work well in MMD environment (for one thing, all bones have parent but not child bones assigned to them; sometimes not even parent ones), but you can’t argue that the biggest part of work is already cut out for you. If the model has *no* bones while you believe it must, check the folder where you got it. Some models use several .MDL files that represent it, with names that have different tail parts. Try the procedure with another one and see if the result is better.
Finally, before you actually start doing anything else with the model in PMDE, save it and try to load it into MMD. It may happen that instead of the model you only get an empty bone that doesn’t even respond to moving. Again, check the folder with .MDLs. There must be another version of a file that works properly.
And that’s all you need to start your own Combine invasion to take over MikuMikuDance! Go ahead, you know you want to.
– SEE BELOW for MORE MMD TUTORIALS…
— — —
– _ — –





Is there anyone successfully exported SMD from a PMD model…? I tried and get a SMD with too many bones…
Say that again: you’re trying to make an SMD file *from* a PMD model? Why would you?
Hi! With the newest version of Blender, 2.8, the preferences are in a different location. That was easy enough to find but I can’t seem to install the addons. I click the zip but they never show up in the list after that. What am I doing wrong?
Sorry, I haven’t updated Blender myself, so I don’t know what the new interface looks like. In fact, after getting this setup, haven’t been installing many plugins whatsoever. Most likely, it’s something simple… but will require some trial and error to figure.
Ah. It’s not that different an interface from what I’ve seen, but as someone unskilled in Blender it’s enough that these tutorials only get me so far. I managed to import the model but that’s as far as I can go. Pymeshio refuses to install. Which version of Blender are you using? I tried going back to 2.78, even 2.76, but even then it won’t work. I only plan on using it for converting models, so is there a preferred version I should be trying?
hello it’s me again.
i got a problem when i turn .obj to .pmd/pmx
image:
https://66.media.tumblr.com/89d15ba35de7ce12a90d2cd7d3b974b5/tumblr_ocwz50twtQ1v00gpwo1_1280.png
when i use NCHLShader2 into the left model (the one i turned .obj to .pmx) and i got this. it’s not work like the right model. ( both model i disabled all the addition sphere or else)
i don’t know what’s wrong with it.
please tell me what i must to do…
p/s: sorry for my bad grammar…
Hi Kiyoshi,
It looks to me like the model has hard edges. One of the first things to do is try it without NCHL enabled to make sure that it’s not an issue with NCHL applying a normal map inappropriately.
If the model still doesn’t look right, even with the regular MMD renderer, you probably want to open it up in a model editor and recalculate its normals. If that doesn’t make any difference, it may have to do with how the vertices are laid out– in PMXE, try joining near vertices, then recalculating normals again.
Hope that helps. Good luck with it!
it’s only happen when i set effect NCHL. it look fine when normal
…oh… I noticed that most of effect in MMD aren’t work with this model.
did it missing something?
If you’re only getting that angular look with NCHL, then it’s a problem with NCHL thinking that there’s a normal map when there isn’t. Remove all sphere add, sphere mult, or subtextures from every material. Do this in a program like PMXE, not just by deleting the texture files.
While you’re there, double check your material settings. Make sure you have grays for diffuse, specular, and ambient settings (around 0.5 gray is fine). Make sure that you have self-map and shad checked. These are good starting settings for materials, that should prevent some possible problems, but you’ll want to tweak from there.
If you have further problems after this, I would be happy to take a look at the model. Tell me exactly which effects it’s having issues with, and send me a download link for the entire model (not just the .pmx, but textures too), and I’ll see what I can figure out.
here is the model
https://www.mediafire.com/?jmyj2yo902q04b1
i’m afraid that i missed some step when i turn .obj to .pmx in blender
but…would you mind to check it for me and tell me what wrong with it?
thank you very much
sorry for the late, i’ve been very busy for these day
ah….note:
these effect won’t work correctly on model
NCHL
Adultshader
plastic (complete not work)
…
..
No problem with time, I’m in no hurry!
In this case, your model looks chunky because it has a bunch of duplicated vertices. As far as I can tell, every plane of the model is independent of the others. Check out https://learnmmd.com/http:/learnmmd.com/understanding-normals/ to understand what’s happening.
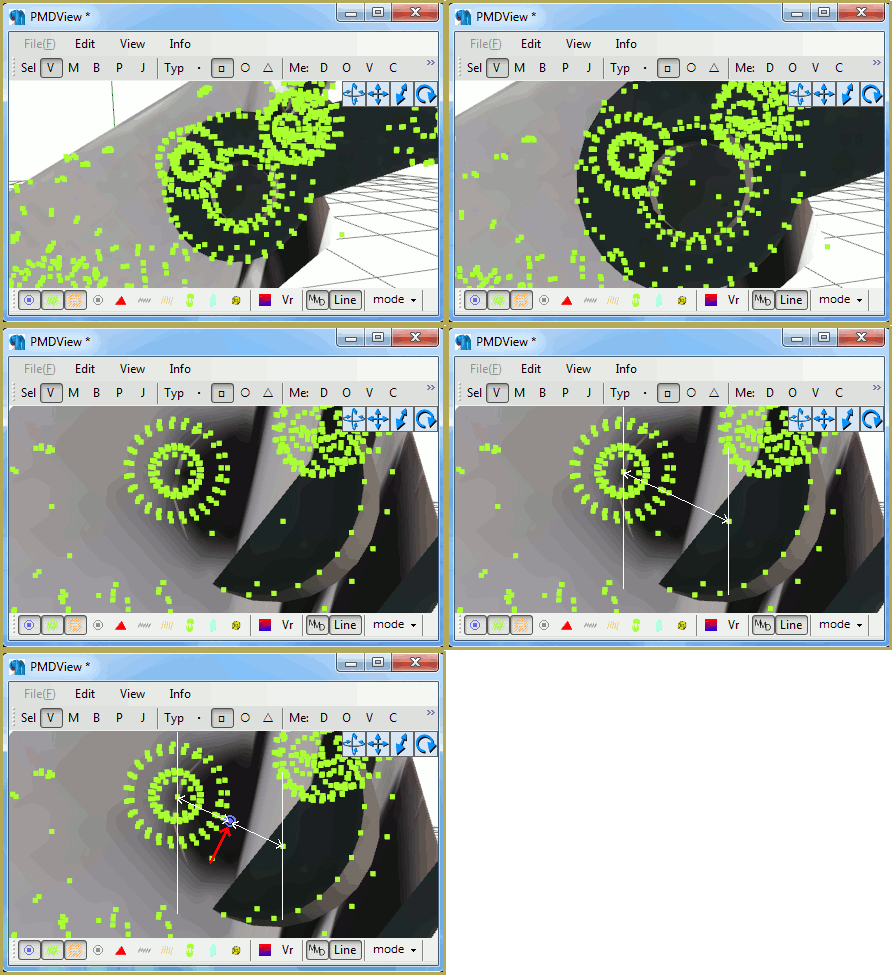
But to fix it, open the model in PMXE, select all vertices, edit->normal->average near normals, cofirm, and give it a second to fix all of your normals. Edit->vertex->join near vertices should also fix it.
Tested in NCHL and AdultShader.
thank you so much !!! <3
I'll do it right away
it’s may work correctly but it still have problem with the light
https://67.media.tumblr.com/d302946864b09fc903cf8399bc9866cd/tumblr_oday1bQnxj1v00gpwo1_1280.png
do you know how to fix it?
sorry for asking to much… i’m just a newbie trying to learn MMD =w=
I understand, that’s why I’m here!
Not sure what your problem with the light is. If the body is too dark in comparison to the face, try increasing the material ambient, or decrease the material diffuse on the face. The highlights are built into your texture; if you want to change them, you’ll have to edit the texture in an image editor. You also have a few sphere maps in your pmx file, but those files weren’t present in the file you sent; if those are present, they’ll affect the lighting as well. For more about material settings, read https://learnmmd.com/http:/learnmmd.com/understanding-pmxe-materials/ . NCHL uses materials differently than vanilla MMD, so read the NCHL readme (or try a different NCHL base shader) if the problems are only present in NCHL.
can i ask you another question?
i use postpointlight on the model and the light got reverse to the otherside, not where it came from
https://66.media.tumblr.com/194ce4448cd8c3a13df20ede6a4765f6/tumblr_odsmtuMcKb1v00gpwo1_1280.png
and i can’t create the edge line of the model too…
can you check it for me? (the same model i gave you)
Both are probably because your normals are reversed. Select all vertices, edit->normal->reverse.