


![]() How can I add my own color-changing morphs to an MMD model? How do I make my model change color as I animate? Can I use PMXE to create my own color morphs?
How can I add my own color-changing morphs to an MMD model? How do I make my model change color as I animate? Can I use PMXE to create my own color morphs?
Or, if you’re British, or prefer British spelling: Colour Morphs! (I honestly prefer that too)
Color morphs, and color theory!
Aight… This is my first article, so let’s start with something simple. Or, as simple as I can think of.
Greetings, children and not-children, or whatever being in the future you may be.
If you’ve already read up on the material morphs before, you may know of those morphs that change the color, and even how to create them. (This link brings you to the old tutorial.) However, with a bit of creativity, you can go even further. Behold!

Nope, this isn’t some kind of special .fx file. This is all the work of four morphs working in tandem. And a bit of gif compression at the end there.
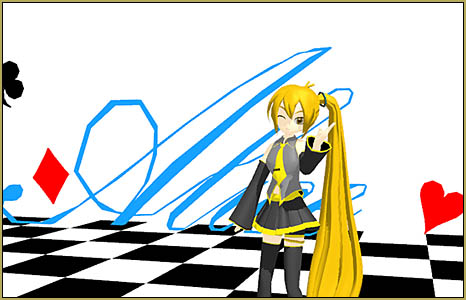
Look at my boy go. Look at ‘im!
It doesn’t need to be exclusively used to change the entire body. You can use it on an energy weapon to indicate different attack modes, on a magical staff to change its orb, or simply just having the option to change a material to any color at will.
If set up correctly, this method can tackle just about any color in the color spectrum, at any brightness. Seems exciting? Well, why don’t we get started, then?
Let’s get going.
First off, this will focus on PMXE and PMX files, so if you’re still, at these modern times, using PMDE and PMD files, I wonder what exactly you’re doing.
If you don’t know how to navigate PMXE, I highly recommend you get used to it before coming back here, take some time to wander around the program, or read up on the many tutorials we have on this site.
If you’re unsure about adding morphs, we’ll get to that shortly.
As a small recap that focuses on the relevant aspects for this article, here are a couple things to keep in mind:
- The model you’re using, if not your own, needs to have editing allowed. Please translate and read the README file so that you can review the creator’s conditions. (Hey psst, between you and me, I use DeepL to translate)
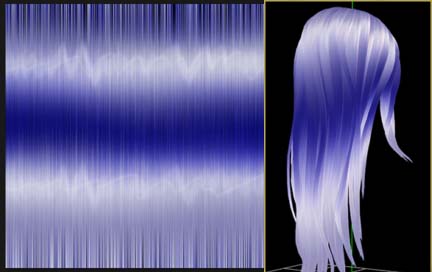
- The material in question isn’t using a texture for its color. It might seem silly for a model creator to use a texture for flat colors, but I have a few models that do… created a bit of a headache for me!
- This method has been untested with regards to spheremaps, toons and textures otherwise, but I encourage you to try with these anyway and comment of its effects.
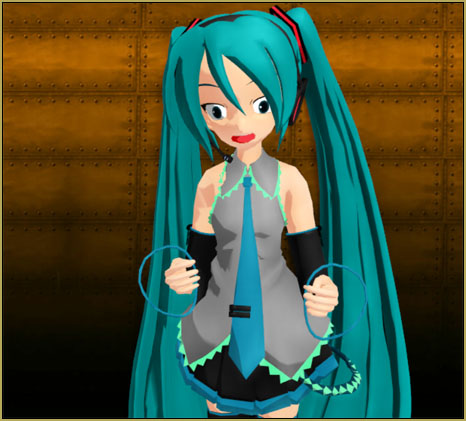
To check whether or not your model’s material uses a texture for its colors, I will now bring up Teto_Kasane_Ver2.2_masisi.pmx as an example of a model that does use textures for colouring.

Now, if all of these issues are of no issues, we can get to adding the morph!
Getting that morph in there…
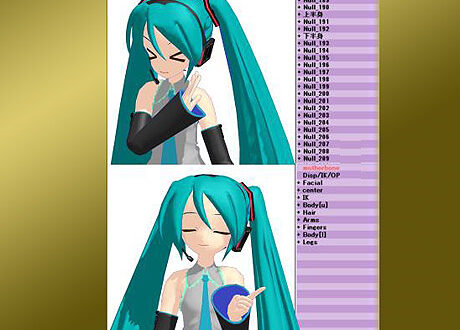
Go into the Morph tab, where you will encounter a couple boxes, mainly. If this is a model already built with some morphs, you’re bound to see the morph names inside the left box. This box is your target. Right click at any blank space inside there, mouse over New, then select Material. This will give birth to a brand new morph with no purpose, its only knowledge being that it is a Material morph. You’re going to want to create at least four of them for the full RGB capacity, but you can exclude any of the three colors if you only want to tackle a singular spectrum. The fourth one is there assuming your material already has some color, or any brightness at all, in there.

Adding the morph target
This morph has no idea exactly what material it’s supposed to work with, so we’ve got to tell it which one(s). You can have one morph target several materials, so if you want to target all the accents of an outfit but they’re split up into several materials, you absolutely can do so with only one morph.
With this newly-born morph selected, it’s time to mess with its targets. Right-click the box to the right and click Add, then there is a box to the right with the name Tgt index: (Target index:), you can go back into the Materials tab to note down the number of the one you want to mess with, and then input that number.
Alternately, you can copy the index by right-clicking the material in the Material tab and click Copy Index, then Paste From Index in the target box, I’ll call it. Selecting multiple materials in the Material tab and copying the index that way also works. Whichever way works, honestly, as long as you get the targets you want in there.
Do the same for all the other morphs you added, so you get that out of the way.
First morph: Draining all the light from the material, turning it to void.
(Too dark?)
This morph is importiant if your morph uses any light in the first place. The other morphs, the RGB ones, add light with my method, so adding more light to a material that already has light will prove to have undesirable effects. To do this, we’re going to make use of a fun quirk in mathematics.
We’re going to multiply all colors… With zero. Multiplying anything with zero turns into zero. No matter how large or 1337 the number, it all turns to zero when multiplying it with zero.
The material will reflect nothing, diffuse nothing, emit nothing. Unlike painting a wall or a car, which needs a primer color that’s usually some shade of gray to act as a neutral “color”, our neutral “color” is, quite literally, the eternal darkness itself. If you only need to turn something black, then the rest of this tutorial is useless.
Choose a morph you added that will act as the “primer” in this, and call it whatever, though in my case I call it ‘Bodyprime’. Now, with the morph selected and named, you now need to select everything in the target index as well. To do this, you click on the top item, hold Shift, then click the bottom item in the index, to select everything there. Honestly, this material morph is suprisingly powerful, you can asynchronously edit these all in one morph… Mad stuff, we won’t be playing with those abilities today. The image below shows what everything selected looks like (In Windows 10 at least)

To get into the Edit menu, you click the Edit button, located under the Target index and some other irrelevant items for our purposes.

Now this is a simple job to do. The Offset calculation should already be set to Multiply, so now all that remains is multiplying stuff with zero. The Diffuse, Specular and Ambient need to dissapear. The matrix of numbers seen at the top shows the R, G and B values you need to turn into 0. Leave Opaque and Reflection as-is, Opaque covers transparency, 1 means it’s fully visible, 0 means completely invisible, and Reflection doesn’t seem to do anything anyways. You can modify the edges (outlines), but you can also have manipulating that be a separate thing.

With everything set up as it should be, Click OK, and feel free to test it with the Transform View or MMD, and if the material turns to complete darkness, you’ve succeeded, and you’re ready to substitute the original light with your own. How exciting!
Bring the gift of light and color!
We’re at the endgame now. This will tackle adding the red color, but you just repeat the steps displayed for the other two colors, just changing which values you modify.
Choose one of the three other morphs you created, and name it accordingly. I named mine ‘addred’ because it’s simple and fits within the constraints of MMD’s morph selectors. Feel free to do whatever, of course, as long as you and anyone looking at your model understands it.
Another quirk of math is, in line with multiplying by zero, you can’t multiply zero into anything else.
Therefore, instead of having the Offset calculation to Multiply, you set it to Add, instead. So instead of 0*1, you’re doing 0+1, and 0+1 becomes 1. Go ahead, it’s right next to Multiply. In case you forgot, to get to the menu in question, you need to click the Edit button.
Next, you simply add the red coloring (Or, the other two colors if you’ve already added Red) by setting the Diffuse, Specular and Ambient values in the appropiate column to 1, leaving everything else as is.

Then, after all the settings are as it should be, click OK, then do the same to the other morphs, just with [G]reen and [B]lue respectively.
I haven’t tried with the texture specific settings, actually. If I figure out how that works, I might write an additional article on it, or someone else may have beaten me to it. Eh, I just want to contribute to the knowledgebase.
That’s it! Test in the Transformview or within MMD!
Oh, wait, one more thing…
You’re going to want to go into the Display tab and put the morphs in there, so that they work properly.
This massive article shows how to fix a lot of annoying things with your model, just scroll down to the Morph part to fix any issues related to using it.
A basic rundown of color theory
- Red+Green=Yellow
- Red+Blue=Purple (And pinkish if the two are put to the max.)
- Green+Blue=Cyan
- All three together=White
That’s all the combinations I could think of. If it’s too bright a color, dial the colors back a bit, instead of having them on full throttle, and this should give you all the other shades to play with. Mix and match with the color ratios to find what you need!
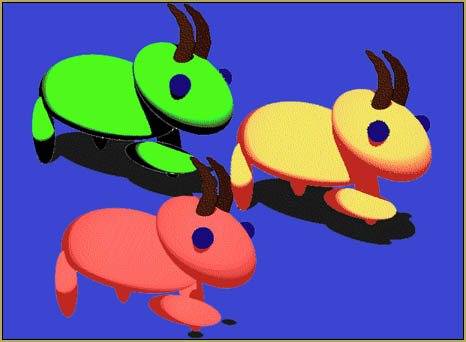
Works with Autoluminous out of the box!
You heard me right! It works with AutoLuminous out of the box in its basic setup.
Or, at least AutoLuminous4, haven’t tested the other ones yet…
Look at my boy being the light for an entire party!

Look at him! You can’t go to a party without a goat lighting up the place!
You can’t go to a party without a goat in general, any and all parties without goats present will be a bore.
If you don’t want it to glow like an unneseccarily intense light-bulb with the power of the sun-… Well, if you don’t want it to glow so much with AL enabled, again, you’re going to have to dial back the sliders a fair bit.
I think that’s it… Oh wait!
In order to use it, set the “primer” morph, the one that turns it into darkness, up fully. Then you can add the colours.
Okay, that’s all!
As for the tutorial, I believe it’s everything I needed to say. If you’re curious about some other things, I encourage you to experiment for yourself, and if you find something interesting, you can put it in the comments below, and I’ll read up on them and either I’ll make an extra article or edit this one, each and every one of you will be credited with the name you choose in the comment section, so don’t be afraid to share!
As for my first article, this is primarily a test, I suppose. I haven’t really written anything in this format at this high a standard, if I had been allowed to relax a lot more you would’ve seen a lot of “you can smell that” and “smell at this gif over here!” because replacing any sensory input with smelling is a fun thing to do. Ah well, I’ll keep those for whatever casual tutorials I make elsewhere.
Oh yeah credits uhh
Goat model by yours truly, NordGeit. I’ll maybe add the model later, just need to think of exactly what to write in the rules.
Teto model by Masisi
Autoluminous4 effect by Soboro, located in this OneDrive link (Heh, this used to be called SkyDrive.) You have to login on that page… it’s free. When you do login, that full page will be there. You can click the tiny “Download” at the top to get the entire lot of effects or you can download just the one you want.
Well then, until later, this has been NordGeit, goodnight and goodbye. You can just search me up in any ol’ search engine to find me elsewhere, though be noted that I do act differently elsewhere.
Have fun with your color morphs!
– SEE BELOW for MORE MMD TUTORIALS…
— — —
– _ — –
![]()


is there a way to do this with a material instead of trying to change colors via this thing.. I already pre-made some great colors. and I would love to be able to morph with them
If you’ve premade some colours, but not any textures (flat colours), the best suggestion I have currently would be to add the V O I D to remove all colours, then make your specific colour morphs, but instead of adding the values as instructed, instead copy over the colouring values for the materials you made into the morph.
Say, for simplification sake, your material has
You would simply set these values into the Add colour morph. Then, if you were to VOID and then try the morph, you should get the colour you want.
Essentially, copying over the diffuse, specular and ambient values of your materials into morphs and combining it with VOID.
That’s the best I got.
I am now the first to comment
Just an FYI, the “Reflect” value controls the strength of the Specular and by manipulating this with a material morph, you can manipulate how a model responds to AutoLuminous, such as turning off the glow or cranking it to blazing sun-level intensity. You can set values higher than 1 for this and it will work.
As to the texture, the main difference to manipulating those is that Ambient, Specular, and Diffuse all have to do with the LIGHT coming off your model and do not change the color of the texture itself. If you didn’t do the void thing, the original colors of your textures may skew the results of your material morph that manipulates only the light. Manipulating the texture keeps the color pure without the need for void.
One downside to these morphs I’ve noticed is that many MME DO NOT like color-changing material morphs and will revert your model back to its original colors if you use them.
When the random reader knows more than me about materials
nice