


![]() How do I replace the hair on my model? How do I change the clothes on my MMD model. Can I use PMDE to add parts to an MMD model? How do I add parts to my PMD model?
How do I replace the hair on my model? How do I change the clothes on my MMD model. Can I use PMDE to add parts to an MMD model? How do I add parts to my PMD model?
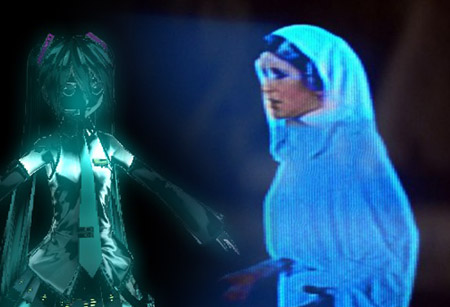
Position Model Parts in PMDE using a placeholder .x Model image!
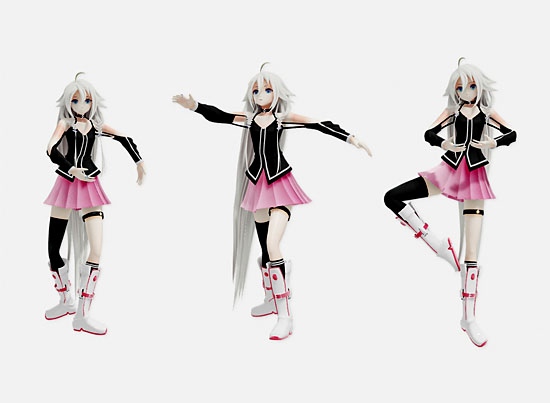
“I am your loyal mannequin. I am the “dummy”.
Sometimes, don’t you fellow MMDers have the urge to “create” your very own model, for your very  own use, which reflects yourself more than the downloadable models out there… a model you can truly call your own, your very own Original Character (OC)?
Unfortunately, making a model from scratch might be waaaayyyyy beyond our league. To be able to make models from the very scratch requires an extensive amount of study and resource.
So should we give up?
NO! There’s no limit to creativity in MMD world, it doesn’t take a visual designer to create a video in MMD, nor to create a model to be used there. YOU CAN DO IT TOO!
Enter… “The Dummy!”
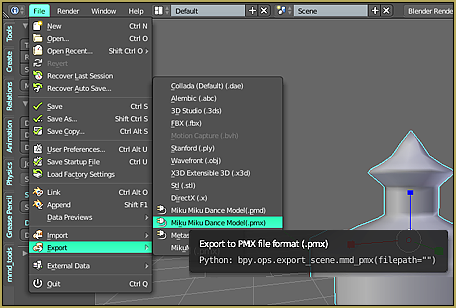
I’ll show you how to do a simple model edit, adding and replacing parts to be exact. But not only that, I’ll throw in a bonus; a little trick on editing models. I call it “The Dummy”. I will show you how to save your model as a .x “dummy” and use that dummy with PMDE to precisely locate new parts onto your model.
It’s easy… YOU CAN DO IT!

Read all about how to use PMDE and “the Dummy”
My article showing you how to use a .x model dummy to add parts to your existing models required a whole page of its own. It has plenty of detailed instructions and illustrations to help you do a successful project, even if you are new to PMD Editor.
Hopefully, that rather long “picture book like” tutorial can be useful for those who want to try out making their own models. There might even be a part 2 of this article, too, once I’ve done with my heap of animation project queue.
Remember! In MMD, the sky is the limit, but do take some consideration. Don’t use illegal parts. Don’t abuse the models you made from other’s parts outside the original creator’s limitation. Don’t claim as your own parts if they are not. And most important of all, always leave a credit to their respective creators.
Keep The Faith!
– SEE BELOW for MORE MMD TUTORIALS…
— — —
– _ — –
![]()

Hello!With wich version can you Make your own MMD Model?
Technically, with any that you can download, but of course, the newer the version the more functionality. The Downloads page has links to latest translated to English versions; if you want the *very* newest version of PMXE, you’d have to visit the Japanese homepage.
Hi, I need help. When I loaded a dress on my model (whose texture is based on a .png file)it becomes white. Everything is in its own folder, the file’s name is in English, everything seems to be fine but the dress is still white. What should I do?
Hi Hill! When you write, “Everything is in its own folder,” what exactly do you mean? When you import one model into another model, you need to duplicate the textures files into the directory of the new model. Try putting textures from both models into both models’ directories, then restarting the editor. Are they still white?
Actually all i had to do was put the model in the same folder as the dress but thanks anyway. Yet now my self model has arived new problem. How to do i join bones with other bones? I am using PMX btw. A picture to show whats wrong with my self model:
http://hill59.deviantart.com/art/Help-634073424
I’ll reply on the link you provided, if that’s okay; it may be easier to engage in long conversations there, and that way, you can create more pictures.
Hi! How do I even download the program?!?!? QAQ HELP!
Hello! Here’s the link:
http://ibozo.deviantart.com/art/PMDEditor-0139-and-0219-english-translation-375517501
If you have any other questions, ask away!
–Silent Headset
Either I am very dumb or this program is evil. I can’t figure out how to put the parts in the editor. All at once. So I failed in the first step. Yay. At least I can make slightly robotic motions!
The easiest way to put a part in the editor is to drag’n’drop a file to a working PMDE window and select “Add” in the ensuing popup. You can’t put more than one file at a time, though, if that was your question.
KillerBeer already pointed out the easiest way ^^
However, if you want to be more technical, from the “File” menu, select “import”. Now select the model you want to add and click “open”. A pop-up will appear. In the “Import System” selection, make sure “Adding” is selected.
Hit OK and that’s it!
However, if the imported part is from a different folder than that of the initial “base” or the model you opened first, the texture-if the new part has any, will be all white. You’ll have to copy the textures from the new part’s folder to your finished model’s folder. Hope that helps!
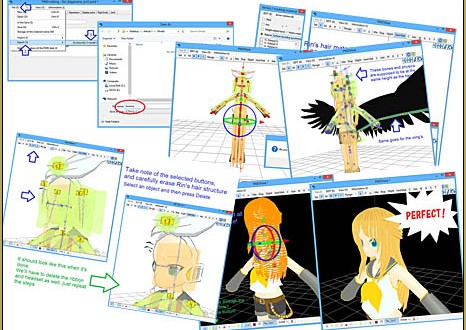
Help please, I can clean Rin bone but I can’t cut Rin hairs… help please…
Hello there!
It’s not exactly a hair cut, more like deleting her hair altogether.
First, make sure you selected the “V” button in the upper left.
Next, click the Vert/Mat button on the right to make the list pop-out.
You’ll see on the new pop-out there are 4 circles with More, Any, Weight related, and Material written next to each circle. Click the Material’s circle and click the button next to it (Surface Recording Synchronize)
Now the model is invisible! And all you have to do is navigate through the list of material below it and locate the hair’s material!
Once you check a box next to a material, it’ll appear on the PMDView window. So you’ll know when you have found the hair when it appears in the window.
Lastly, Press CTRL+A on your keyboard and then Shift+Delete to delete the hair!
And there you go! Hopefully that helps! If you have more questions, ask away! ^^
Adieu~!
Cool article! This is so easy. I even tried making a mark on my computer monitor with a dry erase marker. I would load my base model in PMDE and mark where the hair or clothing has to go. The n load the hair clothing or what evever without the base model move it to the mark then save it. Even then it was trial and error. your method is perfect. I cant wait to try it out. Thank You.