


![]() What are PMXE materials? What is ambient, diffuse, and specular? Where can I find PMXE materials settings? How can I change the color of my PMX model?
What are PMXE materials? What is ambient, diffuse, and specular? Where can I find PMXE materials settings? How can I change the color of my PMX model?
MMD uses lots of PMXE materials settings– maybe too many. It can be hard to figure some of them out. Maybe Teto and I can help?
Ambient and Diffuse PMXE Materials
 Ambient lighting is lighting that comes from all directions. It reflects in all directions and lights all faces equally. Diffuse lighting depends on the direction to the light, but still reflects in all different directions. Generally, your ambient settings are going to be the color of your model in the shade. What about in the light? Ambient and diffuse settings get added together.
There are a lot of things you can do with this. Want really stark lighting? Try black ambient settings and white diffuse settings.
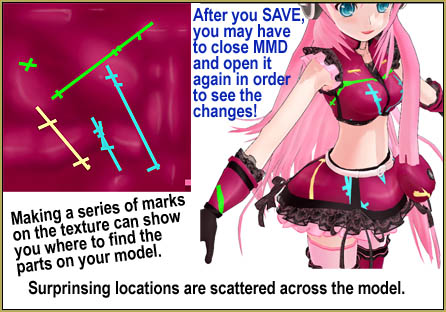
Texture
Your texture represents an albedo for your model. It tells the engine the relative amount of light that will be reflected from any particular pixel. If you don’t specify a texture, MMD will just assume you want a white texture that reflects all colors equally.
Returning to our ambient and diffuse settings, we can see now that lighting in the shade is not just our ambient settings, but our ambient blended multiplicatively with our texture. And in the light, our color is something like
(texture*ambient) + (texture*diffuse)

Specular
Like diffuse lighting, specular comes from a certain direction, but unlike diffuse lighting, it’s also going in a specific direction. That makes specular lighting view-dependent— as you move around your model, the specular highlights change. This makes it look like our light is reflecting off of something shiny. And, just like black things can still be very shiny, specular is not moderated by texture color in the same way that ambient or diffuse lighting is. So we can revisit the actual color of our pixel now, and see that our equation is something like
(texture*ambient) + (texture*diffuse) + specular
Most shiny surfaces are actually shiny because of a thin layer of moisture or oil on their surface. That includes things like bodies. That’s why it’s usually appropriate to use a white or gray specular color. But some things, like some metals, should have a colored specular.
The material’s reflect value affects its specularity. In the default MMD shader, this is used to determine the specular power. This concept can be very confusing. Specular power is about raising the specular to a certain exponent, and since the values being raised are between one and zero, this reduces actual specular. So as you increase the reflect value, you actually end up with less specular reflection overall! That’s because, as objects get shinier– smoother, really– their reflections get tighter and tighter. Increasing the specular power makes these highlights smaller. In order to make them brighter, use the specular color settings instead.
Sphere maps
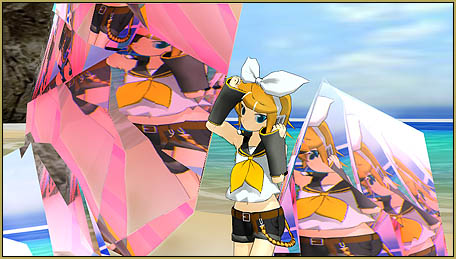
Sphere maps are special kinds of view-dependent textures. They can be blended multiplicatively, which makes textures darker, and which is appropriate to represent certain kinds of iridescence or pearlescence. But more commonly they are blended additively, which makes them act like a map of directional environmental light. Additive sphere maps are sometimes called spa maps. (Sometimes you’re going to hear people call these specular maps. Be careful, because that term can refer to a huge variety of techniques, and sphere maps don’t have anything to do with specular material settings!)
PMXE lets you specify a third option– a subtexture. This is a regular old texture that gets blended multiplicatively with your base texture, but along different UV coordinates. This might be useful for creating decals, but in practice, subtextures are almost never used. At least, I have never seen a model using a subtexture slot. That’s because decals can be created in other ways that are easier to understand and less restrictive.
Calculating the value of our final pixel
Now we can put it all together and make an equation that should give us the value of our final pixel.
texture*ambient + texture*diffuse(light) + specularreflect(light, view) + sphere(view)

There’s one important thing to notice from all of this. Our end pixel is capped to a range from zero to one. But when we add all of this together, it’s easy to get a number much higher than one.
You can test this out easily. Make a model with a 0.75 gray diffuse and 0.5 gray ambient and play with the light settings. You’ll see that your light settings have an effect through most light values, but as you get up to the higher ones, more light stops making any difference. That’s because, once you get up to around 200/255 light, there’s no place for your colors to go. They’re already fullbright: 0.75+0.5 = 1.25, which the engine doesn’t treat any differently than 1.0.
Still, some shaders use this higher value. For instance, Autoluminous will look over the screen for values that are higher than 1.0 and use them to create bloom. So sometimes, you want to have some extra range. Other times, though, using values that add up too high will just obscure the details of your model.
Toons
What I’ve described so far is a general lighting model. It describes how models without toons are rendered in MMD. And it’s used widely in 3D rendering. But if MMD materials have a toon, things are handled a little differently.
Toons are intended to create a cell-shaded effect for materials. They do this by changing the way that shadows are drawn. With a toon, the lighted parts of your model are going to look exactly the same as the lighted parts without a toon. But the shadowed parts aren’t going to be the same simple ambient*texture equation. Instead, the whole model is drawn lighted, and then the toon is multiplied into the shadows.
Your models don’t have to have toons, but can if you want. They’re generally regular old square textures, but there’s only two parts that matter: the left hand margin and the lower right corner. The margin is used on models that don’t self-shadow (or with self-shadow off in MMD), and maps the color to the angle of light. The lower right corner is used when self-shadowing is enabled, and is multiplied by the depth of the shadow.
Like most material settings, toons work better when you think of them as a characteristic of a scene, rather than of an individual material. Rather than creating unique toons for every material, try to use consistent toons throughout all materials and all models in your scenes.

Names from “toon01.bmp” though “toon10.bmp” are reserved for default toons. If you use these names for your toons, MMD will ignore your files and use its own.
Emissive
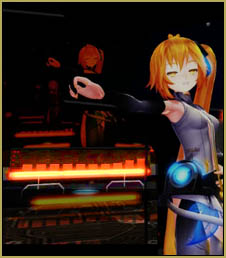
There’s one more material setting worth talking about. Emissive refers to the model’s emission of light– like a lightsaber or an LED. Emissive values add directly to the final pixel, without moderation light or view angle. If you think about the math– hey, that’s exactly what ambient does! And, indeed, MMD makes no distinction between ambient and emissive.
Why even talk about it? Because it’s an important way to think about ambient values. When you choose ambient values for a material that are higher than other ambient values in the scene, it’s easy to make it seem like that material is glowing. Depending on what you’re going for, you might want to avoid that, or you might want to do everything you can to exaggerate it. If you want to exaggerate it, try making the difference as large as possible. Give your other materials a very low ambient, and your glowing material a high ambient. Since toons shadow even ambient material settings, avoid toons on objects that you want to glow.
If you’re trying to use Autoluminous to create objects that really glow, the trick is a combination of a high ambient/emissive with a high (110) Reflect value.

Opacity
There are two ways to specify opacity. One is with the material settings. The other is by the alpha channel in some textures. Either will make the affected faces transparent.
Drawing Options
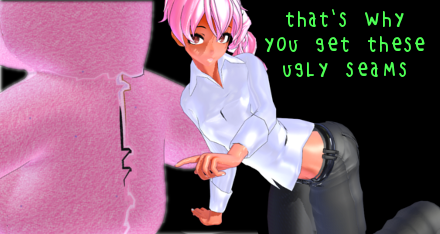
2-sided is a quick way to make a backside of a mesh. You’ll see it used frequently for hair and clothes. But in general, it’s better to use manifold meshes– meshes that enclose a volume, with explicitly defined back-faces. 2-sided materials don’t shadow properly, and some effects look very wrong when used on 2-sided materials. If you don’t need to make something 2-sided, don’t, because it can affect frame rate.
There are a few options that affect how MMD calculates shadows. Shad makes the model cast a shadow (self shadow), and it’s important to disable for things like skyboxes and windows. Grnd Shad enables or disables the pre-calculated MMD ground shadow effect (but that effect is really troublesome, and you should probably disable it in MMD anyways).
I don’t know what self map does. It isn’t affecting MMD in my tests. MMD doesn’t respect color or point or line rendering, and I imagine these are ideas, like QDEF or soft body physics, added to PMXE in anticipation of future developments.
Edges
This should be pretty self-explanatory. You can modify the color, thickness, and transparency of your edges. Note that you can affect all of these values with material morphs, too. If you don’t like edges, don’t just reduce the alpha to 0, as they may still write their depth and make weird artifacts for effects like depth of field and fogging. Instead, reduce the thickness to 0.
Remember, the PMXE materials tab isn’t the only place you can edit edges. You can also affect edges on a per-vertex basis on the vertex tab. Use this if you only want part of a material to have an edge.
Choosing PMXE Materials Values
Most of these settings have less to do with the model than with the scene. To create stark lighting, combine dark ambient with bright diffuse and specular. To make believable environmental lighting, use the same add sphere for all of your PMXE materials, but at different levels of blur. The hue of your sphere map should be similar to your ambient’s hue, since both represent environmental lighting.
Consistency is important. If one material has a dark diffuse and another material has a bright diffuse, they’re going to behave differently in light and it’s going to look weird. Mostly, you should be using tones of gray, rather than bright colors.

You can use material settings to color (or recolor) your PMXE materials. When you do this, your ambient and your diffuse should usually be the same hue, but not necessarily the same brightness. And your colors should never be brighter, overall, than the original grays.
Remember what all of your values add up to. If you have white ambient, there might be no room for diffuse! And if you have both a bright specular and a bright sphere map, there are going to be times when the two obscure each other. There’s nothing brighter than white.
Make changes on a per-material basis when it comes to specular settings. In general, the hue of your specular reflection should be the same as the hue of your diffuse, because it’s the same light responsible for each. But to make a shiny object, try giving a bright specular, with a high reflect, in order to create tight, bright highlights. For a rougher object, give a darker specular, with a lower reflect, to create broad, dull highlights. And for things like metal jewelry, give their specular a hue similar to the overall hue of their texture and diffuse.
PMXE Materials in MME
There’s one more thing to keep in mind: how a shader treats your PMXE materials settings is entirely up to that shader! For ease, most effects hew closely to the intended use of these settings, and so you should see consistent results. But shaders don’t have to work that way. They can use these settings to code for other values. They can combine reflect and specular into a single value to compute highlights. They can use the textures you specify in different ways. If you want to really understand how a specific effect handles these PMXE materials settings, there is no substitute for opening up the .fx and just reading the code.
Addendum, 9/04/2016:
I’ve been continuing to work on shaders affecting materials, and have rewritten the emissive and toon sections based on what I’ve learned. I have also replaced one cribbed image with an original one.
For anyone else considering writing shaders, it’s important to understand the nomenclature that MMD and MME use when referring to material settings. AMBIENT < string Object = “Geometry”; > and DIFFUSE < string Object = “Geometry”; > (typically, MaterialAmbient and MaterialDiffuse) are both copies of diffuse material settings; for actual ambient values, look at EMMISIVE < string Object = “Geometry”; > (typically, MaterialEmmisive). Light magnitude is actually stored in AMBIENT < string Object = “Light”; > (typically, LightAmbient); SPECULAR < string Object = “Light”; > (typically LightSpecular) duplicates this value. DIFFUSE < string Object = “Light”; > (typically, LightDiffuse) is, bizarrely, always black.
Keep the Faith and credit your sources! I’m using my own Tda Tutor Teto and I tricked her out with MissingPixieSticks’s Pick Up Glasses!
– SEE BELOW for MORE MMD TUTORIALS…
— — —
– _ — –
![]()


I think I need to enable #define SPECULAR_MAP_FILE “specular.png” for the Leather material but it needs specular.png and that is not in Ray-MMD. Where can I get that? Any more repositories?