


MMD and the use of Fill Lights
… Part 1 (Half-Lambert Shader)
Fill lights are an important component in the lighting systems used by commercial photographers, cinematographers and lighting engineers. It can be an incredibly complex subject but for our purposes as MMD content creators, fill lights can usually be regarded as simply auxiliary lighting. Specifically, these are lights added to a scene to compensate for areas that do not receive sufficient levels of illumination. But, as this article will show, these types of lighting systems can override almost completely MMD’s default lighting system. There are definite advantages in doing this and in this two part series we will explain how to do this.
There are only really two types of MMD effects that can satisfactorily fulfill the functions of fill lighting:
- Part 1: Cook Torrance / Half-Lambert shader suites
- Part 2: MMD-Ray (all versions)
Since these processes can be finicky, this article will be broken into two parts. This part will discuss the easier option; the Half-Lambert system.
KEY CONCEPTS
Studio photographers use specific lights for specific purposes. Their basic system is applicable to MMD as the same system works for both still imagery and motion videos. In the photographic system there are three types of lights:
KEY LIGHTS
This is the primary light that is used to illuminate the scene. In MMD, this is the default global light. You can change the angle of this light and also its color and in many applications you are best served to do both.
RIM LIGHTS
This type of light is also called accent lighting and usually is back-lighting. It is called a rim light in photography because one of its characteristics is how it makes the edge of a subject glow. You should almost always add this light first as it makes things much easier.
FILL LIGHTS
In practice, fill lights are usually reflectors in a photographer’s studio. Sometimes it is merely a silvered or white panel that throws light back on the subject to even out the play of shadow and light. More complex types are some type of light box or diffused light source.
There is actually another category of lights that will not be covered in this article: Special Effect Lighting.
The Photo Studio System
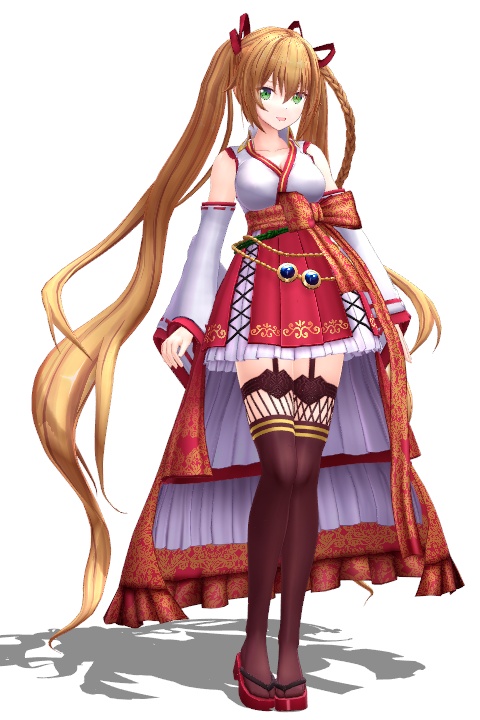
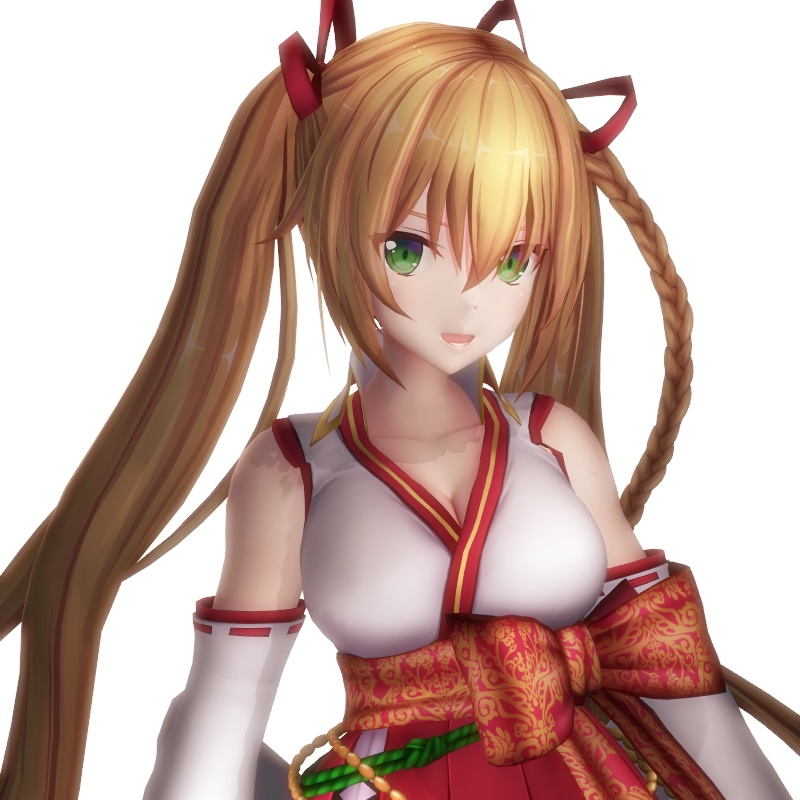
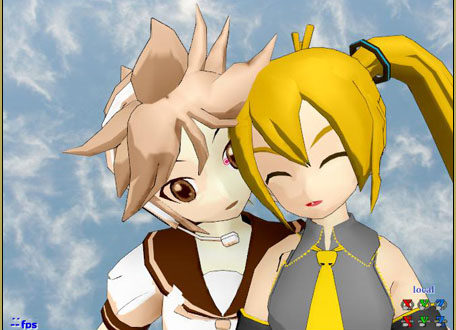
To understand what each of the light types do above, it is quickest to show you an actual example in MMD. This system is based on the way real photo studios set up their shots. We’re going to need a model and I came across one that portrays a character named: Kaneshiro Iroha (金剛いろは)
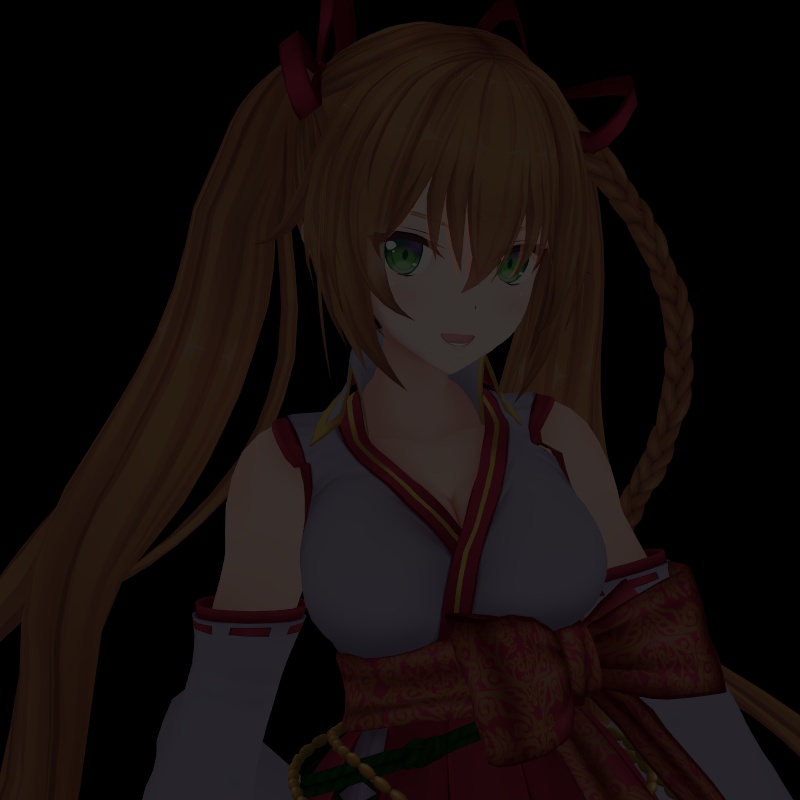
This is a beautiful model with outstanding texture maps which we do not want to destroy by mishandling the applications of MMEs. So first, let us have a look at her “raw“, under the default MMD lighting with only SeriousShader added to her model to smooth out the jaggies and slightly enhance the self-shadows. MMEs should normally be used to enhance a model, but this is my personal approach because I like to preserve the work of the original creators of the model. But in some applications, there are valid arguments for overwriting the qualities of the underlying materials with MMEs.
Examining the render above and the image looks much like what you would expect to see in a lot of print and web images of anime girls. MMD by default doesn’t actually do a bad job with basic lighting.
So why even bother applying MMEs?
The answer is actually very simple: MMD models are 3D. MMD has a lot of short-comings when it comes to rendering 3D anime models. This is why Japanese content creators very early on in MMD’s history created the MME system as a plugin to allow for more advance rendering to be accomplished from within the program. So let us redo the render using one such MME effect; the Half-Lambert lighting suite.
Note 1: You can actually do the same thing using Ray-MMD but the set up is too much of a pain for demonstration purposes and honestly I don’t want to bother…
Note 2: There are actually two Half-Lambert type effects available for MMD. They are similar: Half-Lambert Shader ver 0.24 and Cook Torrance ver 0.301; essentially they can be used interchangeably.
WELCOME TO A MMD PHOTO SHOOT
Turning down the global light
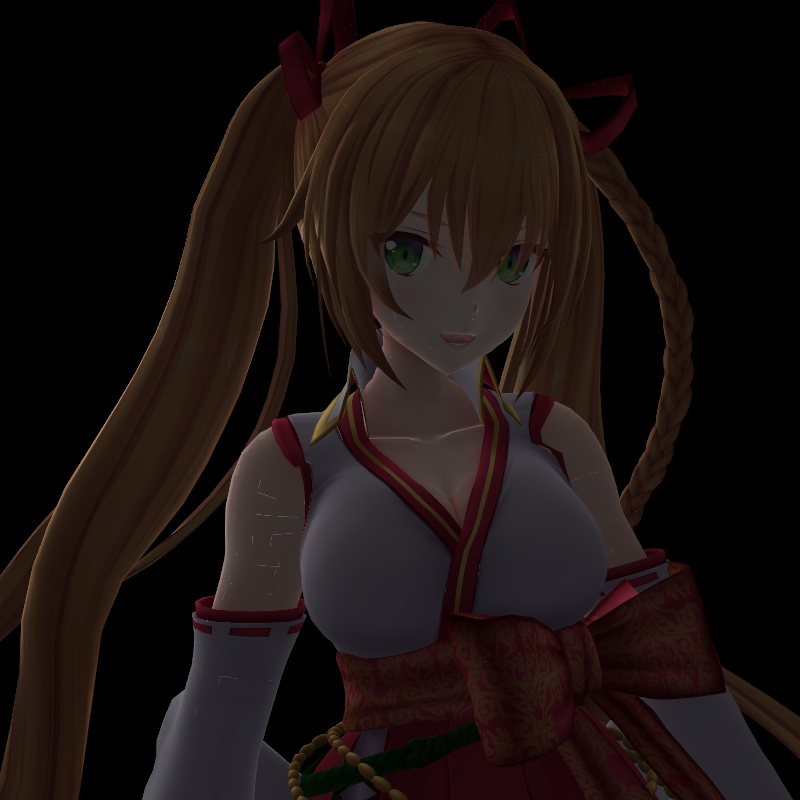
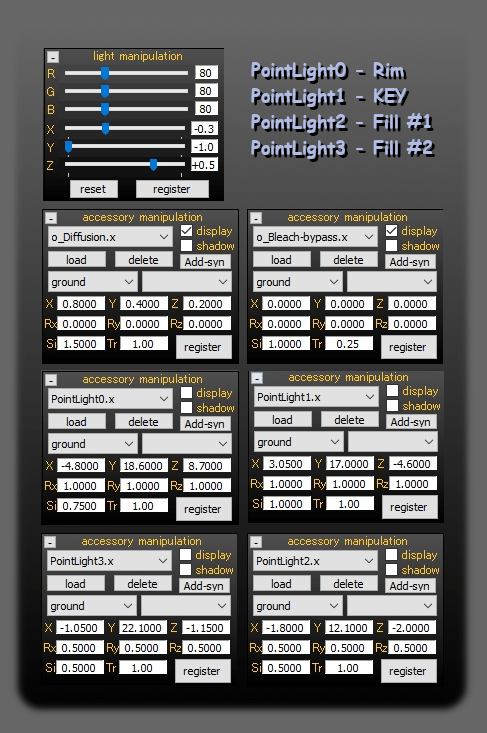
To duplicate a photo studio set up I turned down MMD’s global lighting; in this scene the global lighting should be regarded merely as ambient lighting. Cook-Torrance.fx was added to Iroha so now she looks like she’s in a dark room. It is possible to make her completely dark but then all you will see is a black screen which is pointless. To get the lighting to this level in MMD you set the background to black and the RGB values to all read 75. Below this value and Iroha becomes too dark to even see.
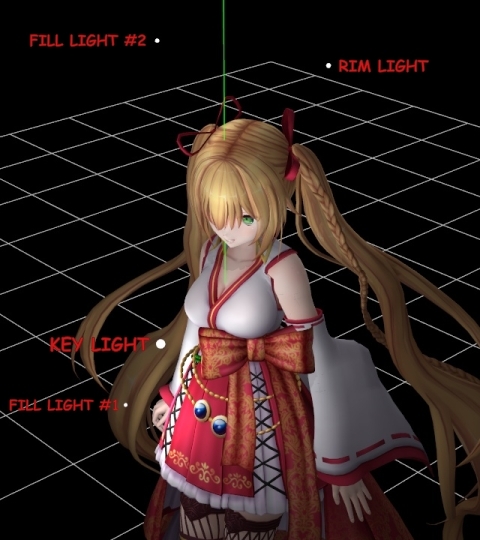
Note that we will be using PostPointLights to create our own custom lighting schema.
Adding the RIM light
First we will add the RIM lights. The image below shows how this type of light got that name. This light is coming from behind Iroha roughly at neck level and offset to her right. The color was set to a neutral gray (50% gray – all the lights will use this color). Do note this model’s mesh has “issues” so there are some undesirable artifacts which the light has highlighted. However, most of these should be eliminated after we add the other lights to our schema.
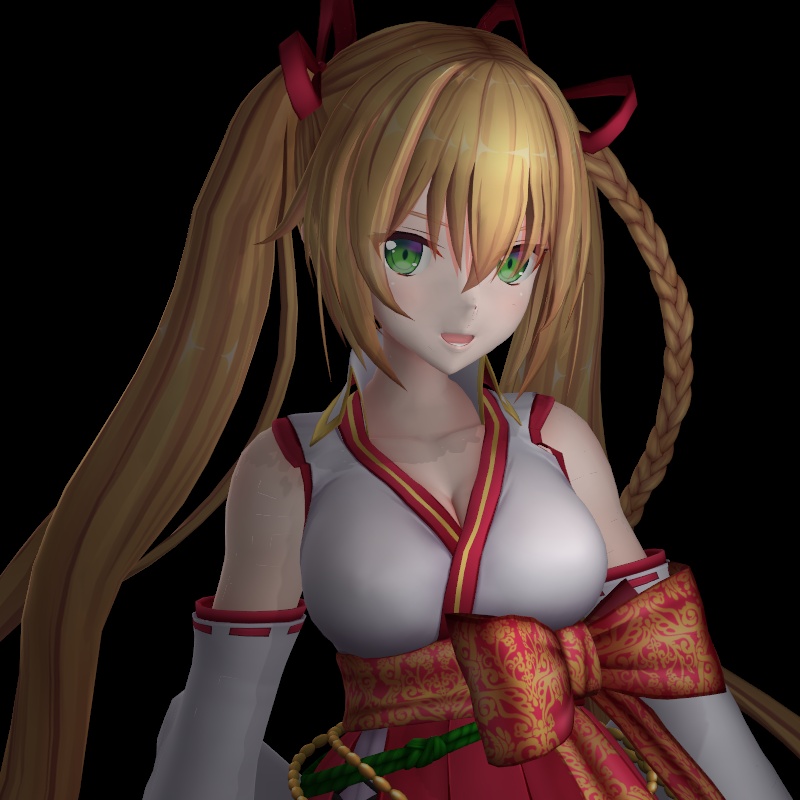
Adding the Key light
We are supplanting the global light with our own primary light source, we placed this to Iroha’s front and to her left. This light is shining down at her. Since this is now the primary source of illumination, it is the KEY light. The illumination level is now back to “normal” and her colors are visibly a lot brighter and vivid. But to balance out the overall illumination level we still need to add at least one more light.
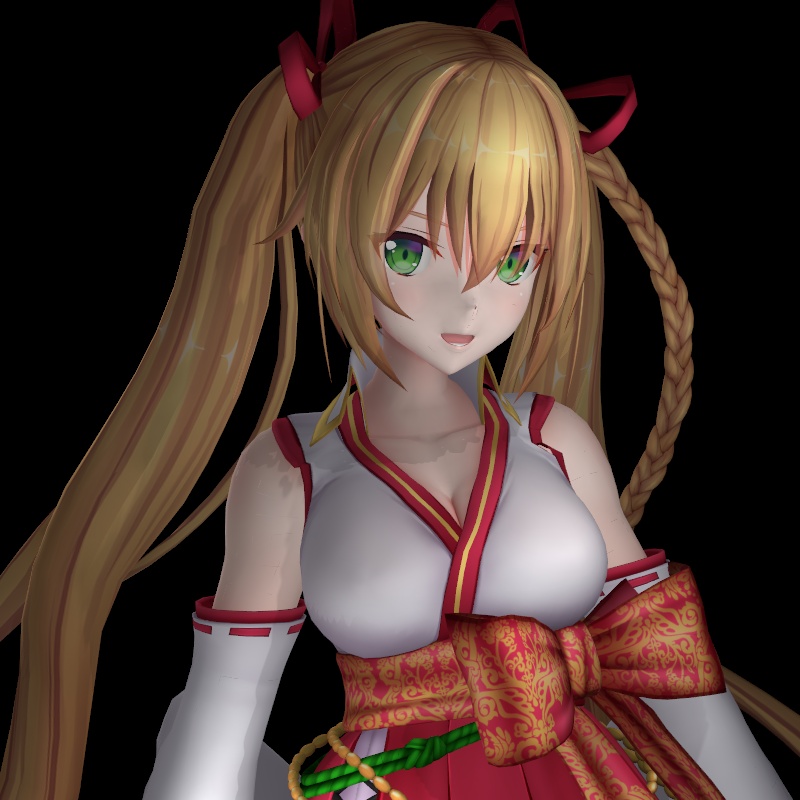
Adding the Fill light
The Fill light is located to her right side. It is in front of her roughly located at her knee height and directed to shine upwards from below. This light helps even out the contrast between the shadow and light areas of her allowing for a much softer lighting scheme. It is subtle, but nevertheless its effect should be immediately apparent. The end result is that we now have a render of Iroha done in a manner which is a fairly common practice in portrait photo studio shoots.
Finishing Touches
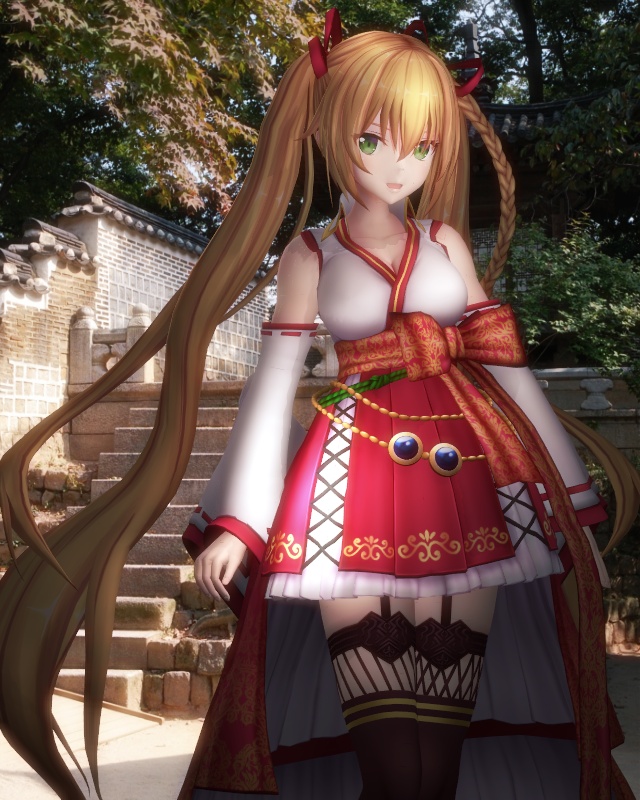
Below is the final reiteration. I ended up adding another fill light to complement the first one, this one comes from the same direction but above her and is directed downwards. To even out the lighting and to add a little warmth to the colors I used o_Diffusion. To make the colors a little more “realistic“, I added a slight touch of o_BleachByPass. I also raised the global RGB color to 0.80 to brighten up the whole scene. The end result, even though I have used one of the older effects, is competitive with anything Ray-MMD can do.
This sequence should serve to illustrate how powerful fill lights can be as they can completely overwrite the default lighting system and allow for much greater freedom with regards to control over how models are illuminated in MMD.
Incidentally, despite setting the background to black initially the background is actually white. I set the screen to black just so I could see what I was doing more clearly. To get a black background to show, I would need to add a black background image. Then again, no rule says that background image has to be black…
REFERENCE: Set Up Details
Panel Settings
The PostPointLights use an RGB system. By default they load as RGB=0.0 which is black or no light. If you set them to read RGB=2.0 the light is pure white. For more natural lighting, most lighting designers will use a middle value called “neutral gray” which is RGB=1.0. In MMD, the RGB values for these lights are set using the Rx,Ry and Rz fields. Note that the fill lights use a even dimmer gray RGB=0.5; this makes their effect more subtle. The Si and Tr fields values are used to control the intensity and density of the lights, respectively.
CREDITS
Kaneshiro Iroha (金剛いろは) – (C) Appland, Inc.
This model can be downloaded from Niconi Solid (3d.nicovideo.jp/)
MMD 9.32
Half Lambert Shader Ver 0.24
o_Diffusion
o_BleachByPass
ObjectLuminous
Temple background image – Public Domain
Inkscape
Gimp
IrfanView
– SEE BELOW for MORE MMD TUTORIALS…
— — —
– _ — –
![]()

Is there any way to download the Full-Lambert Shader not just Half of it? Thanks..
Very funny… I don’t think there is a Full-Lambert.
— Reggie