


![]() Are there any LAT model shaders? How can I use shaders with LAT models? Do they make a shader for LAT models? Why does my LAT model look so bad when I use a shader on it?
Are there any LAT model shaders? How can I use shaders with LAT models? Do they make a shader for LAT models? Why does my LAT model look so bad when I use a shader on it?
Create Stunning Scenes for LAT Models with MME
Hello, everyone! My name’s Kazumi, though some of you may know me as RoboCheatsy! This is my first article for LearnMMD, and I hope you’ll find it full of good information!
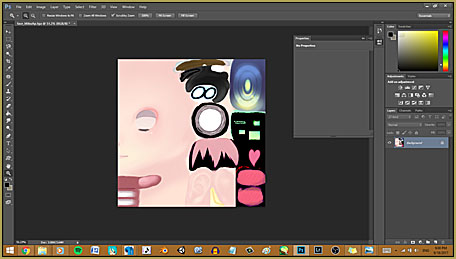
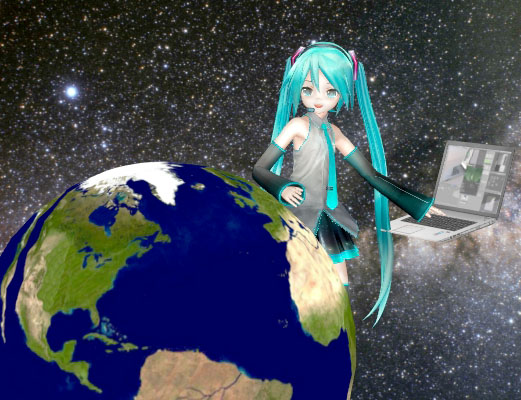
I’m sure a lot of you have made this error before: you load up an LAT model and your favorite shader… then you get this disaster:

Looks kinda weird, right? And you get this with EVERY shader you try. No matter how much you adjust the lighting or anything else, the face still looks weird. You Google search things like “MMD shaders not working on LAT models”, and you’re no closer to finding a solution.
Well, that’s because the face on LAT models is just an illusion; it’s not actually there. Loading up a shader exposes this little “magic trick”. That means no Raycast shader, NCHL shader, or any of those other fancy schmancy shaders will work.
But what if I said you could still create beautiful scenes with LAT models…?
You might be thinking “Oh! Does that mean there ARE ‘LAT model shaders?’”
Well, I hate to break it to you, but there aren’t any “LAT model shaders”… however, you can still use shaders as long as they’re not used on the face or skin. (You don’t want to use shaders on the skin because even though it displays correctly, it will make the skin appear mismatched with the face.)
This little “trick” won’t work with more specialized shaders, like Raycast, NCHL, or Toonshader, but there are several other shaders you can use.
To create beautiful scenes, we’ll have to rely on other effects besides shaders, which brings me into our tutorial for today!
Before we start…
If you don’t have MME installed, nothing in this tutorial will work for you. See Noko2’s tutorial on how to download and install MME.
You also need to make sure your locale is set to JAPANESE, or else some of the MMD menus AND most file names will turn into gibberish (which is actually called “mojibake” — the more you know). If you need to know how to do this, follow this tutorial: https://java.com/en/download/help/locale.xml
Now we can move onto the actual tutorial!
Now the fun begins!
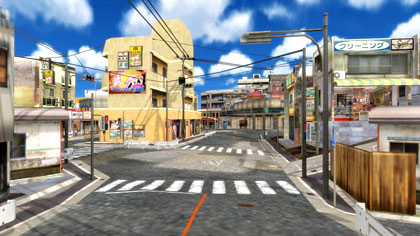
Think about what kind of scene you’d like to create; something cute or romantic? Perhaps something moody? I’ll be creating a moody, rainy scene, but you can create any kind of scene you want (within the rules provided by the model makers, of course)!
Now, load up your stage and your favorite LAT model into MMD, whether that be Miku, Rin, Len, or another character. For this tutorial, I’ll be using my personal favorite, Ohba Makoto’s LAT Sukone Tei MMD model! I’ll put the download link in the credits at the end of the article.
Make sure to turn outlines OFF. To do this, go to view (V) in the menu bar, then in the drop down menu, select “thickness of edge line” (E) and set the edge line to “0”. That gets rid of almost all outlines.
To get rid of the lines around the face, switch to MMD Japanese mode and find the facial that says “全エッジなし” (that can be roughly translated to “without all edges”) which will be located under the part of the facials menu on the bottom left (or right, in your perspective). Set its value to 1.0.
Now, load in any NON-EFFECT related accessories. After you do that, you’ll want to either load or make a motion or pose. For this tutorial, I’ll just be posing the model.

Doesn’t she look so stylish with that umbrella? What a style queen!
Once you’ve got your motion or pose, you’ll want to adjust the camera. If you really want to create a dynamic camera, I suggest learning about the “rule of thirds”. The camera is actually very important to setting a theme or mood for your scene. You’ll want something that nicely shows off the models and their pose/motion.
Here’s the camera I’ve done for mine:

Now for the effects!
Once you’re satisfied with what you’ve done thus far, load up your effects. But, you should NOT leave them all at their default settings (however, some are fine at their defaults, like cheaplens. Run their readmes through Google translate to get a basic idea of what they do).
The most important ones I recommend using are:
- SSAO (whichever version you prefer, but I typically use SSAO_lite) (set it at .4 in both si and tr) (note: SSAO may cause the shadows to look odd in some places. If that happens, go to the MME menu and under “normalMapRT” tab and “DepthMapRT” tab, remove the fx from the subsets that seem to be causing the issue)
- o_selfoverlay
- o_tonemap (this doesn’t always look fantastic stacked with other effects and tends to make things look too saturated, but I do recommend trying it at least)
- SVDOF2 (dof stands for “depth of field”. This effect is an absolute must! It blurs out some parts of background and puts more focus on your models! It’s like how a camera focuses on certain objects, and you want your LAT model to be the focus.)
- Diffusion7
- Dust Effect (NPIE edit) (this is important for creating a sense of an atmosphere.)
- S5baseshader (this is my favorite shader to use and it looks especially nice on the LAT models one you remove it from the skin)
- Excellent shadow 2 (put this on the parts you remove the shader from)
- Cheap lens (creates a fisheye effect and can be useful for drawing more attention to the focus of your scene)
Load up your shader of choice. It looks bad at first, but trust me here. Switch to Japanese mode (because your models likely won’t have any names besides “material” in English) and open the MME menu, then right click your LAT model and select “subset-extract”.
Here’s a list of materials you’ll need to remove the shader from:
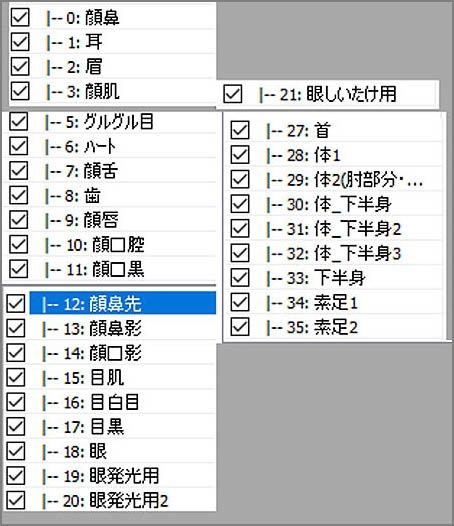
(Don’t worry if you don’t see some of those material names. Some of those are exclusive to the model I’m using.)
My settings!
Here are the effects I used in order and their settings. Feel free to copy the effects and settings I used, or try something else! Get creative!
Dust 1 – si 2 tr 1
SvDOF_HQ – Si 1.5 tr 0.9
Autoluminous – (x: -52.35, y: -1.2, z: 2.05) si 2 tr 1
o_bleachbypass – si 0.25 tr 0.25
o_selfoverlay_soft – si 1 tr 0.7
Diffusion – si 2 tr 0.6
Beamman’s water effect (puddle): (x = 0, y = 7, z = 0) si 15 tr 1
Beamman’s hitrain effect (hitrain hi) (Accessory panel settings: default | Controller settings: “eyes”: 0.75, “mouth”: 0, “brow”: 0.54, “other” – “null_04”: 0.150 , “null_05”: 0.100
Now that you’ve adjusted all of your effects, adjust the lighting in a way that suits the scene. Darker lighting is better for moody scenes like mine while brighter lighting would be better for a “happy” scene. The settings I used are:
R: 71 G: 82 B: 100
X: -0.2 Y: -0.2 Z: +0.3
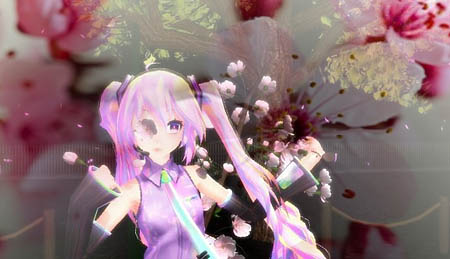
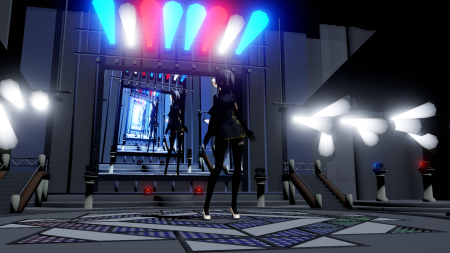
…And here’s the final image! Looks very nice, right?

Bonus content: More examples!
If you’d like to see more examples of these techniques in action, here’s a few MMDs I’ve made employing the very same techniques used in the tutorial:
Credits and Downloads!
Remember to “keep the faith” by following the rules in the read me and crediting the model and effect makers. They work hard on this stuff y’know!
Lat Sukone Tei by Ohba Makoto – You can download her by clicking the link next where it says “ダウロード” in the description of this video:
www.nicovideo.jp/watch/sm18619865?playlist=eyJpZCI6InZpZGVvX3dhdGNoX3BsYXlsaXN0X3VwbG9hZGVkIiwidXNlcklkIjoxODY1NjcyNX0
and entering the correct password. (Translated password hint: two English words you see repeated throughout the video)
Umbrella: seiga.nicovideo.jp/seiga/im6244970 (you must have a Niconico/Nicovideo (NND) account and be logged in to download this!)
Stage: seiga.nicovideo.jp/seiga/im7845142
FX:
Beamman’s fx (hit rain and water were used in this tutorial) – https://w.atwiki.jp/beamman/
Npie’s edited dust effect – https://www.deviantart.com/nutellapie/art/DL-Dust-Effect-MME-570958609
SSAO_lite (not used in tutorial) – no longer available at the time of writing, but you can try to dl it by pasting the link into the wayback machine. (Original link: https://mqdl.jpn.org/public/SSAO.zip )
Autoluminous, cheap lens, diffusion, SvDOF2, excellentshadow2 – https://onedrive.live.com/?id=EF581C37A4524EDA!108&cid=EF581C37A4524EDA
o_tonemap, o_SelfOverlay, o_bleachbypass – https://okoneya.jp/mmd_files/
Please do not comment asking for help on the videos I linked; that is not the proper way to contact me. If you have any questions, leave a comment on this tutorial and I, or another staff member, will do our best to answer.
– SEE BELOW for MORE MMD TUTORIALS…
— — —
– _ — –
![]()

I see Sukone Tei
I click -v-
Hola, ultimamente uso muchos modelos cgss, y el efecto que mas me gusta usar por que les da un estilo suave.
(solo lo uso para esos modelos ya que por alguna razon hacen ver raro a los otros modelos)
—
Hello, lately I use many cgss models, and the effect that I like to use more because it gives them a soft style.
(I only use it for those models because for some reason they make the other models look weird)
I’m an idiot xd
I forgot to mention the effect that it’s actually a shader
en OverRayShader
works the same in some scenarios