



How do I use the frame menu options in MMD MikuMikuDance? How can I select only all of the facial frame motions? How can I select motions to copy to other models? How can I move my model off of the center of the stage in Miku Miku Dance? Can I insert frames inside of a motion? 
The FRAME MENU Options
This post was written in 2011 for MMD 7.39 users. This post is OBSOLETE and does not apply to the newer versions of MikuMikuDance.
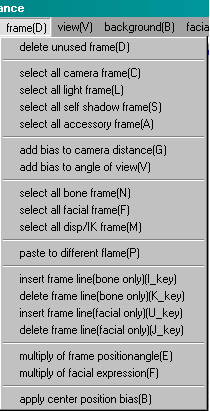 Delete Unused Frame allows MMD to remove unused frames without changing your animation. I have used this and been told by MMD “Frame 73 deleted” … I did not see a difference.
SELECT ALL options: Self explanatory … Choosing the “Select All Camera Frame”, for instance, selects all of the Camera Diamonds in all of the frames. You may then copy, delete, and etc.
Add Bias to Camera Distance adds a wide angle/fish-eye lens effect to your camera’s view. Register the Camera in a particular frame and then choose this Add Bias to Camera Distance and enter a value. Register it. In-between frames are created to ease you into and out of the effect. Entering a value of 1 has no effect. Adding Positive numbers adds a wide angle that appears to move your view back from your character. Adding a huge number, greater than 135 (?) makes the scene go upside down. Again … it’s an interesting effect as the inbetweens glide your view into, and out of, the wide-angle effect. Entering a negative number seems to draw you in closer to the subject.
Add Bias to Angle of View adds an up/down wide angle effect. Choose one of your existing animations and advance the frame counter until you have a camera diamond on your frame. Select this Add Bias to Angle of View and enter a number like 60, register, now play your animation and see the focal distortion that has been created. Experiment with this option for interesting results.
SELECT ALL options, as with the Camera options, select all of the diamonds in all of the frames … All of the Diamonds in ALL of the Layers! I tried to Select All Bone Frame for a dance with several characters … and all of the bone diamonds for all of the characters became highlighted. I clicked COPY. I then advanced the frame counter to the end of the dance and clicked PASTE. Only the currently selected character got pasted … the other layers, other characters, were not effected. I then selected each character and clicked Paste and each character, in turn, Pasted OK. NOTE that Select All BONE does not select the Facial diamonds. If you Select all Bone, Copy, then Delete the character and load another character, and Paste … the new character will have all of the motions but will not get the facial instructions. To move ALL of the data as you replace a character, use Range-Select, All Frame, Copy to capture all of the data.
Select All Disp/IK frame … I do not understand the Disp/IK “bone” … Please email me if you know how to use this function.
Paste to Different Flame (Paste to Different Frame) pastes the selected data into your current frame … same function as clicking the Paste button.
Insert Frame Line (Bone Only) inserts a new frame just before your current frame position. If you are looking at your diamonds on frame 100 and you click this option, the frame counter will still read 100, but your Diamond has moved out to frame 101. As the title implies: it only effects the Bone frame … the Facial frame data and the Camera data have not moved. Insert Frame Line (Bone Only) shifts your bone data inside of your animation.
Delete Frame Line (Bone Only) works the same as the Insert Frame Line (Bone Only) except that it removes a frame directly before your current frame position. With your frame counter at 100 and a bone Diamond on 100, you select this option … and your frame counter still shows 100 while your diamond has been moved to frame 99. Again, only your bone data has been moved … the Camera data and the Facial data stays where it was.
Insert Frame Line (Facial Only) and Delete Frame Line (Facial Only) works in the same way as the “Bone Only” described above.
Multiply of Frame Position Angle allows you to multiply a bone’s settings numerically. You choose a bone and click this option. A chart opens that lets you enter multiplication factors to the XYZ Position and XYZ Rotation effecting that particular bone. You’ll need to experiment with this option to see if it’s of value to you.
Multiply of Facial Expression is another numeric option … this time letting you adjust facial settings.
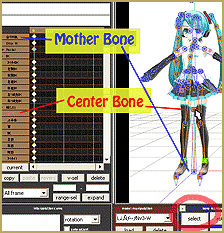
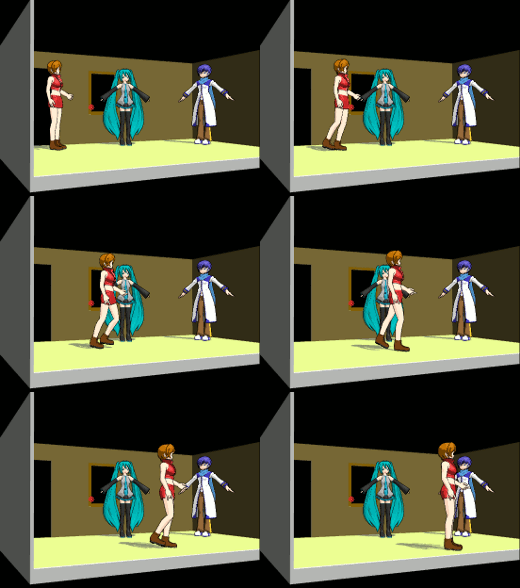
Apply Center Position Bias allows you to move  a character away from the Stage Center Point. The character to be moved has to have a registered position before you can use this. Select and highlight the Diamonds for the Center and the two IK-Leg bones of your model. Clicking the Apply Center Position Bias option shows you a chart of XYZ location for your model. Entering values relocates your model’s center, home position.
You can create a dance for one character, Use Range Select to Copy all of the frames, Load another character, Paste the data to give the new character the identical dance data, then, with all of the motion diamonds still highlighted, select the Apply Center Position Bias option to re-position that second character away from Stage Center. Register. Now you have two characters dancing in unison. You could create a stage full of dancing characters all dancing in unison as seen in the Sample(AllStar) sample dance that comes with MikuMikuDance. Have fun with this option, it is an easy shortcut.
Click aa1 MENU Option Descriptions in the Contents section to see all of my Menu Option write-ups.
Please email me, Reggie Dentmore, if you have questions. I learn more as I research the answers to your questions.
– SEE BELOW for MORE MMD TUTORIALS…
— — —
– _ — –