


![]()
How can I fix my model’s MMD hair physics? How do I use PMDE to adjust my model’s physics? How do I fix MMD hair physics?
Oomary’s guide to
Mastering MMD Hair Physics
TABLE OF CONTENTS
- Who I am
- Bodies and Weighting
- Body Physics
- Joint Physics
- Closing
Who I am
Hi, hey hello everybody! I’m a new member of the LearnMMD team named oomary! My specialty is in physics and making them as smooth as possible and not floppy (like the usual MMD physics!).
A little disclaimer: Depending on what you’re going for, your physic settings will be different from the ones I recommend in this tutorial. Also do note, you should probably apply the learnings of LearnMMD’s other basic physics tutorials, then use this tutorial for things like tuning the hair physics.
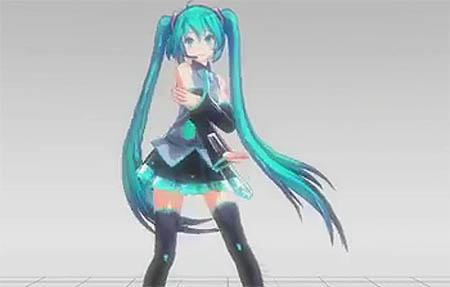
This video demonstrates the MMD hair physics I create using the concepts I show you in this tutorial.
The body and joint settings of your physics are what make them look smooth and flowing. Most physic tutorials will tell you “put these numbers in and you’re good”, but what’s any use in knowing the numbers if you have no idea what you’re typing in?
Let’s go tab by tab in both the body and joints tabs, but before we do that, let’s go over something very important.
Bodies and Weighting
You’ll want to have weighted your hair and added bones, but there is
A. a much easier way to add bones, and
B. a much smoother way to weigh hair.
A: pro tip: Correctly parent and position bones. Let’s say I have hairbone1, and hairboneend… I parent hairbone1 to the head, and hairboneend to hairbone1, then select both bones, go to edit, bone, and create middle bone. Do this several times, parent and connect them all together, and you should have a nice balanced set of bones.
B: Gradient weighting is almost always the best way to go in terms of weighing you hair. It’s easier to explain if I show you this video, below. It tells you exactly what you need to correctly gradient weigh hair. (pro tip: if it doesn’t work with the weight mode set to weight, try re-doing everything (the weighting) except in normal mode instead. Weight mode just doesn’t like some people, specifically: me!)
The video: “MMD Hair weighting tip”by YouTube’s Digitrevx Trev
The part your looking for can be found about 4:30 into the video.
With those tips out of the way, let’s begin the main part of the tutorial!
Body Physics

(mini side note: You will never need repel or friction, whether your making skirt or hair physics, and although I’m referring mainly to hair physics, everything besides the mas values can be used for skirt physics, as well.)
Going from top to bottom, let’s start with SHAPE: Shape is almost always irrelevant to actual physics, just set them to cap (which is a pill shaped looking physic) and you should be basically fine). The SIZE of your physic bodies will determine how good the collision physics on your MMD model are. Good physic edits will have bigger sizes going down on the model, as most hair meshes are thin at the top, slowly getting bigger down at the bottom. Position and Rotation shouldn’t be messed with, as they both simply mean where your body is on the hair, and you don’t have to change that, and if you do need to change it, you should do it from the PMX view window.
Next up, we have the important part: physics. I’ll start by explaining mass, and go on from there. The simple explanation of what hair mass is, would be: weight. it’s how much your hair physics weigh. Set this to something like 1000, and your hair won’t move, because it’s too heavy. Set it something like 1, and it’ll swing and go absolutely insane! You also won’t want the same settings on every physic body.
Your best bet for well weighted physics (besides the actual rigging, which I have covered) is to have this set to something in between 1 (super duper light physics) and 100 (pretty heavy physics) so maybe something starting off at 40, and going down to 1 would work. Also, don’t skip numbers, go down at a consistent rate, that will leave you with 40 going down to 1, so if you don’t have 40 bones for your hair, (not altogether, in one pigtail for instance) don’t go,
40
49
48
47…
because your hair won’t look natural. If you have 10 bones (which can work, but it’s recommended to have at least 20.) Then you should have your mass values go down in ten even/progressive steps:
40
35
30
25
20
15
10
5
.5
1
This isn’t exactly what you may have, but it’s close enough to be good.
Next up, your move values. This can be simply explained as how slow or fast your model’s hair moves around, hence the term, move values.
With the move value settings, try starting off with something like 0.5555 at the top of the chain of bones, and then make your way down to 1. Like with the other settings, gradually go down at a consistent rate. Another thing to mention is that setting model’s move values to something over 1 will end up with your model’s hair physics looking way too unaturally heavy. Your hair is going to look really bogged down with this setting, and I would recommend not to turn this value up past 0.9…
That was a short one, but I think this one is even shorter, Your rotation values. This is, relatively similar to move values, it controls how much your hair rotates, or spins around, now this you won’t really have to change much. Your best bet with smooth rotation values, is to set them to something like 0.999999999 (just a hair less than zero) and then at about the last 2 or 3 bodies, set it to 1. This will make the ends of the hair more similar to real physics, moving around less at the bottom, and more in the middle and top.
Joint settings

This is going to be a quick one.
The first row, is similar to the aforementioned move values, it limits how much your hair can move around.This parameter isn’t really needed to be edited for hair physics to be super smooth, though they definitely help with skirt physics (which I end up explaining a few sentences later.) You should usually never use the axial rotation row (the row under the move one), as it usually won’t ever help your physics. The spring rotation and move rows, also usually won’t really need to be messed with. If you change them, it just changes the limits on like, how much your joints can move, and rotate, similar to the row above it. While this is definitely a hair physics tutorial, I know there’s gonna be that one person who goes, but what about skirts??the body settings I provided above are most likely not gonna work either your ultra high quality skirt plugin skirt physics, but I can make a separate tutorial on that if you would like. for now though, I can give this one general tip for smoother skirt physics, specifically for dancing motions; in the move parameter llimits row set the first box to -1 the second to 1, as shown below. Don’t set these settings on hair physics though, as it’s not necessarily needed, and honestly, while it’s good to know how they works you most likely wont need to do many joint edits when updating your hair physics.

If you have all of that done, your physics should be just about good to go! Open up transform view, and test them out!
Closing
I hope I was able to help you smooth out your physics!
Please leave a comment and let me know, and… I’ll see you in my next article!
– SEE BELOW for MORE MMD TUTORIALS…
— — —
– _ — –
![]()


Hey, the video in the tutorial is down
That video worked for me, just now… Here is the link to that video on YouTube.
— Reggie
Heya! I have a little problem. Idk how to rig the hair and the video is no longer available :c What can I do?
So I’m confused by some of the numbers, like where it suggests things like “try setting your rotation value to 0.9999999 (just a hair less than zero).” Um. Numbers don’t work that way. Less than zero is going to be a negative number. 0.9999999 is a hair less than 1.
You’re Right! … If you go less than Zero, you end up with a negative number. … I am sure the author meant to say “less than one”
… I will ask her.
I’m referencing this while rigging a long coat (game rip, came with no bones or physics), and I’m also finding a few more inconsistencies, such as starting with a move value of about “0.5555 and going down to 1.” You would be going UP, or increasing the value, to reach 1. There’s also a point where I think she meant to type “2.5” but ended up typing “.5” instead.
I would love to see an explanation for what exactly happens if these numbers are set very high or very low, to help give an understanding of what exactly they do. And while this might just be me, I also don’t think the Repel and Friction values should be ignored. If they didn’t do anything, they wouldn’t be there in the first place, but I’ve never found any tutorial that can explain these values.
Repel sounds like it might control how much a specific physic bounces off of other physics, or maybe how much IT bounces off of other physics.
Friction… well, in real life, it slows things down and stops movement as things rub against each other. (ex. car tires! Friction is what lets them grip the road. It’s why bald tires are disaster waiting to happen. And less friction is why wet or icy roads require you to double or quadruple your stopping distance!) Or it can make sure things don’t start moving in the first place. If you try to slide a heavy piece of furniture across a carpeted room, you need enough force to overcome the friction between the item and the carpet.
If it works anything at all like real life, the Friction value could be VERY important. Silky hair could have a value to indicate it slides smoothly past itself without much resistance, while coarse hair might impede its own movement with more friction. …Whichever numbers. Maybe I could figure out a way to test that….
So this is my understanding of “rigid bodies”
The “move” factor, however high or low, affects the way the body will literally move. for example, if set at 1 it will be quite a lot slower, even appearing static in the air if the body that it’s connected to isn’t moving. but if set at .5, it will appear to follow the body it’s connected to more cohesively rather than being dragged through the air (I hope that makes sense) the mass of the body also affects how that will work. I generally use .1 or lower mass with 1.0 move factor at the very end of a body chain to help give it that flowy feel.
The “rotate” factor affects how “jiggly” or “jittery” the bodies are, like basically how much the body whips around. I generally set this at 9.0 and go up to 1 at the very end of a chain. much like the move factor, the higher you put the number the more dampened the rotation will be.
I hope this was understandable, I’ve never really had to put this kind of information into words so… I hope it helps.
This is awesome! Well done. This will definitely come in handy.