


![]() We are on the last stretch of this 3 part series. This will be “challenging” so be warned.
We are on the last stretch of this 3 part series. This will be “challenging” so be warned.
RAY-MMD: Haku’s crazy light show
[PART 3]
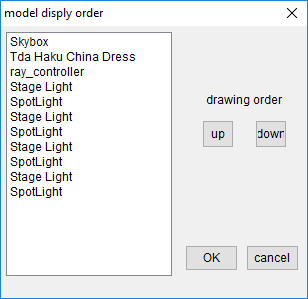
First load the StageLight.pmx model from our Articulated Stage Light set. This model will have to be loaded 4 separate times but we will only describe the first installation.
Word of Caution: the model file name conflicts with RAY-MMD; it thinks that this light is one of its lights but there is a side benefit. You could rename the model file, but the naming conflict has an interesting side effect: it makes the light a lot easier to shade.
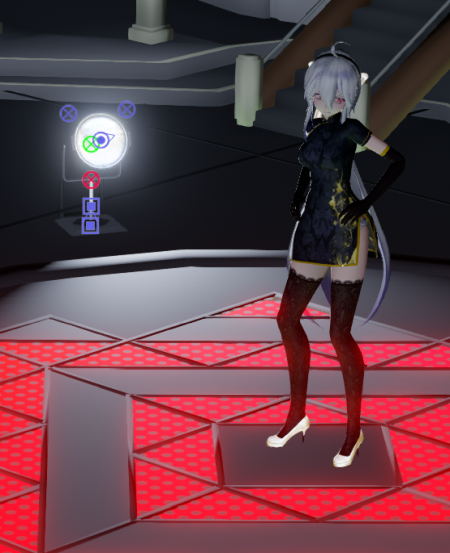
Anyway, loading the light will place it at Haku’s feet. The bone in red is the model’s center bone; use this to locate the model to its final destination.
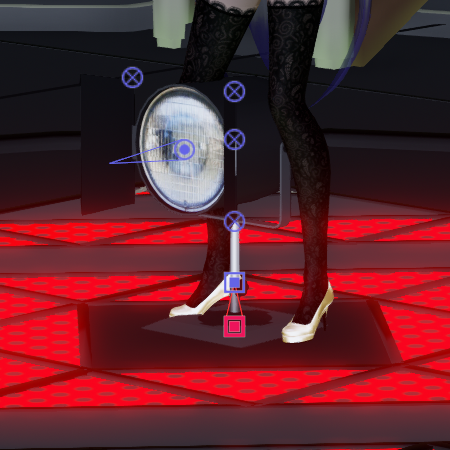
At 45 degree angles are 4 structures on the stage model intended as a stand for the stage lights that comes with the stage (and you could actually use those instead, but they are a real pain to set up). Use these structures as markers to locate your lights.
Here is one of the lights located at its final location. Honestly, it may take awhile to position each one, but it isn’t hard. Just a bit fiddly.
To shade the lights do the following:
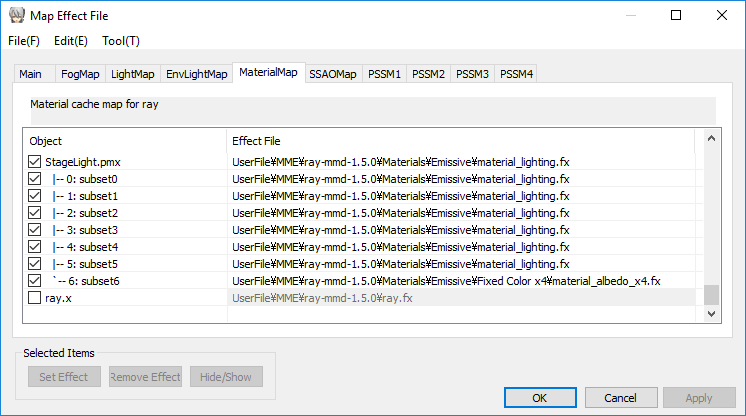
Do the same for all 4 lights. They will look and work just fine. Your lights should like the one shown below and now all we have to do is to add a “real” light source to each of them.
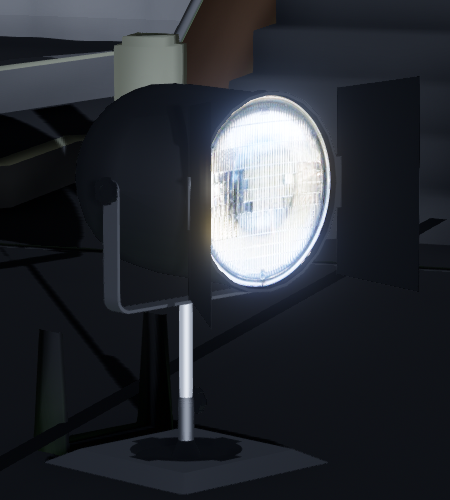
RAY-MMD has several types of directional lights. We are going to use the one that will most closely replicate the type of illumination that this type of equipment throws out. These add on lights can be extremely bright so the operative word here “is to use a light touch“. Plus they need to be aimed; but by specifically using these stage light models, we will make it much simpler as all we need to do is to aim these lights at Haku as if they were lights in the real world. It does not get any easier than that now does it?
Also, I highly advise that you install these lights in a clock-wise fashion as it will keep them logically organized. This will really help with the next part.
Adding the light bulbs
Once again I will describe the procedure for one installation. It needs to be done 4 times in total. From the RAY-MMD Lighting folder load the SpotLight.pmx model. As before it will load at Haku’s feet. By default the light will be off but I’ve turned it on for now so it can be easily seen.
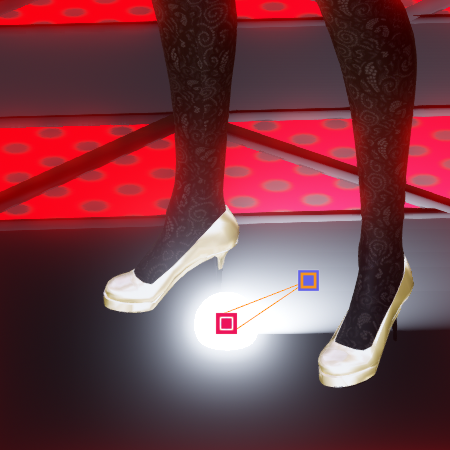
The light model has 3 bones. One labeled “direction”, another uses a label in Asian characters and the root bone (the red one selected here) which has no label at all.
There are 2 ways to aim this type of light. Either use the rotation only “direction” bone or to drag the bone with the Asian label which is at the end of the arrow to the target which you desire to aim the light.
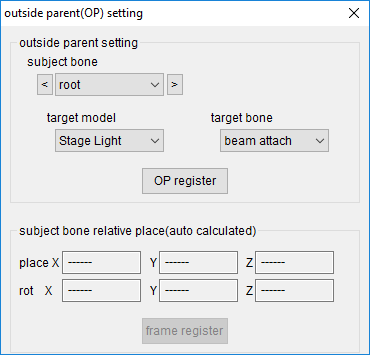
But there is an easier method. We use MMD’s OP function to attach the SpotLight.pmx model to the StageLight.pmx model. Doing the following will pop the light source to the light model in a painless fashion.
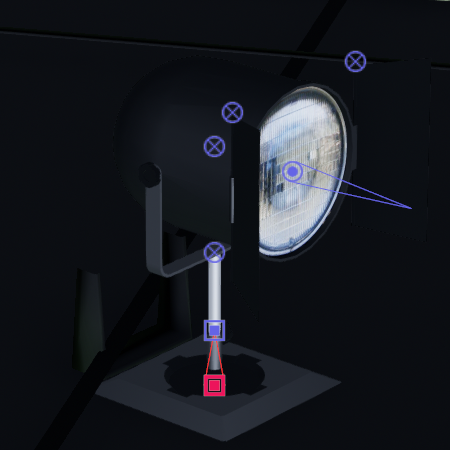
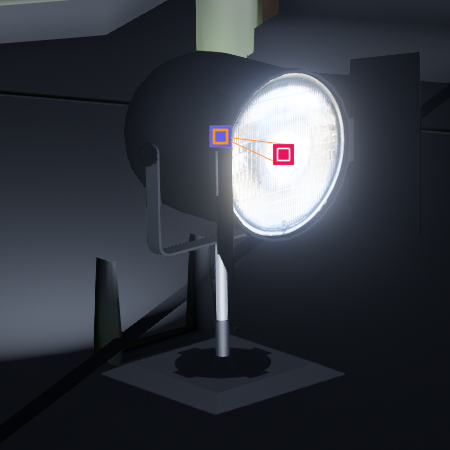
However, as this screenshot shows, the light direction is in directed in the wrong direction. We will fix this next.
Aiming the light
See the following screenshot. Click on the thumbnail below to see my screen actual size to fully understand the procedure.

The really neat thing is that the OP function has slaved the light’s coord system to the lamp model’s coord system and this save us from having to pull out our calculators. Do not aim the lamp model yet. Using the “Z” widget (where the mouse cursor is in the screen shot), simply slide the bone with the Asian name towards Haku. How easy is that?
If for some reason the light does not follow the bone, you can force the direction the light is thrown by rotating the “direction” bone to the desired orientation. The OP function can throw the normal behavior of these controls but it is a small price to pay for simplicity of operations.
The lamp model has two bones (frameRev/lampRev) which are used to aim the light, use these to make the final adjustments. Turn on the light to do this; this is done with the SpotLight model’s facial controls. Use the RGB and intensity controls for now so that you can interactively see where the light is going and what it is lighting up.
Note: There is a glitch with the SpotLight model’s facial controls. Always use the sliders to set values. Entries made directly into the text boxes do not seem to take. This is true of many of the other light models that comes with RAY-MMD.
Light settings
When you played with these lights whilst installing them, it should have been pretty obvious that they can throw out a lot of light. Overwhelmingly so, especially with 4 of them. So the best approach is to tone them down a bit or they will white wash Haku and much of the surrounding areas.
Here are my actual settings:
- R+, G+, B+ : 0.70 (note that this is a light grey color and not white)
- Angle – : 0.50 (this narrows the beam of light thrown out)
- Intensity+ : 0.80 (kind of works as a dimmer switch)
- AttenuationBulb- : 0.30 (the power/output of the bulb used)
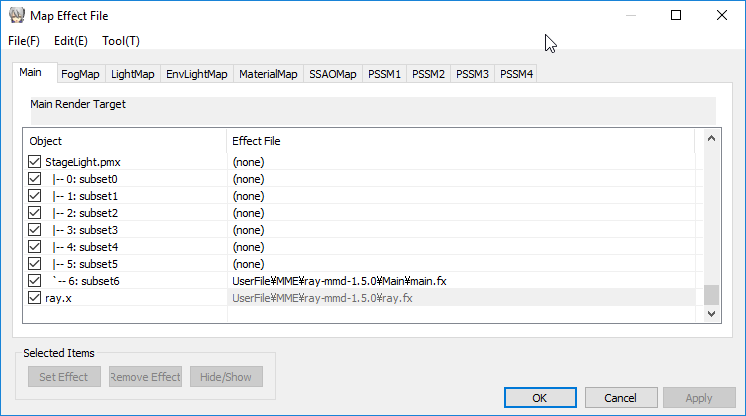
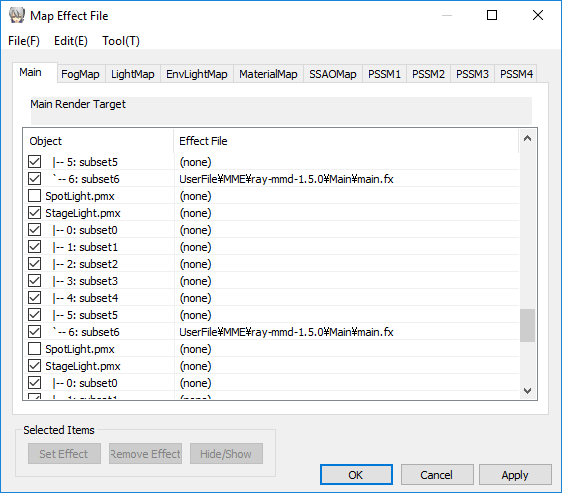
Note that the SpotLight.pmx models are still visible and should be hidden. To do this, uncheck the boxes next to their names in both the Main and MaterialMap tabs of the MME interface.
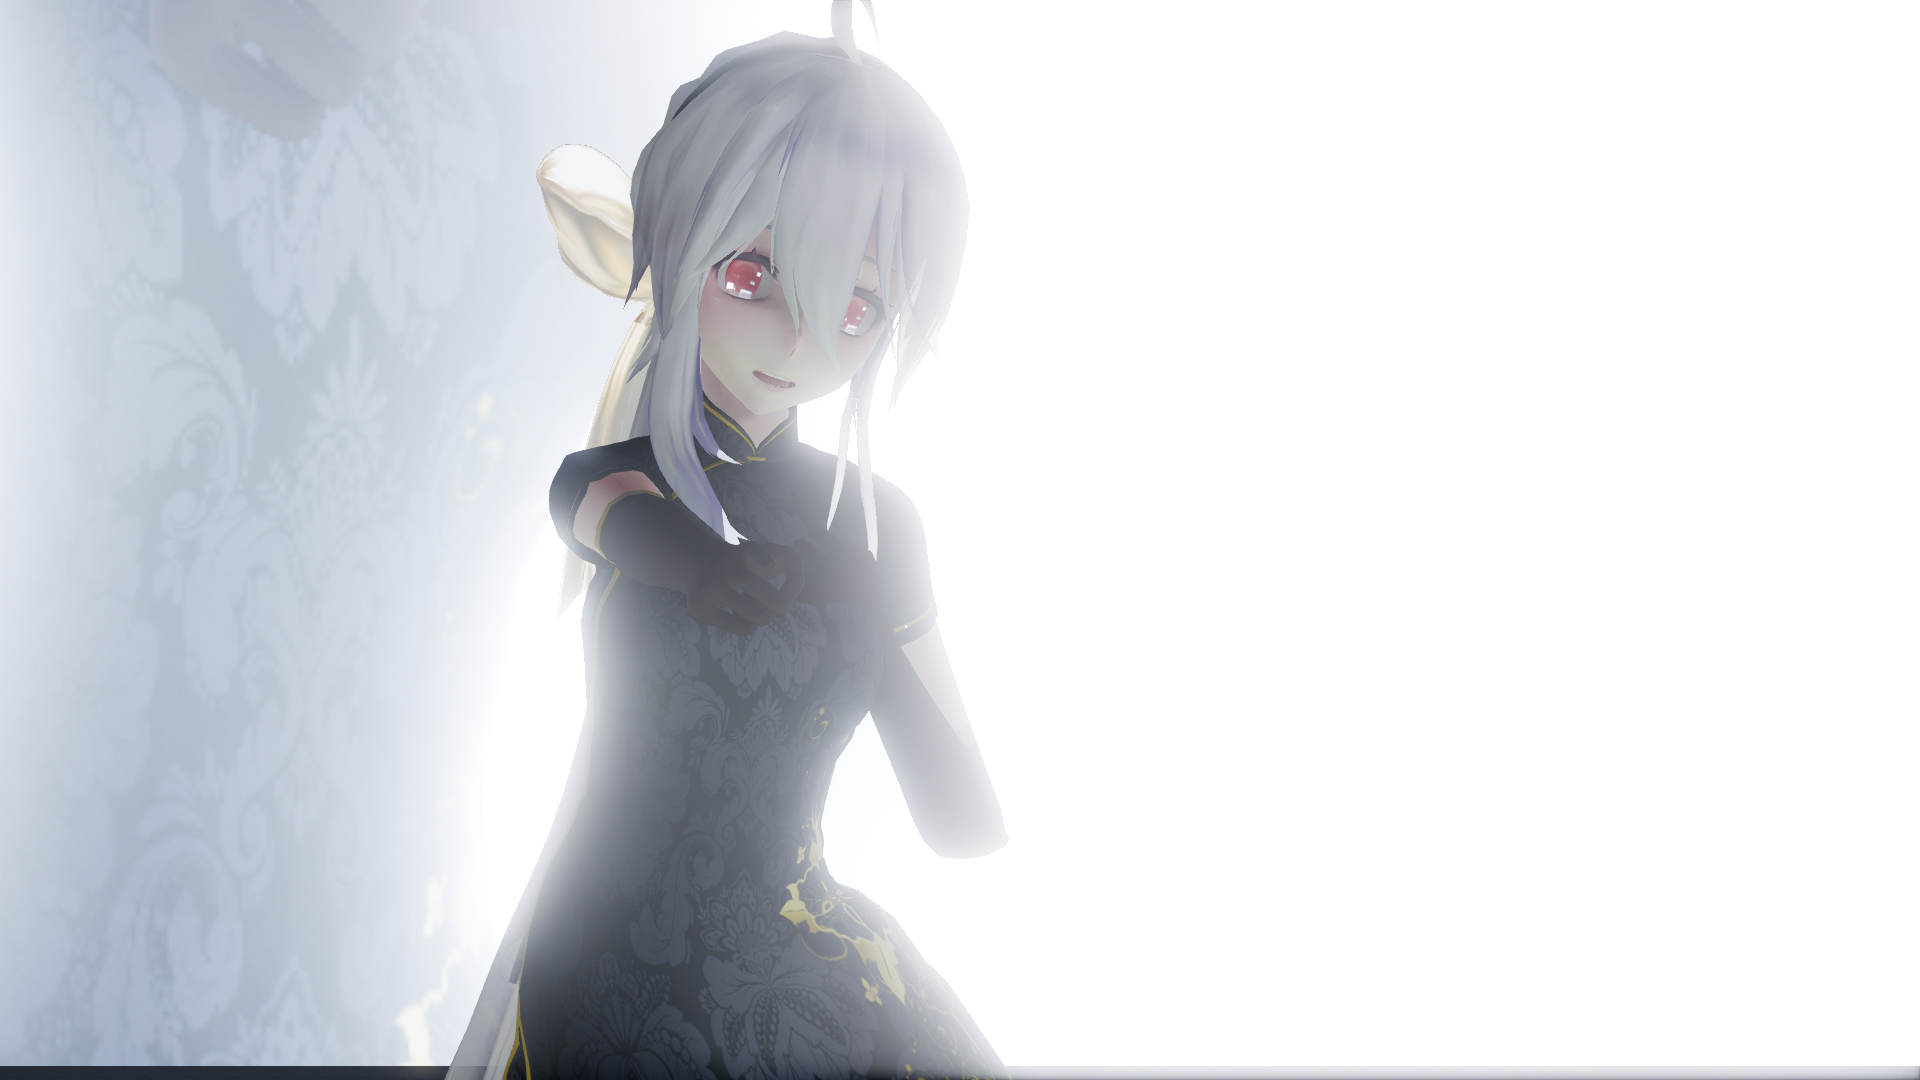
If you used these values and did everything else prior Haku or your performer should now look something like what is shown in the screen capture below. Quite a difference from all the images of her that we have shown thus far isn’t it?
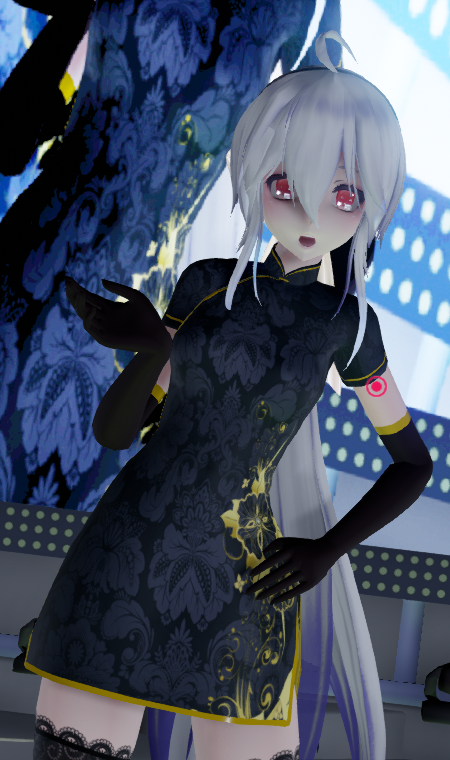
Now all that said, you do not have to use any of the values that I selected. For a start, there are no rules stating that the stage lights have to only throw out white light. You could go for a warmer look or even go for a more disco like presentation (use colored blinking lights for example). RAY-MMD gives you a lot of flexibility in this regard.
If there is one piece of advice that I do want you to take away when working with RAY-MMD it is to: “experiment“.
The Blooming Finale
Well since Haku wanted to put on “The Show of the Century“, we will add some spiff to the final production by introducing Bloom into the equation. Bloom hardly exists in the real world unless you have astigmatism. But it is commonly seen in a lot of camera photos and especially computer games. Since Haku is really a denizen of a virtual world, we can safely add Bloom without the expectation that viewers will find it odd. In fact, it can be used as the “WOW” factor to give some polish to our production.
RAY-MMD bloom controls, especially with the kind of set up we used here, can be overwhelming. So use a light touch or it will just look bad.
Here are our settings (Bloom is controlled using the ray-controller widget):
- BloomThreshold : 0.35
- BloomRadius : 0.10
- BloomColorAllH+/S+/V+ : all set to 0.05
The last two controls we accessed “color corrects” the scene by adding a little yellow to offset some of the whitewash caused by the 4 stage lights we added earlier. Basically, these help warm up the flesh tone colors a bit.
- BalanceR+ : 0.30
- BalanceG+ : 0.15
All these settings should give you this kind of look (some of the time as Bloom is camera angle dependent to an extent).

Haku’s Show of the Century
Finally, here is all our hard work shown in video form below. Well, “Show of the Century” maybe hyperbole but hopefully the performance looks very polished even though we used only a single effect suite and a stage that dates back to MMD’s earliest days.
Anyway, please enjoy Haku’s show and thank you for reading along with us as we worked through this project. By this point, you should have gained some really good insights as to what RAY-MMD is truly capable of and how to access these features.
We would love to see what you can do with it too, so please feel welcomed to link your own video productions below in the comments section.
CREDITS
- Tda Haku China Dress ver. 1.1: edit by iRon0129
- default stage by Animasa (?)
- MMD 9.31
- RAY-MMD 1.5.0
- AviUtil
- IrfanView
Original Tda model by Tda; Haku Yowane (C) Crypton Future Media, Inc.
– SEE BELOW for MORE MMD TUTORIALS…
— — —
– _ — –
![]()


Ray-MMD 1.5.0 – 11.1.2018.
Ray-MMD 1.5.2 – 13.3.2018.