


I wrote a tutorial awhile back on using the OP function to allow MMD character models to easily hold objects. However, it only briefly touched upon how to use this function in an animated sequence. This has caused some confusion as the process is not intuitive. This article will show you exactly what needs to be done.
THE PLAN
Always have a plan when embarking upon any MMD project. For our purposes, I am going to have my model pick up an object on the ground and place it on a table. Now, you may think “Ho Hum” as you and I can easily do something like this without a second thought, but it is quite a bit more challenging to do this in MMD.
This will be a simple animation but it still needs to be planned out and the thinking is as follows in our example (and this plan will also be indicative of what our key frames will need to be).
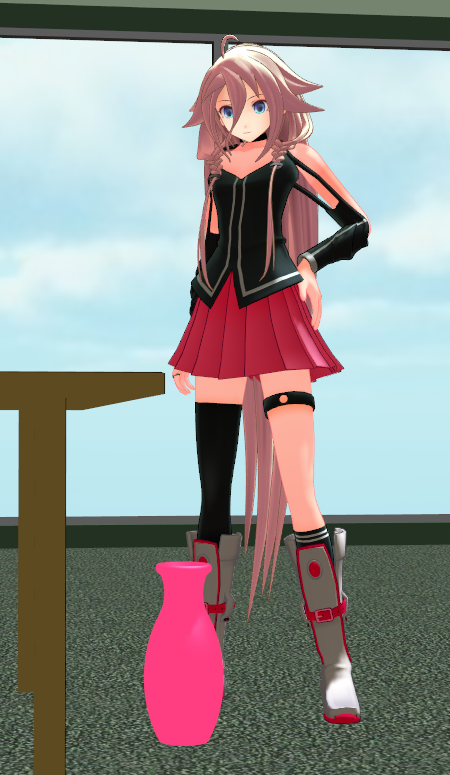
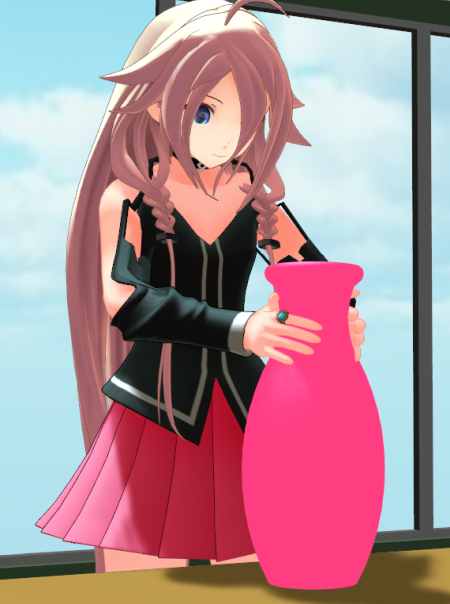
- The sequence begins with the character model standing next to a table looking down at a vase on the floor.
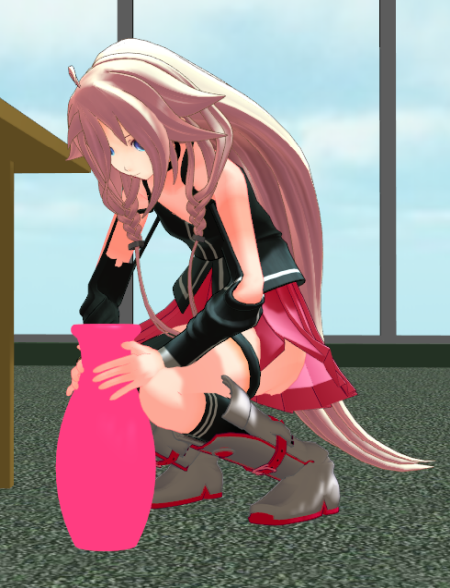
- She then kneels down using “safe” lifting techniques to pick up the vase. It is at this point also that the OP function is first accessed to associate the character and the vase.
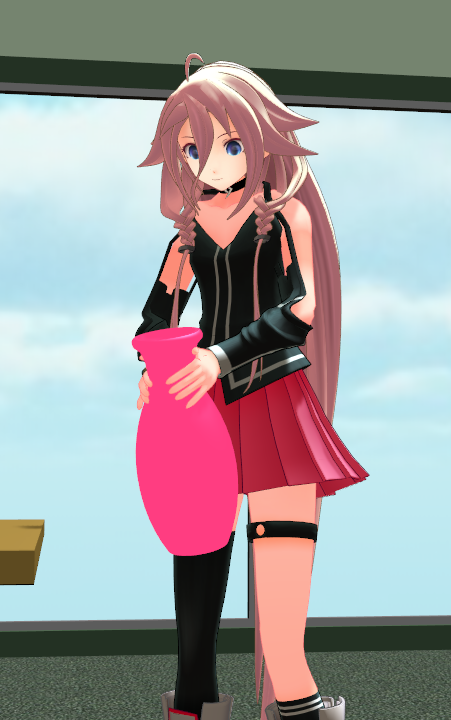
- She then lifts up the vase in preparation to place that item on the table.
- She places the vase on the table and the OP function is accessed a second time to break the association.
- Finally, with the vase on the table, the character model can stand back and watch the results of her handiwork.
MODEL ASSETS
For my project I will be using the following items in case you want to duplicate my steps. Please note that you do not have to use the same models and some of them are not available for download anyway as I created them specially for this article.
- IA ROCKS [UNOFFICIAL]
- MMD Production Dance Studio
- MMD Vase (WIP) – you will need to convert this into PMX format yourself if you choose to use this item.
- A table that I created in the PMXe (and yes, you can actually create models using the PMXe; at least simple ones).
- Plus a sky dome (source unknown – probably originally by UssiP)
These were set up as shown in the screenshot immediately below.
The vase is at it’s load position but since it will be moved in this animation, you must register its start location even if this is at the default location. So select its center bone (most accessory models will only have this bone, but in doubt, register everything) and click “Register” to record its location and aspect.
When I use the term “aspect” here, what this refers is its rotational data. All MMD bones have positional as well as aspect data. This entire set of data tells MMD everything it needs to know about the bone. This is especially important for objects that needs to be moved through 3D space. When you click the register button, this will put in effect a record of this data set so normally, you do not worry about this but it is still important to know.
PICKING UP THE VASE
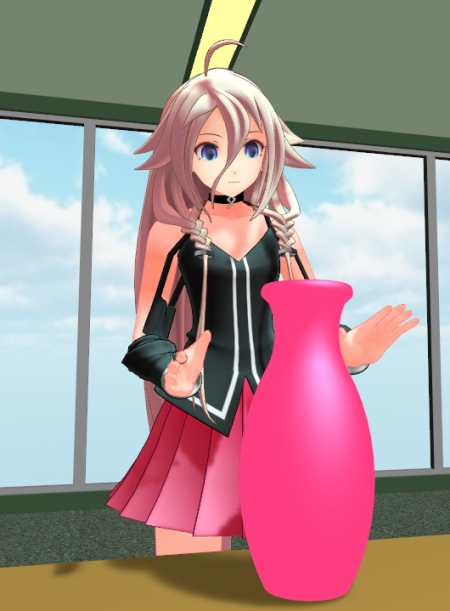
In our animation, IA reaches/bends down to pick up the vase. This is the point at which the vase is associated with IA using the OP function.
This is actually frame #30 in our animation and at this point we simply flip over to the vase model and access the OP function.

The vase only has one bone; the center bone. So we simply use that to attach it to a special bone in IA’s hand that is used for her to hold things. Most modern models have this bone. It is called the attach_R bone on my model but may have a different name on other models. Click the OP register button to create the association.
You can also add the attachment point bones to a model using the PMDe/PMXe with the semi-standard bone plug-in installed (or do it manually, which is what I do).
The next part is IMPORTANT.
Below the OP register button is information that records the exact position and aspect. This will only occur if you followed our instructions above and registered its positional information on the first frame; otherwise these fields most likely will be blank.
If your fields are blank go back to frame 1 to register the vase’s location and then repeat the OP function step, otherwise just click on the frame register.
So, if you did this right you will have clicked on both the OP register as well as the frame register button at this point. These two operations tells MMD what the vase is now slaved to, and when this association starts on the animation timeline; plus where the vase is and its aspect when this association is first created.
Now, with the vase we are using because we created it correctly, the vase remains on the floor when the OP function operations are recorded. With other models, this may not be the case. In which case you will have to move the object back to the desired location and repeat the procedure. Specifically, you must first register the bone’s new location (most likely now in the model’s hand) and then repeat both parts of the OP procedure.
Honestly, the process is not intuitive but it is logical, so think it through if you run into a stumbling block. There are just too many variables for me to be able to give clear instructions for all situations.
MOVING THE VASE
Now that she has the vase in her hands, IA can now lift it off the floor. As you animate this portion, you can see the vase moving along with IA. Nothing else needs to be done with the vase for this to happen.
Then, next we turn her and her vase towards the table. It is important to note that IA is actually only attached to the vase via her right hand (since we used her right hand attachment bone). What this means is that the left hand is free to do whatever, but more importantly, with this type of pose, it will not automatically compensate for what her right arm is doing and may require adjustment.
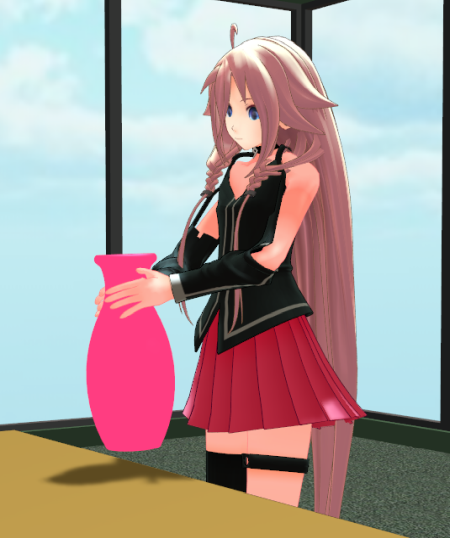
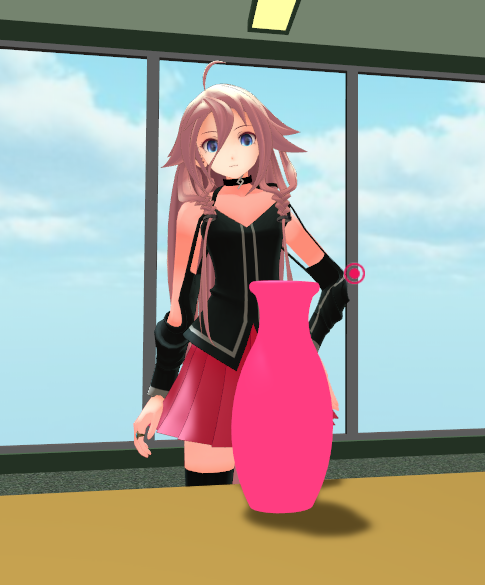
We then lean IA forward to place the vase at its final location.
At this frame, since the vase is at its final location, we need to break the association between IA and the vase so that she can let go of it. This really simple to do. Open up the OP function window again and do the following:

With the center bone selected in the subject bone box, set the target model to non. The target bone field will be automatically filled so just click on the OP register button as well as the frame register button. The last step will correctly record the vase’s position at the location where it is dropped.
This next frame shows the vase remains where it is placed once IA takes her hands off it.
And once IA is disassociated from the vase she is free to normal as can be seen in the final key frame of our animation. So in actual fact, only 7 key frames were necessary for this entire sequence. There were some correction frames needed to fix issues since as some movements required corrections to the left arm.
Plus I forgot to lock certain bones and that messed up my animation sequence in parts… *groan* … it is easy to forget the simple things when dealing with MMD.
HOW TO SAVE YOUR MOTION
People trying to save this type of motion sometimes run into an issue even after they have set everything up correctly but find that they cannot be able to save their motions correctly; which is why it is necessary for me to cover this subject.
Remember that both IA and the vase are in motion. Each one is an individual entity. This means that there are 2 sets of motion data and not just 1. So when you save the motion data you must save the data for both IA and the vase, as in our example.
But there is an easier method: save your entire project as a .pmm file, which you should have already done anyway. This captures everything. But the above steps are necessary if you specifically need to save the individual motions, such as when you desire to share the data with other people.
AFTERWORDS
As always, thank you for reading and we hope that you have this article useful. Our animation is shown below and serves as “proof of concept”.
CREDITS
- IA Rocks [Unofficial] – Mqdl/Trackdancer
- IA (C) 1st Place Co. Ltd.
- MMD 9.31 & PMXeditor
- IrfanView
- AviUtil
- ExcellentShadows2
– SEE BELOW for MORE MMD TUTORIALS…
— — —
– _ — –
![]()


How do I attach one object to both hands and have the hands and object move at the same time( Im trying to animate someone holding a two-handed gun)
Howdy! … You might get some hints from this post… allows one model to automatically follow the motion of another… like put a hand on a head while that other model is walking… adnd the hand stays on the moving head. … Trackdancer also has this other tutorial about using the OP function in a complicated way.