Why can I only load one DropShadow effect at the same time? How does the accessory draw order work? DropShadow_dual creates two effects… why does it need a modification?

![]()
DropShadow, produced by BeammanP in 2015, is one of the most popular effects every produced for MMD. Its simple premise is easily manipulated to suit the artist’s needs, so much so that it is still in wide circulation 5 years later. I, personally, have modded this effect no less than 6 times now! However, one question comes up again and again amongst MMDers: why can you only load one DropShadow effect at a time? Is it possible to get more than one DropShadow effect to work properly?
I’ve asked myself this question many times before, especially when making the promotion image for my own DropShadow mods. Unfortunately, I rely on photoshop to present my effects as it’s impossible to show them all working properly at the same time.
However, earlier last month the issue was brought to my attention again by fellow effect-editor, Luna M., in the MikuMikuEffect Discord Server. After more thinking I realised that, if the conditions were right, it IS possible to get more than one DropShadow effect to load at a time. It just requires a little… illusion…
DropShadow_dual Creates Two DropShadow Effects at Once!
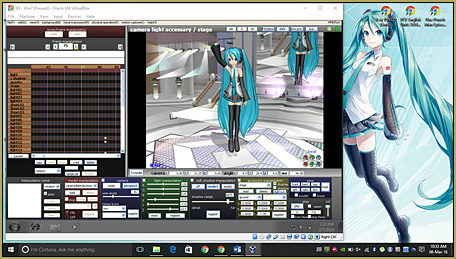
Firstly, we have to understand how DropShadow works in order to understand how to manipulate it for our personal projects. DropShadow requires 3 files to function: DropShadow.fx, DropShadow.x and Tex.png. DropShadow.fx is the effect code where all the effect information is stored. DropShadow.x is the file that loads into MMD, reads the .fx file and renders it in the engine. Tex.png is the texture file which the effect renders to create a visual image. To make DropShadow in dual colours, the Tex.png file is the most important file.
Unlike many MMD effects, the DropShadow texture does not follow the model’s movement. Instead, when the shadow moves around the screen, it moves across the texture file. Think of it this way- if your body is casting a shadow on a large painting, as you move your body around, your shadow will cover different parts of the wall. DropShadow works in the same way. When the model moves left and right, it covers (and therefore, shows) different parts of the texture. This step is crucial to understanding how to manipulate DropShadow for dual colours.
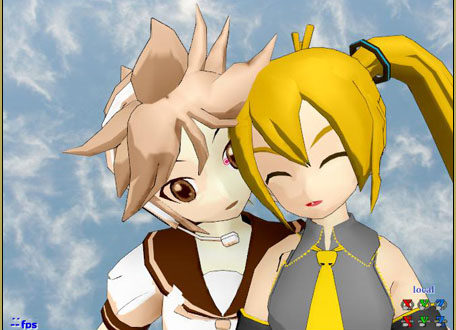
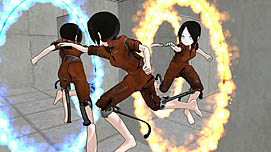
So, why do we even need to manipulate DropShadow in the first place? Why can’t it do two colours already? The problem lies in the drawing order. In order for DropShadow to run behind the model as it is designed, it has to be above the model in the drawing order. However, if you add two DropShadows, you can’t have both of them drawn at the top, so one will always render incorrectly in front of the model. For example, this is what happens when I try to load DropShadow_pastelPink and DropShadow_pastelBlue at the same time…

Yeah… not ideal. _pastelPink works just fine, but because _pastelBlue isn’t at the top spot in the drawing order, it covers the models. And so, the only way to have different coloured DropShadows at the same times is to editing the texture file.
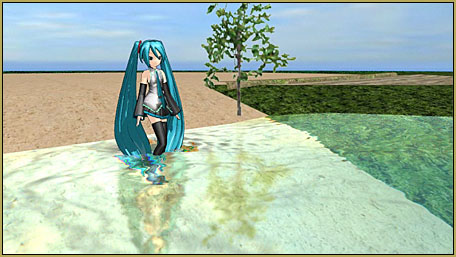
Now, you’ll need to work out exactly where your models are going to be on the MMD screen, and how they are going to be posed. Placement is very important when using this method, as moving the models later may mean editing the effect again. Load up your project and finalise the poses. You will also need to finalise the screen size, as this data should carry over in the canvas size of the texture, to make things as easy as possible. In this image, there is a fairly big gap between both models, and I’m going to render at 2000×1000.

Load up your photo editing software. Make sure your canvas size is equal your screen size in MMD. I’m making my canvas size 2000×1000.

Now, I want Luka to have a light blue shadow and Miku to have a light pink one. To make this a reality, I’m going to draw a line down the centre of the texture, and fill in the left side blue and the right side pink. Then, I’m going to save over Tex.png in my DropShadow folder and make sure it overwrites the original texture. Alternatively, you can save this texture as any name and any file type, but this requires going into the code of DropShadow.fx and changing the directory. You can do this on line 21 by replacing “”Tex.png”” with the full name of your texture.

Load up your effect, and there we go! That’s how DropShadow_dual creates two effects! Super easy right?

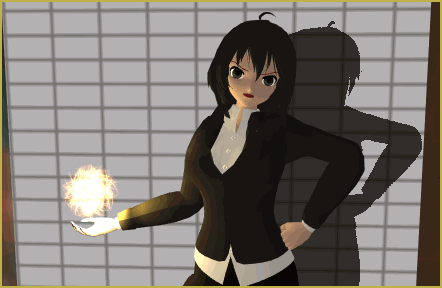
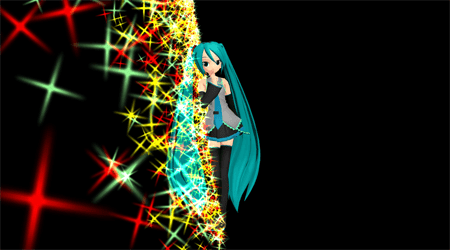
…not so easy depending on the circumstanced. As we saw when I was editing the texture, there’s a black boundary down the very middle of the texture. If the DropShadow effect passes over that boundary as it passes over the texture, it’s going to show the boundary. This unfortunately destroys the whole illusion of two DropShadow effects, and ends up looking like this:
See how Miku’s hand in the DropShadow has turned pink? This is a difficult area to work around, especially in videos where the camera and models change position so frequently (remember, DropShadow always stays behind the model when used correctly, which means as the camera turns, the DropShadow changes position). However, if it is just an awkward positioning in a still image, you can still fix it! We just need to edit the texture so that the boundary bends around the hand.

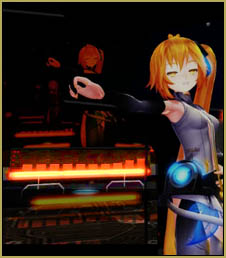
Open your texture in your photo editor again and edit the boundary to fit around the hand. For this example, I have chosen to warp the image, however you could also cover the hand area with a full colour shape, or move the whole boundary to the left. Save the texture as before, and test it in MMD once more.

And there you go! With the boundary bent around the hand, the illusion of DropShadow_dual is not broken!
If you would prefer not to edit the texture, you can also manually move the boundary using the DropShadow.fx code. This method is much quicker, as it only takes a few seconds to edit parameter code. Open up the .fx file in any code editor (I use VSCode, but MS Notepad works just fine) and navigate to line 15, which reads “static float TexLoop = Scale*0.1;”. This parameter technically changes the loop number of the texture, however changing the *0.1; number within around a tenth decimal place will allow you to move the texture left and right.

In this example, increasing the TexLoop scale by a mere 0.009 will move the texture to the left by a considerable amount. Increasing it to 0.12 will move the boundary entirely to the left, and decreasing the value to -0.12 will move the boundary entirely to the right.
And that’s it! It’s really that easy! Obviously, this technique will have limits depending upon the art you’re making with DropShadow, especially if the models are very close together. The camera also affects the effect. If the camera rotates too far around the models, the boundary will appear again. However, for renders where the models are very far apart, there’s no way you can go wrong! Why not try experimenting with two, three or even four boundaries to get even more colours! I hope this tutorial on how DropShadow_dual creates two effects helps you get the most out of DropShadow! ᕕ( ՞ ᗜ ՞ )ᕗ
If, for whatever reason, you find editing the texture of DropShadow or if you are unable to edit the code parameters, you can download the ready-made DropShadow_dual mod I made for this tutorial! You can download it HERE!
Credits:
Hatsune Miku and Megurine Luka by Sour
DropShadow by BeammanP, _dual mod and _pastel mods by Chestnutscoop
Motion: 1,2 Fanclub by Hime Hina
If you have any constructive feedback or a request to write an article on anything on the subject of MMD, please:
1. Leave a comment below
OR
2. Contact me directly at any of these places: https://www.rhiannonford.com/contact-and-platforms
Have fun with MikuMikuDance!
– SEE BELOW for MORE MMD TUTORIALS…
— — —
– _ — –
![]()