![]() How do I import Daz models into MMD? How do I keep textures? How do I keep the bones?
How do I import Daz models into MMD? How do I keep textures? How do I keep the bones?
How to import Daz models into MMD…
This tutorial was inspired by arisumatio. Okay, to make this as easy as possible I’m going to provide exactly what you need in order to get your Daz character into MMD.
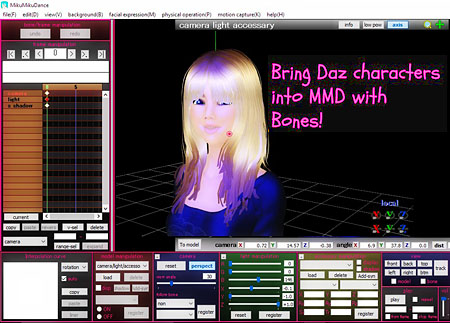
Links to get started
You’ll need Blender. For this I’m using Blender 2.71, if you use the newest one or an older one I can’t promise that this will work. I’ll give you two links one to the new one and the other is to the Blender that I have.
- This is the official Blender website, https://www.blender.org/
- This is the pymeshio addon you’ll need, I use this to export my models I never use MMD tools for this, you’ll most likely get an error if you use MMD tools to export your Daz character to prevent less of a headache just use the pymeshio addon. For pymeshio I install this manually, the link I’m giving you explains where to place pymeshio and get it working propperly. https://pypi.org/project/pymeshio/
- Here is MMD tool, I used this to import my character back into Blender if I want to edit the facial expressions, etc. This is actually not a must for this particular ariticle but it’s best to just have it anyway. https://github.com/sugiany/blender_mmd_tools
- Last one is xps tools, this is so we can import our converted Daz model into Blender and export it out as a pmx. For this I installed from file with Blender open. http://johnzero7.deviantart.com/journal/Blender-2-7x-XPS-tools-1-6-1-576316527
- https://download.blender.org/release/Blender2.71/ This is the link to Blender 2.71 if you would like to to download that one instead of the latest.
Here’s a quick tutorial on installing addons for Blender https://www.youtube.com/watch?v=0v9JOEaVJu4
Next is Noesis
Noesis is a free 3D viewing software that lets you translate/convert models from one format into another. We’ll need this to convert our Daz model into an file that is compatible with Xnalara. The first link is to the official website the second is the same but has the plugin that you need. You can download the plugin yourself here.
1, This is the link to the plugin. http://xnalara.org/viewtopic.php?f=17&t=1139
2. This is the official download: http://richwhitehouse.com/index.php?content=inc_projects.php#prjmp91
3. This is My copy of Noesis (a 12Mb download) that has the plugin set up so you’re ready to go. https://learnmmd.com/wp-content/downloads/noesis.zip
You’ll also need Xnalara
Xnalara is a free posing software which is similar to Daz, after converting our model we’ll be bringing them into here to export it as generic item mesh.
- This is the official Xnalara link http://xnalaraitalia.deviantart.com/
- This is My copy of the Xnalara version (71Mb download) that I have https://learnmmd.com/wp-content/downloads/xnalara.zip
You’ll need a zip program to extract my downloads I suggest using WinRar. You can also check out this zip-tool which Reggie recommends: Bandizip. https://learnmmd.com/http:/learnmmd.com/bandizip-keeps-japanese-file-names-intact/
If you are new to Daz I recommend checking out Practical Digital Advice just to get the feel of Daz. Just so you know Daz is free to get started but you will have to buy models, clothing, hair, etc. Before opening Daz lets create a folder on our desktop or place the folder someplace you know you’ll remember it. It doesn’t matter what you call it just as long as you create a place to save your files.
Now for the fun part!
Lets create our character then export it to the folder we just created make sure you’re saving you file under FBX so that you can keep your bones!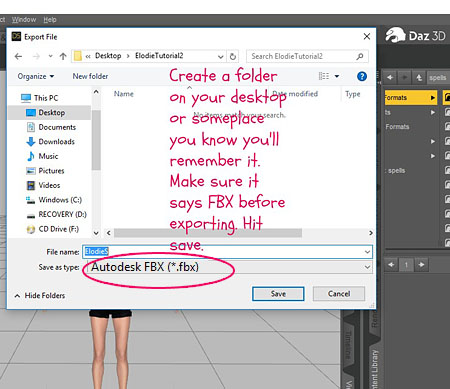 (Note, I’m using genesis 3 which comes with facial bones, genesis 2 and the first genesis do not. Facial bones may come in handy if you use Riveda1972 facial expression tool which would require some renaming of the facial bones but makes the process a bit easier in the long run.)
Then this screen loads
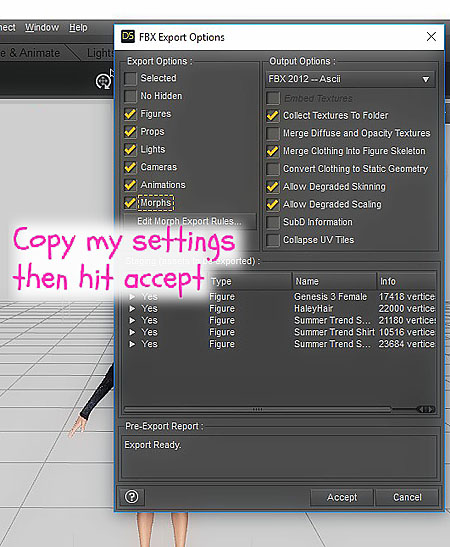
Copy my exact settings then hit accept.
Lets open up Noesis
And find our file, we’re going to export the character as an Xnalara file. If you downloaded my file or if
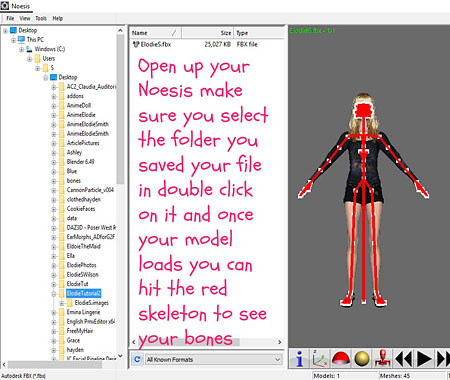
you installed that plugin correctly then you should have an option to 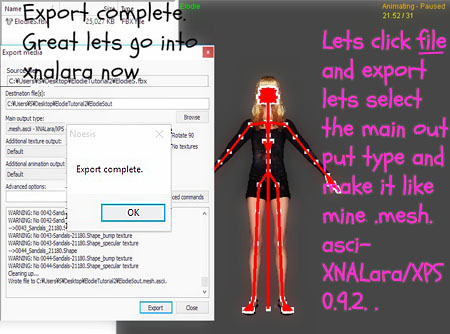 export your character as a Xnalara file. Now this may take a moment or two to complete, from my experience it varies depending on your models hair, clothes and textures.
All done, now lets open up Xnalara
Okay, so I haven’t figured out how to prevent these popups from coming up. I believe there is a way by renaming render groups…but I usually just keep clicking enter until I see my model. https://www.youtube.com/channel/UCiPPZWwHHkFthUR8n3DIkwA Has a quick tutorial going over exporting you Daz models and importing them into Xnalara, he explains how to rename the render groups rather quickly. I recommend checking him out.
Okay so now we need to clean the armature before saving her.
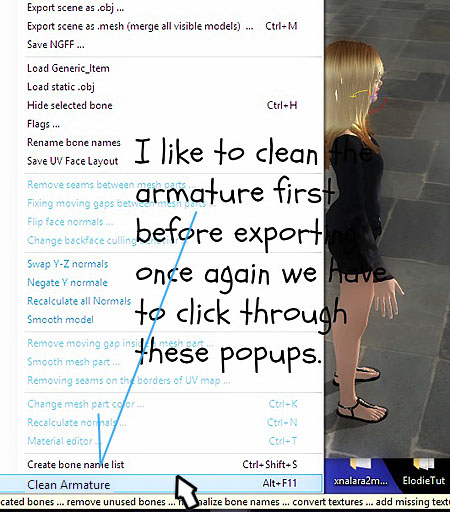
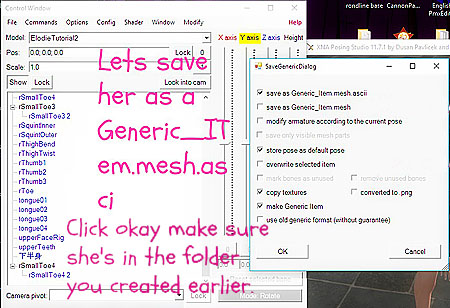
Then what we’re going to do is save her as a generic item a box will pop up make sure to check the top option.
A list of what you’re exporting will appear just click okay.
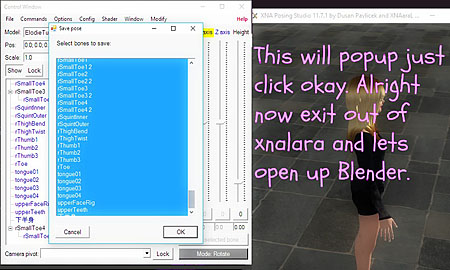
Lets head on over to Blender
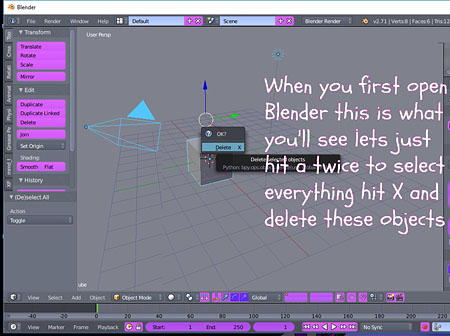
When you first open Blender this is what you’ll see just select all and click x to delete all. Make sure your auto run python script is running which you find in your user preferences. You’ll also need to make sure your addons are running search for it in the addon tab type in pymeshio and click the check mark. Do the same for xps, and MMD tools.
Time to import your character
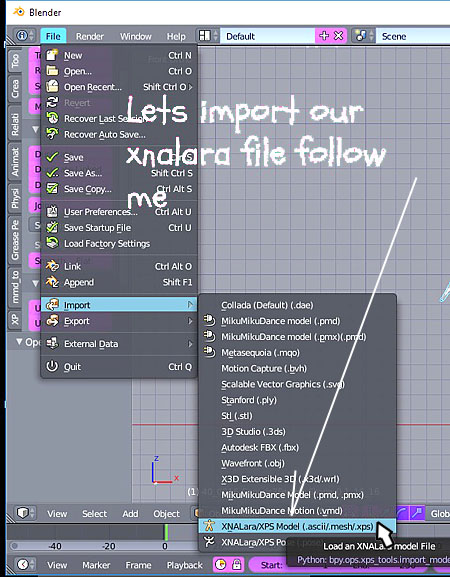
Go to file import Xnalara find your file and it should load in, what we’re going to do next is first hide the bones by clicking the eyeball on the upper right side of Blender. Then we’re going hit b to box select and press join which is on the left side of Blender on the tools tab. You can also hit Control J to join your mesh together. Then we’re going to go into edit mode and remove doubles. Click back to object mode.
We need to join her together
We need to join her together before we do anything else, Control j to join or simply hit join found on the left side of Blender. But first make sure to click one part of the model then hit B to box select and make sure she is highlighted, okay?
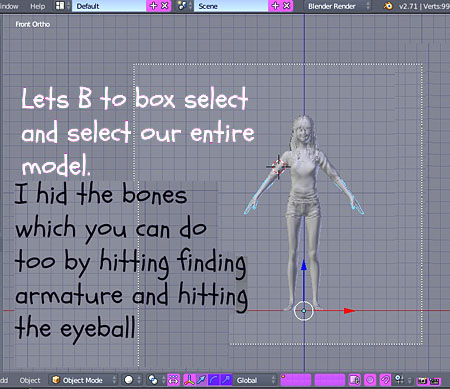
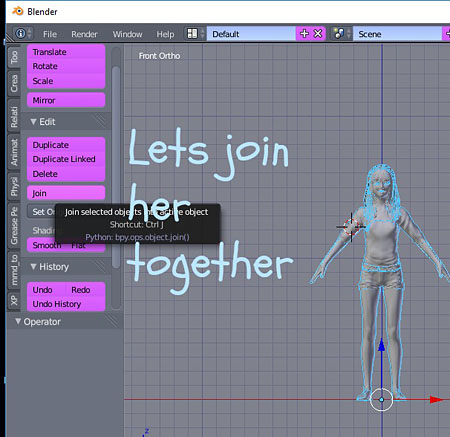
Control J to join or hit Join in the tool panel.
Time to Decimate
I like to decimate my Daz characters before importing them into MMD makes it easier to work with however if you like you can skip passed this part just go on ahead and export your character as a PMX and read further to learn how to fix the textures.
One more thing before we decimate we need to remove doubles, alright?
We go into edit mode and on the left side in the tool panel we scroll down until we see remove doubles you must be in edit mode when you do this or else you won’t see this option. Click that and Blender will tell you how many vertices it removed. Here’s a picture of what your model will look like in edit mode.
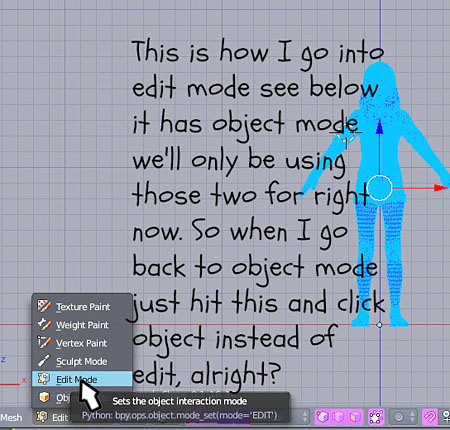
Okay now to decimate we’re going to go back to the right side of Blender and click the icon that looks like a wrench, add modifier decimate type in 0.5000 hit apply I like to do this twice so repeat what you just did then export the model as a PMX.
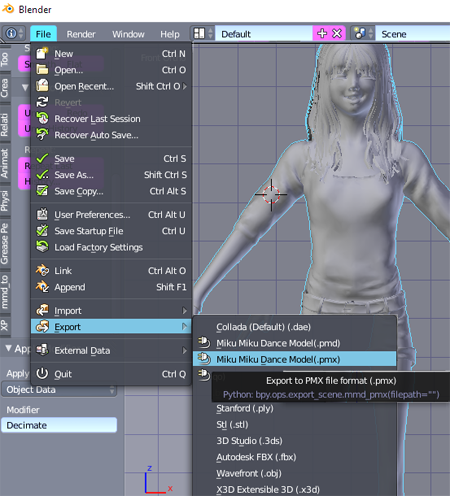
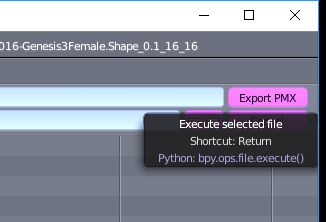
Open up your PMX Editor
You can download the PMX Editor on the downloads page of LearnMMD.com.
Alright now open up your folder in which you saved your model drag and drop her into the pmx editor. When you do make sure you hit 10 on scale just like I did.
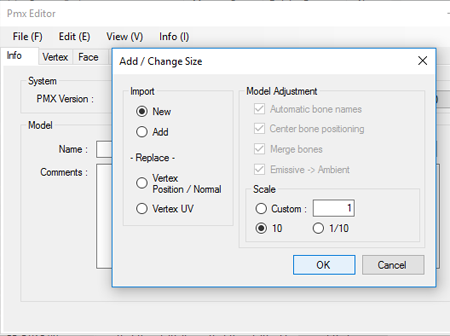
She’s all blue!
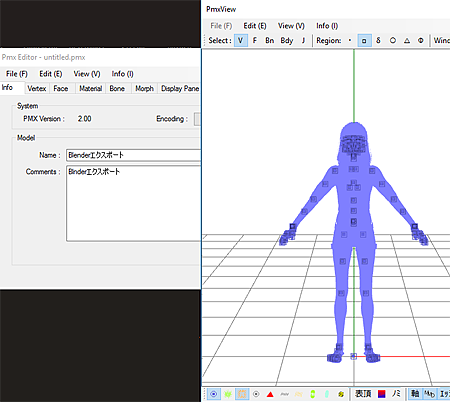
Don’t worry we can fix that just open up you folder go into maps and your textures should be there. Go your material tab, to see which material goes to which you can go into the mask option and click the check mark depending on which layer you checked the model parts will vanish. This is a great way to tell which part belongs to which simply copy the textures name from the folder and apply it to that material. Repeat until you have all your textures again.You also want to find the eye lash layer and remove that unless you want boards for eyelashes.
End
That’s the end for right now. I may make another article explaining how to add facial expressions as they are many options when adding them to your model. Now you may run into a few issues doing this as this is very experimental, I’ve done a lot of trails and errors when figuring out how to import my character into MMD. Some good some bad, I haven’t figured out all the issues yet but this works so far.
… a little more:
You’ll need to rename the bones to Japanese, add physics, etc. If you want to, save your motions and add other peoples motions. Please note you are not allowed to redistribute these Daz models. You can use for commercial purposes, but you can NOT give away parts, hair, skin, etc. I understand that editing things and giving them out on Deviant Art is fairly popular in the MMD community but you can not do that with these characters. You can create flat 2d images, animations, comics, anything that doesn’t allow someone to steal the actual 3d model. You can read Daz Studios Eula in the link below. Also feel free to improve on this method; the reason I decided to share this was because I believe it can be improved.
Have fun with Daz models and MMD!
– SEE BELOW for MORE MMD TUTORIALS…
— — —
– _ — –





This is great, thank you. While it has a lot of steps it’s easier than the attempts I was making.
One thing I’d add to this is that MMD models are rarely optimized, but DAZ is built for very high poly still renders. There’s a plugin for DAZ that I’d advise running your models through before exporting them:
https://www.daz3d.com/decimator-for-daz-studio
It IS paid but if you can afford it, it’ll make your life much easier for this, and many other applications.