
![]()
How can I adjust the shadows in MMD? What are popular MMD shadow mistakes and how do I not make them? Can I change the shadows? Why do the MMD model’s shadows look fake, look weird?
Shadow business …
Adjust the Shadows in MikuMikuDance
Shadow handling is one of the more confusing elements of MMD. There are plenty of videos where shadows are simply turned off (quite often, I suspect, because their creators just didn’t like how it turned out and didn’t know how to do better), and there’s a lot of those where the shadows look rather crude; demeaning the overall quality of an otherwise good video. This happens because MikuMikuDance actually has *two* independent systems of shadow rendering and they can conflict if not managed wisely.
Don’t be afraid of your shadow!
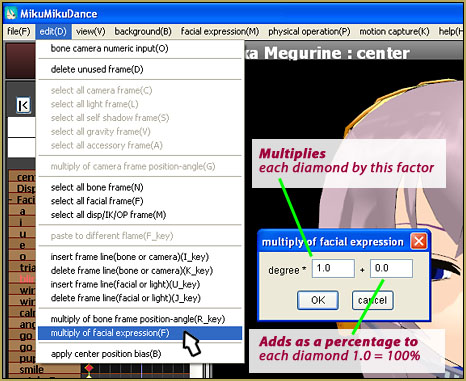
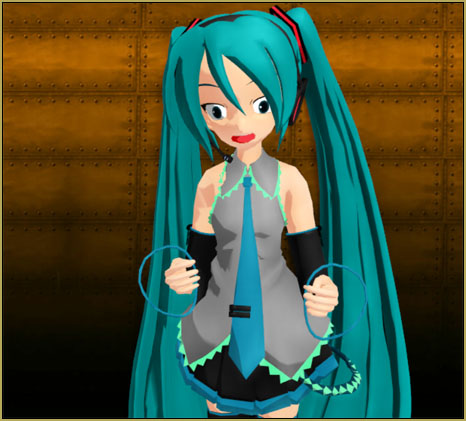
Launch MMD and call for the View menu. In the upper half of the list you’ll see “Display ground shadow” command (and two of its minions – “Ground shadow color” and “Transparent ground shadow“). The most important thing you must remember about Display ground shadow is HOW TO TURN IT OFF. There are only two possible reasons to use it: when you make a video without a stage (fig.1), or your computer is really weak and can’t handle more intensive calculations. In all other cases, Display ground shadow brings more trouble than it’s worth. What it actually does is produce a flat shadow at zero height, regardless of stage’s actual position and terrain – if your surface is at Y<0, the shadow will dangle in the air, and if the stage is higher there will be no shadow visible at all (fig.2). And even if you level your stage exactly at the necessary height, the color will not look natural – even at its best. In addition, you can’t determine which models should or should not cast shadows, and don’t even try to make stage elements cast shadows of their own. You have been warned.

So … How do you make GOOD shadows?
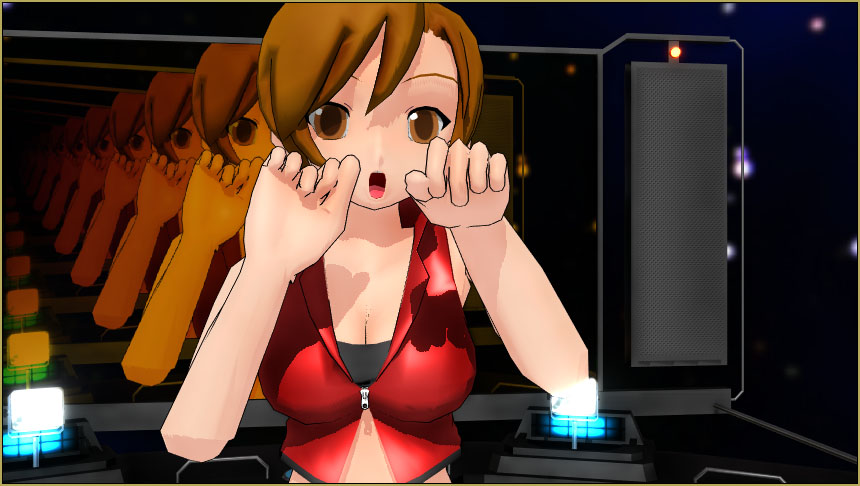
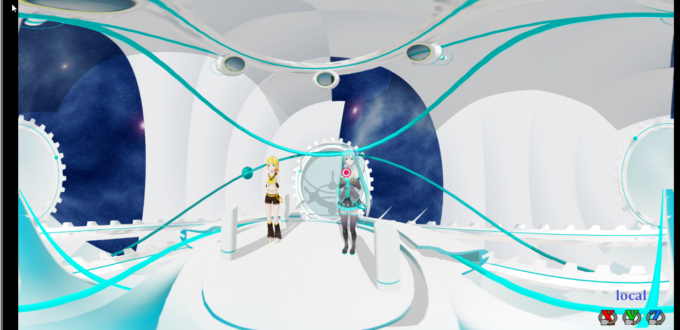
Now, that we got rid of this cheap impostor of a shadow rendering engine… why don’t we see *good* shadows? The answer is: each element of your video has its own setting determining both whether it will cast a shadow of its own, and at the same time, will it reflect shadows cast by other elements. And, unlike .pmd models, all Accessories (to which class your stage most likely belongs) do not have shadows set to “on” by default. Switch into “To camera” mode, select your stage in the AMP, and set its “Shadow” checkbox “on”. Do the same for every other “material” accessory (that is, not MME effects, stage lights, and such), while you’re at it. Voila – your models now have genuinely rendered shadows (fig.3).
The fact that they are properly rendered, though, doesn’t necessarily mean they will always look pretty – the engine has to settle to its own level of approximation lest calculation time will be unacceptably long. In order to tune your shadows to the current situation, use the second group of commands in View menu: “Self-shadow” and “Shadow setting”. Self-shadow determines whether the engine should calculate only shadows that an item throws at other elements, or does it need to calculate shadows that various parts of the model throw at the model itself. Usually there’s no reason to turn it off.
Shadow setting …
Shadow setting is the “distance to the shadow source” (confusingly, not the same thing as “light source”) – a conventional parameter determining quality balance in shadows’ rendering. Depending on camera distance to the stage, you may want to adjust it. In “Mode 1”, there will be a relatively small window of “shadow distance” value at which *all* elements’ shadows present on screen are displayed. The farther is the camera, the narrower that window usually is, and the higher the value you must set to cover the whole stage. At closer distances, the shadow will look too pixelated, so you’ll have to decrease that value – you can afford that because at such distances there won’t be too many shadows to take care of. In “Mode 2”, it is much easier to cover the whole stage with less precise shadow distance settings, but the overall quality of shadows is worse. The “OFF mode” turns off shadow rendering completely.
The paragraph above might sound intimidating and hard to memorize, but in practice, you always can find a suitable balance of parameters providing the necessary quality of the image. Don’t forget to Register, though.
Finally …
One more factor affecting shadows is the light source’s position in the Light Manipulation Panel (green). With it, you can set the angle at which your shadows fit the whole arrangement best.
You’re good to go!
That’s pretty much all you needed to know in order to make your shadows look neat!
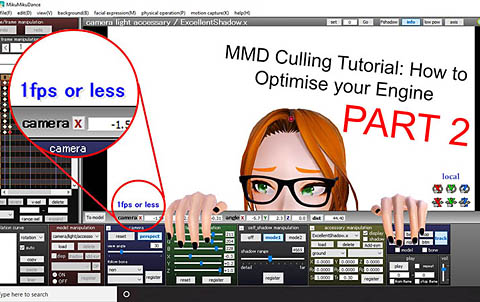
UPDATE: Since the version 9.00 of MMD, “Shadow setting” menu is moved into its own screen panel displayed in Camera mode. Also, the newer version is added with “Fshadow” button in the upper right corner of the screen that additionally increases the quality of shadows rendered. This mode requires a lot of memory, though, so better turn it on only before making the final version of a picture or video.
– SEE BELOW for MORE MMD TUTORIALS…
— — —
– _ — –
![]()