 How do I convert SFM/GMOD models to MMD?
From where do I get SFM/GMOD models?
Is it possible to edit converted SFM/GMOD models in PMXEditor?
Do you ever see a pretty model that is for SFM or GMOD and wish that it was for MMD? Well, look no further! In this article, I will explain everything you have to do to get your dream models into MMD! This is a really long process so please stay focused.
Convert SFM/GMOD Models Into MMD Flawlessly!
First, you need to download the following programs (See your computer’s OS properties to download the correct program):
| UPDATE: 6/14/2023 by reader Fahmi4869: Some of the links in this article are already down so I need to google some of them. I use MMD Tools made by UuuNyaa on Github because it’s the latest one (the Sugiany’s version is already outdated), and also I use Blender v3.1 and it works like a charm! |
Blender 2.79
GWTool: drive.google.com/file/d/1X5arhID8fPjchcdHj8vK31lPDA_cNJCn/view
VTFEdit: nemesis.thewavelength.net/index.php?c=178
Crowbar
MMD Tools
Source Tools
Step 1: Applying MMD Tools and Source Tools to Blender.
After you download and install Blender on your computer:
1. Open Blender.
2. Go to [File>User Preferences].
3. At the bottom, click on [Install Add-on from File].
4. Go to the folder where MMD tools is located then click on its ZIP/RAR file to install the add-on, do the same for Source Tools.
5. In the User Preferences window, search for “MMD Tools” and “Source Tools” then check the boxes next to them.
Step 2: Downloading the models.
Two sites I prefer for downloading models the non-Steam way is garrysmod.org and SFMLab. You can also download models through the Steam Workshop Downloader website to download models only available on Steam.
- Method for SFM/GMOD Models downloaded through SFMLab/garrysmod.org:
1. Download the model.
2. Unzip the file.
You’ll have two folders: “models” and “materials”. The “models” folder has files that have the extensions (.mdl), (.vvd), (.phy), and (.vtx). We don’t need the VVD, the PHY, and the VTX files because they are additional data that work only in SFM and GMOD so you can delete them. We must focus on the MDL file. That’s the model’s data, similar to PMX and PMD but MDL files are compressed and need decompiling or decompression.
The “materials” folder has files that have the extensions (.vmt) and (.vtf) which stand for “Valve Material File” and “Valve Texture File” which can be opened using VTFEdit. VMT files are code so you can delete them. VTF files have the textures in image file formats which are what we need.
The method for SFM models downloaded through the Steam Workshop Downloader is the same.
-
Method for GMOD Models downloaded through the Steam Workshop Downloader:
When the download is finished, you’ll have a file that has the extension (.gma). Rename it to a simpler name (Ex: NameHere.gma) then decompress by doing the following:
1. Open GWTool.
2. Drag the GMA file into the GWTool window.
The program will extract the GMA file into a (.7z) file.
3. Extract the 7z file with 7-Zip.
The 7-Zip file will extract a ZIP file. Decompressed it with 7-Zip. You’ll have the two folders: “models” and “materials”.
Step 3: Decompiling the MDL files.
Go to the “models” folder and do the following:
1. Open Crowbar.
2. Go to the decompile tab.
3. Drag the MDL file into the program window.
4. Choose an output folder and uncheck the following settings:
- Physics mesh SMD file
- Bone animation SMD files
In the output folder, a bunch of files will be extracted. Most of them have the extension (.smd) and one file has the extension (.qc).
The SMD files are the model separated into multiple parts or assets. This is very helpful if you only want a part of the model. The QC file is the complete model unseparated, that’s the one we need.
Step 4: Decompressing the VTF files.
After you complete decompressing the MDL files, you have to extract the textures. This is where VTFEdit comes into play. After you download and install VTFEdit, go to the “materials” and do the following:
1. Open VTFEdit.
2. Drag the VTF file into the VTFEdit window.
3. Make a folder for the textures, I’ll call mine “Tex”, and save the textures in the folder either as a TGA file or a PNG file to keep transparency.
Step 5: Converting the models to PMX format.
Now you have to convert the model to PMX format by using Blender, MMD Tools, and Source Tools.
1. Open Blender.
2. Go to [File>Import].
3. Look for [Source Engine (.smd, .vta, .dmx, .qc)] and click on it.
4. Look for the model’s QC file and import it into Blender.
There are multiple tabs on the left. If you have installed MMD Tools correctly, you’ll see a tab titled “MMD”.
5. Click on the MMD tab.
6. If your model has bones (the small spheres on the model) then click “Convert” to convert the bones to the MMD bone format. If your model doesn’t have any bones, then click “Create”.
7. Click “Attach meshes to model”.
8. Go to [File>Export] and look for [MikuMikuDance Model (.pmx)] then click on it.
9. Look for a folder to save your model.
Step 6: Editing the models in PMXEditor. (Applying Textures and fixing minor errors)
Although you did convert the model to PMX format, there are still some errors. Some are the model is too large and the model is missing textures. Here’s how you fix these errors:
- Fixing size:
1. Open PMXEditor.
2. Drag model in PMXEditor window.
3. In “Add/Scale” window, go to the lower right part of the window and write 0.3 in the box next to the word “Custom”.
0.3 is the normal size for most SFM/GMOD models to fit the MMD height. But you can resize it as much as you want!
- Applying textures:
1. In the materials tab, select all the model parts and change “Diffuse” and “Ambient” color boxes to white and the “Specular” color box to black.
2. Normally, the textures are named the same as the model parts. So find the texture that has the same name as the model part.
3. Add/Edit some extra things to the model to your liking. Such as adding morphs, adding toon or spheres, re-rigging some parts, or connecting bones to each other.
That’s it! You have your model ready for MMD!
Ask your questions in the comments and I’ll answer them all!
See you in the next article!
– SEE BELOW for MORE MMD TUTORIALS…
— — —
– _ — –









Actually, never mind. I just figured it out.
I opened GWTool.exe, but it requires .NET Framework 3.5. I tried installing .NET Framework 3.5, but it did not work.
What exactly is the process for adding textures, though. (I’m new to using PMXEditor)
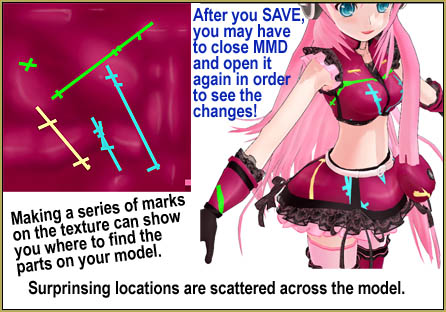
First you need all the textures in the same folder where your .pmx file resides. Then, you open the model in PMXE, select the “Material” tab, select the part in the list, and type the appropriate file name in the “Texture” field. If you can’t tell from the name which part is which, go to the PMXView window, press the “M” toolbar button or F3 in the keyboard, and use the masking panel to find out.
thank you!
So after porting a sfm model to mmd, how do you change the bone structure to mmd bone structure?
hello I have this problem, when I try to activate the source tools my blender 2.79 sends an error message and does not let me activate it, any solution?
hey! I was trying to do this, and had done it successfully with a model the other day. I followed the steps perfectly for a second time, and my textures aren’t going onto the model correctly. The names also don’t match up to the materials, which is confusing. The materials seem to be matching up to the vmt files, instead. This model also has several versions of itself, within the same model, for different skins? I explained everything here:
https://photos.app.goo.gl/P3VmzCJQkDJhQSty8
if there’s anything you can do, please help! I appreciate it a lot.
is it possible to do it the other way? i mean from mmd to sfm
If anyone has problems with the MMD Tools addon, here is an updated link: https://drive.google.com/open?id=1GIbmzQVBpnDtz-ZWJi7eS7BjGUbhbfkg
Hey can you help me? The Blender one is really hard for me. I have a bone on my model, but you said “Convert” i don’t know which Convert it is. And “Attach meshes to model” i don’t see that option.
Updated link: https://drive.google.com/open?id=1GIbmzQVBpnDtz-ZWJi7eS7BjGUbhbfkg
hey this worked for the most part but i have no clue how to get the textures in. my model is grey and i have the texture files converted to png but when i try to put them in they just appear as a giant flat image behind the model. thx for your help
Can you send me an image?
Email: htamer754@gmail.com
Try again with this: https://drive.google.com/open?id=1GIbmzQVBpnDtz-ZWJi7eS7BjGUbhbfkg
what version PMX use to this tutorial?
PMX 2.0 and not PMX 2.1
If you’re talking about PMXEditor, then I personally use Inochi-PM’s PMXEditor: https://www.deviantart.com/inochi-pm/art/PmxEditor-vr-0254f-English-Version-v2-0-766313588
i have a issue when i tried to export to pmx
something about uknown file?
Can you send me an image?
Email: htamer754@gmail.com
Try again with this: https://drive.google.com/open?id=1GIbmzQVBpnDtz-ZWJi7eS7BjGUbhbfkg
whenever i try to export it in pmx format i get an error in blender
What does the error say??
Can you send me an image?
Email: htamer754@gmail.com
Try again with this: https://drive.google.com/open?id=1GIbmzQVBpnDtz-ZWJi7eS7BjGUbhbfkg
is it possible to convert mmd models to gmod?
I sent a note to the author… I hope he gets back to you, soon.
Yes, but I don’t know how.
When trying to install MMD-tools, it doesn’t show up in the add-on list.
Then it was probably not installed correctly. See https://blender.stackexchange.com/questions/23053/im-trying-to-install-this-add-on-blender-mmd-tools for installation instructions (or look on the MMD Tools wiki documentation.)
Got it, thank you!