


![]() Ray-MMD is one of the most popular MME shaders currently available. It also seems to be one of the hardest for many new users to MMD to get working. Part of the problem is that the effect comes with next to no beginner’s instructions and most of the tutorials on how to use the effect on YouTube are not particularly helpful either.
Ray-MMD is one of the most popular MME shaders currently available. It also seems to be one of the hardest for many new users to MMD to get working. Part of the problem is that the effect comes with next to no beginner’s instructions and most of the tutorials on how to use the effect on YouTube are not particularly helpful either.
Beginner’s Guide to Using Ray-MMD ver 1.5.0
This article will give you the basic steps on how to set up the effect and get it working. We will not discuss the theories nor technologies underlying the effect, except for the basics. You really need to know a little bit about what the effect is suppose to do and how it works. There are good articles on this site on how to use the effect at a more advance level, but if you have never used the effect before, it is best to start here.
What is Ray-MMD?
Unlike most MME packages, Ray-MMD is an environmental lighting system. Because it is a system rather than merely an effect, it gives the user a lot of latitude and freedom. Unlike other MMEs that were written essentially to do one thing, Ray-MMD can do many things. Also, the package was written with the expectation that the user has at least some background knowledge on computer lighting, shading and rendering techniques. This is the primary reason why it is difficult to set up and adjust. However, once you have managed the basics, it isn’t all that hard to use. It is just very fiddly and a lot of tweaking will be needed to get really good results.
But as mentioned above, this article will only introduce the basics, so without further ado, let’s get to it.
What you will need.
You will only need three things for this tutorial:
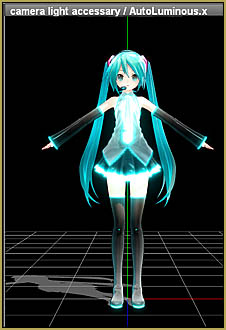
- Any TDA style model with gear that lights up. We will be using the Tda Neru Append edit by VK.
- An outdoor stage model. This must be either a pmd or preferably, a pmx model. Maybe search DeviantArt.com for MMD outdoor stage to find one you like. Remember to keep track of your sources so that you can give credits for the elements you downloads.
- Ray-MMD version 1.5.0. This is the latest release version and differs slightly from older versions.
Below are the steps needed to get Ray-MMD up and running successfully on your system.
Step 1: Load the models and effect files.
First of all turn off MMD’s ground shadow display: view(V)>display ground shadow(S)
Load the models in this order:
- Ray-mmd-1.5.0>sky box>Time of day.pmx
- Your stage model (pmd or pmx)
- Your Tda Append model (add a pose if you like)
- ray_controller.pmx
- ray.x (added using the accessory panel)
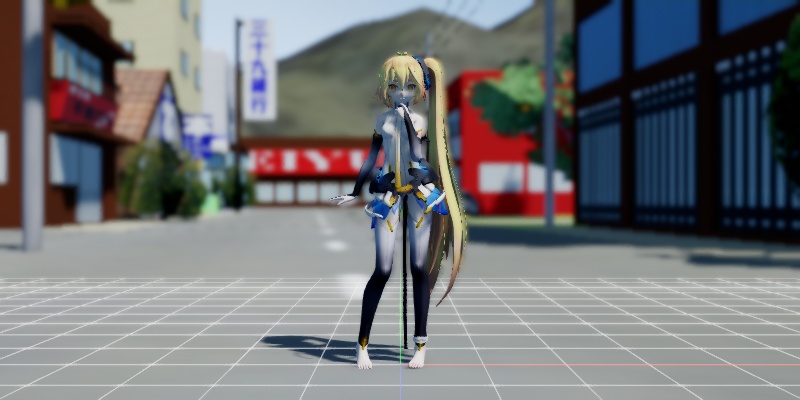
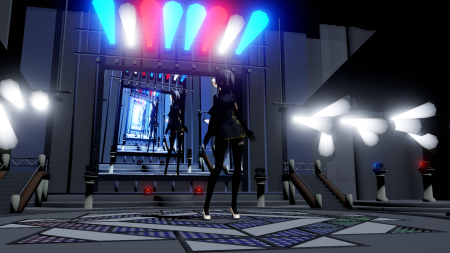
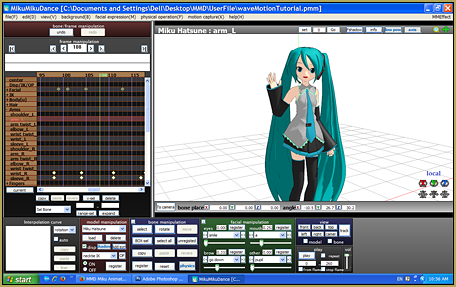
Your screen should look something like this: 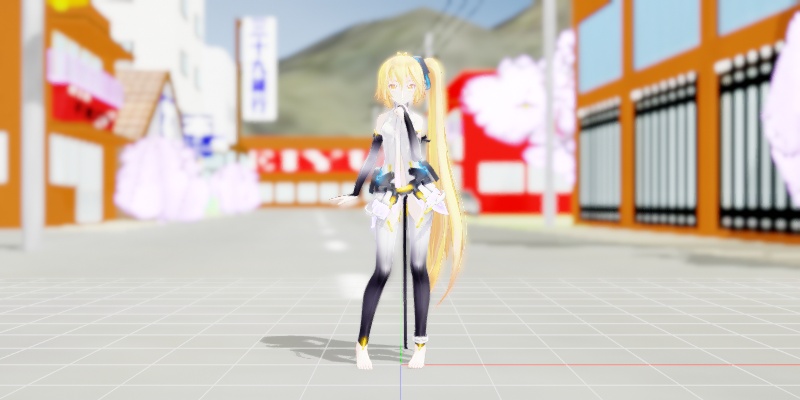
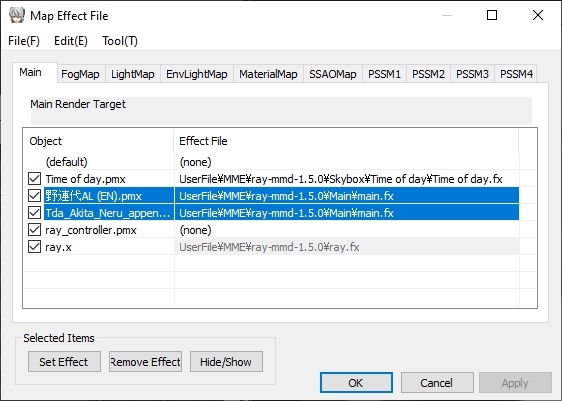
Step 2: Adding the main effect files.
Open up your MME panel and add main>main.fx to the stage and Tda model. Note that these are added to the models under the Main tab.
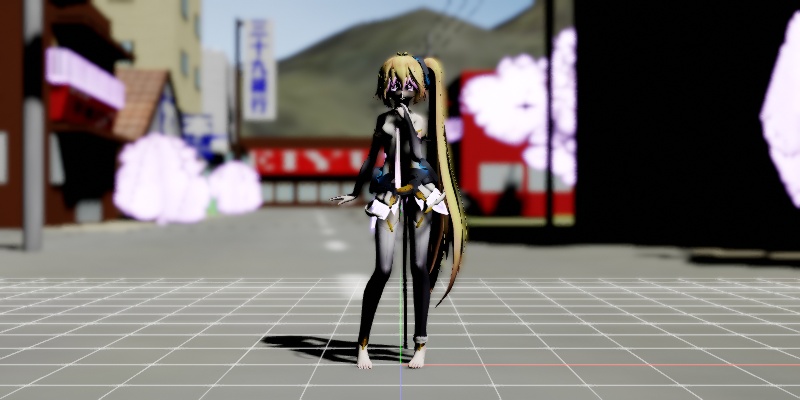
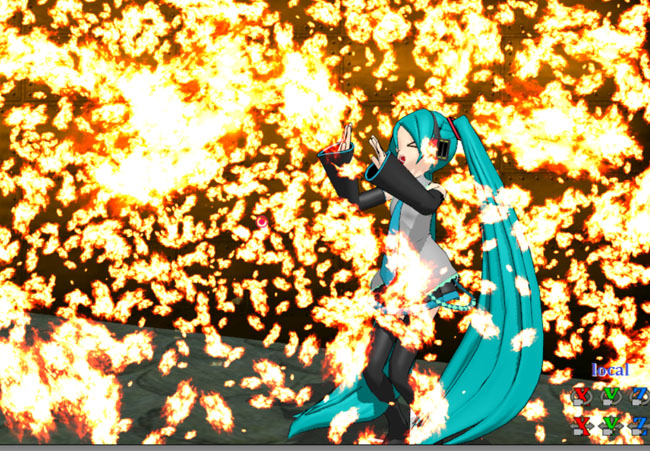
The screen image is going to look a little freaky at this point, but that’s normal. It will be fixed in the next step.
Step 3: add the environmental lighting specification file.
Open up the MME panel again and go to the EnvLightMap tab. Select the sky box model and add this file to it: ray-mmd-1.5.0>Skybox>Time of day>Time of Lighting.fx
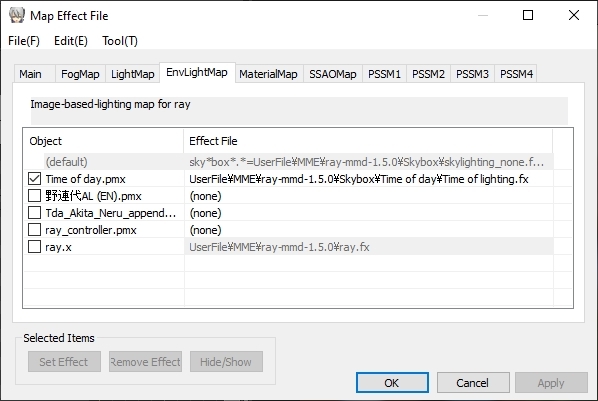
The scene should now be normal. There might be a bit of a blue bias in the colors, but that’s normal with this sky box. This can easily be corrected.
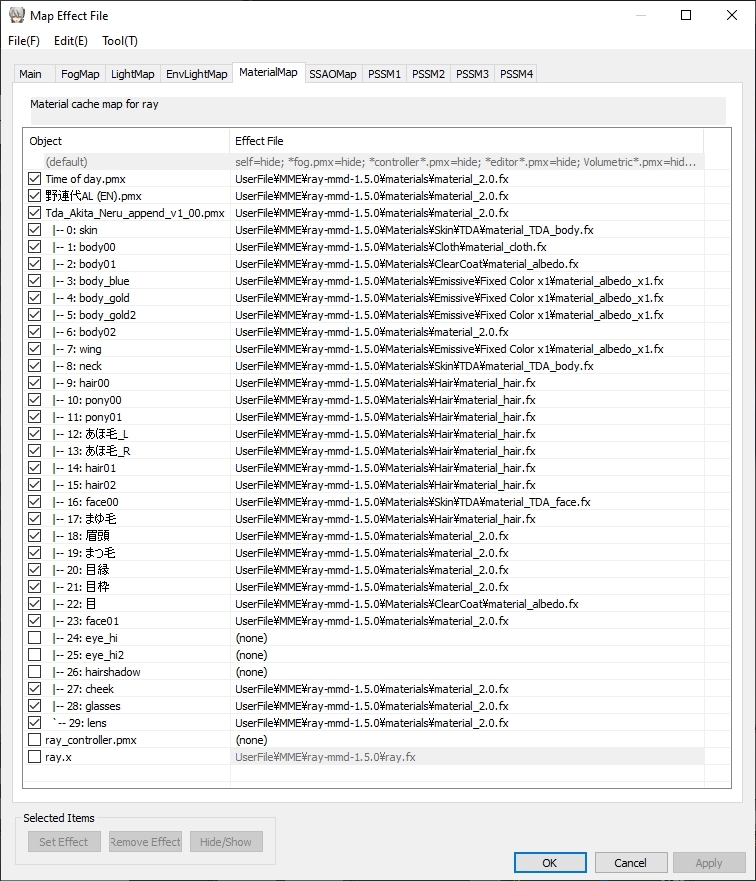
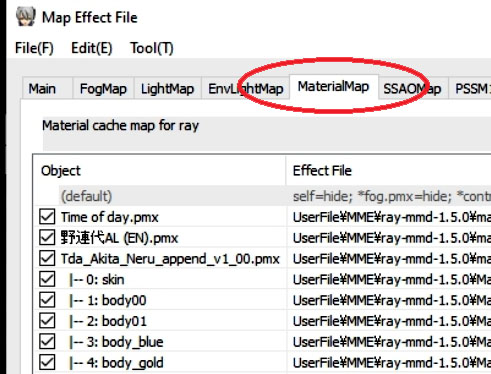
Step 4: adding material specifications to your model.
There is a lot of latitude with what you can do in terms of material specifications. But basically, you add a shading specification to make material look like a real world material. In any case, material specifications are under the materials tab of the MME control panel. Our materials are shown in the table below. But note the following:
- “albedo” materials are materials that do not alter the underlying colors. Useful if you don’t want to change the colors, but just want to add an effect or texture to the selection.
- “Emissive” materials emit light. These were used to make Neru’s accessories glow.
- “ClearCoat” materials are shiny, this was used on her Append gear housing to make these items glossy.
- Item 24, 25 and 26 are materials on the model that I chose not to display. Simply uncheck the box next to the name of the material under this tab, and they will be hidden.
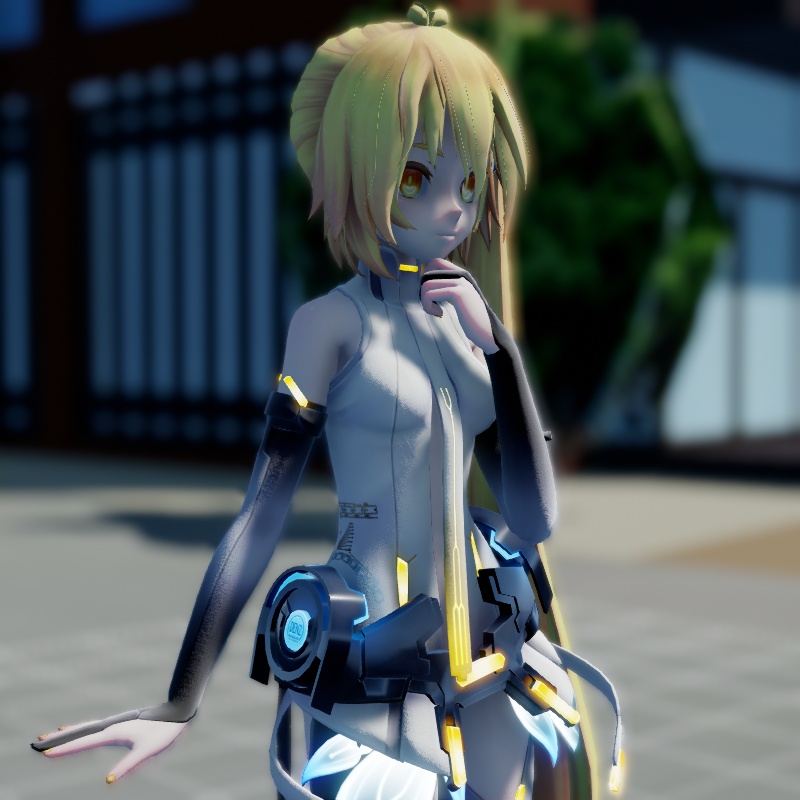
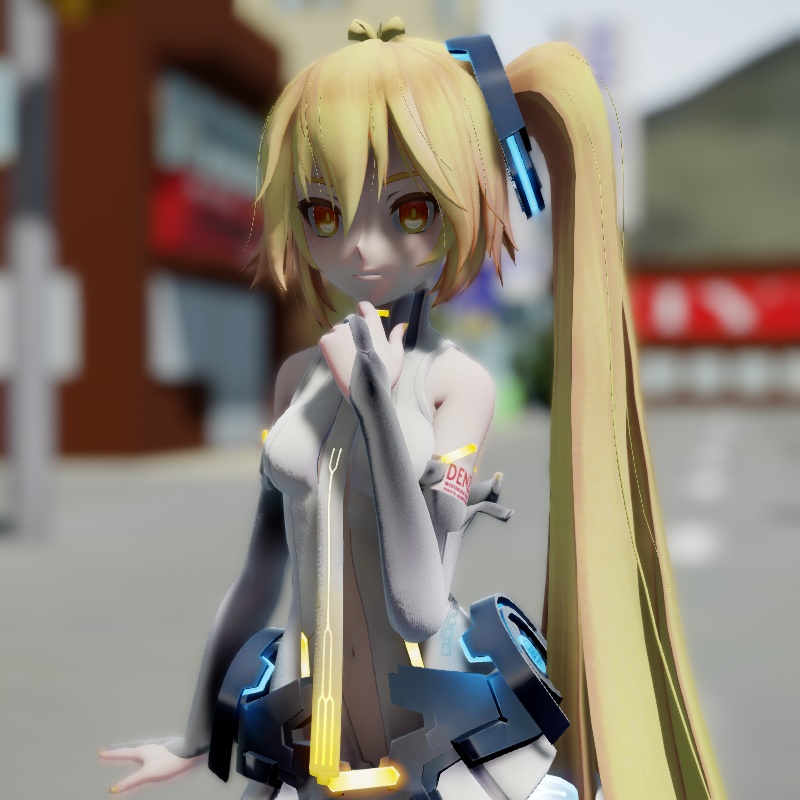
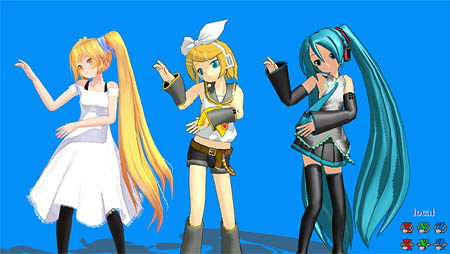
The end result at this stage looks like this:
Step 5: Fine tuning the sky box.
Each of the sky boxes provided with Ray-MMD is intended to fulfill a specific function so their controls will differ. The Time of day sky box is used primarily for day time scenes, so comes configured with controls to set up that type of environment. Some controls might do nothing because a dependency or condition is either missing or not satisfied; these are beyond the scope of this article and will not be discussed. Do play with the other controls as most will work and just see what they do.
What we really want to do is to correct the blue hue and how this is done is described below.
To work the controls dynamically so that you can see changes as you make them, ensure that you do the following:
- Make sure “select” is NOT selected.
- Make sure “track” IS selected.

To correct the colors just do the following:
- RaleighHeight+ : set this to 0.850 or higher.
- EnvSpecLight+ : set this to around 0.150.
You should get results similar to those in the next image:
Step 6: Fine tuning the lighting environment.
The lighting environment is controlled using the ray_controller widget. As above, to use this dynamically, turn off “select” and turn on “tracking” before manipulating the sliders.

To get the results shown below, the following settings were used:
- SunLight+ : 0.250
- SunLight- : 0.750
- SSAO- : 1.000 (this helps with the white of the eyes since this is a recessed space with Tda models).
- BloomThreshold : 0.650 (helps the accessory lights glow brighter)
- Exposure- : 0.200
- Contrast+ : 0.300
- Saturation+ : 0.150
- Gamma+ : 0.100
- Temperature+ : 0.200
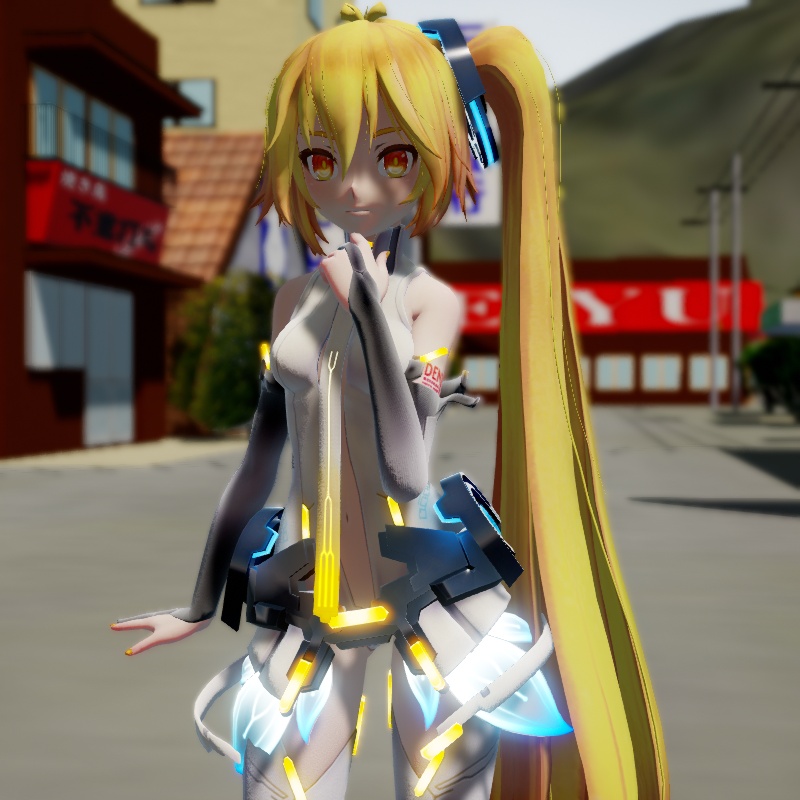
With these settings your scene should look like the following:
Step 7: Adjusting the global lighting direction.
This step could have been done first (and usually should be done first). We use MMD’s own controls to adjust the direction that the primary light source is coming from; this is the direction from which sun light is coming down on to the scene. Since this is an outdoor scene, to get a better play with the shadows set the self_shadows to mode 2 with a range of 9000. This step is optional but can help with a set up like we have here.
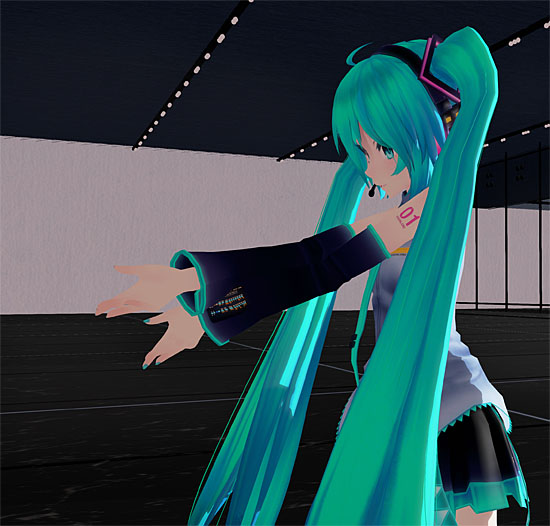
You can do whatever you like with the light direction but we just used the values as shown in the image below:
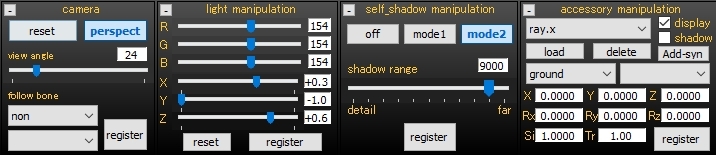
Note that we also adjusted the camera view angle; but this is also optional.
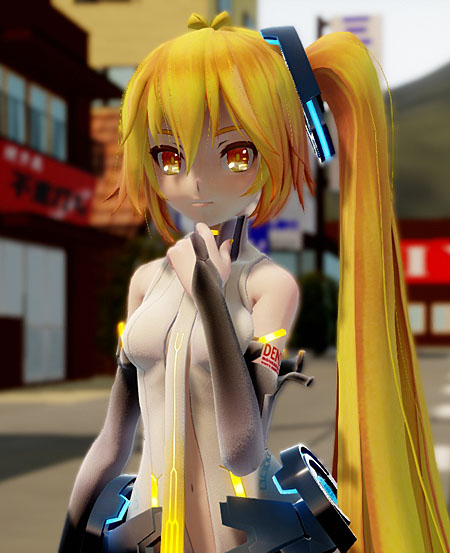
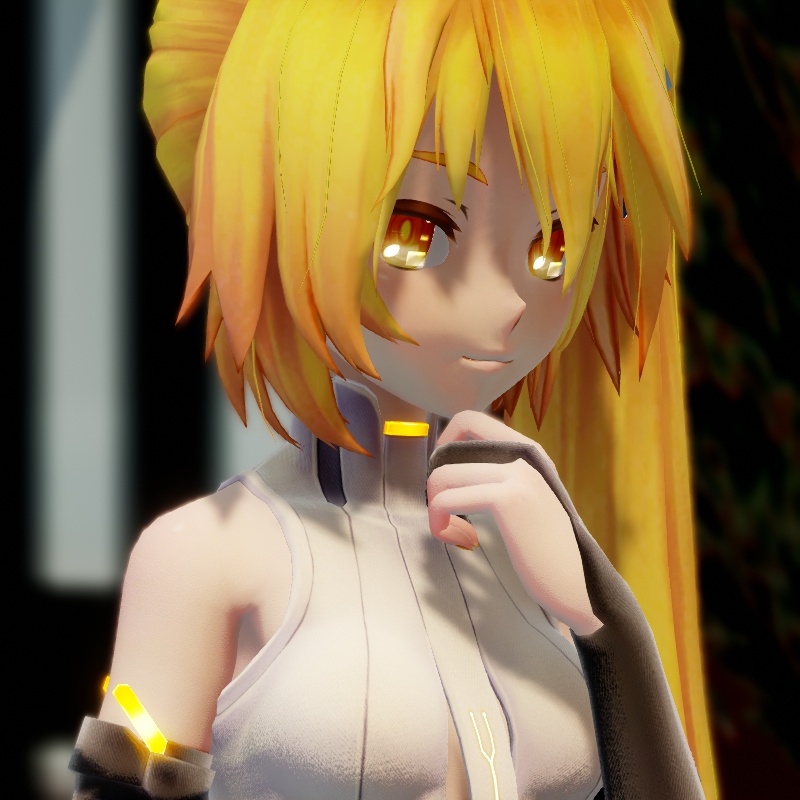
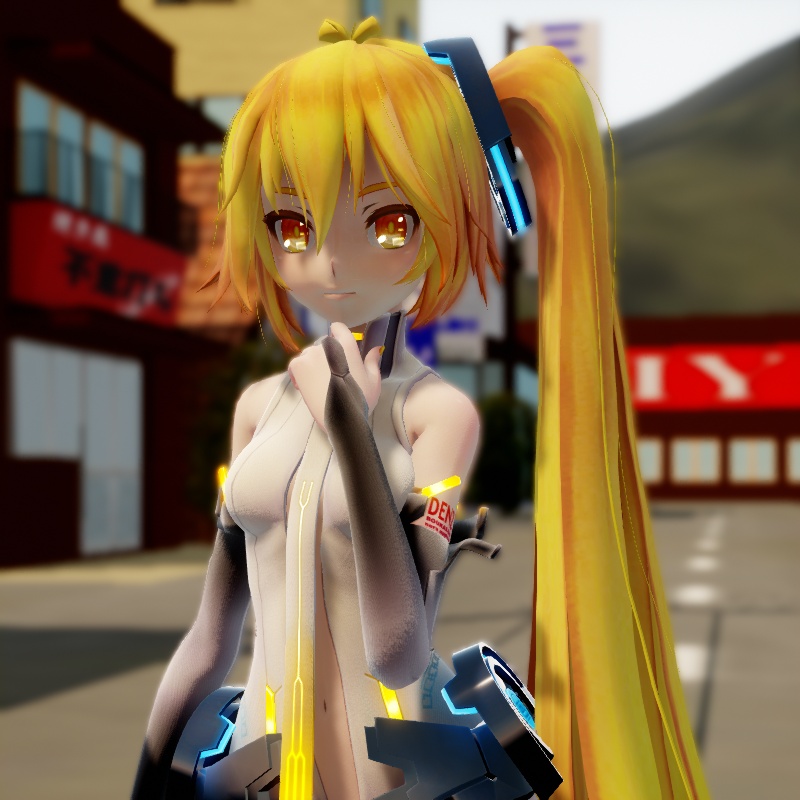
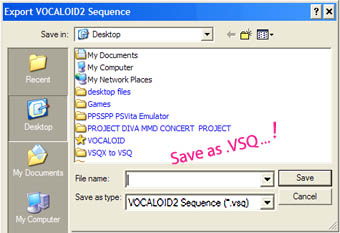
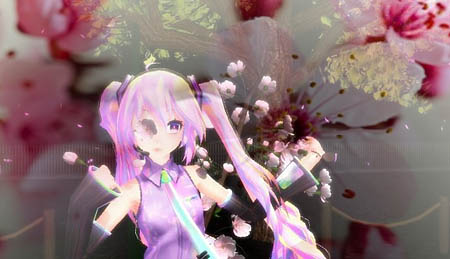
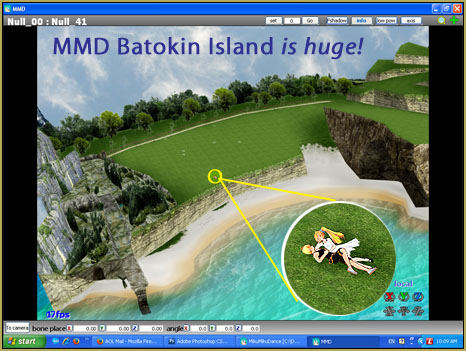
The background behind Neru is slightly blurred in our images. This is because we have enabled Ray-MMD’s depth of field controls. By default, these controls are disabled. Instructions on how to enable these controls are covered in other articles on this site on how to use Ray-MMD so they won’t be discussed here. Anyway, our final image looks as shown below (and these are essentially the same settings as used in the header image at the top of this article):
Hopefully, that the information in this article will help you get up and running with this fantastic effect. If you have questions, please feel free to post these in the comments section below. We also encourage you to read the more advanced articles about how to get the most out of this effect in other tutorials on this site.
CREDITS:
Tda Append Neru – Tda/Vk
Akita Neru (C) Smith-Hioka
Norendai Town – 銀匙P
There’s an entire series of these basic town sets; look for them on VPVP wiki. They are rather old and simplistic, but still very usable and are extremely light weight resource-wise.
MMD 9.31
Ray-MMD 1.5.0
IrfanView 64
– SEE BELOW for MORE MMD TUTORIALS…
— — —
– _ — –
![]()

I stuck at step 4 :(( the materials won’t show up I don’t know why. I already have the latest MMD and Raycast :(((
They simply MUST be there… I got no idea why they don’t show for you…
I think you need to right-click on the model’s tab then select the Subset-Extract option.
I am running a 64-bit Windows 10 machine. I have the same problem LycheeJuus describes:
“i followed the steps to the T up until setting up main.fx and I bumped into a big problem. The model is transparent, and very light in color, like a ghost. What could be the problem?”
When I attempt to apply ANYTHING other than main.x to any part of any model. Main.x looks fine, but the ghost-like, mostly-clear with only very slight hints of the old color, effect persists through EVERY other material option in the folders.
I mention my machine and LycheeJuus because I saw you responded to LycheeJuus by asking what kind of machine they’re working with and simply saying some features don’t work unless you have a 64-bit Windows 10 computer.
I haven’t had any issues with any other effects, it’s just RayCast/RayMMD doing this. Both when I was trying 1.3 and now with 1.5. My computer is running and rendering everything else perfectly. I know it’s not any one material or an issue with the model because I have tried every material on the model, AND I have tested other models.
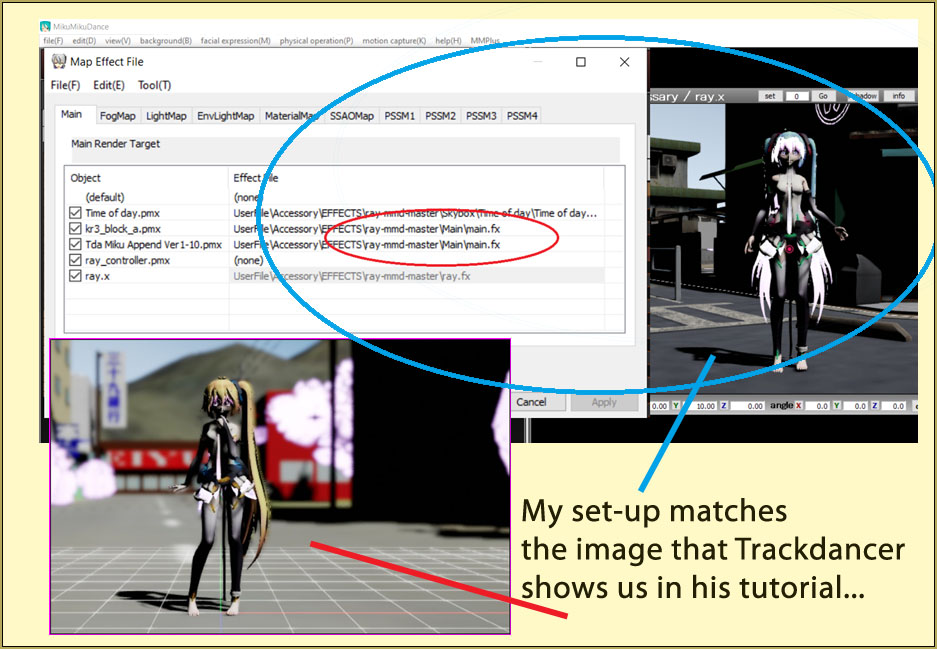
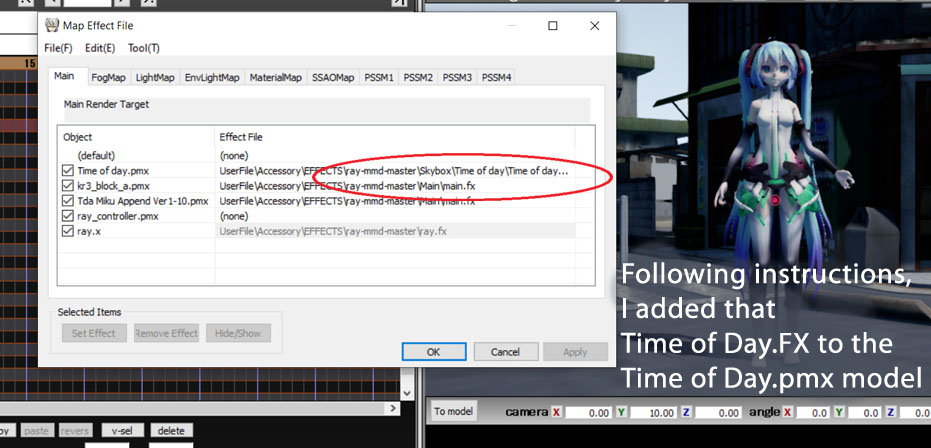
I just started following that tutorial. When I added main.fx to the stage and the model, my scene looked like this… and then I moved to the next step of adding Time of Day to the Time of day.pmx model… … YOURS did not look like this?
My sliders for the time of day skybox have completely changed from the ones listed here in the guide. All I recall doing was trying out 1.5.2 and now the slider’s names are different. I posted an issue on ray-cast’s GitHub but no reply. I see sliders like “SunRadius+”, “OzoneMass+” and none of the ones listed here are present anymore. Does anyone know what happened? :(
I don’t know if 1.5.2 is “the one”… there are a few versions out there… Try 1.5.0 … you’re on your own as you learn these things… best wishes!
I did go back to 1.5.0 but that’s when the sliders changed. I haven’t found a fix and can’t use the original sliders as listed here. I’ve tried removing/adding MMD, removing/adding MME, and the same with Raycast. They’re just stuck and I haven’t figured out how to get 1.5.0 back to normal. Still no response from Github, so I’m just gonna keep backtracking on versions until I get the sliders I need. Not my preferred course of action but if it works, it’s something I guess.
Sorry. I have nothing for you…
I’m back. I figured out the problem. Turns out I’m just blind as a bat… I completely skipped over a step and didn’t realize I was looking in the wrong spot. My deepest apologies. I thorough went back through the guide and found out where I went wrong. Thank you for responding so quickly and I’m very sorry about any inconvenience I might have caused.
anyone ever got i fix on hwo to stop it from turning bright pink? I followed all the steps up to step 3 but it still went bright pink :(
I renamed the stage model file from Japanese to English and it worked.
i did all the steps up to 3. when i finished step 3, the scene went bright pink. what happened?
Try again… I just did steps one through three… and at the end of step two, the image was looking freaky with high-contrast black skin and such… but when I went to step three, went to the MME… selected the sky box model and clicked the EnvLightMap tab… and went to the Time of day folder and added that Time of Lighting.fx to the Skybox model, my image was looking great… as pictured in the tutorial…
… carefully retrace your steps… mine worked as per the tutorial.
followed all the steps carefully but it still turned pink ? is there a fix to it ?
you followed the steps as in loading Time Of Lighting.fx to the skybox correctly?
I got pink if you load up the “time of day.fx” instead of “time of lightning.fx” in the EnvLightMap section. When I change it to “time of lightning.fx” it works as per the tutorial.
stuck at step 2
Please be more specific. What exactly are you trying to do and how are you stuck or what is it that is not working?
When you respond, also tell us exactly what type of computer you are using (brand and model). Ray-MMD is pretty intensive; under-powered systems will have issues with it. Now on the other hand, if your PC has no issues running graphic intensive 3D computer games, then something else is going on here.
MME does not connect to MMD.
What should i do?
Install DirectX 9.0c.
Make sure you downloaded the latest versions of each, and that they match the bit version (32bit MMD+32bit MME – 64bit MMD+64bit MME): Now drag the three DLL files of MME (MMHack.dll – d3d9.dll – MMEffect.dll) onto the same folder your MMD is located on–
I had a problem using RayMMD, I used it last month and had no problems until today in step 4, I am adding some materials to the Model but it hasn’t changed and I removed the tick to hide it, but through it leaves only a faint pattern Model that doesn’t disappear like before. I have used 2 win10 machines and it has the same result (I used Ikpolishshader but it was similar to Raymmd)
If you get an error when you load Time of day, than just use Sky Hemisphere instead!
It helped me alot.
[No other steps need to change.]
Ray-MMD 1.5.0 – 11.1.2018.
Ray-MMD 1.5.2 – 13.3.2018.
i followed the steps to the T up until setting up main.fx and I bumped into a big problem. The model is transparent, and very light in color, like a ghost. What could be the problem?
Are you running a windows 10 PC? … Raycast runs best on Windows 10. If not, many features will be unavailable to you. … Also see our complete set of Ray-MMD/Raycast tutorials. The first ones listed there are the most simplistic.
And what “features” would those be? Raycast / Ray-MMD is written in DX9 and thus will work on any DX9 capable operating system. Windows 7 has DX11 by default so there is no reson for it not to work. For Raycast the most important factor is the graphics card, which even the newest and fastest can work in Windows 7 (utilizing up to DX11 graphical features). You are mixing up “RTX Features” (real ray-tracing) which require DX12 (default on Windows 10) and an DX12 capable gpu, with “Ray-MMD” which is based on DX9.
https://en.wikipedia.org/wiki/Shading_language#DirectX_High-Level_Shader_Language
Also, please correct the misinformation in all those articles where Trackdancer neglected to state he is using Linux and that he misinterpreted
“Ray-MMD – 1.5.0 (tar.gz) (updated: 15. Jan 2018)”
thinking for two years that 1.5.0 is the latest version, while 1.5.2 was the latest version.
https://github.com/ray-cast/ray-mmd
What I had seen online (so it must be true) was that you needed Win 10 64-bit. I was running Raycast on my 32-bit XP Pro Dell Optiplex 745… and could not address any of the “environment” settings on RayCast. When I wrote THIS piece, I was on XP. Early in 2019 I bought a “gamers” Win 10 64-bit machine and have had no issues with Raycast.
I just Downloaded Ray-MMD, the folder is called “ray-mmd-master”… and I copied this info from the README in this latest Version of Ray-MMD: March of 2018:
Requirement :
————
* [MikuMikuDance](http://www.geocities.jp/higuchuu4/index_e.htm) – 926ver (x64) (Without Anti-Aliasing)
* [MikuMikuEffect](https://bowlroll.net/file/35012) – 037ver (x64)
* Direct3D 9 With Shader Model 3.0 (ps_3_0)
So… 64-bit Required… Yes?
Ray-MMD will work fine ad long as you have Windows 7/8/10, and a GTX 970 / GTX 1070 / RTX 2070 desktop gpu. And as you can see from the UI screenshoots in all these articles, Raymmd can even run on Linux and a laptop… but you will (as obvious from the visual fidelity in all the screenshoots in aformentined articles) have to sacrifice realism. Therefore, for example, a GTX 1060 M is much slower than a GTX 1060; meaning depending on the brand, you may need to watch out that it is not overheating that’s causing your issues. Also, it is best not to use integrated gpu chips for Raymmd…
Download MSI Afterburner and you can watch the graphisc card temperature while you are working in MMD, with the MSI OSD.
https://www.msi.com/page/afterburner
Also useful is HWiNFO which will show you all you components’s temperatures.
https://www.hwinfo.com/
Does RTX GPU help in anyway for mmd videos ÒvÓ!?
Yes! Absolutely! Ray-cast – Ray-MMD is very demanding. It supports 8096 * 4 realtime shadow map, and not to mention other stuff like real time shape based Bokeh DOF and other stuff. But the performance/framerate during creating your MMD is not important as being able to max out photo-realism (IMO) since this is not a game and when working in RayMMD you are just working in interfaces/sliders or in Notepad++ changeing numbers/values. So the framerate can be 1 FPS and that is not importamt as this IS NOT A GAME where you NEED high FPS. When rendering to video you can render up to 4K 60 FPS even with a Q6600. So the most important thing to know, where most people make a mistake, is that you literally need a HIGH-END DESKTOP GPU. Don’t be fooled by the “RTX” on some MID-RANGE GPU. It wont be able to do anything and will surely overheat when you max out settings. Rather get HIGH-END / TOP-CLASS DESKTOP GPU with high quality MOSFETS, capacitors, PCB, GOLDEN SAMPLE CHIP, ETC. So at least a 2KG Card. If a GPU is at more than 67 – 76 C at maximum turbo clock, it is time to think about cards with quality components. Also important to remember about Ray-cast is that it is essentially the essence of Ray-tracing. So be cateful not to fry your laptop if you want photo-realism. You can always get a used GTX TITAN or TITAN BLACK or a card like mine and you will never have a problem with MMD. Because remember, MMD IS NOT A GAME. YOU DON’T NEED FPS, YOU NEED DETAIL. You can move sliders and type numbers at 1 FPS too.
https://www.asus.com/Graphics-Cards/TURBOGTX970OC4GD5/
At the time this article was written latest version was 1.5.2 …
What if I don’t get the blurriness present in the first step?
There are many effects for background blurs you can use, such as PowerDOF and ikBrokeh.
As it’s said, blurriness is not turned on automatically by default and has to be enabled, and instructions for that are elsewere. See here, for example.
Thank you for very beautiful Ray-MMD tutorial!
After reading the tutorial below, I started to disable SSAOMap for face materials only.
https://twitter.com/i/moments/1176101607496241152