


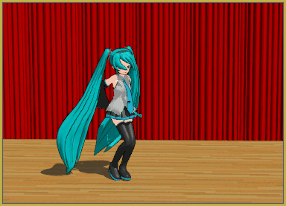
![]() How can I make a walk-in-place motion for MikuMikuDance? is there an animation shortcut to making a walk-in-place motion in MMD?
How can I make a walk-in-place motion for MikuMikuDance? is there an animation shortcut to making a walk-in-place motion in MMD?
Easily Create a Walk-in-Place Motion in MMD
A reader and I were trading ideas today, and she said she saw a method for  making a walk-in-place motion for MMD in a video on YouTube… and once you get the idea of it, the process is all too easy!
You open MMD… and load a model. You swing the camera’s view around so you are looking at him from the side. You create, in frame  Zero, the pose with the character’s feet farthest-apart in their stride… let’s say left-foot forward and right foot back. You also move the center bone down a little since, with feet farthest apart, the model should not stand at full height. Move the arms so that the hand is forward on the side with the foot back… and the hand is back on the side where the foot is forward. Tilt the lower-body up a little on the side with the forward foot. Double check that the center bone is low enough to allow the feet to be flat on the floor… but not too low.
Let’s get ready to skate!
We will do one walk-cycle in 30-frames… so go out to frame 15 and make the opposite pose: Right foot forward, left foot back. Right arm back, left arm forward, tilt the lower-body up on the foot-forward side. Copy that Center bone from frame Zero and paste it here, in frame 15.  Then go back to frame Zero and do a Vert-Select, copy, and paste it into Frame 30.
Go back to Frame 8 (about half-way through the stride motion) and raise the center bone until the feet are just touching the ground. COPY that diamond and paste it into frame 23 (middle of the next stride motion).
Now… Enter a length of animation (under the Play button) of 0 – 29 (since frame Zero is same as frame 30, no need to repeat frame 30) then click the REPEAT box by the Play button, and when you click PLAY, the character will be skating along! … all too easy!
The final “step”…
… is to go back in and raise the Leg IK bone of the foot that’s coming forward, rotate it so the toe is pointing down. Do this in  the same frame where the Center bone is at its highest… frame 8 and 23 in this example.
… and then in Frames 14 and 29, use the Leg IK bone to roll the forward foot back just a little, bringing the toe up above level, so that it “slaps the floor” in frames 15 and 30.

And… There you have it!

This little demo took me longer to write about than it did to actually produce the walk!
Of course, you can continue to add enhancements to your walk… swinging the upper body, keeping the face pointing straight ahead… move the center back a bit and then bend the upper body forward to compensate… LOTS of room for creativity!
I would almost swear the floor is moving!
We have only done the first thirty frames. Once you have everything looking just the way you like it, you can make it into an actual long-distance walk-in-place motion for your animation, just use Range Select and select all frames from 0 thru 30 and COPY. … then go out to frame 30 and PASTE, making your animation now be 60-frames. Go out to frame 60 and PASTE, again… for a total of 90 frames… and so on. Attach some scenery to a Dummy Bone and slide the scenery past your walking figure… sweet!
But wait, there’s more!
Our Silent Headset points out that if your model has a mother-bone… (or if you can add a mother bone to the model), then, after creating the “walk in place” motion, simply move the mother bone forward at a sensible pace, register the position at the end of the animation, and then you’ll have the model “walking” across the stage.
Useful in case you have multiple models and can not simply “slide” the stage backward to create the illusion of moving forward :)
Have fun with MikuMikuDance!
– SEE BELOW for MORE MMD TUTORIALS…
— — —
– _ — –
![]()


This reminds me, is there a way to remove motion and camera data in order to load another?
At the bottom of your timeline, you should see two empty boxes, put the frame # of the beginning of the motion (usually 0) to the frame # of the end of the motion. Click range-sel right below it and then delete.
Hoi!
You can also use the COPY and REVERSE function too? (Instead of copy and pasting) It’s what I was doing but…I was wondering if there would be any error by doing it this way? Or am I doing the right thing this whole time?
I do not recall using any Paste-Reverse while creating this motion. … You can experiment and, if it works, it works… but this motion is pretty quick to make, anyway.
I have a general question. I know that if you move the mother bone, the whole body moves accordingly. Is it possible to fix a certain part of the body, like a foot, in one location so that, when you move the mother bone, everything moves EXCEPT the foot? Haven’t been able to figure out how to do this (or if it is possible).
Yes. But the trick is, you’re not really supposed to move the motherbone. It’s okay when you’re learning, in order to quickly turn a walk-in-place animation into an actual walk, but in general, you shouldn’t be using your motherbone for any animation.
Instead of applying motion to the motherbone, try applying it to the center bone. With most models, you’ll find that moves the body, but not the feet. These feet can then be moved independently of the center by use of the IK bones.
Most models only have IK leg/feet. But a model can be made with any kinds of IK bones you want. Once made, these can be locked to any position in the same way that a foot can. More experienced animators regularly edit their models to simplify animation, and sometimes use multiple versions of the same model within a single animation, based on what those individual versions are tuned for.
If you’re interested in this in more depth, it’s about bone structure. Everything except your leg IK bones are parented to your center bone, so that when the center bone moves, those bones move. The center bone and the leg IK bones are parented to the motherbone, so that when you move your motherbone, your model just skates– everything moves together, as one.
I see. Thanks!
By the way, how would you make/edit a model to have hands IK bones (so the hands would stay in the same place when the center bone is moved)? Would that be possible?
It is possible. In order to do it, you’ll need to get familiar with model editing and bone structures. In your shoes, I would begin by downloading an editor like PMXE (like the one at http://eoscustom3d.deviantart.com/art/English-Pmx-Editor-v1-1-542100208 ), then searching this site for “bones” and reading whatever I could. After that, you might check out http://vasilnatalie.deviantart.com/art/MMD-Advanced-Bones-Part-3-Inverse-Kinematics-616998394 . If it doesn’t make sense yet– well, read more on bones, make more models. Or look at models in PMXE. That’s the best way to learn, studying how others have done it.
But it can be overwhelming. There are months or years worth of things to learn for MMD. IK structures are something even many experienced MMD modellers never get around to understanding well.
Of course, I want you to learn, but don’t think that it’ll be easy!
An easy way to make it would be to use IK Maker plugin by paperguitar. It’s designed specifically for hands, not for creating IK bones in general. Keep in mind, though, that it adds reserve bone chains for hands rather than modify existing ones. You better keep a backup copy of the model you transform and do not use a transformed model for motions that don’t require hand IK bones.
I replied, but LearnMMD decided I was a spammer, lol. And KillerBeer has great info that I wasn’t aware of.
Check your email. Maybe the spam folder.
Bandages already covered pretty much everything you need to know, but I’ll answer your question just for the sake of it.’
YES, you can move the motherbone and leave the leg IKs in their place. You’ll need to use the Outside Parent (OP) function for this.
In Model Manipulation Panel, there’s a small button labeled “OP”. Click it and a window will pop out. On the “Subject Bone” droplist, select one of the Leg IK bone. On “Target Model” droplist, select “Ground”. Now hit “OP Register” button under it.
Now do the same for the other IK bone.
Now I don’t know if it’ll be useful or not. But it’s another MMD trick you can add to your knowledge. You can also use this to “attach” one model to another
I’ll have to play around with this OP function. Thanks for the info!
By the way, this is why I wish there were a real User’s Guide to MMD. There’s so many details like this in MMD that it’s almost impossible to figure them out by trial and error.
Hi! I have created a successful walk cycle and I’m so happy! But, I try to move the mother bone up so it looks like the model is actually walking, but she stays in place until the motion is over and then goes to the desired spot. If I try to move her halfway through the motion, she just goes backwards. What can I do to make the motion more flexible?
Did the model just teleport all of a sudden at the end? That’s funny ^^
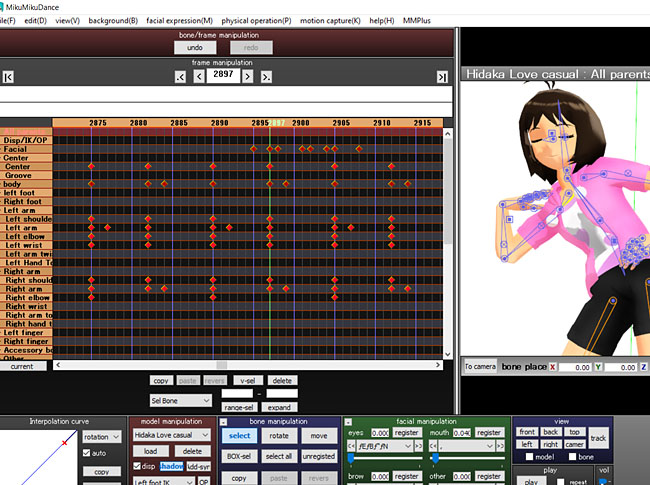
Try this… Let’s use Range Select to erase the data in those motherbone frames:
-Load the motion. Let’s assume it’s 101 frames long (frame 0-100)
-Go to the last frame and move the motherbone to the desired position and register it
-Now at the frame manipulation panel (the one with the diamonds), there’s a droplist at the bottom left. Choose “Sel Bone”
-Next to that list are two fields with the “range-sel” and “expand” button below them. enter the number of the first frame+1, and the last frame-1. In this case, since the motion starts at 0 frame and end at 100, enter the value of 1 and 99 to each field
-Click the “range-sel” button and then hit “Delete” on your keyboard.
-Play the motion, it should work properly
yay! Thank you!
May I add some?
You can add a mother bone to the model and, after creating the “walk in place” motion, simply move the mother bone forward at a sensible pace, register the position at the end of the animation, and then you’ll have the model “walking” across the stage.
Useful in case you have multiple models and can not simply “slide” the stage backward to create the illusion of moving forward :)
Thanks S.H. … that’s the perfect solution!… thank you! … I added that info to the article!