


Yes it’s almost that time of the year again and all the Halloween merchandise is on glorious display at COSCO. Right, I’ll admit a bought a large pack of variety candies but those are to fuel my sugar fixes, not to dole out to random kids. After all kids shouldn’t take candy from strangers; isn’t that what all good mommies say to their kids?
But Halloween and Horror scenes have been a fave subject of MMDers for years so what we will do in this article is just show you how to create scenes like these with some of the assets available out there. A lot of MMDers actually seem to get it all wrong and so it is a topic worth discussing. After all, in the final analysis, horror scenes is all about “atmosphere” and it really isn’t hard to create scenes like the image above.
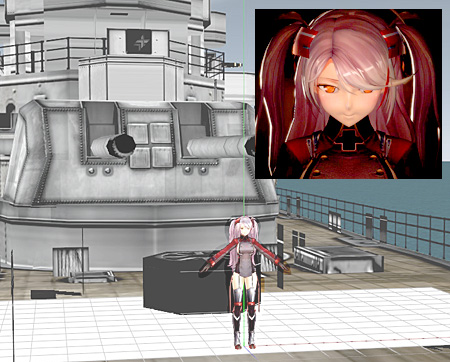
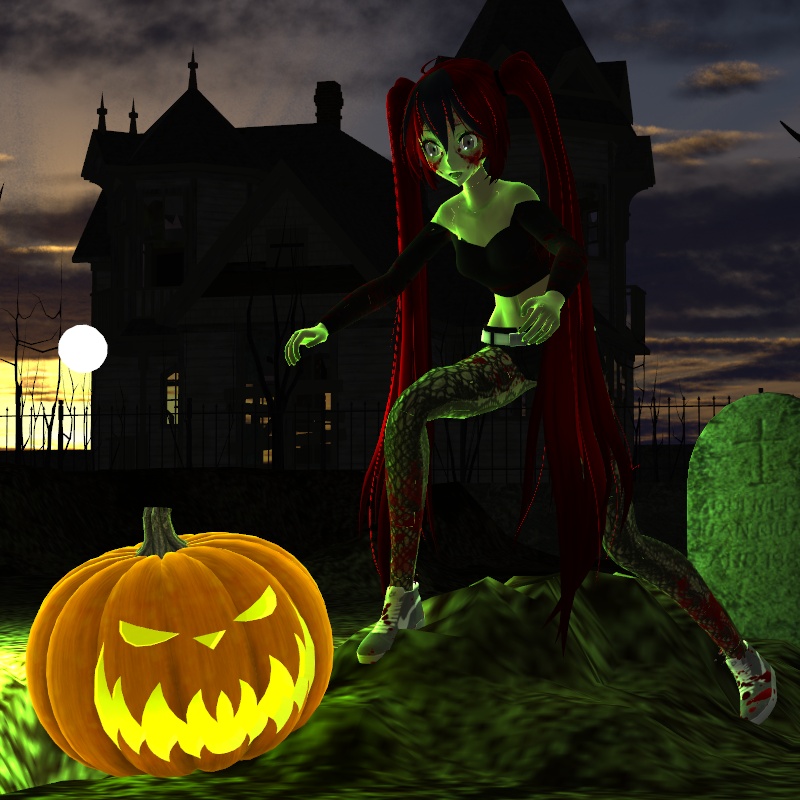
The image above…
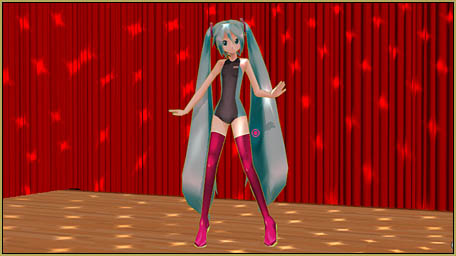
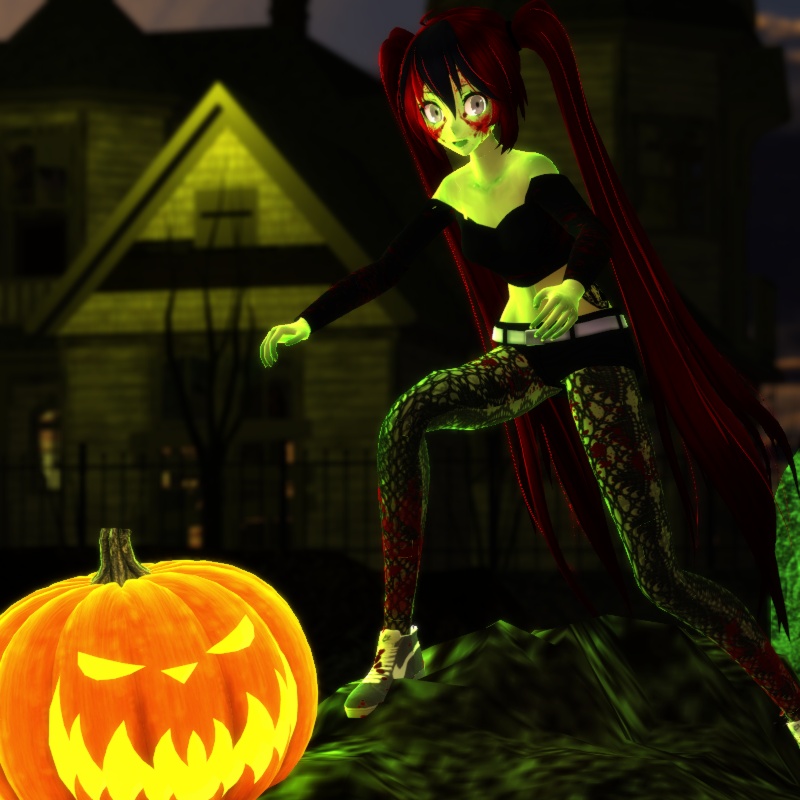
… took about 10 minutes to make including the posing. It also only uses two MME effects and some minor tweaking to the lighting. Let us show you the same scene without any effects. The image below is pretty bland, right?

To get the moody scene shown at the top of the article only two effects were used: dDarkAdultShader_ES and Diffusion 7. The other part of the equation was just minor tweaking to the lighting set up to blend the model and the stage.

But why didn’t I use plain vanilla AdultShader, which is not to be confused with dDarkAdultShader? Simply because the latter is darker and helps us blend the model into her environment much more effectively. To normalize the overall lighting, Diffusion 7 was used as it inherently has a darkening effect. Plus it also softens the imagery and makes the scene easier on the eyes.
The whole point that I am trying to make is that you don’t just plonk a model onto a textured stage like the one used here and expect instant satisfactory results; you actually do need to blend the different elements together to create a unified scene. That’s what MMEs are for, shading models and blending them into a scene. Many users forget the “blending” part of the last statement and without understanding the importance of that last point, they will end up with pedestrian results.
Where do I find “scary” stages?
The easiest way to find scary stages for your MMD Halloween or Horror project is to use the following search term in Google Search: “mmd spooky stages“. It will pull up a bunch of useful links to stages made for this purpose. Many of these stages are game rips, such as the one above and the one we will be using below.
Now, I don’t normally condone using ripped models as technically, that’s “stealing“. These stages take a lot of work and money to make, not to mention skill. That said, they are useful…
A lot of MMDers fail to understand that they were made for use under different types of lighting systems and you cannot just plonk them into MMD, add a model and expect the same results as you can see in the video games from which they were originally made for. There are tricks to it and we will discuss at least one approach to successfully using such a stage in MMD.
But before that, select your star…
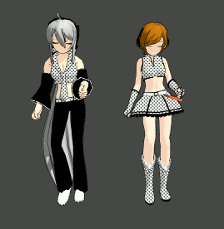
Whatever stage you decide to use, ultimately it is just the backdrop for your MMD characters. There are horror themed MMD models around, including zombie versions of Miku Hatsune. Some are better than others, and you can spend some quality time later finding one. Using the search term “mmd miku zombie horror model” will lead to a whole list of potential candidates for the theme. But in keeping with our Halloween theme here, I will be sticking with Alice since her costume is in traditional orange/black Halloween colors anyway.
The stage we will be using…

We found this wonderful dark theme chapel model on DeviantArt. It is a game rip from the Silent Hill video game just like the stage used above. But notice that built into the texture map is the lighting set up. What this means for us when we use it, is that we don’t really need to do anything with it other than to load it into MMD. Preferably, the stage is loaded as a DirectX format model with no provisions for self-shadows as that will be problematic.
Fortunately, the rip I got is exactly like that and so all we need to add to the stage is full_SimpleSoftShadow. This effect actually brightens it up a little which is what we want as it will prevent the stage from being too dark when we lay on other effects later on in the process. The image below shows the same stage with this effect in place; it doesn’t look brighter than the image above but there is actually a difference which will be more evident when viewed on a computer monitor and that difference is actually vital to the process.

If you do use the same stage, note that it needs to be resized otherwise it will be too small. Simply set the Si value to 2.0000 in the accessory manipulation panel.
Adding Alice…

Alice is loaded into the scene and posed. Then the lighting set up was adjusted to blend her into the scene. Note that I chose to hit her slightly from one side with the lighting rather than from straight on, as this improves her shading. Plus the other trick was to adjust the light color to have a red bias to make her colors blend in with the colors of the stage. Even with only these simple adjustments, she already looks like she is actually integral to her environment. The setting used are shown below.

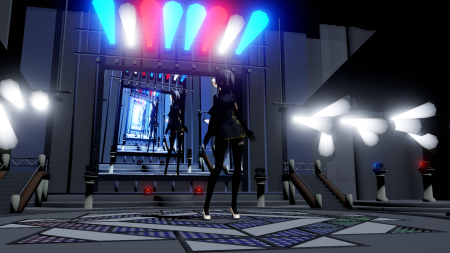
The KISS approach to shading the scene.
With the correct lighting set up, shading and improving the scene with MMEs is a breeze. All we need are three effects. First we added DarkSeriousShader_ES to Alice; then we added Diffusion 7 and o_BleachByPass to blend the scene. The image below doesn’t show fully the depth of this approach is, but if you click on it, the image is shown as rendered in its original full screen size. This larger image will demonstrate exactly how effective this approach can be in better detail.
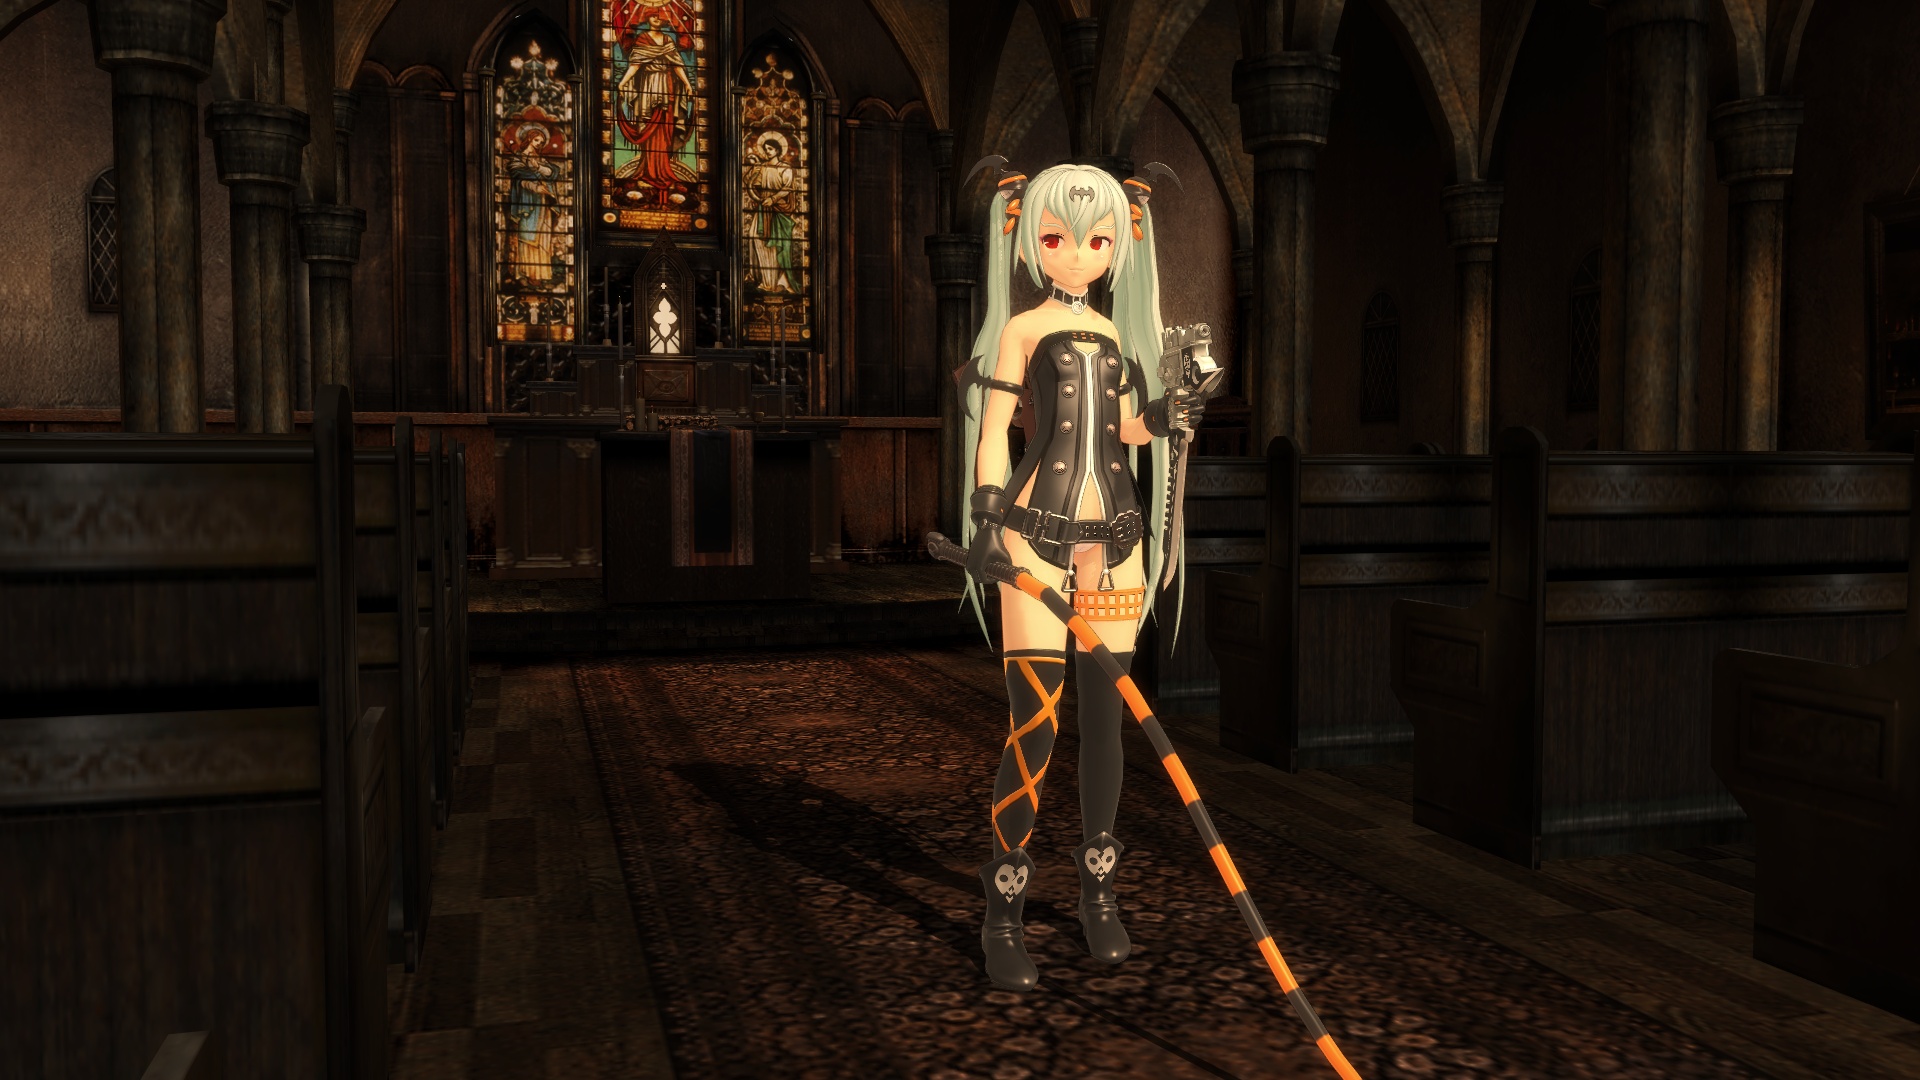
Do note that to compensate for the darkening effect of Diffusion 7, we did need to adjust the illumination level and reduce its strength. Also, o_BleachByPass, was also used at partial strength. It serves to desaturate the colors, helping Alice’s colors which are actually quite bright compared to the stage colors, blend in better.

To use an effect at less than full strength, many effects allows you to make adjustments using the Tr field in the accessory manipulation panel. For the full size image, these were the values used:
- Diffusion 7 – Tr=0.5
- o_BleachByPass – Tr=0.15
So far, we have explained our method of blending models into textured stages ripped from games…
But since it is Halloween, how do you make a spooky picture?
This is the “fun” part and a little bit more fiddly, but still easy to do. We’re going to need a graveyard and a zombie… and a pumpkin!
A quick GOOGLE search got me what I needed and the models used are listed below.
Now I have to admit that horror movies make me laugh and that I am no big fan of horror video games. So this means, that I am really bad at making “scary” images in the conventional sense. Besides, how can Miku be scary no matter what her guise?
Model List
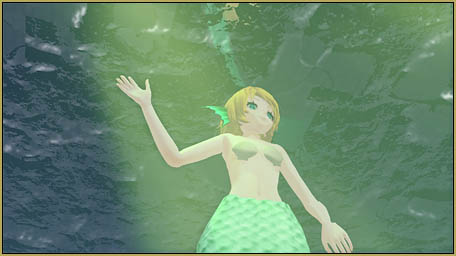
Anyway, putting these all together I created the scene below. Note that I adjusted the lighting so that the scene is illuminated from the direction of the setting sun on the skydome. I left the ground shadows on to help in this process, but it will be switched off when the MMEs are applied.
The haunted house stage comes in both DirectX format and as a PMX model, but it is actually much easier to shade using the DirectX version of the stage which is the version used here.
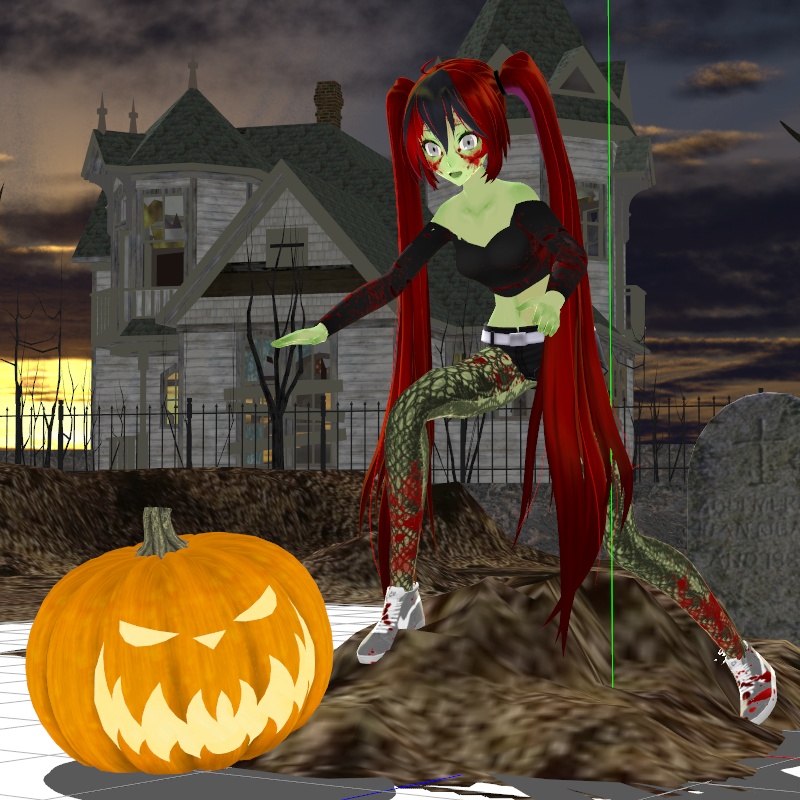
One of the best shaders to use for low lighting scenes is the old Half-Lambert shader suite (also known as Cook Torrance). It consists of several fx files and PointLights. It is very easy to use and highly effective. To start off with, the Cook-Torrance.fx is added to all the models in the scene except the skydome. The skydome uses SeriousShader.fx primarily to avoid issues downstream as well to ensure that it is smoothed out. The MME panel shows all the effects used to create the final scene and these will be discussed in further detail below.

After the Cook-Torrance.fx is added the scene should look like this. It is important to note that the Cook-Torrance effect only works on models that have self-shadow enabled. So this meant that we checked off the shadow display for the haunted house model in the accessory manipulation panel. This causes the stage to go dark and that is exactly what we want.

To illuminate the scene, we will introduce our own light sources using the PointLight.x models. The effect comes with five of these numbered 0-t0-4. Instructions on how to use these lights are given below. We will need several to light up our scene and the first one goes inside the Jack-O-Lantern as well, it’s a lantern, right?
Using the PointLight models
The PointLight models are special models that are encoded to give off light. They may come in DirectX format or as PMX models with sliders. The ones that comes with the Cook-Torrance effect are DirectX models and they work like this.

The widgets at the lower right corner of the main MMD windows are used to control the PointLights:
- First click on the title across the top until it reads “accessory”. This toggles controls over to the active accessory and disables the camera movement controls.
- The middle row of rotation controls are used to manipulate the R, G and B values of the light. By default these lights are loaded with these values at “0” which means that they give off no light. If you rotate the light the illumination level will increase. You have to use a light touch as otherwise, these lights can be too bright. Rotate in one direction to increase the illumination level, and in the opposite direction to decrease it.
- Remember, white light is equal values of R, G and B. Also X-axis=R, Y-axis=G and Z-axis=B. The widget icons uses the same colors if you get confused or forget.
- The lower row of movement controls allows you to move the light around much like any other model.
- By default these PointLight models comes in the form of a white sphere. This is so that you see where they are so that they are easier to move and locate. But, after their location is fixed you will usually want to not display them. This can be toggled in the accessory manipulation panel.
- The size of the sphere determines to an extent the area of coverage. So a really big sphere can give out a lot of light and a very small sphere much less so. The size of the sphere is set using the Si field in the accessory manipulation panel.

Word of warning: When rotating the PointLight with the widget controls, USE A LIGHT TOUCH, as these controls are very sensitive and you can end up with highly undesirable results.
The system is actually really easy to use but if you are doing this for the first time, a little practice will be helpful, so do play with them until you are comfortable with them. Also be aware that these lights can be pretty demanding on your graphics adapter, especially if you have a low quality one.
The images above shows our first light placed into the lantern and with the illumination turned on to give off a yellowish light. But because it is too bright at its default size, we reduced it in size to suit. However, being inside the pumpkin, not much light is thrown on the scene, so we will need other lights for the purpose.
This next image shows the second light placed and tweaked. It gives off a greenish light to make the scene and Miku more spooky. But at this size, the light doesn’t have much range so the house at the back is unaffected. We will have to introduce other lights into the scene for these purposes and also to improve the light quality falling on Miku. In total, four lights had to be used to illuminate the final scene.
- #0: inside the pumpkin
- #1: to the side of Miku
- #3: in front of Miku
- #4: to illuminate the haunted house
Post Effects
Once all the PointLights are placed and configured, it becomes necessary to adjust the colors of the global light source. This is especially the case since a lot of unnatural light colors were used in the image. The final settings are shown below. Note that to compensate for the darkening effect of some of the Post effects that were added, the global illumination level was made higher.

Post effects are important as these helps to blend everything together and improve overall image quality. The following were used:
- Diffusion 7 (Tr=0.5) – to soften and darken the overall scene
- o_BleachByPass (Tr=0.25) – desaturate the colors to make them look more realistic
- o_likeHDR (Tr=0.5) – sharpens features; helps image definition
- 0_PixelEdgeBlur (Tr=1.0) – eliminates some of the artifacts created by the o_likeHDR effect
- PowerDOF – slightly blurs the background but allows the foreground models to remain sharp
The use of PowerDOF will make more sense if you see the camera set up. This uses a focal length of 15 which simulates a telephoto lens. The characteristics of this type of lens is for foreground objects to remain sharp while background objects lose definition and becomes blurred.

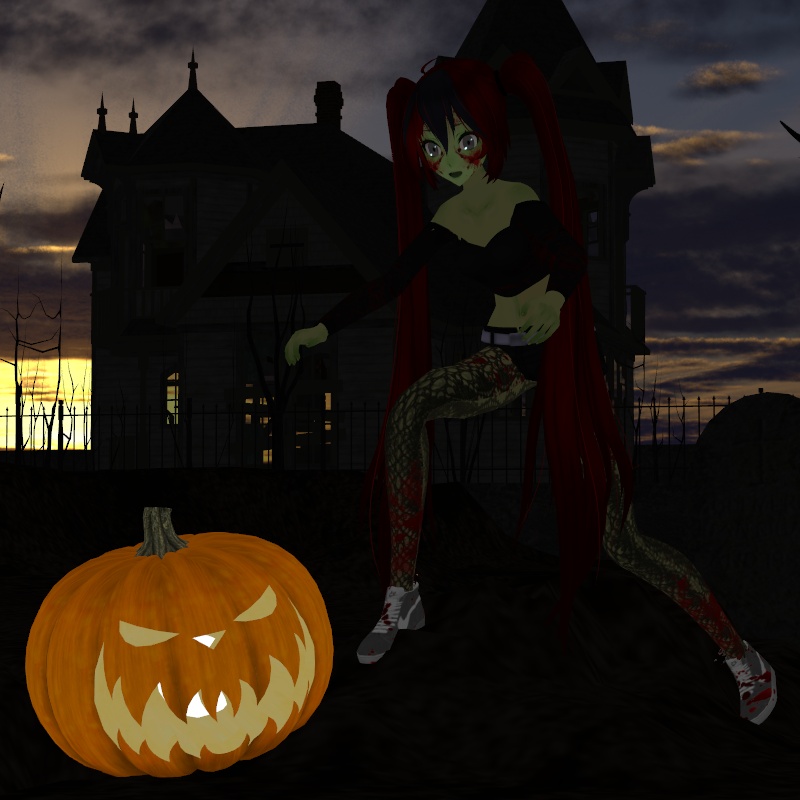
The set up actually works from different angles so in closing this article, here’s another shot of the scene taken from another angle.

Hope you found this article helpful and thanks for reading. If you have any questions, feel free to post these in the comments section below.
Afterwords…
Just to be clear in case the main text did not clearly state the following points. There were two rendering strategies used in this article:
- METHOD 1: Blend the MMD model into the scene using the texture colors of the stage as the determining factor.
- METHOD 2: Use global MME effects to determine colors and use post effects to blend all elements of the scene.
Credits
Alice: model by Kakomiki
(C) Nitroplus, HobbyJAPAN
Zombie Miku: model by TDA/editor did not include a readme.txt (see model link above)
Miku Hatsune (C) Crypton Future Media, Inc.
Silent Hill Stages: rips
(C) Konami / Team Silent
Haunted House stage: no readme.txt (see model link above)
Pumpkin: o-DeadSilverVirus-0
MMD 9.31
PMX Editor
IrfanView 64
Inkscape
dDarkShader: https://bowlroll.net/file/15240
Cook Torrance Ver 0.301 aka Half-Lambert Shader: https://bowlroll.net/file/7596
Diffusion 7: http://www.mediafire.com/file/7zzu80701o0284h/Diffusion7.zip/file
PowerDOF: https://harigane.at.webry.info/201209/article_1.html
SeriousShader: https://ux.getuploader.com/Elle_DataPort/download/8
o_BleachByPass / o_likeHDR / o_PixelEdgeBlur: https://okoneya.jp/mmd_files/
Kirkland Signature Funhouse Treats, Variety, 92 oz – available from COSCO and Amazon.com
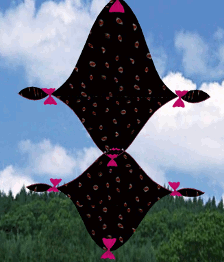
THE SCARIEST MMD PICTURE EVER MADE…
WARNING: The following image is so scary that we dare not publish it plainly on this site. If you are prone to heart attacks or have a pace maker installed, DO NOT VIEW.
Disclaimer: We will not be held liable for fainting spells, seizures, epileptic fits or insanity caused by viewing the image.
ABSOLUTELY DO NOT VIEW AT MIDNIGHT ON OCTOBER 31.
To view: [ CLICK HERE IF YOU DARE ]
– SEE BELOW for MORE MMD TUTORIALS…
— — —
– _ — –
![]()