


![]() How can I make MMD model hands for my MikuMikuDance model? How can “Mark Seams” help me make nice textures? How on Earth do you make hands?!
How can I make MMD model hands for my MikuMikuDance model? How can “Mark Seams” help me make nice textures? How on Earth do you make hands?!
Use Blender to make MMD Model Hands from scratch:
Making an Easy to Texture Hand

One of the hardest parts of modeling hands isn’t the modeling itself – it is instead trying to unwrap the hand for texturing. Due to all of the nooks and crannies, it can be nearly impossible to mark all of the correct seams. However, in this tutorial, I will show you how to make MMD model hands that are easy to texture.
For this tutorial, I grabbed an image I found on Google Images. As you can see, it has a CC0 license. That means that we can do whatever we want with it and not even have to credit anyone. Even better? You can make money using it! If you’re paranoid about copyright law, it’s a good idea to gather up only references with a CC0 license.
Note: This will assume you have quite a bit of knowledge on how to navigate Blender. If you’re lost but you want to follow along, check out my Make A Model from Scratch Using Blender tutorial series here!
Plopping Down The Vertices
So, this method is pretty easy to get started! Load up your background image and resize it and line it up. Because I might test this in MMD, I made sure that the entire image was above the “ground”.
For the first part of this, all you need to know is that you can extrude a single vertex. You’re going to use that knowledge to trace the hand.
To get into edit mode, you need to actually put an object to edit into the scene. Add whatever you want – I picked a plane! To get started, select your geometry and enter edit mode.
Now that we’re in edit mode . . .
Now, for the quick rundown. For this, we’re going to extrude vertices to make an outline of the hand. Then, we will fill in the outline with planes and then extrude those planes to make a 3D object. To start, just hold down “Ctrl” and left click where you want the first vertex to go. Then press “E” to extrude that vertex. Click to plop down the extruded vertex . . . Press “E” . . . click to plop down . . . And delete the original geometry you added as we only needed it to get into edit mode!
Once you trace it, you should have something that looks a little like this . . .

Note: It’s orange because I selected everything. If I didn’t do that, it would be almost impossible to see it!
Now, we just need to figure out how we’re going to add planes!
The easiest method is to just press the “F” key. That will fill it with one singular plane.

The next is a little more involved, but will allow for greater control. Instead of selecting the entire edge, let’s just select four vertices at a time then press “F”. Remember – if you need more vertices, you can use subdivide. Select the edge you want a new vertex on and press “W” then choose subdivide. Select the new vertex and press “Shift + V” to move it around.
Why is this a better idea? Loop cut! If you use four sided polygons, you are able to press “Ctrl + R” and make loop cuts.
As a note, adding a vertex with other vertices selected will really mess with your geometry . . .

So make sure that you deselect everything before adding a new vertex!
But there’s a problem!
So, the thumb poses a problem. There’s an area between the palm and the thumb that just can’t be connected together using the simple method of “select four vertices and press ‘F'”. If we use subdivide on an edge connected to a plane, we can no longer use “Loop Cut” on those faces. If we make the area between the palm and the thumb an “n-gon”, we have the same problem. So how did I get around the problem? “K for Kut!” Ok, ok, that joke was stale the moment I used it in my tutorial series. Use the knife to cut the four sided polygon closest to the gap. Then, you have two four sided polygons and you can use Loop Cut on both of them!

The orange part is the face that I made. The black line running through the quadrilateral is the line I made using the knife tool.
Unfortunately, I didn’t realize until after making that face that obviously, adding a random vertex to the top of an edge would make the quadrilateral underneath it an “n-gon”. Gosh darn it! Thankfully, running the knife tool down through all of the faces fixed that. All quads here!
Now, for the fingers, we’ll need to loop cut the faces on the palm so that we can make nice quads and not icky “n-gons”! Essentially, repeat the same process you did for the thumb. It’s up to you whether you use the knife or loop cuts. They do more or less the same thing!
Once you finish a finger, press “Ctrl + R” while hovering over it to make sure that everything is nice and four sided.
In the end, I got this:

But as of now, this is simply a plane. We need to actually make it 3D!
Making the Plane 3D
So, let’s select everything, move into side view, and press “E” to to extrude. After extruding, I pressed “S” to size it so that the middle of the hand would be bigger than the inside. Then I did it again, only this time making the new faces smaller. Press “Ctrl + N” to flip the normals, and then you have an . . . uh . . . 3D hand!

It’s not a particularly good one, but it is one! Now, you just need to just move around the vertices until it looks ok to you!
Now . . . Let’s get started on why we made this hand in the first place . . . To make textures for!
Before I get started, I’m going to take pictures of my hand and email them to myself because I don’t want to deal with SD cards right now!
Note: I’m using pretty bad textures. My hand hurts from trying to pose so that the textures would work well! The best way to do this would be to stitch together several photos or paint the textures . . . But I’m not feeling up for that today! This is going to be especially bad because I used flash when I took the pictures . . . Whoops!
Adding the Texture
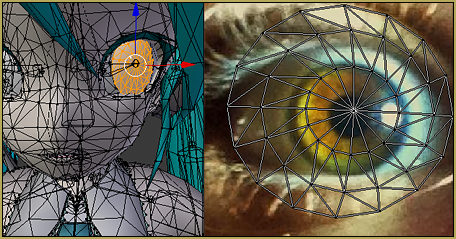
Now that I have my texture saved, I need to start the unwrapping process. Wanna know why starting by tracing that edge was a good idea? All we have to do to unwrap the hand properly is by pressing “Alt + Right Click” on that original line! “Ctrl + E”, then select “Mark Seams” . . . Select all, then press “U” and select unwrap.

Well . . . That’s the unwrapped hand, and it’s a little rough. Let’s open up our texture so we can move around the islands to try and make it look okay. In 3D view, there is a button where you can choose what view you want to see. If you choose texture, you can see your changes in real time!
Now, let me be really honest here.
This was way harder than I anticipated. The worst part was that as I finally got one half of the hand perfect . . . Editing the other half would bork the whole thing up! So I selected the half I got really good and pressed “P” then chose “Separate By Selection”.
Oh . . .
I feel. So. Dumb.
Select what you want to unwrap, press “U”, then “Project from View.”

It took one click of one button to do what felt like took me hours upon hours.
Anyway, here is the final mapping:

And . . . Here’s the finished product!
Yeah, it’s pretty bad. But by the same token, it was actually simple enough for me to actually get a texture on the hands! Before, I just . . . couldn’t.
What have we learned?
First things first, it would have been so much easier to paint the hand inside of the UV map. It would have just been as easy as pie if I had just painted inside the lines . . . But nope. Had to use a photo because I was too lazy to grab my Wacom. Because it was such a struggle to get things lined up, there are parts of the texture where they don’t belong. That really dings the realism factor!
Next? It’s a bad idea to use flash for some reference photos. Actually, any small variation in lighting can make your model go from FAB to drab almost instantly. The massive shadow from the flash really didn’t help.
And finally? This was way too hard and took way too much time for a “quick” and “easy” article!
If you want a detailed breakdown of what went wrong or have any questions, make sure to ask in the comments!
– SEE BELOW for MORE MMD TUTORIALS…
— — —
– _ — –
![]()

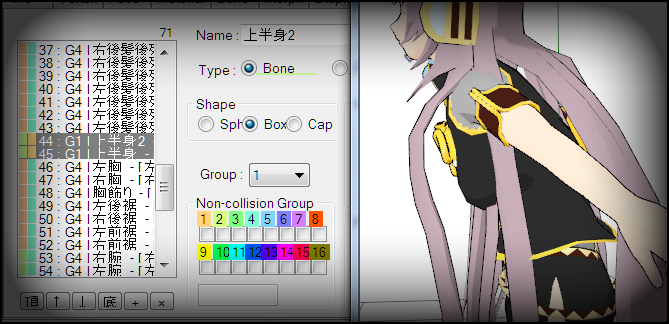
hey i have a huge problem here im rigging this number 20 model here and frankly got it finished. but the bones i put in this model allows the bones to move however i want it causing the arms to stretch and i only want them rotate.
so..do you have any ideas on how to fix this?
if you’re confused i can give you pictures of this if you want, and btw im not using pmx editor, just blender cause im using mmd tools.
if there’s no solution please let me know.
Pictures would be helpful. What is a “number 20 model”? Are you using regular bones? What does “stretching” mean in this context?
I wish i can post pictures here but i can’t unless you gave me your email address
Then i can tell what’s going on but the number 20 model you find that at models-resource.com
So ill give you a clue
A bone that show olny a circle
And a bone that shows a square on the characters arm.
I am not shy about my email address… ReggieDentmore@aol.com
… didn’t understand the rest of your statement.