

![]() How can I use Blender to make a realistic eye texture for my MMD model? Can I just paint a new texture image to be my model’s eyes? How can I use a photo to make realistic eyes for my MMD model?
How can I use Blender to make a realistic eye texture for my MMD model? Can I just paint a new texture image to be my model’s eyes? How can I use a photo to make realistic eyes for my MMD model?
Hey there! Do you like eyes?!
I do. I’ve been obsessed with drawing eyes since I learned how to draw!
But let’s be honest – eyes are hard. You can make them fun and easy, or you can cry into the eternal night when none of the tutorials make a lick of sense. For this, we want to make eyes that look as if we spent the night sobbing to the moon . . . But we don’t want to shed a single tear!
The Easiest Way to
Give Your Model Realistic Eyes
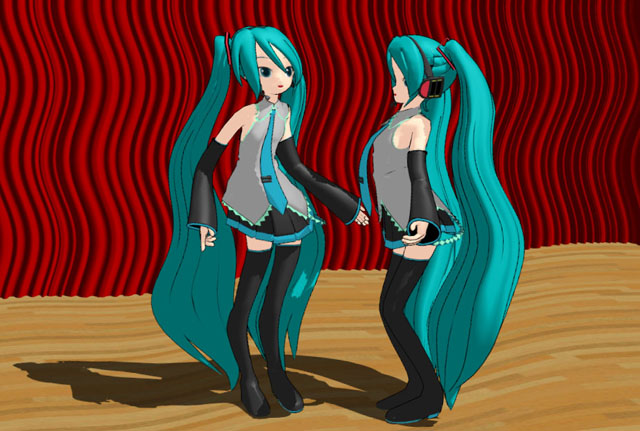
Today, I’m going to show you two different methods to use a photograph of an eye as the texture for your model’s eyes.
For this, I will be using a Miku model that comes with MMD and my Camila model. I wanted to use Miku for both parts of the tutorial . . . but the size of the eye textures that come with MMD are just too tiny to be useful.
I thought about using a TDA base for the demonstration, but the legality of that situation just confused me too much to push forward on that idea.
Getting your Texture
So, let me start by saying that your product will likely come out much nicer if you use Google Images to find a good shot of a model’s iris. However, that’s not as much fun!
To get my reference, I used my iPhone 5, a mirror, a flashlight, and the app Snapseed. I wandered around my house to find the best lighting. When I found it, I realized that the reflection of the window made the texture less than ideal. So I turned my back to the light and just shone a flashlight into my eye. Is that safe? I’m not sure. I’m not really the smartest when I launch into an artistic endeavor. The mirror was there so that I could try and use the higher quality back camera . . . It was very difficult to line up the shot and I mostly relied on the fact that you can take a nearly unlimited number of photos with a digital camera!
Once I got a decent enough photo, I opened up Snapseed and edited a bit to make it pop.

As you can see, the flashlight wasn’t the best idea for lighting up the eye. A good dose of sunlight would have been better! However, that would have required going outside! With all of the ragweed blooming, I was more than content to stay in my house.
Due to how centered my iris is in the first picture, I will use it for the first method. I do prefer the second eye from an artistic standpoint, but it would need some re-positioning to make it work well. For that reason, I’ll use it for method two.
Method One: UV Mapping in Blender
For this method, you simply need your texture, Blender, and MMD_Tools.
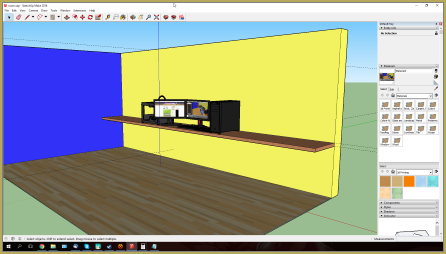
Let’s open up Blender and import Miku!
Now, before we get started, let’s point out something that will make life a lot easier. In Blender, you can do split screen! You can have the UV map in one half of the screen and the 3D view in the other. This will be pretty darn helpful for us!
To split the view, simply track down the little triangles in the upper corner of the screen and pull them out.

Once you split the screen, you should switch one of the screens over to UV Editor. To do that, click on the icon next to the drop down menu named “View”. There will be two views we will use in this tutorial – 3D view and UV/Image Editor.

Select Miku in the 3D View window and go into Edit Mode. Select her eye by clicking on part of it and pressing “L”. This will select everything that is linked to the part you selected. Hopefully, the geometry of the eye showed up in the UV editor!
To open the image you want to use, jump over to the UV Editor and press the “Open” button.
![]()
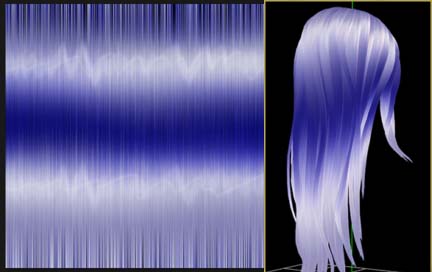
Once you do that, you should be greeted by something like this!

You can probably tell what the problem is – the geometry of the eye doesn’t even kind of line up with the image! This is an easy fix, however. All we need to do is select the geometry in the UV editor and size it so that it fits.
To size it, just select everything and press “S”. To scale it in only one direction, press the key for that direction. If you want to scale it on the Y axis, press Y. If you want to scale it on the X axis, press the X key. If you want to scale it on the Z axis . . . This is a 2D image! There is no Z axis.
Once you size it properly, use the “G” key to grab it and move it to the proper place.
As a note, the mapping on this model’s eyes seem kind of weird. There’s something off about them – so I’m not expecting a perfect fit!
When you’re happy with one eye, switch to the other eye and repeat the process. If you want the highlight to be on the opposite side for that eye, you can simply rotate the UV map around until it looks right. This model’s eyes just feel off . . . So I’m still not expecting a perfect result!
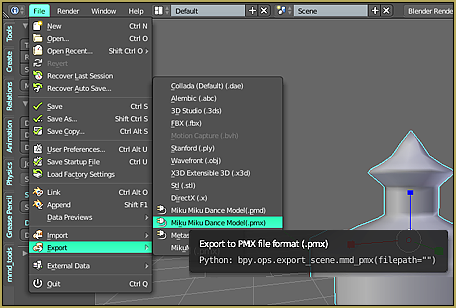
Once you’re happy, export the model using MMD_Tools and pop it into PMX Editor to assign the correct texture to the eyes. (Note, there is most definitely a way to do this step in Blender. It just isn’t coming to me right now!)
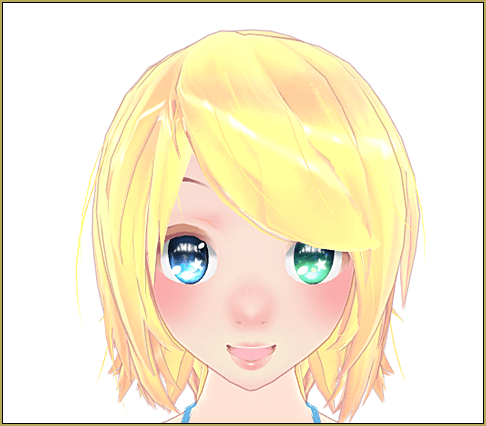
Save the model with the correct eye texture, and pop her over into MMD!

Eeeee! I know that it’s silly, but seeing my eyes on Miku just made me feel so happy and accomplished!
Method Two: Editing in an Image Editor
If you’re good with image editing software, then you’ll love this part! It’s a lot easier and doesn’t even require you to open PMX Editor! If you’re not a fan of image editing software, the above method is a lot easier.
For this version, we’re going to give Camila my eyes. As I said earlier, I wanted to do both parts with Miku . . . But the existing textures were just unusable.
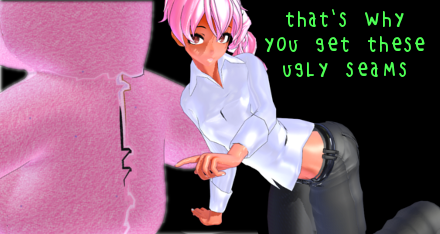
So, the first thing you need to do is track down the model’s eye texture. Sometimes, the eye texture is on the same image as other textures. If that is the case, then you need to be careful. If you bork the area around the eye in that case, then the entire face is borked.
However, with Camila, her eye has its own texture. No matter what I do, the eye texture will not affect any other area.
If you don’t want to open PMX Editor, then you simply need to save over the current texture. If you want to preserve the original texture, you will need to save the new texture with a different name and then open PMX Editor to assign the new texture.
Both Camila and Miku’s eyes used a mirror modifier so that they only needed one texture for the eyes. However, because I needed to adjust the UV maps, I had to edit both of Miku’s eyes. Because I am editing the texture and not the UV Maps, I am able to only concern myself with one of Camila’s eyes.
I don’t want to open PMX Editor, so I’m going to save over the original. First things first, open the eye texture in any image editing software. I do not suggest using MS Paint, but it’s up to you what you do!
For this, I will be using Photoshop just because it’s easier.
Note, I didn’t line up Camila’s eyes as well as I should have when I made the texture for her eyes. For that reason, I’m using the UV Map to line up my eye. Hopefully, if you use a base, the eye texture will be properly lined up to begin with.
First, I’ll line up the eye with the original texture.
Once it is lined up, let’s think about how eyes should look on a model. If we want to add a highlight with a sphere, it would be silly to have a giant highlight already on the model. For that reason, I’m going to try and get rid of it.
Now, there would be two main ways to do that. The first would be a Photoshop Only option . . . Spot heal. However, I’m not the biggest fan of that idea. The other option could be carried out in almost any image editing software . . . Just copy half of the eye and paste it over the other half. That’s what I’ll do.
Doing that leaves me with this:

Now, to save it and open up Camila . . .

If you zoom in closely, you can see some slight issues with alignment. However, I’m still super happy with them!
What else can I do?
Once you get the textures lined up the way you like, there are almost endless possibilities! If you’re used to editing the colors of eyes on base models, then it’s the same thing. You can paint over them with a color layer, you can use the hue and contrast sliders . . . If you want to really go crazy, you can just throw filters at them to see what looks cool! Maybe you want them to look painterly? Maybe you want them to have more contrast? In the end, it’s up to you what you do.
Have fun creating your own eye textures!
– SEE BELOW for MORE MMD TUTORIALS…
— — —
– _ — –
![]()

Um… there is a plugin for PMX editor called UV editor that can be used to map the texture to fit the eye……
There’s a fraction of users who believe that Blender is so superior that it knows how to do MMD business better than MMD’s own tools. :D
CooooOOool! I’ve been trying to figure out how to make eyes realistic and this helped me! Thanks!
Your eyes are really pretty… /creepy
When using Blender, can’t you just drag up the window with the timeline and switch that to UV? I often find that easier than making a whole new window.
This tutorial is definitely useful. Changing eye textures is a cool, (relatively) easy way to customize models. It even gives me an idea of what I want to do if I ever want to make a more realistic self-model.
Awh :D ! Thank you so much!!
I like to work with the 3D view and UV editor selection synced so that I can select something on the UV map and see it also selected on the model. . . For that reason, it’s a lot easier for me to have two windows (panels sounds more accurate, maybe) open at the same time :D