


Ray-MMD Advanced Lighting:
A Night on the Town
![]() You sometimes see urban scenes of Tokyo at night in Japanese anime with a plethora of lights from different sources, office building, street signage and the like as in the image shown below.
You sometimes see urban scenes of Tokyo at night in Japanese anime with a plethora of lights from different sources, office building, street signage and the like as in the image shown below.

Tokyo street at night. Image source: www.japan-guide.com. Image re-used here for non-commercial, illustrative purposes only as permitted under Fair Use guide-lines.A scene like this can be quite a challenge to replicate, not just in MMD, but in any computer rendered scene, simply because of the multiple  light sources that needs to be accounted for.
But it can be effectively faked and it is worth doing, especially if you want to create a “wow” factor in your MMD project. This article will show you some Ray-MMD advanced lighting techniques you can use to “simulate” a multi-source lighting environment using Ray-MMD/Raycast. The techniques discussed here will explain how to create a street scene, but the same method can be effectively used for a concert performance project.
INITIAL SET UP – PART 1
The model components required are actually quite simple, at least for our demo project. These are as follows:
- A night time sky box; we will be using the SKY NIGHT sky box that comes with Ray-MMD.
- A night version of an urban stage. We will be using the night version of BTA’s Gull Town because it has night texture as well as Auto-Luminous support. The stage is supplied in .x format; this was upgraded to PMX format for use in this project.
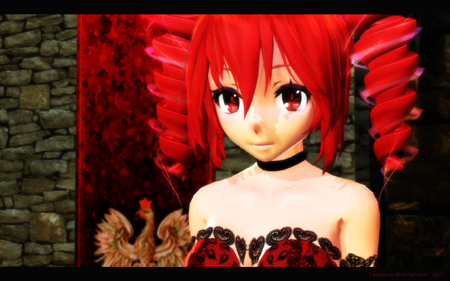
- A MMD model; use one of your own choosing if you are following along with this discussion, but we will be using Mamama’s model of Yukari.
LIGHTING ASSESSMENT
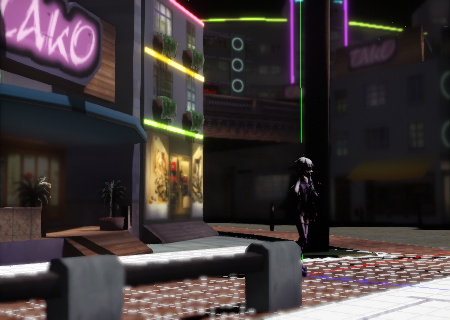
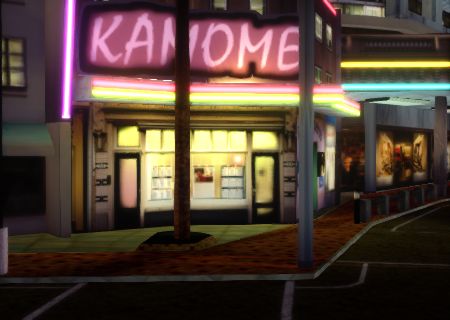
Our initial set up is shown below:

A cursory examination of the set up indicates that the lighting that we want to consider the most important to factor in are as follows:
- The primary lighting coming from the global light source.
- The pink neon “Tako” sign.
- Street lighting.
- Lighting from the shops and surrounding buildings.
There are a lot of colored lights to factored in, but we can rationalize the colors needed just by examining the scene above and these would be:
- neutral to dark gray global lighting since it is night time.
- bright pink, red, yellow, green from the neon lights.
- warm yellow lighting from the incandescent lamps in the stores.
- cold green lighting from the fluorescent lamps from some of the offices.
Honestly, we do not have to account for all of these different light sources for our purposes; it will make our project much easier to just aggregate the different light sources and using this type of strategy we can reasonably shorten the list to include only the following:
- neutral to dark gray global lighting
- bright pink and warm yellow
- optionally mix in a little red and green lighting
Also, we will want the global lights coming from the front of the model and the pink and yellow light coming from behind the model.
So what about the blues? Simple: blue will be factored in when we set up the overall ambient lighting conditions.
The main lesson to be learned here is that whenever you attempt to replicate a real world lighting environment using Ray-MMD, it pays to make at the start, at least a cursory examination of what would be the logical light sources.
INITIAL SET UP – PART 2
At this point we need to load the rest of the primary components and these are:
- Yukari; we applied a pose to her as well as main.fx
- ray_controller.pmx and ray.x
- sky with lighting.fx to the sky box under the EnvLightMap tab.
To the town model itself we applied the following:
- main.fx under the main tab
- materials/Editor/Standard/material_editor_1.fx to it under the materials tab
- Auto Luminous
We could also use the Ray-MMD emissive materials to turn on the lights on this model but Auto Luminous is a lot simpler. Also we used the editor material as this comes with a controller and gives us fine controls over the material’s behavior. Honestly, even here I am using a brute force approach to the town’s materials but this was done for the sake of simplicity.
The controller for the material is called: Editor_1.pmx and is found in the same folder as the material’s .fx file. Each of the Editor materials have their own controller. I chose to use this material on the town model as I needed better control over the way the building walls absorb and reflect light Essentially, I applied a dampening effect on the material to stop the planar surfaces from reflecting light like a mirror.
Next we sorted out the Draw Order which should read as follows:
- Sky box (Night Sky)
- The stage model (Gull Town Night)
- The MMD model (Yukari)
- The Ray-MMD controllers (Editor_1.pmx and ray_controller.pmx)
SETTING UP THE GLOBAL LIGHT
Because there will be a lot of settings, in this article, it would be somewhat pointless and extremely tedious to note all the settings used. Instead, we will just focus on the lighting strategy and its implementation in the text of this article.
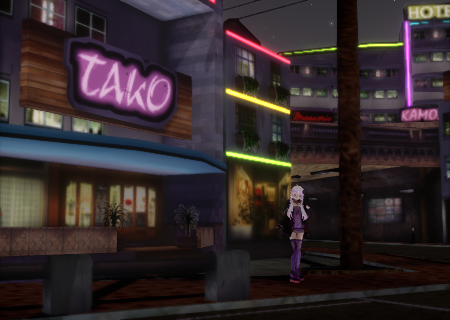
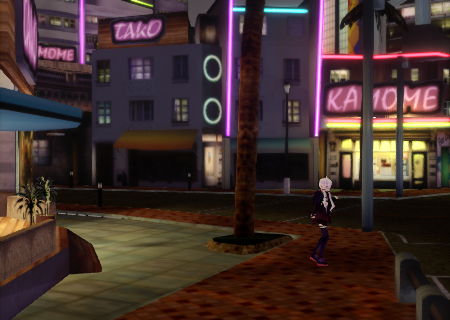
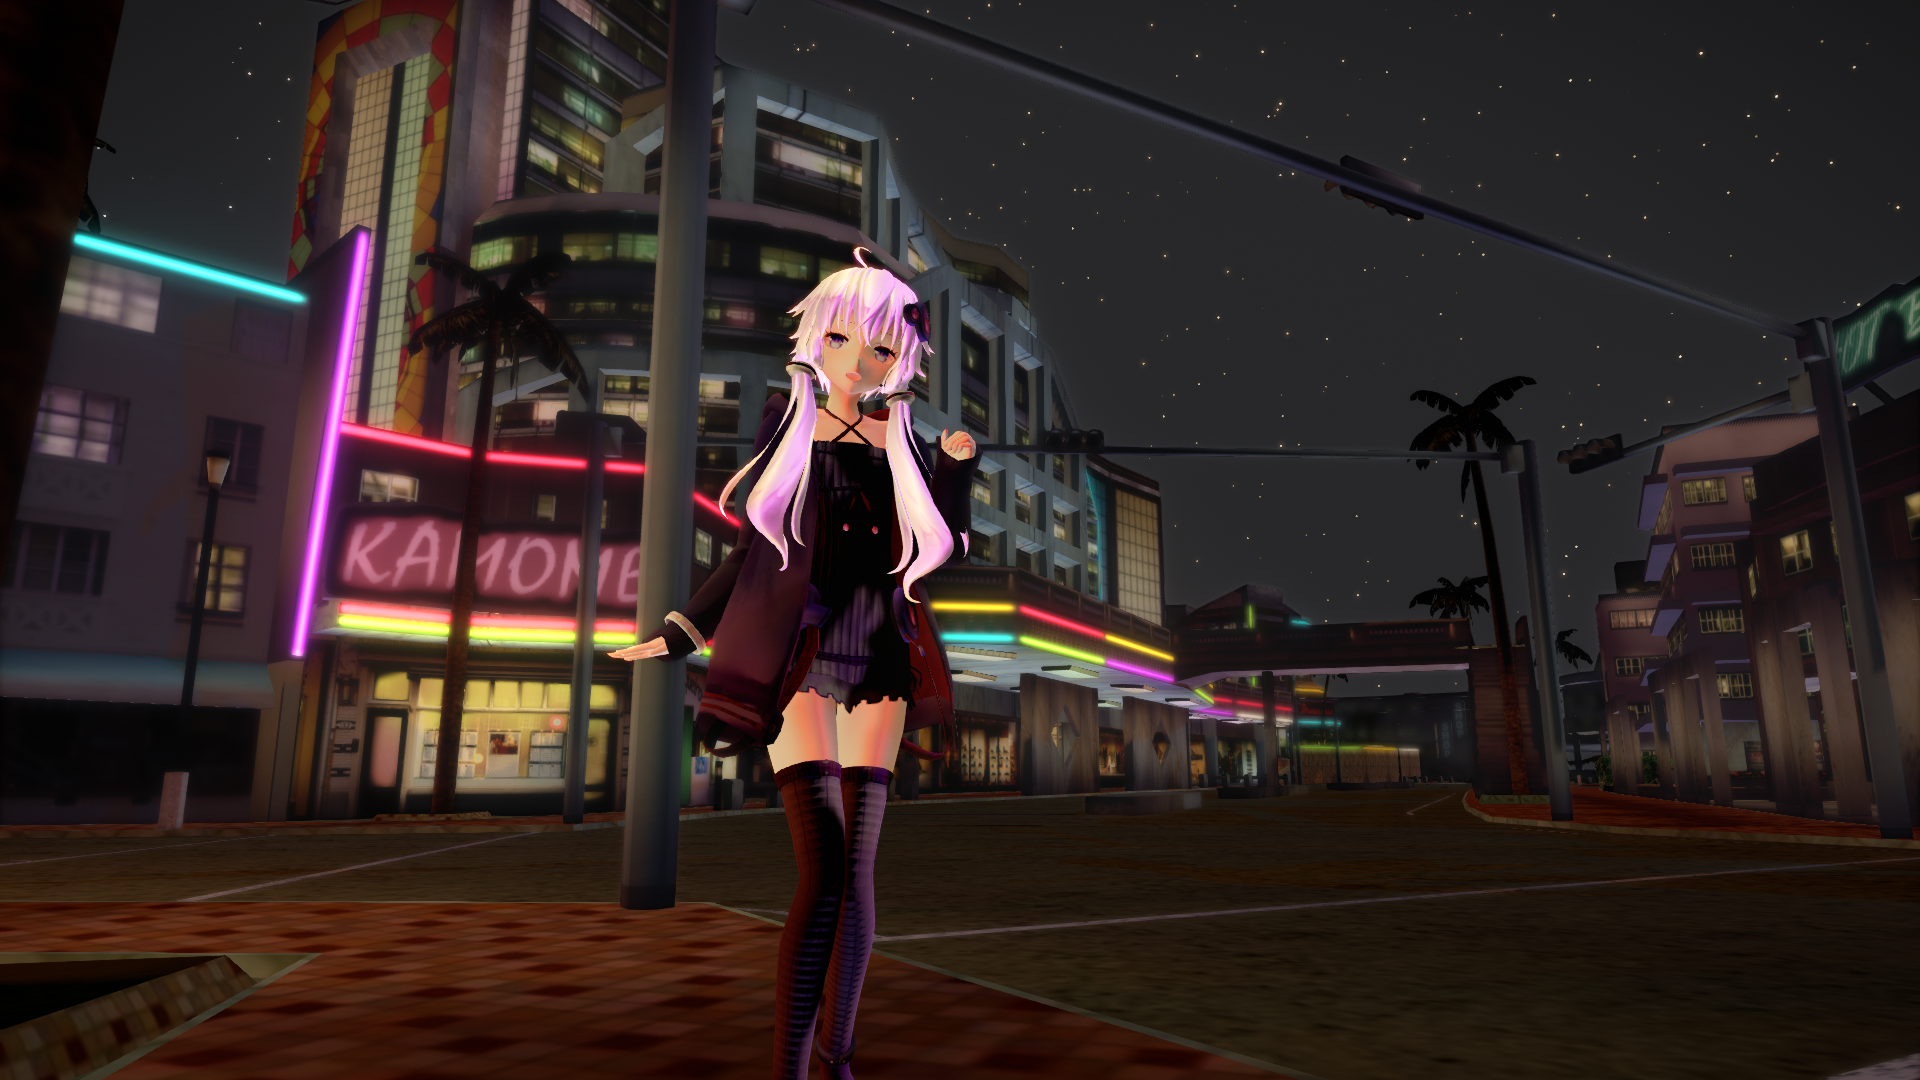
With the global light set up, what I wanted to do first was set up the scene’s lighting assuming only that it is lit by the moon and the resultant ambient lighting (light reflected off the surfaces in the environment). The images below shows the results of my initial settings. Please note that the scene is being designed to be view-able from almost any angle; an important consideration if you’re planning to use this type of set up to create a video that features multiple camera angles. Also, my Ray-MMD configuration has the DOF functionality enabled and at this point, this has not been adjusted. One of the considerations is that even at this stage, the lighting set up needs to be “usable without additional enhancements”; the other important consideration is that I can tweak it further as needed.
If you scroll up to see the photo of the Tokyo street by night and compare that with the images below, the renderings below should already be very similar in terms of “look and feel“.
ADDING THE ACCENT LIGHTING
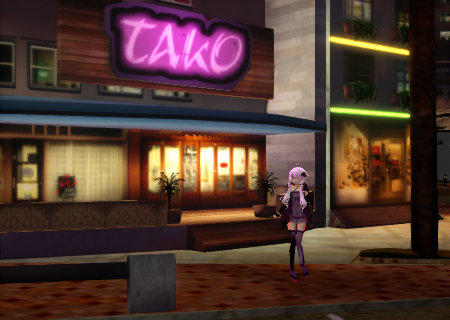
If you look at the door way behind Yukari in the middle image above, it looks rather dim. What we want to do next is to brighten up that area and bring out some of that light, far enough to illuminate the back side of Yukari. To do this we use a sphere light which has been positioned inside the canopy above the doorway. The default sphere light throws out very harsh shadows and that will be a dead giveaway that we are “faking it”. To resolve this issue we use another lighting solution: sphere_light_with_shadow_low.fx which is found in the ambient options folder for the sphere light model.
Shown below is the scene before the sphere light is added and after it is added. It is actually very subtle but it makes a big difference, which is exactly what we want. Those textured window lights now look like they are really throwing out light. Note also that the sphere light has been configured to throw out the same color light as the window lights: a yellow tungsten hue.


Likewise across the street, we used a tube light with a yellow light to accent the shop as well as the area around it. You do not have to do this for all the shops; just the ones closest to the main performance area. These little touches helps to bring “life” to the scene.
There is a lot to look at in scenes like these; too much for the mind to take then all in, so the strategy isn’t to replicate every detail, rather, it makes more sense just to highlight the more obvious details. The thinking is very like what magicians do; make people see what you want and not see what you don’t want them to see. Things can be hidden even when they are in plain sight simply by using distraction techniques. Plus, with urban night scenes, you really want some sharp contrasts between areas of bright and dark; it adds visual richness to the overall imagery.
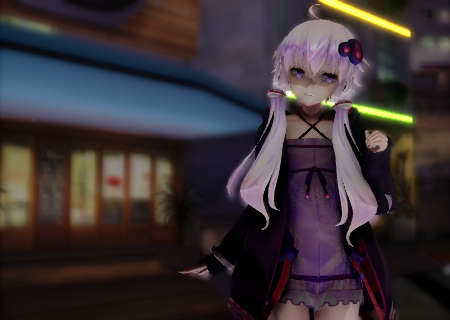
I continued to add more accent lights to accentuate key areas in the scene and the following images below shows the results of my efforts. I could have used much more but for the purposes of this article, the ones I used more than sufficed.
The 4 accent lights that were used are:
- 1x sphere light
- 1x tube light
- 2x rectangular lights
Ray-MMD does come with a good assortment of add-on supplementary lights; more than sufficient to meet most fill-light and special lighting scenarios. Just develop the knack for choosing the right one for the purpose that you want to achieve.
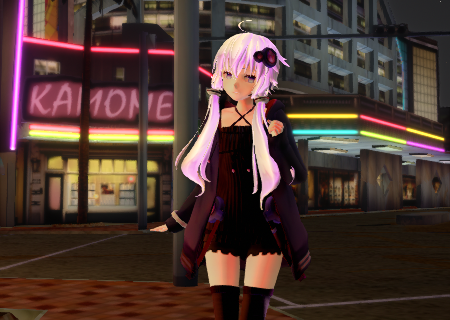

To achieve the levels of illumination in the 3 images above, further tweaks were needed to the global settings and as you can see, the light now falling on Yukari has been evened out, eliminating much of the harsh and unflattering shadows that were evident in the earlier images.
Further, the city-scape has “livened” up and there is a decent mixture of well illuminated spaces as well as darkened areas; this helps reinforce an impression of volume and depth in addition to making the background scenery much more interesting and vibrant . Plus there is also a good mixture of warm and cold light sources evident.
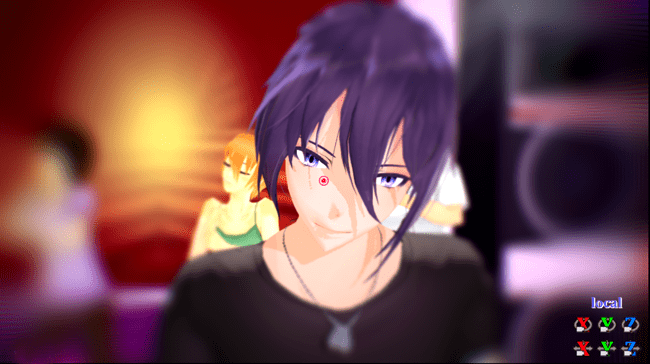
The “Tako” signage behind Yukari is now a lot brighter and some of it’s light together with the lights from the windows behind her are visually having an effect on her person. This is exactly the way you would expect things to look if this were in a real world situation.
A NIGHT ON THE TOWN
I hope that this article and its presentation has served to highlight some of the tools and techniques required to carry out a project like this. Honestly, it does require a lot of planning and patience to successfully pull off something like this. Even here, with this presentation, I took a lot of short cuts and fudging just to keep things manageable; but the real purpose of this exercise is to demonstrate that something as complex as this type of night scene can be done using MMD.
Also, I really hope that by reading this, you will try out the strategies and tools outlined here and have a go at making videos or pictures with them. The end results are well worth the investment in time, if not just for others to enjoy but for your own self-satisfaction.
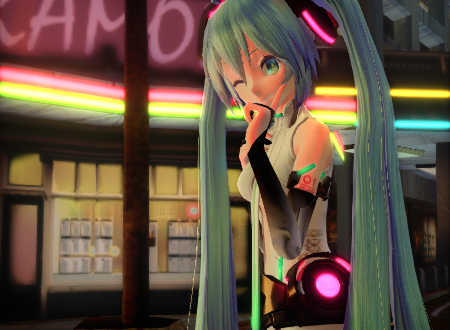
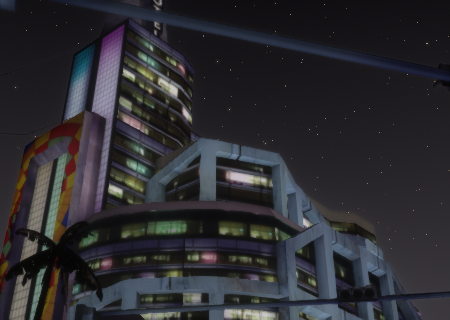
In closing, I will leave you with one last image; this time rendered for full screen viewing, just so to show the actual quality of the imagery in better detail than can be seen in the small 450 pixel wide images above.
Thanks for reading; if you have any questions, please feel free to leave a comment below.
CREDITS
- Yukari model by Mamama
- Miku Append by TDA
- Gull Town stage by BTA Kerorin Jo
- MMD 9.31
- Auto Luminous 4
- Ray-MMD 1.5.0
- Irfanview
- Yukari © 2016 VOCALOMAKETS powered by Bumpy Factory Corp.
If you want the pose I used on Yukari, it can be downloaded here from my GOOGLE DRIVE.
– SEE BELOW for MORE MMD TUTORIALS…
— — —
– _ — –
![]()

Ray-MMD 1.5.0 – 11.1.2018.
Ray-MMD 1.5.2 – 13.3.2018.
Editor_1.pmx from folder “Standard” or “Standard without map” ?
Where can I download this stage?? Please! I can’t find it anywhere
The author of that tutorial lists the stage name in the credits…
Gull Town stage by BTA Kerorin Jo
… and that is the hint we have. Part of the “fun” of MMD is tracking these things down.
Go for it… Best of luck!
–
(I just spent about twenty-five minutes searching, myself… I did find a distribution page by that artist with several other stages to download… but not that particular stage,… not yet! … you gotta be ready to dig into Japanese pages and, especially, NicoNico!)
Oh, i wanted to ask one more thing, if not too much trouble would you be willing to make a small youtube video of the end result with Yukari walking through or dancing in the city perhaps so we can see the full glory of the work that you made?
Thanks! … I don’t think Trackdancer has made a video of that scene… at least, not yet.
Dear Trackdancer,
Thank you so much for taking the time and doing the effort in making such a wonderful article. Although I haven’t tried making a scenery like this yet, when you look at the Tokyo picture in the beginning, what is noticeable are the extreme contrasts between extremely bright and pitch dark. If you look at the square building in the left , it has like 6 extremely bright billboards, and right underneath it the windows are almost pitch dark black. This happens throughout the first picture, and the sky is also a pitch dark contrast. I imagine that this must be hard to simulate as the light effects in a computer simulation might have a tendency to overflow on objects right next to them.
All in all i think it’s a great article for the more advanced MMD-er who wants to expand on their light technique skills, well done!