


A couple of days ago, a fan of the Prinz Eugen character from the Azur Lane franchise wrote and asked a few interesting questions about how to set up nautical scenes in MMD which, after some thoughts, I felt were well worth answering. Specifically, they wanted to know how to set up battleship models in an ocean and have the Prinz Engen character model dance on it and looking drop dead gorgeous. It isn’t actually that hard to do something like this but there are a few tricks. So in this article, we will show you how it can be done.
RAY-MMD Technique…
…of Battleships and Fleet Girls
Resources needed
If you want to follow along and try out the steps as discussed below, which we strongly recommend, you will need the following models:
- Prinz Eugen 3d.nicovideo.jp/works/td43641.
- If you prefer, feel free to use another character model from either the KanColle or Azur Lane franchises.
- MMD Ocean Stage https://www.deviantart.com/trackdancer/art/MMD-Ocean-Stage-501407341
- The MMD Ocean Stage can be substituted by using a custom made flat plane model made using the PMXe if you prefer. All we need is just a flat surface to hold the water effect material. Just make sure that the plane model is larger than the sky box.
- A WW2 era battleship or heavy cruiser model. Choose any you like from those made by Tansoku102cm https://bowlroll.net/user/1458
- We will be using a 1940s Heavy Cruiser model since the real Prinz Eugen was that class of warship.
- RayMMD 1.5.0
Initial set up
Important (but optional): This article uses RayMMD with the Bokeh Depth Of Field option enabled. To enable this functionality, before starting MMD, go to the RayMMD folder and find a file named ray.conf. Using either notepad or another text editor, edit the last line by changing the value “0” to “1”. Save the file and exit.
// Bokeh Depth Of Field
// MeasureMode can supports the following options:
// When MeasureMode at (0.00 ~ 0.24) : Test circle
// When MeasureMode at (0.25 ~ 0.49) : Test circle + Bone from ray.x
// When MeasureMode at (0.50 ~ 0.98) : FocalDistance Only
// When MeasureMode at (0.99 ~ 1.00) : FocalDistance + Bone from ray.x
// 0 : None
// 1 : Enable
#define BOKEH_QUALITY 1
After starting MMD, turn off MMD’s default ground shadow display. Then load the following models and preferably in the order noted below:
- The Time of Day sky box from the RayMMD suite.
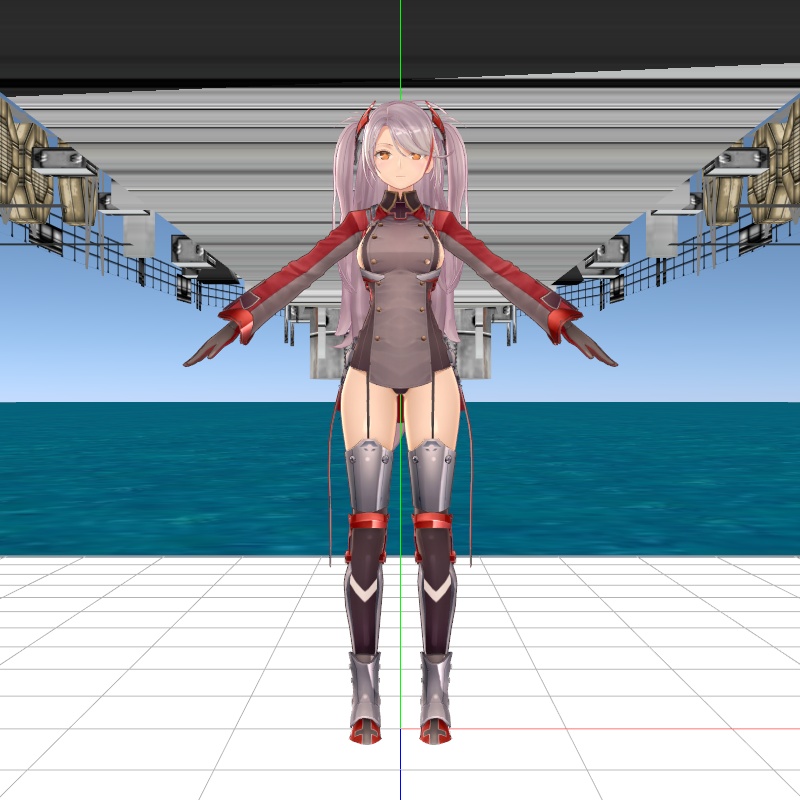
- The Prinz Eugen character model. Add her mech gear if you want; but this article will not feature this item.
- The MMD Ocean Stage.
- And finally your battleship or battle cruiser model.
Of note are the following considerations:
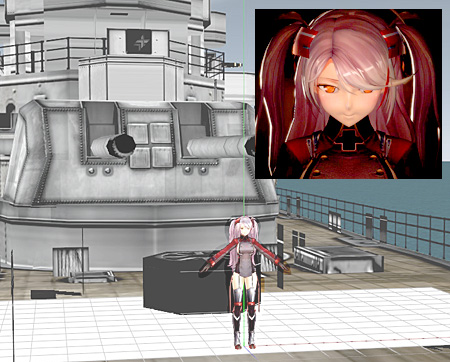
- Battleship models are HUGE. They are actually the full sized thing relative to the character model. This means that when first loaded, your character model will be inside the hull of the vessel. We will address this issue in the next steps.
- The ship models made by Tansoku102cm uses transparent textures for some of the ship models’ fittings. For example, the safety railings that run along the side of the upper hull. This mandates that these types of ship models should be at the bottom of the model draw order stack.
Moving the ship and the sea
We want to easily move the main stage components around; specifically the ship and the ocean. To do this, use the OP function to attach the ocean stage to the ship model. Once this link is established, all you need to do is move the ship and it will always be correctly placed relative to the ocean.

Next, move the ship model to the area where you want your character model to be; and not the other way around. i.e. move the ship not the character model.
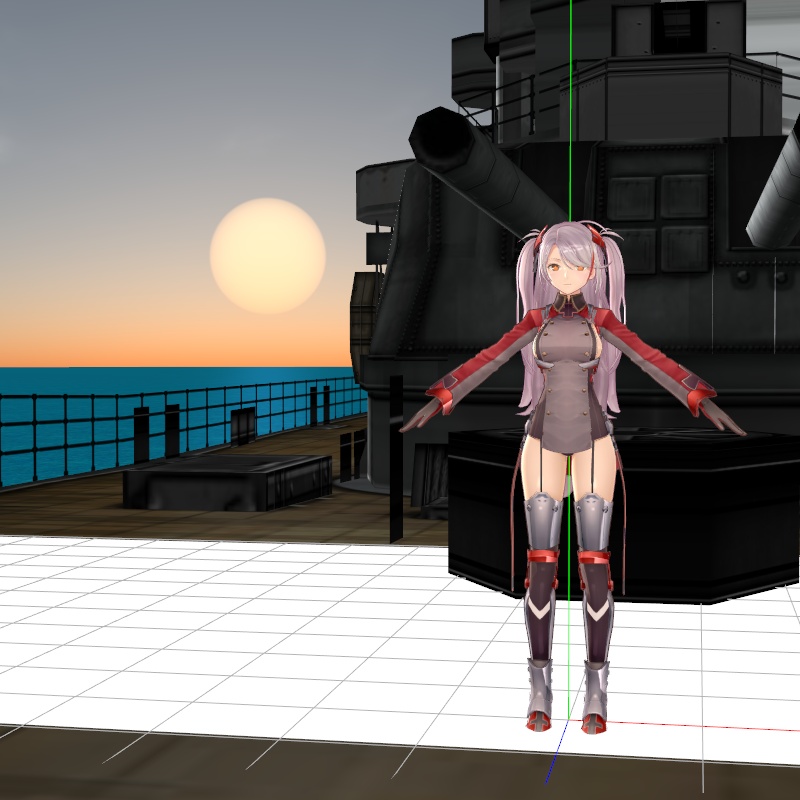
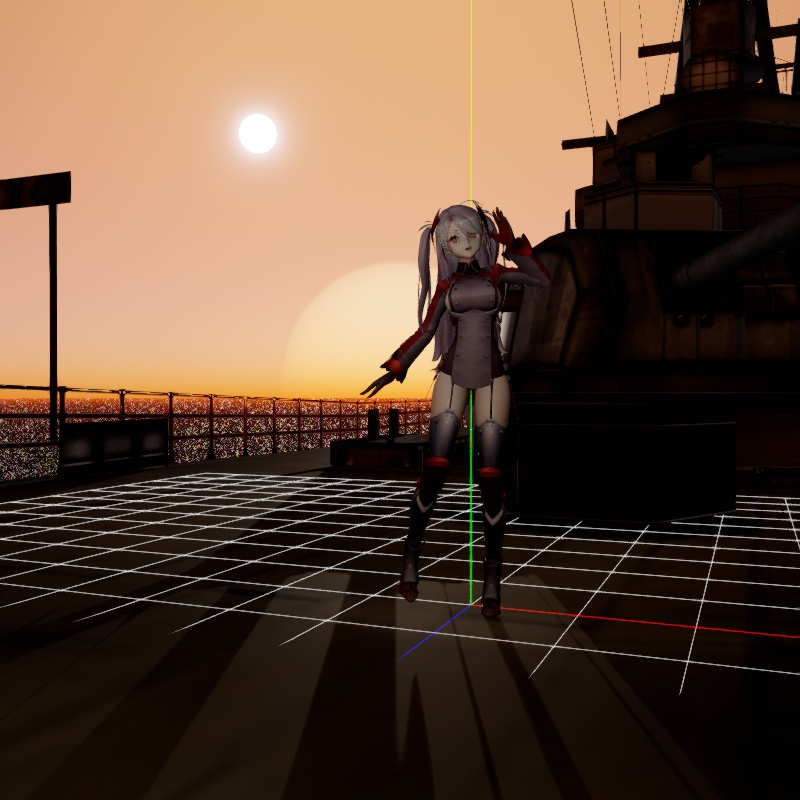
This keeps the “action” in the central area of the MMD display and makes working with this type of scene much easier. Note also, that the character model relative to the ship model is tiny. So pay attention to where she is relative to the ship as by default she is hidden from view inside the hull of the ship. The easiest solution is to first move the ship model straight down so that you can see where she is, and then move the stage area to its final desired location.
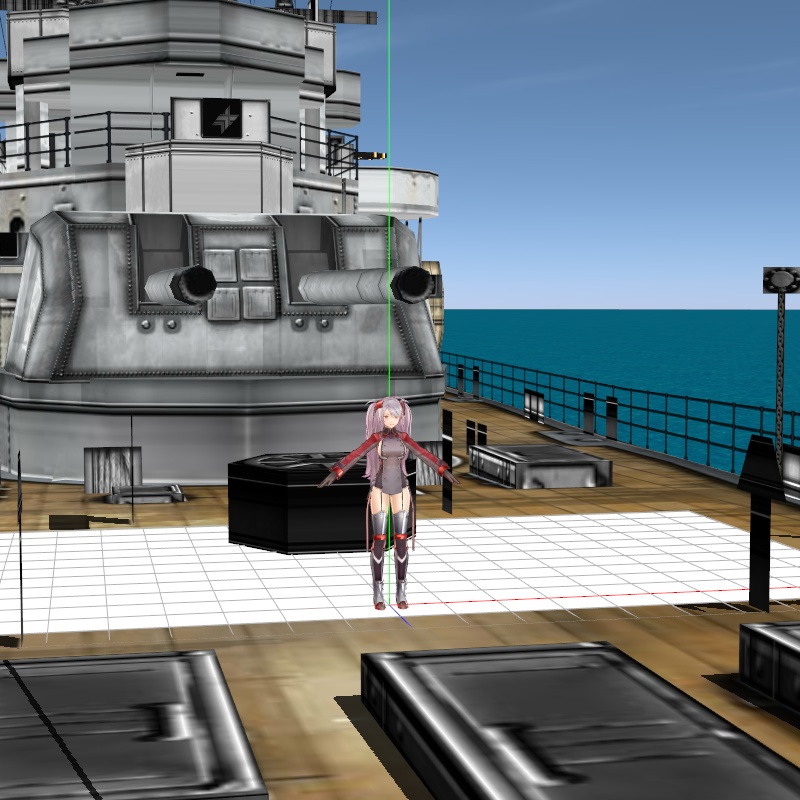
Our set up is shown in the image immediately above. The stern of the ship model is used as it has the most usable performance area. Note that the deck is slightly sloped but gentle enough not to be an issue in most applications. Many MMD video makers using this type of set up, places the performer on top of the gun turrets. This is also a good approach as the turret tops offer a decent size flat performing area.
Setting up the lighting position
Since we want dramatic lighting in our final production render, we need to properly set up the position of the sun. Straight up, the next steps are optional as you may want a different type of set up for your production, but the rest of this article will be based on the set up described here.
Our schema will use back-lighting as this accentuates the mood of the scene. There will be strong light and shadow play and be slightly reminiscent of the old 1940s naval ship battles movies. This approach also allows us to make the most out of the primary hues and tones of the Prinz Eugen and battle cruiser models which both features deep grey tones. With this approach, the primary hues will really accentuate the Prinz Eugen model since she has a lot of flesh and red tones; not to forget a rich stock of light colored hair.
Adjusting the sun’s position
One of the features of the RayMMD sky boxes is that they are dynamic in nature but for the purposes of the initial set up, it is easiest to set up the light direction before the main RayMMD components are added. Use the lighting controls in the main MMD panel to set up the light direction. The Time of Day sky box has a sun model which can be located by using these controls. The steps described below is probably the easiest way to achieve the desired results.
- Use the “Y” axis control to lower the sun into a position where it will most easy to see; mid screen, just above the horizon. When you first do this you won’t be able to see the sun as it will be behind the camera but since the sky at the horizon turns orange towards “sunset”, this will be your clue as to when the sun will be at the correct height.
- Use the “X” and “Z” controllers to rotate the sun so that it is behind and to one side of the ship as can be seen in the image shown immediately above.
Use these controllers to adjust the sun’s position to your satisfaction and then resister the sun’s final position. You can tweak it again later as needed, but for now get the sun and lighting direction more or less into the position where you want it to be for your scene; at least as viewed from the front of the character model.
Adjusting the primary light hues
The color of sunlight during sunrise and sunset differs. With orange hue in the sky on the horizon this is suggestive that the scene occurs during sunset. As such, there should be a red hue in the primary lighting conditions. It is best to set this up also before loading the main RayMMD components. Also, you should set the size of the sun at this time. This done using the SunRadius+ variable found under the facial controls of the Time of Day sky box model. In our set up, we used a value of 0.85 and do note that we further lowered the position of the sun in the sky.
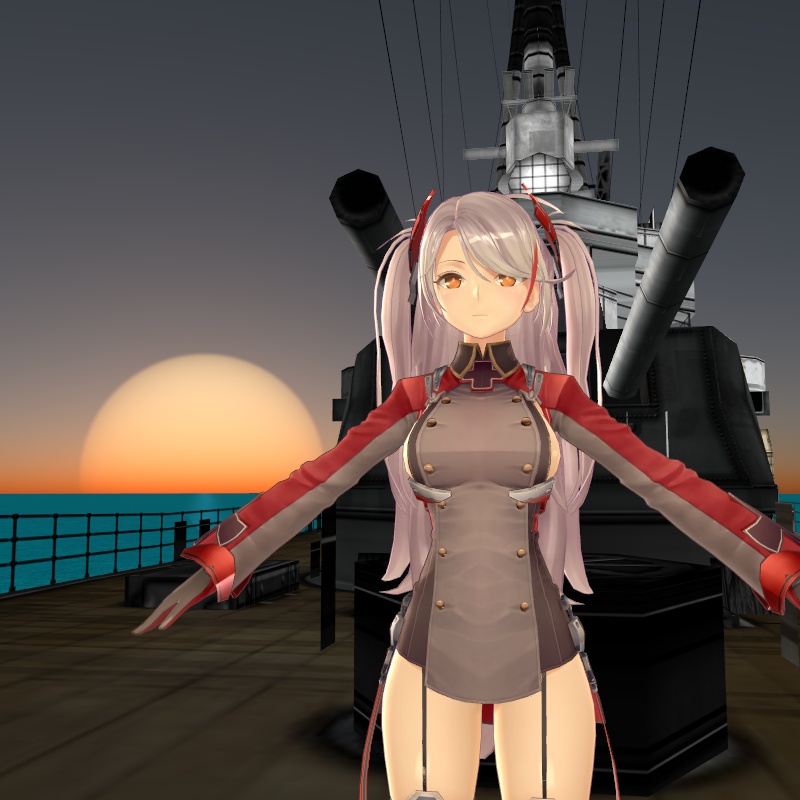
Our final global lighting set up using the default light setting tools are shown below. As can be seen in the image above, the primary light direction comes from the rear and there is a reddish hue to the light color. All very subtle but it will look awesome once we add the RayMMD components and the final tweaks.


The journey so far…
With everything done thus far, your scene should now look similar to the image below. This is also a good point to add either a pose or a motion to the character model as well as to experiment with different viewpoints to make an assessment of the visual possibilities offered by your set up. These final steps really can help for formulating the final shading set up.
Adding RayMMD
Load ray.x and ray_controller.pmx to MMD. Then do the following initial specifications:
- Add main.fx to the character, ship and ocean stage models.
- Under the FogMap tab of the MME panel, add Time of fog with godray.fx to the Time of day sky box.
- Under the EnvLightMap tab, add Time of lighting.fx to the sky box.
- Go over to the Materials tab and expand the material subset for the ocean stage. Apply the material_water.fx to the surface_water material. You will find this material in the Water subfolder inside the Programmable materials folder.

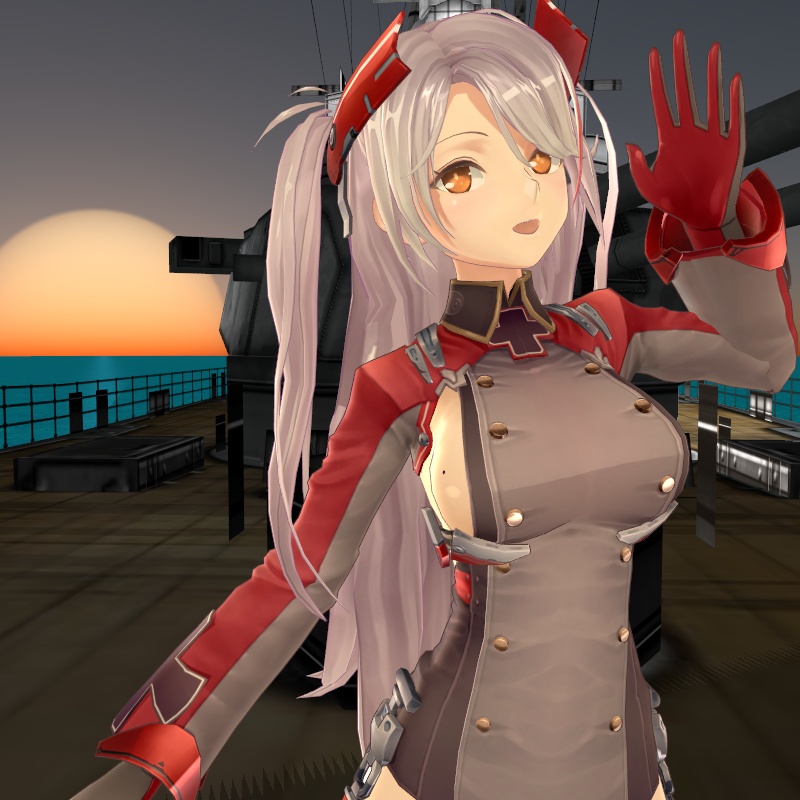
Since the scene is back lit and the primary light source is the sun your scene will look similar to the image shown below. This is fine, we will add illumination coming from a frontal light source and the scene will look awesome.
Adding a frontal light source
Inside the RayMMD Lighting folder, find PointLightIES.pmx and load it into MMD. Then move it to the front of the model and raise it to slightly above the head.
Use the settings below and your character model will become much better lit. Note that the last value is Attenuation Bulb- = 0.25. Optionally, for the R,G,B values, you can use R=0.60, G=0.50 and B=0.40; this will give a slightly warmer color to the light.
IMPORTANT: Although this is a “point” light, the lighting is actually directional. To control the direction of the light, just rotate the sphere. What you want to do is to make sure that there is even lighting falling on the front side of the model. The AttenuationBulb settings I gave above is dependent on how far the light is away from the model so adjust accordingly. You can also increase or decrease the illumination level with the intensity settings.
You can hide the PointLight model by unchecking its display properties under both the Main and Materials tab of the MME panel. Not displaying it using the MMD controls will turn off the lighting it gives out also, so that is why you need to hide it using the MME panel controls.

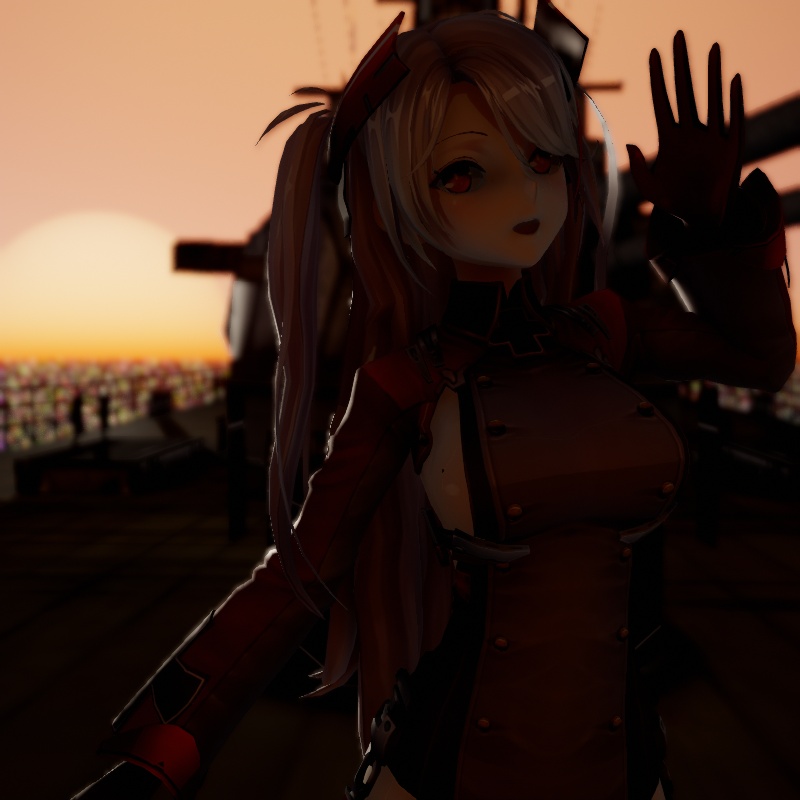
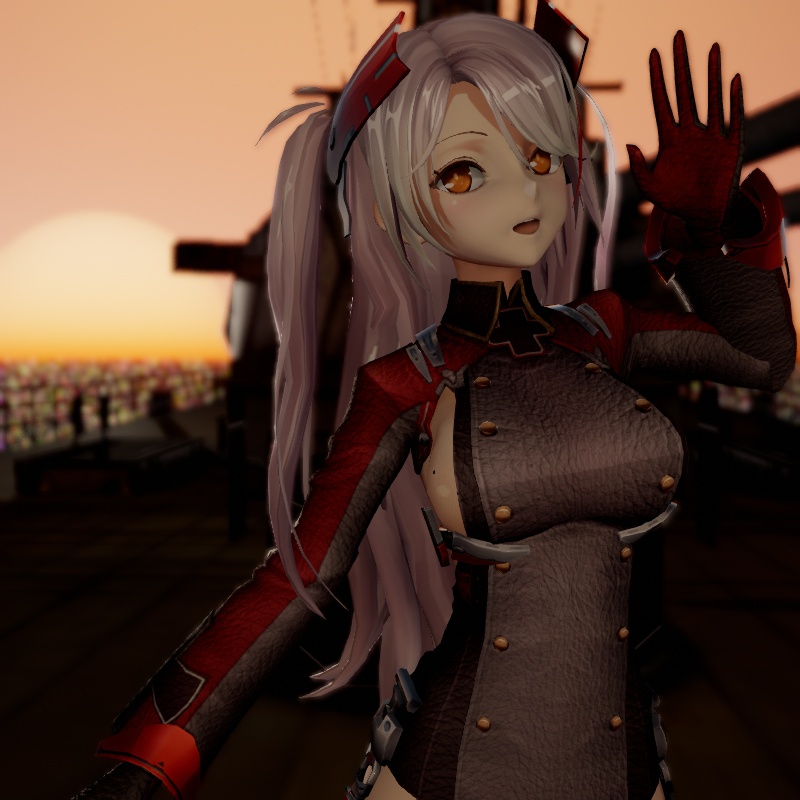
This is a good point in the work sequence to add material specifications to the character model. Since this is a straight forward process, we won’t discuss how to do this in this article. If you need more information, please refer to some of the other RayMMD tutorials on this site which covers this area in more depth. Our model with the added light and material spec looks as shown below.
RayMMD value settings
With our foundation settings created, it becomes a really simple task to tweak the RayMMD settings to create absolutely gorgeous scenes. Fair warning; when you first do this for yourself, it could take awhile as there is a lot of variables to set and choices to make. It may literally take hours of tweaking to get things “right“.
Since this type of lighting is “interpretive” the process is as much a creative process as it is a technical exercise. It is not so much that you are trying to simulate a real world scene but rather, with this type of approach, you are creating an idealized but credible alternate reality.

The list below were the settings we used. These settings are not set in stone so please don’t just use them verbatim, but merely as a starting point for your purposes.
Time of day
SunRadius+ 0.30
SunRadiance- 0.30
SunTurbidity+ 0.25
OzoneMass+ 0.30
RayleighColorS+ 0.05
RayleighColorV- 0.25
RayleighHeight+ 0.15EnvDiffLight+ 0.25
EnvSpecLight- 0.50Cloud+ 1.0
CloudTurbidity+ 1.0
CloudSpeed+ 0.45ray_controller
SunLight+ 0.05
BloomTheshhold 0.55
BloomRadius+ 0.50
BloomColorAllS+ 0.50
BloomColorAllV+ 0.10
Vignette 1.0Fstop+ 0.28
FocalLength- 0.35Contrast+ 0.10
Saturation+ 0.10
Gamma+ 0.05
Temperature+ 0.35PointLight
R+ 0.20
B+ 0.20
G+ 0.20
Range- 0.30
AttenuationBulb- 0.40SphereLight
R+ 0.75
G+ 0.50
B+ 0.35
Intensity+ 0.05
AttenuationBulb- 0.15
The PointLight is in front of Prinz Eugen model. Use the values given merely as guidelines as the values you use will be determined by where you place your PointLight relative to your performer.
The SphereLight is used as an accent light to brighten the area behind Prinz Eugen. Its presence is very subtle and purely optional. In the video set up it is located just above the capstan(?) in front of the turret and just under the gun barrels.
The Bokeh DOF values are only applicable if you have that option active as discussed at the top of the article. You could use PowerDOF or a similar effect to essentially do the same thing.
Afterwords
Thanks for reading. We hope you found some useful information and techniques that you can takeaway and use in your projects. Comments and questions are welcomed; please post these in the comments section below.
Credits
- Prinz Eugen – yatsurugi_mmd: 3d.nicovideo.jp/works/td43641
- 1940s Battle Cruiser – Tansoku102cm
- MMD 9.32
- IrfanView
- AviUtil
- RayMMD 1.5.0
- Video motion – Ureshiiiiii
– SEE BELOW for MORE MMD TUTORIALS…
— — —
– _ — –
![]()


Thanks! … I know… it can be a tangled web. … and how deep do we go?
Every change must be followed by a “register” button hit, on Bone Manipulation panel (blue) for .pmx models or Accessory Manipulation panel (yellow/ochre) for .x accessories respectively.
The “root” bone can have other names: ‘parent”, “all-parent’ and ‘motherbone’ are the normal variants. It is also possible that the model doesn’t have a ‘root’ bone. In which case you can add one or just simply use the ‘center’ bone which all models loaded into MMD must have.
Thank you. Really happy to read your response. This is most kind of you and I am delighted that you felt this way about this article.