


How do you use the x, y, z, and Rx, Ry, and Rz windows in the accessory manipulation panel in MMD? How do you change the size of a stage or accessory in MikuMikuDance? How do you make an accessory transparent in Miku Miku Dance?![]()
Coordinate Coordination: The Sequel.
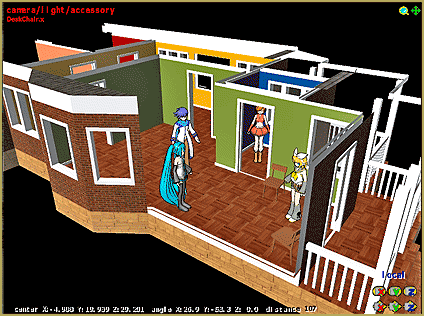
Have you ever wanted to use just one section of a stage as a backdrop? So you think to yourself “Do I really have to move ALL my models to that section?” Well, actually, you don’t have to. You can move and rotate the entire stage and save the dummy bones for your other props (Please see some of our other articles for dummy bones). This is a very similar exercise to using the Center Position Bias but there are some twists … and it requires a bit of creative visualization.
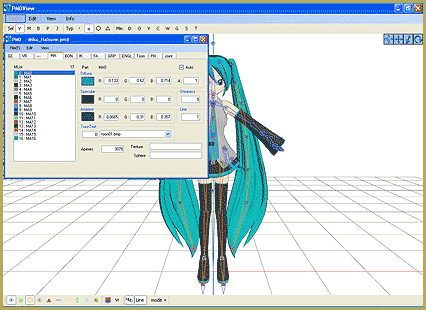
The accessory manipulation sub menu (or panel)") is what you use to load all your accessories, stages, effects etc. It’s the one that disappears when you load a model and reappears when you click on the arrow button and choose “camera/light/accessory” option in the model manipulation panel. It has 11 fields and 2 check boxes. What I most want to focus on are the X, Y, Z, and the Rx, Ry, and Rz fields. The first thing we need to do is show you how to visualize these planes.
is what you use to load all your accessories, stages, effects etc. It’s the one that disappears when you load a model and reappears when you click on the arrow button and choose “camera/light/accessory” option in the model manipulation panel. It has 11 fields and 2 check boxes. What I most want to focus on are the X, Y, Z, and the Rx, Ry, and Rz fields. The first thing we need to do is show you how to visualize these planes.
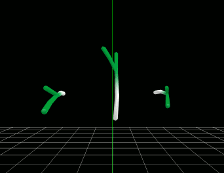
Hold out your hand in front of you, about eye-level, with your palm down and your fingers straight. Next imagine the knuckle of your middle finger is the center of your stage. Now this is important, imagine the beam of a laser pointer targeted straight down on the center of your stage (knuckle). This would be your display coordinate axis. Actually, if you do have a laser pointer, go get it and we can use it to do something other than teasing the cat.
Keeping your hand in this position, slowly move your hand in a left/right side-to-side motion. The laser beam would travel across your other knuckles and the back of your hand. This would be your positive and negative X axis.
Go back to your original position and move your hand in an up and down motion; all the while, keeping the beam focused on your center knuckle.  This would represent your positive and negative Y axis.
To represent the Z axis, you would move your hand in a forward and backward motion. The beam would travel up your swearing finger and across the back of your hand toward your wrist.
To help you picture the Rx, Ry, and Rz axes, you’ll now have to imagine your center staying in its original fixed position (Think of it as a fulcrum on a teeter-totter). The “R” in all these axes names means rotate. Just stick with me, it’ll become clearer.
With your hand out again, keep and imagine the center point totally still. Move just your wrist up and down like a see-saw and you get the +/- Rx axis plane.
Now back to the original position, this time twist just your wrist from a right side to left side, you might need to move your forearm and elbow a bit to keep the center axis centered. This would be the pos./neg. Ry axis.
If you just twist your wrist in a thumb up/pinky finger down and vice versa rocking action then you have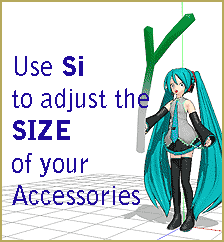 the coordinate values for Rz axis plane.
The Si (Size) field changes the size of the stage. By entering a numeric value in that field you can make the stage or accessory as big or as small as you want. This is invaluable with sky domes! Notice the size of the actual model is unchanged; they just appear to be smaller or larger than their surroundings.
The Tr field adjusts the transparency of a stage or accessory. 1.00 is the default and highest value you can add, in other words, opaque. At 0.00 the stage is invisible-totally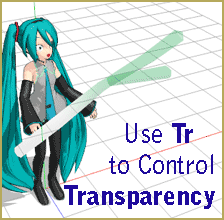 transparent. So, by entering any 0.xx value you can get the level of transparency you may want.
Add-syn allows you to, temporarily, remove an accessory. This could be useful for editing your scene. Right click it once and the accessory will disappear. Click it again and it’ll reappear. It isn’t completely deleted; it is just out of your way.
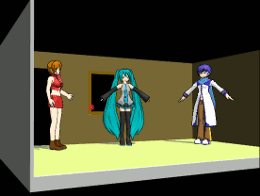
The most important thing to remember is that you are adjusting the accessory- not the plane the model stands on. If you’ll notice in the illustrations only Miku’s studio is manipulated. Everything in MMD is (initially) set in relation to the display coordinate axis. Dummy bones and Mother bones can over ride this and give you options.
Have fun with this.
– SEE BELOW for MORE MMD TUTORIALS…
— — —
– _ — –
![]()


i need to know how to fix the physics of a model ?
o.o