 The making of…
My new “Arrow” MMD Animation
and video!
About six weeks ago I was listening to Melanie’s “Freedom Knows My Name” CD and the “Arrow” song caught my imagination… “Wouldn’t that make a nice MMD animation… a “Diva” song… for an MMD model to sing?” … ?
The Process…
I created the animation following these steps…
The Soundtrack…
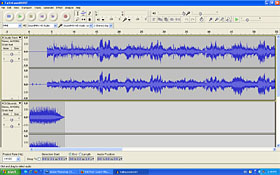
I started the project by creating the soundtrack. I hard-wired the line-out from my stereo receiver to the line-in on my old Dell XP computer. I opened Audacity® audio editing software and recorded the song from my CD. … I wanted the song to be only about two-minutes long, so I cut out the central 2 verses from the song (my apologies to the song-writer Cheryl Wheeler!) … leaving me with the nice first verse and the final verse and song-ending as Melanie recorded it.
I dug into my old saved-WAVs folder and found an applause-track that I could add to my Arrow song… I did a Fade-in and Fade-out to both the beginning and the end of the applause tracks… worked-out very well.
As a final step in Audacity, I selected all tracks, Control-a, and chose Mix and Render from the Tracks menu. … then I did an Export As… to create my final WAV file.
The Stage Set-up…
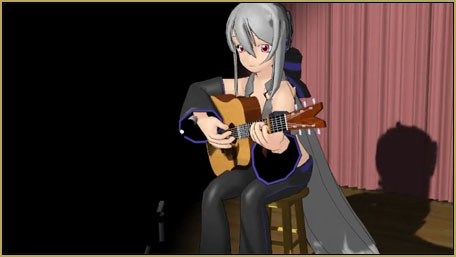
I was able to assemble the stage and the model, Haku, to match my imagination. I wanted a simple “singer with her guitar” on a small stage. My old Auditorium stage is what I see in my mind’s eye. I used dummybones to hold and position the pink drapes to cover the stage’s normal red ones.
The model…
I chose to use the original Animasa Haku Yowane. I usually DO use the Animasa models… and Haku seems like the LEAST of them… something about the model seems less finished, less developed. I figured if ANYONE needed love… wished to fall in love… it was our Haku.
The Pose…
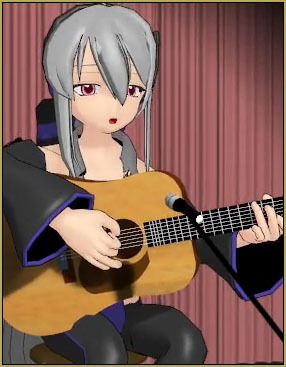
The actual pose of the model was the most important element of the composition. I used one of my “wooden stool” accessories… in the “wood” finish… and found that it was a bit too tall for Haku to sit upon comfortably. I set its size to 90%… perfect. I Googled guitar player on stool pose and worked with those images as I positioned Haku and her guitar “just so”.
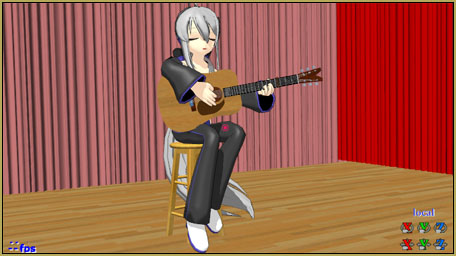
Haku isn’t exactly human-proportioned… so ANY pose attempting to duplicate a human’s pose must be modified accordingly. I am happy with her pose. You may note that the guitar digs into her right leg, a little… but it looked better than having the guitar sitting on top of her leg. In “the real world” the guitar WOULD impress into your 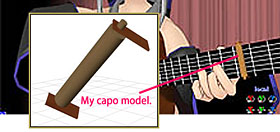 leg, a little.
In doing my research, I found that the guitar needed to have a capo on its fourth fret. I went into Sketchup and, unable to FIND one, decided to make one…. pretty easy. I made it huge so I could reduce it to a tiny size with smooth curves.
The Camerawork…
Sure… the music and the model are important, but I feel the Camerawork really MAKES this MMD animation. In my works, I keep the camera moving; almost never does my camera sit still. … With the model sitting still on her stool, the only way to add “action” to the scene was with camera action. I had to be careful not to make it TOO active; Arrow is a quiet song!
The Effects…
I remembered that our Arizona had written a tutorial about the Spotlight Effect and I had always wanted to try it out. When 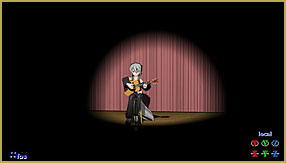 I started using Spotlight, I discovered that OTHER shader effects were blown-away by Spotlight… even the standard MMD lighting controls were run-over by it. … “Well, that makes it easy.” No other effects to worry about. … Except I did add SvDOF
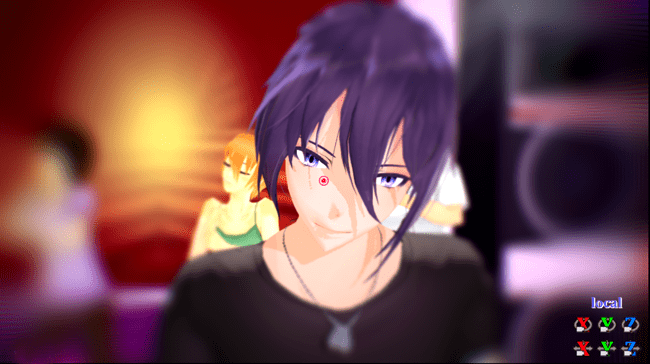
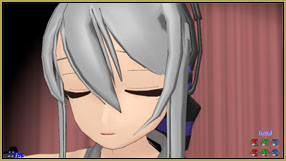 to get a nice depth-of-focus effect. I changed the effect’s values with each camera-cut as dictated by the new scene’s requirements… softening the sharp folds of the drapes while keeping Haku in the focus.
I decided to be a little creative with the Spotlight effect and use it during the camera-cut/scene 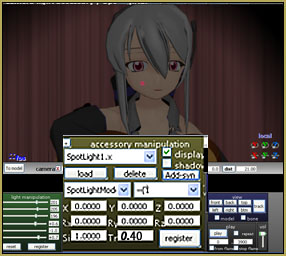 transitions. At each of those, I set the Spotlight at only 40% (dim light) and gave it 7 frames to come up to 100% (full brightness). It adds a softness to the abrupt camera-cut. Actually, I thought I’d use the Blackout effect for this… but Spotlight keeps Blackout from working.
A test video…
I made a Test Video at this point to see what I had created, I mean… it seemed, now, like I was mostly DONE with the project! Lights… Camera… Action! … Oh yeah, I didn’t have any “action” yet!
The Animation…
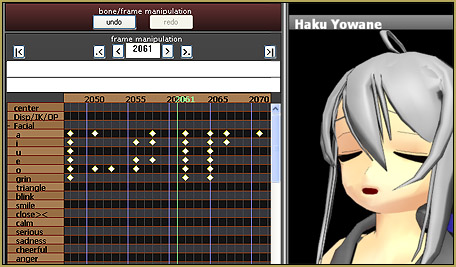
The Lip-sync was my first step in the animation. Haku would be on-camera with close-ups for every second of the animation… the 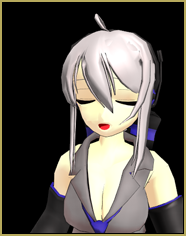 lip-sync had to be “nice”. I did the lip-sync as a new PMM file… a new animation… so as to have no distractions as I worked on the mouth motions. Haku Yowane has only a few mouth-slider options and I found myself using several sliders at a time to get the shapes I wanted. I spent about five or six hours on the lip-sync, being able to tolerate only an hour or so, a night. I posted a video of just the lip-sync and soundtrack. You can DOWNLOAD the lip-sync and Soundtrack zip for your OWN use. That download includes the soundtrack as an Mp3… two are included: with and
  without applause.
The first thing I realized as I considered the animation was that I needed the guitar to stay with Haku’s hands as her body moved. I decided to attach the guitar to Haku’s right wrist bone with OP, Outside Parent. … I knew I wanted to have Haku hold the guitar with the third- and little-fingers of her right hand firmly planted onto the guitar’s pic-shield… so that her thumb. index- and middle-fingers would be free to pluck and strum the guitar. That OP-bond is solid… the guitar stuck to her right wrist like it was glued there! ( I used OP to attach the capo’s dummybone to that right wrist, too, so it would stay in place on the moving guitar.)
I watched several videos of guitarists on stools to see how their body’s swayed as they played. My first action was to set Haku’s right leg to moving slightly left/right with the beat… a very slight motion. I next rolled her lower-body a little left and a little right with the beat… rolled her upper-body with a little MORE motion as the main motion… and set her head and neck into action, as well … all slight motions… I copy/pasted a few frames at a time to fill out the length of the entire 3900-frame animation. … a test video I made for my own use was astounding… Haku was looking very-much alive and “natural” in that test!

My “Arrow” folder was accumulating files as I worked. ALL of what you see there is inside my Arrow folder… including several PMM’s that I used like scratch-paper to build motions which I then copy/pasted into my main saved file.
I found that the Spotlight Effect overwhelmed my computer… it was tough to open the dance and scroll-through the frames… very laggish! … It was easier to have another dance with no effects in which I created my various motions and then paste those back into the Main dance. So, as I said, I had my MAIN dance, with all the camera and effects in-place, into which I pasted my added-touches as I created them in other PMM’s.
The Guitar Chords…
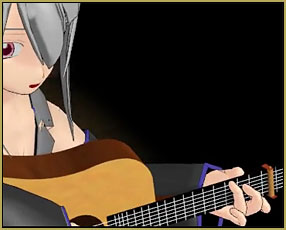 Haku is holding a guitar… and needed to look like she could PLAY it. THIS was a project, by itself.
 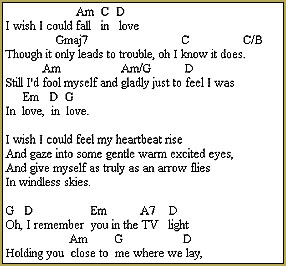 I wanted her action to look realistic… and I wanted her to be fingering the proper chords! A quick search found me the guitar tablature for the song. I wished for actual “sheet music” but THIS is what I could find… and… armed with that information, I set about looking-up an image for each
 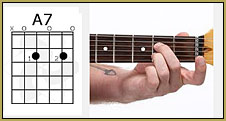 of those chords and then making a saved-pose for Haku as she fingered each of those chords! With that done, I could simply advance the frames up to each required chord-change and paste the appropriate chord-pose into place.
A few of the chords, in order to 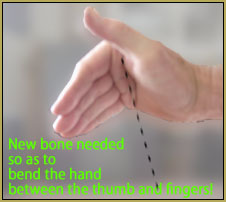 be fingered properly by my inhuman Haku, required me to move her arm, elbow, and shoulder as I got her fingers to the proper frets and her wrist rolled into a realistic position. I was careful not to over-twist wrist, arm, shoulder or elbow as I worked the wrist into the required positions. (It seems that another joint in the hand was needed… a bone with which you could realistically fold the palm of the hand between the thumb-line and the row of knuckles… ) … The result of these moves is that the pasted chord-pose change make her arms “flap” a little. I decided it was not too objectionable as I couldn’t FIX it without over-stressing her wrist, and such, or accidentally moving her fingers into the wrong frets. So… flap-away!
Finger-pickin’ good!
NOW I had this MMD animation almost complete… the sound, the stage, the set, the model… the swaying… the chord-fingering… NOW it was time to think about the right-hand fingering action.
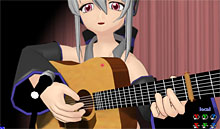 I started with the right thumb… getting it to hit that bass string as per the song. The visual oscilloscope we can see was a big help…. but often that bass note is soft and I had to listen to the piece as I found the correct place to drop-in the visual action. As with the finger-chords operation, I did not have to “do” the entire song… just those moments when the guitar was actually in-scene/on-screen.
After making the thumb motions, I created a Index/middle-finger scratching-motion that I could copy/paste to create that nice fine-finger action. ALL of the finger motions have an interpolation S-curve… as do almost ALL of Haku’s motions. But the thumb-action curve has a cane-shaped curve for a quick-action at the beginning of each thumb motion.
FINALLY…
With everything in place… all of the motions, the fingering, the effects… 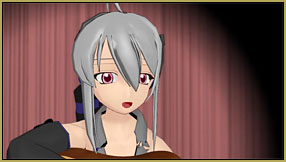 everything… I made a final pass, or two… or three!… to make fine adjustments to Haku’s motions… eyes, head… looking up. looking down… all gentle motions.
I added that free-standing microphone that I had made from a Sketchup model by “Paul”.
and… I decided “I’m through!” … Fini!… That’s it!
I did my final Render to AVI and watched it, like twenty times, before deciding to upload it to YouTube.
Enjoy “Arrow”!
– SEE BELOW for MORE MMD TUTORIALS…
— — —
– _ — –





Beautiful motion and a really nice job.
i love this music!
Thank you!