![]() What are textures? What is UV? What is RGBA? What is alpha? What are blend modes? What are clamped textures? How do sphere maps work? How can I make models shiny? What is sph? What is spa?
What are textures? What is UV? What is RGBA? What is alpha? What are blend modes? What are clamped textures? How do sphere maps work? How can I make models shiny? What is sph? What is spa?
Textures are the two dimensional images that MMD (and other 3D renderers) paste over your three-dimensional object. Well, kind of. Textures are that, and a lot more too. That’s what we’re going to be talking about in this tutorial.
Sometimes you just want to know how to get something done, to duplicate the cool things you’ve seen others do. When that’s the case, your best opening move is to open a model, image, or animation and see how it was done. But if you want to be creative– to create new effects, original and eye-catching- then you need to understand how things work under the hood. So let’s talk about a few of the ideas around textures.
File Formats
You’ve probably seen your folders full of .spa and .sph files. Maybe you’ve tried to find a way to export to these file formats from GIMP or another image editing program. You don’t have to! These are just regular image files. The extensions are only there to tell how the image was meant to be used.
MMD can use PNG, JPG, BMP, and TGA formats (and maybe more). You can save your textures in any of these formats. If you want to rename your sphere maps to use the .sph file extension, you can– but you don’t need to! MMD doesn’t care what the file extension is. It only cares that it knows how to read the file.
If you’re having trouble deciding, I recommend using PNG files with full compression. The compression won’t affect the quality of your image, but it will greatly reduce the size of any model that you choose to distribute.
What is UV?
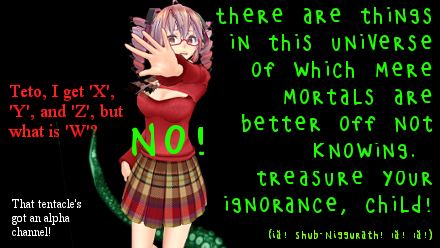
Programmers might be the laziest people on the planet. They are so lazy that they find it difficult to strike even two keys on their keyboard in a row. When programmers started figuring out texturing, all of the good letters were already taken. X, Y, Z, and W referred to coordinates in 3D space. R, G, B, and A referred to color values.
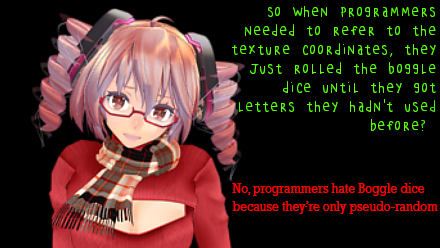
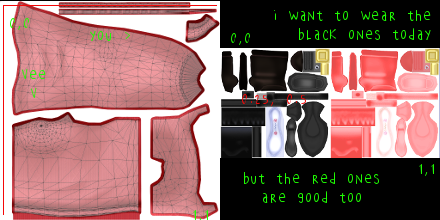
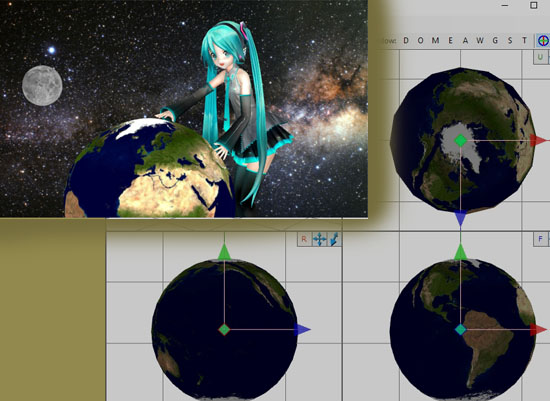
Each of your models’ vertices has a particular UV coordinate assigned to it. When MMD renders a pixel, it figures out what the UV coordinates should be, based on what vertices are nearby. Then, it looks those coordinates up in your picture, and viola! Teto in all her glory!
MMD decides how to handle these UV coordinates. MMD says that the top left of every image is 0,0 and the top right of every image is 1,0. So it doesn’t matter how big your image is, and it doesn’t matter if it’s square. That range– 0 to 1 in the U axis, 0 to 1 in the V axis– can represent every pixel in your image.
But, as we’ll find out, that’s not the only way to map textures onto a model.
RGBA?
Red, green, blue, and alpha. In your image editor, these are probably mapped to values between 0 and 255, but, same as with your UV coordinates, MMD converts RGBA to values between 0 and 1. (This is important for something we’ll talk about in a minute.) High numbers are bright and low numbers are dark.
What’s alpha? People usually call it transparency, but that’s almost backwards. A better word might be “opacity”. Most pixels have an alpha value of 255 (or 1.0, in MMD), meaning that they’re fully opaque: you can’t see through them at all. If the alpha value is 0, that pixel is totally invisible! And with values that fall in-between, you’ll be able to see both that pixel, and the pixel that lies behind it.
Blend Modes
If you’ve spent much time with image editing, or if you’ve tried to make recolor morphs, you probably already know all there is to know about blend modes. You might not realize how much you already know! Blending is about using math to combine two colors into one color.
There are a lot of different ways to blend colors, but to understand MMD, you only need to understand two of them:
Additive blending
With additive blending, colors get brighter when you add two of them together. This is what happens when you shine two lights on an object: the light adds together, and the object looks brighter. And additive blending is exactly what it sounds like. MMD just takes the two numbers and adds them together!
Multiplicative blending
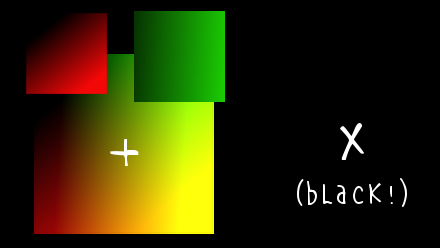
With multiplicative blending, MMD takes the two numbers and multiplies them to get the result (did you see that one coming?) Now, you’d expect multiplying to make things really bright, but remember, MMD is using values between 0 and 1, and when you multiply numbers smaller than 1 they get even smaller, so multiplying makes things darker. This is kind of like what happens when you lay multiple transparencies over each other: each transparency darkens the previous one. If you multiply red and green, you get black!
Masking
Using a texture mask is the same as what you do when you paint a house: you put masking tape over the trim so that you don’t get any paint where you don’t want it. Texture masks are used to control the effects of other textures. When those masked textures are intended to be used as images, masking can use multiplicative blending (to reduce the influence an additive texture has on the final image), it can be subtractive blending (to reduce the alpha channel of the masked texture, making it more transparent), or it can be something else, depending on exactly how the masked texture works.
Clamped vs. Tiling Textures
Mostly, models are created so that none of their vertices are mapped to U or V coordinates higher than 1 or lower than 0. But they don’t have to be made that way. You can create models with any UV coordinates you want. There are two ways for MMD and MME to handle these unusual coordinates: they can clamp the texture or they can tile the texture.
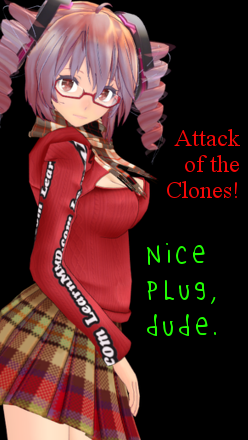
If they clamp the texture, then any time the renderer runs into an out-of-bounds coordinate, it just uses the edge of the texture to figure out what to draw. This is really useful for things like decals, where the edge is transparent. You can scale the decal without worrying about seeing its clones creeping in from the edges.
The other way to do it is to tile the texture. When renderers run into weird coordinates with a tiled texture, they just start over at the beginning of the image. So a U coordinate of 1.1, 2.1, 3.1, or -0.9 all end up drawing from the same part of the texture.
Sometimes, you can make textures that tile in one direction and clamp in the other. But you’d probably have to program your own effect file to do this. (It’s easier than you’d think!)
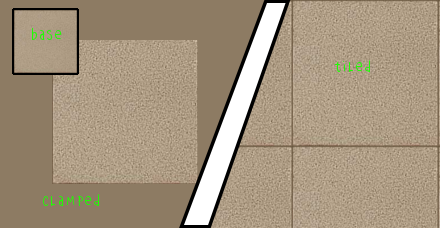
The edges– seams– of textures tiled like this usually stick out. But it is possible to make textures designed for this repetition. Their artists take special efforts to disguise the seams. People call these seamless textures.
MMD treats all textures as tiled. But that’s not true of every effect you can download.
View-dependent Textures
I said there was another way to look up colors in a texture. But it’s a little complicated.
What we’re going to do is figure out at what angle we’re seeing a particular part of the model, and instead of using the model to figure out the texture, we’re going to use that angle.
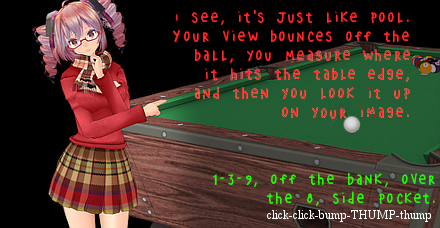
These kinds of textures are always circles instead of squares. Teto assures me there’s a good reason for that.
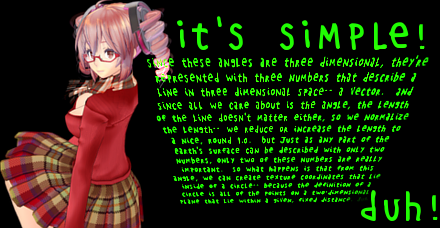
Umm. Okay. I’m not sure that clears anything up for me, but maybe one of our readers understood it.
In MMD, sphere maps are an example of a view-dependent texture. Just like a pool ball, they reflect off of the viewed surface and use their reflection angle to figure out what part of an image to look at. This makes it look like the model is being lit from all directions, instead of just from your single light source or from directionless, ambient lighting. Because the angle changes as the camera moves, this texture moves as you move, just like the reflections of overhead lights as you walk over a polished floor! This is pretty cool for rendered images, but it’s really breathtaking when you use it in videos.
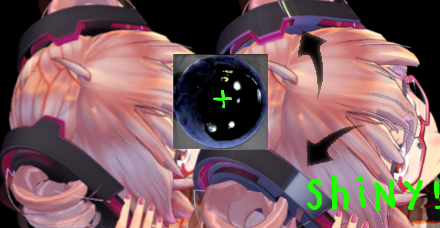
Smoothing it out with sphere maps
In real life, shininess is all about how smooth an object is. A mirror is really smooth. Water is very smooth. Your skin is kind of smooth. Rocks aren’t smooth at all. This smoothness and roughness is at a level of detail we could never build directly into our models’ meshes, but we can communicate it through the use of sphere maps. And now that we understand our textures better, we can get to the solution right away, without a lot of trial of error, just by using our brains. Or CPUs, in Teto’s case.
With a rough object, light hits the objects and reflects in all different directions. You can have the same amount of light being reflected, but reflected over a wide, wide area. With a smooth object, the reflection is very tight.
If you want to make a shiny object with an additive sphere map, remember that an add sphere represents light from the environment: light that is getting reflected tightly by shiny objects and spread out by rough objects. So for your rough materials, use a blurry add sphere, and for your shiny materials, use a sharp add sphere. Just like the filters in your image editor! More modern rendering engines do this automatically (by using a roughness map to choose the miplevel of an environment map— oh my goodness, I’m afraid Teto is rubbing off on me). In MMD, you’ll have to make separate image files for each of these blur levels.
Although you can create any number of diverse, crazy sphere maps, you need to ask yourself whether you should. If you want to make realistic scenes, you should only use a single sphere map for each scene, not a completely new sphere map for each model or accessory, and certainly not a completely new sphere map for each material! That’s because this sphere map represents the environmental lighting that (should be) affecting every object in your scene. You’d want that sphere map at a lot of different blur levels, but not a lot of different colors or shapes.
Well that’s all for today everyone! If anyone can explain any of that weird jargon that Teto was using, please leave a comment. Or if you have any questions, post them too, I’ll pass them on to Teto!
Credit your sources– it’s the right thing to do! This tutorial used remii’s Little Devil Teto– he has a nico nico page at www.nicovideo.jp/user/10024450! To download the pool table used in this tutorial check out Kohaku-Ume’s page at http://kohaku-ume.deviantart.com/art/Pool-Table-DOWNLOAD-547374416!
Correction, 26/08/16
When I wrote this, I was under the misapprehension that specular maps were something different than sphere add maps. They’re not, at least, not as most MMD users use the term. Specular map is a really imprecise term, because there are a lot of different ways that specular can interact with textures (maps). But a specular map is just a sphere add map– a .spa map. Which makes some sense, because a sphere add map really represents the specular highlights from environmental lighting. Just be careful, because there are a lot of different things that can be called specular maps!



Does anyone know how to apply a mask for a texture?
Hello! I searched LearnMMD.com for MASK TEXTURE and I got a list of results.
I think these two might be the most useful… Yes?
https://learnmmd.com/http:/learnmmd.com/know-about-pmd-pmx-textures/
https://learnmmd.com/http:/learnmmd.com/know-about-pmd-pmx-textures/
— Reggie
How do I add a dds file into MMD? I have no idea how and it’s drive me nuts.
DDS… that’s a Microsoft DirectDraw Surface file… as far as I know, you cannot import that into an MMD model format. I saw THIS after a Google search:
The DirectDraw Surface file format is typically used for DirectX-compatible textures; these files are often used to texture game models and environments. GIMP, an open-source image editor, doesn’t support editing of DDS files by default, but installing the GIMP DDS plugin makes the program DDS-compatible.
… I don’t know of an MMD or PMXE application for that file type.
Guys. I have a blank stage that has no textures. I want to add textures to it in pmxe so that afterwards I can use normal maps on it… Do I re, ally need to go through all of these not directly related to my question tutorials just for a simple matter like that? Like it’s really just: How to add textures to a blank stage? I can’t find anything on google, only stuff related to models…
1) There’s no royal path to Geometry.
2) PMXE-wise, stages (and all accessories) are just the same as models, except that they do not have bones and physics and therefore are simpler to render. Speaking about textures, practically everything you’ll learn about models will come equally handy for stages.
I am just finishing up on a model that I’ve been making by hand from scratch right now, and I am starting to work on textures.
Does anyone happen to know if there are any limitations imposed on the color profiles you can use in a texture? I have been using 32 bit RGB for all of my textures and would love to save on some Vram in rendering if they arent being used fully.
Additionally, if there are any limitations, would anyone happen to know where those limitations are? As in, are they imposed by the .pmx file format, or mmd itself (I am using mmm so any info there would be more relevant)
Thanks in advance for any help.
MMD does use 32 bit (8 bit per channel, RGBA) textures. It doesn’t have anything to do with the model format, which contains only a reference (path) to the texture image, which MMD uses to load the texture.
It’s my understanding that even though something like a .jpg takes less hard drive space, it takes the same amount of video memory because it needs to be decoded for use. However, MMD also supports the .dds (Direct Draw Surface) image format, which was designed with the express purpose of allowing on-the-fly decompression by your video card– so .dds textures should require less video memory. However, in my experience, the benefits are fairly slight, 10-20% savings over a .png.
64 bit MMD can also support high dynamic range images, but there’s little point to this unless using an effect that takes advantage of the HDR. The default MMD shader does not.
I’m not familiar with MMM, but expect that it is similar to MMD in regards to texture use.
This might be a really specific inquiry but…I recently acquired a white flag model that the creator said I could recolor. I’m trying to make it so I can change the white model to a country’s flag (I’ll be doing this with multiple flags). I’ve tried following a couple tutorials, but nothing seems to work.
What I currently want to do is change the flag texture to the People’s Republic of China flag. Can’t be done with color sliders, obviously, and there aren’t any png files in the folder to edit. How would I change this?
Textures aren’t necessarily .png files. They can be any image format.
First, figure out what material on the model contains the parts you want to have a flag, probably by using the masking tool in PMXE. Then, check that material for its settings on the tabbed view. If it has a file in the texture field, that’s the file you want to edit.
If it doesn’t, you’ll have to specify one and create a new image file (.png is a good choice for format.) If the model has material settings (colored diffuse and ambient) you’ll probably have to replace those with shades of gray to get your flag looking right, and then write those colors into the image file, around your flag. If it doesn’t have a texture, it’s also possible that you’d need to UV map the material.
Or another option is to do it with a decal. Create a new, flag-shaped mesh, UV map it, give it a texture. and wrap it around your model. Depending on the characteristics of your model, that might be easier or harder.
I could be linking to a lot of tutorials, too many, so let me know which part of that you get stuck on first.