![]() What is weight painting? What is skinning? How can I paint weights in PMXE? What is BDEF? What is SDEF?
What is weight painting? What is skinning? How can I paint weights in PMXE? What is BDEF? What is SDEF?
Weight painting, sometimes known as skinning, is my least favorite part of making a model. If you want to paint weights, it’s important to understand as much as possible about the tools and terminology to avoid any extra frustration.
PMXE weight painting mode
 To enable weight painting, hit the Wght button on the top bar of PMXE’s 3D view, or hit F6. To get started painting, hit the Start button, then shift-click on the bone to which you want your vertices skinned. PMXE gives you an option to quickly select a bone’s parent or one of its children to make it easier to switch between bones. I like to leave the selection guide open with all important bones in it so that I can quickly select a new bone.
There are three main ways PMXE lets you paint weights: circle fill, circle gradient, and linear gradient. There are a few other options there, but UV painting isn’t actually about weights, and W4 won’t make any sense until we explain a few other concepts.
But before we talk about those, let’s talk about some options in PMXE that will make weight painting easier.
Mode and x-ray
You’re going to have trouble painting weights if you can’t see them. On the bottom of the PMXE 3D view, there’s a button labelled mode. If you click on it, you’ll get a menu of different ways for PMXE to display your model. Try weight(D). Now select a bone. Vertices and faces strongly weighted to that bone will show up in red. Vertices and faces weakly weighted to that bone show up in blue. And unweighted vertices and faces will show up as black and gray.
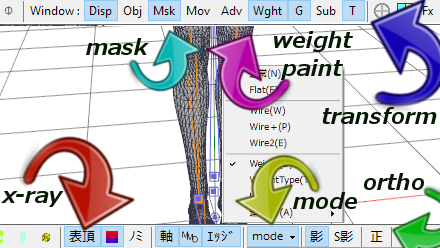
Another important button down there for weight painting is for disabling X-ray mode. It’s the leftmost kanji on the bottom of the screen. When you disable X-ray mode, you won’t be able to select vertices behind other faces, and your weight painting will only affect the vertices that are facing you– the faces that you can see.
Masking
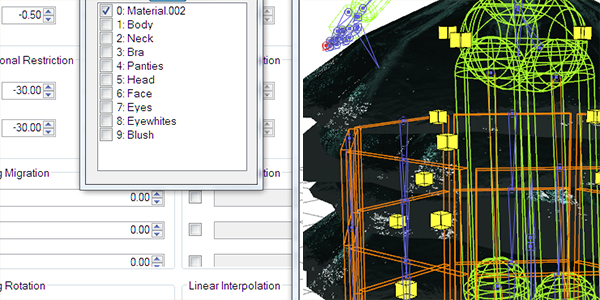
You can easily limit your weight painting to parts of your model with the masking window (F3). Limit to a particular material, or to one or more bones when you mask by weight. Use Bone->Soft -Select to include vertices only partially weighted to your selected bones.
Circle fill
Circle fill just paints the weight you’ve selected on all vertices under your cursor. It’s a good way to rapidly paint solidly weighted objects, and it’s a decent way to tweak carefully created weights. To set the weight you want to paint, type a number in weight and hit enter, select one of the five preset weights, or ctrl-LMB on a vertex to select that vertex’s weight (if it has any).
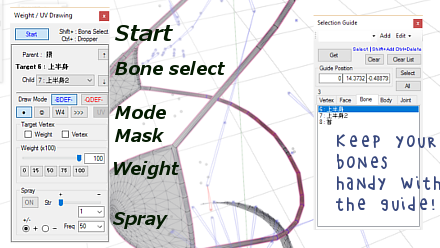
By checking the weight box, you can limit your painting to vertices already weighted to your selected bone. By checking the vertex box, you can limit your painting to only vertices you have selected. But since entering weight paint mode deselects all vertices and disables the selection tools, I haven’t found a way to make this useful. Instead, I often truncate faces to a new material (Edit->Vertex->Show face to select faces from vertices + Edit->Face->Truncate to truncate) and use that for masking if I want to limit my weight painting to specific vertices.
You can also use a spray gun to add to or subtract from existing weights. Set Strength with the slider or with a number in the drop-down (smaller numbers are stronger). Freq is how long the spray gun waits to drop more paint on the vertices under the cursor (smaller numbers are more frequent). The plus/minus radio buttons allow you to switch between adding weight and subtracting weight.
Circle gradient
When painting, the hardest thing is getting smooth transitions. Gradient tools are handy for this.
The circle gradient affects all vertices under your cursor, but it affects them differently depending on how distant those vertices are from the center of your cursor. At the center, it paints the full weight. At the edges, it paints no weight. And between, it scales smoothly, interpolating weights.
You can’t change the size of the circle gradient. You can’t change its aspect. But you can zoom in and out in the 3D view, enable or disable orthographic view, get a new perspective on your model by moving your camera, or change the FOV in the Display settings dialog (F1, tab 2). Since the circle gradient stays the same regardless of view, you can get your circle gradient acting at any relative size and aspect by adjusting these factors.
Other options are identical to those for Circle Fill above.
Linear gradient
The linear gradient is useful for rapidly getting smooth gradients along straight lines, especially for long bones, like at the knees or elbows. Select a start weight and an end weight, then click and drag a line. Vertices will be weighted to your selected bone based on how far along that line they lay. You still have access to the weight checkbox to limit the affected vertices. Note that the linear gradient draws a zero weight on everything outside of the band described by your line, which is a little annoying, as it will probably overwrite some 100% weights that you would rather not see changed. Mask these out of the display, or just paint them back with the circle fill.
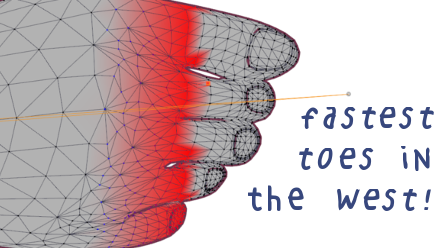
Blend mode does something different. I can’t say I understand it. If you do, please let me know!
Common problems
One of the frustrating things with weight painting is that weights always get normalized. PMXE recalculates their values every time you select a new bone, adjusting them until all of their values add up to 1.0. If none of your changes seem to stick, make sure that vertex is actually weighted to another bone! If it’s not, weights are always going to be 100%.
Sometimes you just can’t get a vertex unweighted to a particular bone in order to weigh it to a new one. Try weighting it 100% to one of its parents first, then weigh it to your new bone.
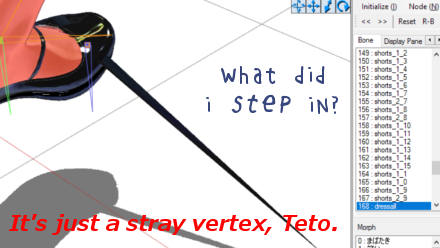
One big problem is finding stray vertices. One of my techniques is to mask by weight, then truncate to a new material and mask by that. Enable Parts and look for holes.
When you delete a bone, PMXE drops all of its weights onto the bone just above it in the list. So you can combine weights just by positioning bones in the list and deleting them.
If worse comes to worst, you can edit weights directly in the Vertex tab. Unfortunately, the menu options that suggest that they should allow you to halt normalization of weights don’t actually work– or at least, don’t work for that purpose.
Good weight painting usually means switching between the transformation window and your 3D view frequently to check your work. Remember, these views have independent undo histories. Selecting a bone in the transformation window will also change to that bone in the 3D view when you return to continue weight painting. Always make sure you’re painting to the correct bone.
Deformation types
Take a look at one of your vertices now. Look at the method used to deform that vertex. There are a few choices here, and it can be useful to understand them.
BDEF
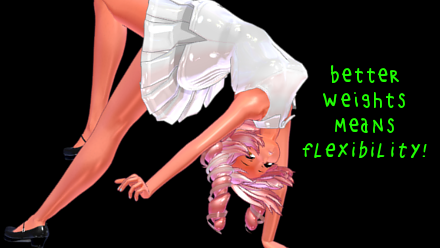
There’s actually a few varieties of BDEF, based on how many bones factor into the deformation. I’m not sure what BDEF stands for, but it’s a linear deformation. BDEF1 deforms the vertex by a single bone. BDEF2 deforms the vertex by the combined action of two bones. And BDEF4 deforms the vertex by the combined action of four bones.
What about BDEF3? BDEF4 bone weights can be zero, so if you want a vertex to be deformed by three bones, make a fourth entry with a zero weight.
PMXE should move smoothly and invisibly between BDEF1 and BDEF2 so you shouldn’t have to worry about which is which (but you can always select all of your vertices and change them to BDEF1 to limit them all to a single bone’s influence). But PMXE has very limited tools for working with BDEF4. The W4 weight painting tool allows you to paint BDEF4 vertices, but without any of the handy goodies you have with the other tools. If you would like to be able to skin vertices to more than 2 bones, I would strongly recommend learning Blender.
SDEF
As BDEF bones rotate, the volume described by their vertices collapses. Spherical deformation alleviates that problem. It uses two additional parameters, intended to act as a sort of center for the sphere. PMXE figures these out for you. It’s easy, because these centers are the same as the centers of the bones involved.
SDEF is great for twist bones and “knobby” bones, like elbows and knees. Sometimes, enabling SDEF on a knee feels like magic. With the push of a button, a troublesome part of the mesh starts working perfectly.
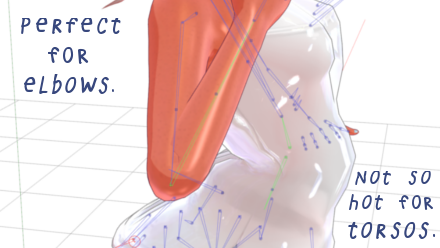
To change vertices to SDEF, select the vertices you want to change, then, on the 3D view menu, select Edit->Weight->SDEF. PMXE assigns centers and tells MMD to use spherical deformation.
Spherical deformation looks great on some bones. It looks awful on others. You’re going to need borders between SDEF vertices and BDEF vertices. The best place for borders is wherever you can make 100% weight lines. Ideally, you want a loop of SDEF vertices weighted 100% to a single bone, followed by a loop of BDEF vertices weighted 100% to the same bone. This reduces the risk of tearing at these borders.
If you convert vertices to SDEF then adjust bones, the vertices’ centers won’t be updated with the bones. You might do this on purpose in order to play with what happens when SDEF centers are located off-bone. But if you want to restore the centers to their default position on top of their bones, the easiest way to do it is to select your SDEF vertices, convert to BDEF2, then convert back to SDEF.
The final thing about spherical deformation is that there’s no way to deform vertices with more than two bones. If you want to do that, you’re stuck with BDEF4.
QDEF
QDEF stands for Quaternion Deformation. And it’s very easy to understand its relevance to MMD: if you have any QDEF vertices in your model, your model will crash MMD. QDEF is not implemented in MMD.
Other weight tools
Edit->Weight->Average can be very useful. When you use this on a group of selected vertices, it computes an average weight and assigns this to all selected vertices. It’s important to use this to prevent ugly deformation on things like clothing rims. Otherwise, even small differences in weights can lead to ugly stretching of the rim.
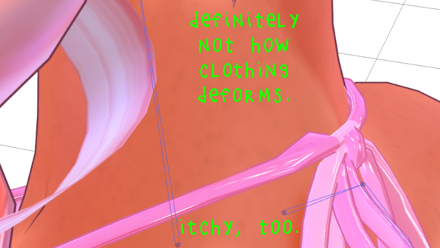
Edit->Weight->Mirror Vertex is another handy tool. Once you have one half of your model weighted, select the other half (careful not to select the center vertices), then use this option to copy the weights over. If bones are named appropriately (using 右 and 左), the weights will be applied to the appropriate bones.
Edit->Weight->Smooth and Smooth Value sound like they would be useful, but my experiments with them have not led to anything smooth. I don’t understand how they work, and if anyone understands them or how to use them well, please let me know!
Any weight painting tutorial would be remiss not to mention the excellent weight transfer plugin. This is the fastest way to paint weights. It’s not perfect, but the ease of use means it should always be the first tool you try.
The skirt plug-in is a handy way to rapidly weigh any area– not just skirts! Remember, you can always delete any of the physics it creates.
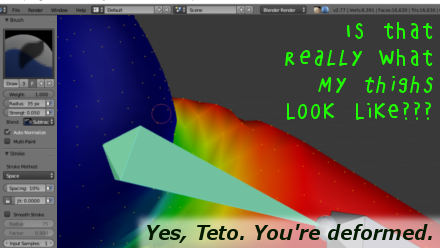
Finally, there is a free tool with much more powerful ways to paint weights. The best thing about Blender is that it allows painting directly on posed models. That turns the nightmarish task of weight painting into one merely tedious.
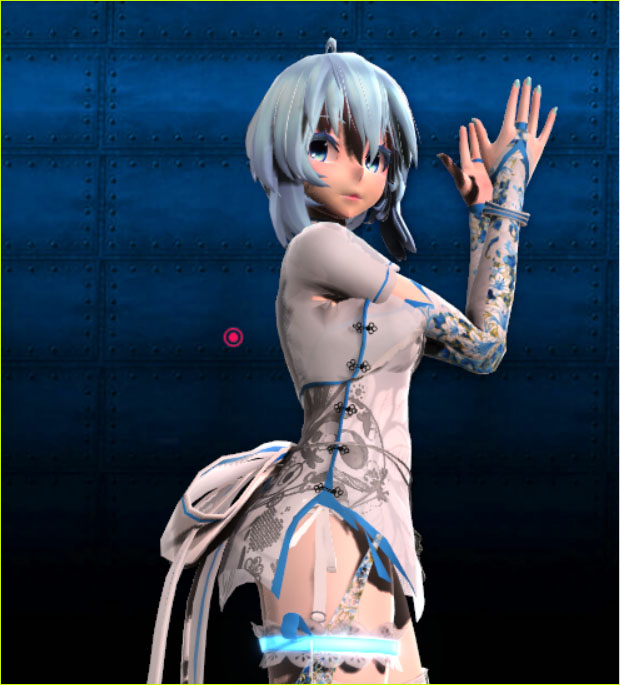
 Keep the Faith and credit your sources! I used my own Tda Tutor Teto for this tutorial, in a dress based on meshes by Kanahiko-chan!
– SEE BELOW for MORE MMD TUTORIALS…
— — —
– _ — –







So I’ve been trying to weight paint bangs and for some reason I just can’t get it right. Every time I move the bone I weighted to the hair, it just doesn’t move the hair like it’s supposed to if that makes any sense. Any words of advice on what to do?
I am sorry to ask this question here but I have been to both Reddit and Deviant Art and no one has even responded.
I want a smooth knee for a character model I’ve been playing with bc his knees look really terrible when they bend, but I can’t figure out if they’re weighted properly (or need SDEF?) I’m sorry, I’m a complete noob at PMX editor and MMD alike.
Any help/suggestions at all would be massively appreciated.
I checked with out Mae Blythe…
“I am so sorry you haven’t got any responses so far!!
It’s been so long since I’ve been making models, I’m a bit of a n00b myself now! I think there are two possible issues. The first would be IK bones. I think I do remember that they can stop knee bones from bending like that in the first place, but I may be entirely wrong. There’s a small intro on IK bones here: https://learnmmd.com/Make-Your-First-Model-Using-Blender-by-Mae-Blythe/Make-a-Model-Part-15/index.html
The other issue would just be weighting. This article has information on weighting that is a little easier to understand than this article: https://learnmmd.com/Make-Your-First-Model-Using-Blender-by-Mae-Blythe/Make-a-Model-Part-17/index.html
The secret to joints that flex nicely is to make sure that none of the areas that need to flex nicely are weighted to 100% – 75% was the number I read was the best for weighting joints so that it is controlled by two bones at once!
I hope this was helpful :)
– Mae”
Thanks so much for the reply Mae and Reggie, it’s really appreciated! I will try both of these methods out and hope either one works ~
is there any way to increase the circle?
so, im trying to weigh this skirt to my models waist bone right? no matter what i do, it wont select the ventricles, is there anything i can do?
Do you have the vertex/material tab open? It’s the tab with the many boxes to the left of the separate materials. If the box for the skirt material isn’t checked, you won’t be able to add anything to it.
If it stopped letting you add weight seemingly randomly, try saving your progress, closing the editor and opening it back up fresh. I’ve run into a problem like that before and that fixed the problem for me.
I was looking for how to hang paintings in mmd. I have a motion file that needs a painting. This wasn’t the tutorial I was looking for. It’s great though!
I’ve asked many questions on many sites but didn’t get a reply how do I delete weight for a bone that I never selected for some reason when I’m trying to weight my shoes a part of the leg gets picked and I never weighed it for some reason I can’t get it to go away
You can not “delete” weight, only add it. So, if a part gets weighted to a wrong bone, you have to select the *right* bone and weight it back.
You’ll find weighting easier if you do it by materials.
The reason you’re adding weight to parts you did not intend to is because the weight adding tool applies weight to all vertices it touches, and it applies it straight through the model. (If you look at the model from a top view and add weight to the head, it’ll go right through the head and add weight to the body, legs and feet).
While you can’t ‘delete’ weight once added, you can change the intensity of the weight. When you open up the weight tab, you’ll see the box with the 100 in it and the slider that changes how ‘grabby’ the weight is for a bone.
Change that 100 to 0, reapply the weight to the mistake and it’s like you deleted the mistake.
You can delete it by setting the weight to -1. If I find a limb attached to a wrong point I just set it to -1 and select the area. It will return the point to black.
A couple of times it bugged out and I had to select one of the value buttons, then type -1 and it automatically selects the 0 button, but still deletes the weight.
So, I’m trying to edit the weight painting of a particular bone (upper arm). But It keeps turning green instead of the usual red gradient. I’ll click the bone, and it’ll go red but in half a second, it’ll switch back to green. This is troublesome for me because it prevents me from painting the weights for the area I want. I’ll press start and no bone will be selected, but I will be able to paint, It’s just that it won’t be assigned to anything. Any Ideas on how I can fix this?
Did you fix it????? :(((
Hey. I have a question about BDEF4, I’ve been trying to make gradient rigging since some time and it’s a pain in the ass in PMX. I don’t mind learning Blender skinning for that but can you actually export the model with BDEF4 rigging into PMX afterwards so the rigging doesn’t disappear or gets reduced to BDEF2 instead. This is very crucial for me and I’ve been struggling with it since some time. If it’s possible, could I get the name of the plugin used? There are a few afaik and some are outdated. Thanks a lot man
Yes, it’s relatively painless to do so. I use powroupi’s MMD Tools to do it. You can get that at https://github.com/powroupi/blender_mmd_tools .
I’ve written a little bit more about things you should keep in mind when using Blender to paint weights for MMD models at https://vasilnatalie.deviantart.com/art/Painting-MMD-weights-in-Blender-716246154 , which might be useful for you as well.
Hi, I’m not sure where to ask this, but with PMX 0222, whenever I separate an object from another, it automatically selects the very last object in the mask/material tab. This is really annoying when I have a long list of items and planned to delete the object I separated. Is there a way to toggle that off?
There isn’t, not to my knowledge. However, if you’re separating off faces to delete, you might find it easier to delete on the tabbed view (select last material, hit del) or you might find it handy to use the All or R buttons on the masking tab. R inverts everything that was visible (so if all was visible, none would become visible), making it easy to display only the last material in the list. All, of course, displays all materials, handy for after you delete.
I’ve been trying for weeks, every time I try to correct the weight of a converted model from Xnalara, it gets 10x more bugged. When I move the face, it moves its chest because the hair puts weight on it for unknown reason(and I obviously can’t easily delete these weight), both pinky3 always seems to magically put weight in parts of the torso. When I’ve managed to repair this, some vertex of the model are simply following the camera, waaa what a nightmare, I’ve tried to import the model to try on blender but it went completely bugged full of names everywhere :'(.
Trying to convert a model from Xnalara to MMD is definitively not as easy as they make it sound on those 15minutes tuto vids from youtube.
We have only one article that discusses Xnalara… I hope that helps!
Oh i’m going to try it, many thanks!