Skip to content
Learn MikuMikuDance – MMD Tutorials – Free 3D Animation Software

Learn MikuMikuDance – MMD Tutorials – Free 3D Animation Software

Download Free Animation Software – Let's Learn How to Do Everything!

  • Step-by-Step MMD instructions
  • DOWNLOADS
  • Troubleshoot, Fix MMD
  • Site Contents
  • Reggie Replies Q&A
  • Homework!
  • What IS MMD?
    • Download MikuMikuDance Newest Latest Version of MMD
  • “HOW TO”
    • Raycast RAY-MMD Effect Tutorials
  • BONUS PAGES
    • Why convert PMD models to PMX?
  • HALL of CHAMPIONS
  • Tutorial Categories
  • About
    • Privacy Policy
  • Toggle search form
  • The Art of Moe and the genre’s backstory. Random Thoughts & Visions
  • How to subtitle MMD videos MMD Tutorials
  • Everything you never wanted to know about textures Bandages
  • MMD animation made-from-scratch
    MMD animation made-from-scratch Forgotten Vocaloid Mew Rags on Reggie’s MMD Videos "the making of" my video
  • Change the Edge Line Color and Shadowing of your Models KibaSan
  • How to Switch Models and Stages in MikuMikuDance Accessory Manipulation/Adjust
  • Fixed the MMD 8.05 Configuration Error Failed to Start MikuMikudance Reggie Dentmore
  • How to Lip-Sync in MMD using MoggProject Face and Lips Animation Shortcuts

Easily Make Realistic Hair Texture for MMD Models

Posted on October 30, 2017 By Mae Blythe No Comments on Easily Make Realistic Hair Texture for MMD Models

A featured article by LearnMMD's Mae Blythe!What programs can I use to create realistic hair texture for MMD Models? How can I make my MikuMikuDance model’s hair look realistic? How do I make hair textures? How can I make textures without a tablet?

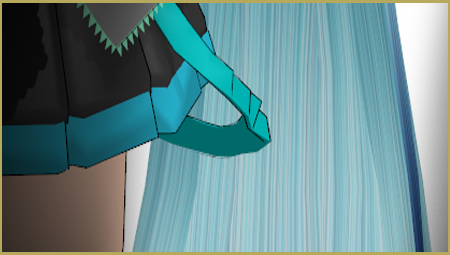
Look at that beautiful. realistic hair texture I made for Miku!

The Easiest Way to
Make Realistic Hair Texture for MMD Models

Textures are hard!

When making a texture, you don’t only need to think about how it looks . . . You also need to think about how it wraps around the 3D body.

However, there is one texture that can be easy as pie . . . Hair textures!

In the following video, I explain how to use Photoshop to easily create a realistic hair texture that looks pretty convincing on a model. The same concepts can also be applied in GIMP.

As a note, this isn’t the end-all-be-all way to do hair . . . It’s just the easiest way to get these results. For the best results, you would need to study up on painting (either digitally or traditionally) to learn how to make the most beautiful tresses ever. But for most people, that simply isn’t in the cards for them.

As with most art, it’s hard to just make a list of steps that will be best for everyone. If you like your textures with less highlights, then add less highlights. If you want it to be rainbow colored, then play with Overlay or Color layers to get the desired look. If you want it to be monochrome . . . then make it monochrome! Most of the fun is in adding random things to see what looks best! Just remember that “Ctrl + Z” works funny in later versions of Photoshop. To undo more than the last thing you did, you need “Ctrl + Alt + Z”.

And always remember, layers are your friends!

If you don’t want to watch the video . . .

Here’s the basic gist of how you do it!

  1. Either fill the entire image with the paint bucket or gradient tool or select part of the image and fill it in.
    1. When you fill in only part of the image, make sure to do it with a transparent background!
    2. If you want a softer selection, you can choose to use the feather option.
  2. Add noise to the layer you just filled in. In most cases, you should check the “monochromatic” option!
  3. Add motion blur to that layer. Make sure the angle is 90! You can play with the other options as much as you wish.
  4. Using new layers, add highlights and shadows. Overlay and Multiply are the best layer types for shadows, while Screen is my favorite for highlights. Make sure to play with opacity too!
  5. Play with Gaussian Blur to your heart’s content – blurring the highlights and shadows gives them more “realism”.
  6. And finally, have fun! I like to copy the base layer and paste it in a new layer. Then I set that one to overlay to give more definition to the hair . . . But that’s just me!
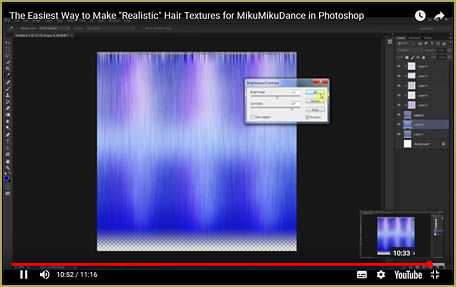
Here is the realistic hair texture that I created in Photoshop for this tutorial.

I hope that this helps someone make some new hair textures that they are super proud of! As always, make sure to share your creations in the comments . . . And never be afraid to ask questions!


– SEE BELOW for MORE MMD TUTORIALS…


— — —


– _ — –


Visit the LearnMMD.com Homepage! Plenty of Mikumikudance instruction and info!

More MMD Tutorials...

Enjoy the "camera Angles WEIRD in Anime" meme...

Enjoy the "camera Angles WEIRD in Anime" meme... This image is from The Slayers - NEXT, ...read more

Reader asks how to create MMD artwork... stuff like posing, camerawork?

A reader asks... Is there a tutorial on how to create MMD artwork, like those you ...read more

Learn MikuMikuDance in Small Steps! New LearnMMD Video Series

Learn MikuMikuDance in Small Steps. Where can I find easy-to-follow MMD instructions on YouTube? How ...read more

Apply Multiple Effects on an Entire MMD Model Using M4Layer Effect

How can I apply multiple effects to an MMD model? Can I use more than ...read more

MMD Plugin Manager... I Found a Treasure!

What sorts of MMD Plugins are there? MMD Plugin Manager? MMD Plugins. Plugin MMD. More ...read more

2025: Hatsune Miku is 18... but she is designed to be always 16 Years old, by design and in reality!

Finally, in 2023, Hatsune Miku is 16 years old! but in August of 2025, she ...read more

Mae Blythe, Making Models, MMD Tutorials

Post navigation

Previous Post: Make MMD Model Hands from scratch in Blender
Next Post: MMD First Steps Make your own motions from scratch

Related Posts

  • L_EdgeShader_Ver 1.00
    How to Use the L EdgeShader Effect for MikuMikuDance. ARIZONA
  • Breathing “SOUL” into MMD models and scenes using Fine Art Techniques Advanced Shader Technique
  • Close Up of Sph File with Text
    Create Sph Files in Blender Without Drawing Anything! Blender
  • About changing models skirts using PMD Editor PMXE KillerBeer
  • Learn How to Dress the LearnMMD Stage – Instructions Dummy Bones
  • Export Import MMD Models Using Blender and PMXE Blender

More Related Articles

Getting Started with MMD MikuMikuDance Intro to MikuMikuDance
Try Reggie’s Evil Eye Effect for an Anime-style effect MMD Tutorials
Sweet Home 3D Creates Custom MMD Interiors as .x or .pmd MMD Tutorials
An MMD town stage: Making Kerorin Town Great Again – Part 2 MMD Stages
Use the PMXE Transform Window to edit your MMD models! Accessory Manipulation/Adjust
My Top 6 Favorite Shader Effects for MikuMikuDance GloriaTheAnimator

Leave a Reply Cancel reply

Your email address will not be published. Required fields are marked *

Download the latest version of MikuMikuDance!
See the MMD Step-by-Step instructions page!
Learn how to make your own MMD motions!
LearnMMD.com
  • Learn MikuMikuDance in Small Steps: a new video series on YouTube by LearnMMD.com!
    Learn MikuMikuDance in Small Steps! New LearnMMD Video Series MMD Tutorials
  • Use Center Position Bias to Move Models in MMD ARIZONA
  • Video Dojo Expo 1 Winner: Angel Dreams Video Dojo Champions
  • The Easiest Way To Add Hair Physics in PMX Editor! BigPerryman
  • Animation Styles: Park and Bark vs. Choreography Creating Motions
  • Make your own stage for MikuMikuDance using SketchUp Models Google SketchUp and MMD
  • The TrueCamera Effect enhances the 3D look of your MMD animation.
    MME TrueCamera Effect enhances 3D appearance Reggie Dentmore
  • New LearnMMD Stage Instructions just posted! MMD Tutorials

Copyright © 2022 Learn MikuMikuDance – MMD Tutorials – Free 3D Animation Software and Instructions..

Powered by PressBook Premium theme

Go to mobile version