


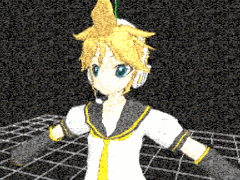
![]() How do I use the OldTV MME Effect? It looks weird, how do I change its settings? How do I configure the OldTV MME Effect for MMD? An MMD MikuMikuDance MME Tutorial!
How do I use the OldTV MME Effect? It looks weird, how do I change its settings? How do I configure the OldTV MME Effect for MMD? An MMD MikuMikuDance MME Tutorial!
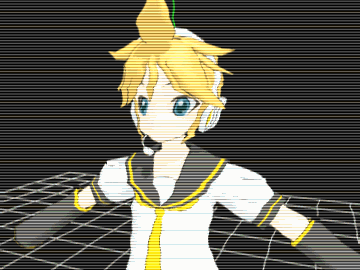
Learn to Configure the OldTV MME Effect!

OldTV is an amusing effect that allows your video to look as if it was shown on a *really* old TV set – old-fashioned oval screen, dense static, badly untuned carrier frequency – all the niceties of the archaic age of technology. In its original state it makes the picture practically illegible and usable only for short glimpses – but there’s more to it.
Using OldTV is really simple!
First, of course, you need to DOWNLOAD MME from the LearnMMD Downloads Page, if you haven‘t done it yet. Then you download the OldTV TV Effect.
Unpack it into UserFile/Accessory/Effects folder of your MMD residence, load OldTV.x in MMD‘s Accessory Manipulation panel – and this is it, easy as pie. Turn it off and on when necessary with “Display“ checkbox, and you‘re good to go.
…But wait!
What if you actually *don‘t* want the image in your video to be distorted beyond recognition? What if ye olde TV is not really *that* olde? Well, there‘s an undocumented trick to control the level of distortion to your needs.
Open the file OldTV.fx in the Notepad or other simple text editor you use. Scroll down to the lower part of it. In the next-to-last block of text, you will find following lines:
// … and finally distort
img.x += distortionScale * noisy * dst;
float4 image = tex2D(Image, img);
And now add your own multiplier to it:
img.x += distortionScale * noisy * dst * 0.2;

Save the file and look how the output has changed (you don’t have to reload the effect for that). Now you can actually *see* what happens on the screen! There‘s still distortion, but it doesn’t prevent you from getting the picture. By changing the multiplier to zero, you can disable the distortion completely, leaving only static and oval frame components of the effect.
Let’s see what else we can do with this effect.
Right next to the fragment we just edited, there’s this text:
// Combine frame, distorted image and interference
image.rgb += interference * rand;
image.rgb *= frame;
image.a = 1;
Hmm, does it look like what I think it does? What if I comment out a suspiciously looking line?
// image.rgb *= frame;
Check the effect again… What do you think, the frame is gone! Well, all right, maybe you liked it. But point is, now you have choice.
Now for the static component. It is neat… but for purposes I had in mind when looking for a suitable effect, something else would be more appropriate… Let’s look at those two .dds files that the effect uses. GIMP can open them if you provide it with a necessary plugin. One of them looks like some weird cloud, and another… well, it’s static! By close examination, we can see that the file consists of 64 frames, each with a different random pattern. Apparently, these frames rotate between each other, creating the effect of noise.

Original textures
Now, let’s replace it with something simpler. Just one layer of the file will be enough.

And the result is…
(blinking of raster lines isn’t part of the effect, it’s what the AVI renderer did to a picture)
What else can we change?
Our raster lines are nearly perfect… but just to add the cherry on top, can we make them float? Remember the name of the texture that we changed? It’s Random3D.dds. Let’s see where in the script it is used and how.
texture3D Rand_Tex
<
string ResourceName = “Random3D.dds“;
>;
sampler Rand = sampler_state
{
Texture = (Rand_Tex);
…
// Interference … just a texture filled with rand()
float rand = tex3D(Rand, float3(1.5 * pos, time_0_X)).r – 0.2;
That’s the part that forms an image of static noise (and now, with our new texture, raster lines) that is later applied to the final picture. By playing with numbers in this formula, we can figure that the 1.5 multiplier changes thickness of our raster lines, so apparently… what if we change it a bit?
float rand = tex3D(Rand, float3(1.5 * pos + 0.1, time_0_X)).r – 0.2;
Now if you save the script while MMD window with the effect still works and keep close attention to the screen, you’ll notice that our raster lines shifted a bit down. Now, if only we could make that addend change its value automatically, then raster lines would scroll down by themselves. But how? Keep exploring the script further.
The second coordinate in the formula above has a rather suggestive name: “time_0_X”. We no longer use multiple-layered .dds file, but originally the script selected one of many pictures packed in it, based on… time? Where do we get it from? Search the program for the name and find
float time_0_X : TIME;
You can bet your hat that this way the script gets current time using a standard function… in other words, a variable that increases itself automatically. Just what we needed! Now let’s modify the script once more:
// Interference … just a texture filled with rand()
float fracttime = time_0_X/20 – int(time_0_X/20);
float rand = tex3D(Rand, float3(1.5 * pos + fracttime, time_0_X)).r – 0.2;
The added line gets a fractional part of the time-based value that we can add to coordinates of a pixel we extract from the texture – the texture that is responsible for appearence of raster lines. Now we see them actually scrolling down! By changing the divider 20 to something else, you can regulate the speed of scrolling, if you want to.
This is it. *That* is the effect I looked for!
Do you think that’s all you can do?
In the next episode… Sliders! Learn to improve OldTV further, making it adjustable straight from MMD!
– SEE BELOW for MORE MMD TUTORIALS…
— — —
– _ — –
![]()


Hello! So I downloaded OldTV and loaded a model to test but when I load the oldtv effect in Acc Manipulation it’s just… a white leek on the floor???
I have MikuMikuDanceE_v931x64 as well as MME
Did I do something wrong? ;-;
When you say you “have” MME, do you mean that you downloaded files that you thought are right and placed them into a supposedly right place, or that you successfully used it with other effects, and OldTV is the only one that gives you trouble?
I successfully used it with other effects, yeah. I also tried deleting the OldTV file and redownloading it but still just a leek XD
This is weird. OldTV is supposed to work “out of the box”. It’s hard to tell what could go wrong without looking at your system with my own eyes. There has to be few other files, OldTV.fx and a couple of .dds, are they there? Try to open (not import!) the OldTV.x into PMXE and see that the Fx button in the upper right corner of the PMXView window is pressed. Do you see a leek or the OldTV screen? And, well, better be safe than sorry, check again if all d3dx9 files are in their proper location in C:\Windows\System32.
Yes, the OldTV file have the .dds NoiseVolume and Random3D, the OldTV fx and x files, a pmm sample and the readme note. All d3dx9 are in the System32 file.
I opened the effect with PMXE and it’s working perfectly (although I can see the leek is there too) and the Fx button is pressed.
I tested on MMD again but it doesn’t work… (also, MME is v037)
Redownloading mmd doesn’t solve these problems, right?
Oh I think I got it… Is there a rule about subfiles? I organized my effects by mmodlers and the OldTV was inside another subfile in the autor’s file. It started working after I moved it out haha maybe that’s why some other effects don’t work too, I should check
Thank you for helping and sorry for the trouble! ^^’
You gotta know that the creators of the files will not know your file/folder system… so don’t be hiding the folders.
I don’t understand this at all….when I put img.x += distortionScale * noisy * dst * 0.2; in I get an error message saying it can’t load the effect or something like that. what am I doing wrong?? D:
Apparently, there’s *something* you do wrong, but it’s hard to tell what exactly without seeing the script itself. Can you copypaste the fragment around the line you edited with the margin of 2-3 lines more? Also, the error message must have contained a “[line,column]” piece specifying the position of an error more precisely, what are those numbers?
i think u got it by now.
I’m having a problem, I can’t get the lines even when I add a layer to the file “Random3D”
You mean, you want to get horizontal raster picture like in the article, but can’t draw it strictly horizontally? Try to press Shift key while drawing (or is it Ctrl?). You also can zoom the picture really big to make your hand steadier.
yes, I don’t understand how they got the horizontal lines in the picture
Where can I download the GIMP plug-in?
The link to plugin’s homepage is right in the article.
Could I please have a link for the old tv effect? I looked everywhere and all I could find was a .rar.
A .rar is an archive; the effect you look for is *inside*. You need an archiving program to unpack it – there are many of them, including free ones. I recommend Bandizip, for it allows proper decoding of Japanese file names, and dealing with MMD, you’ll face the need often enough.
Thank you for your reply!
It finally worked, I just noticed that I wrote the wrong number (I’m a bit absent-minded sorry…).
Hello!
I have a problem, I can’t open the OldTV .fx file in MMD. Is there a way to edit the .x file to obtain the same result as with the .x one ?
Sorry sor my bad english…
Can you use other MME effects? … This one should simply “work”. In the Accessory panel, you load the .x file … and use Display to turn the effect on and off. You don’t have to do anything with the .fx file unless you want to edit that file to modify that effect. You open the .fx file in Notepad, or a similar simple text editor. You might change the file extension to .txt, then open and edit the file, and then save the changes, and then change the file name extension back to .fx … but, again, no need to open the .fx file.
2Ghostie: I’d hazard a guess that you placed “*” and the multiplier after the semicolon instead of wedging them between the semicolon and the operator itself. A semicolon signifies an end of a sentence. But of course, without seeing your code in person it’s hard to tell.
And if you’re interested in OldTV, don’t miss the second article – https://learnmmd.com/http:/learnmmd.com/customize-mme-effects-by-editing-fx-files/ . It gets even better.
Very helpful! I like how you explained things to make the technical jargon understandable. Just the adjustments I wanted for this effect!
My only problem is that it doesn’t work when I edit the .fx file in Notepad. I get a strange error message: Failed to load effect file. error X3000: syntax error: unexpected token ‘*’
It doesn’t like the * before the distortion multiplier. But removing the * just leaves the distortion at the normal level.
Am I doing something wrong?
VERY good first article!